Advanced Beauty Retouching In Photoshop
Lesson 1 from: Advanced Beauty Retouching In PhotoshopLindsay Adler
Advanced Beauty Retouching In Photoshop
Lesson 1 from: Advanced Beauty Retouching In PhotoshopLindsay Adler
Lesson Info
1. Advanced Beauty Retouching In Photoshop
Lessons
Advanced Beauty Retouching In Photoshop
1:25:23Lesson Info
Advanced Beauty Retouching In Photoshop
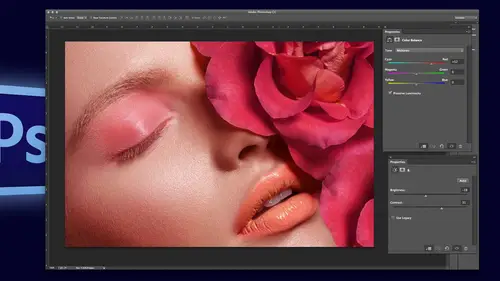
Lindsay adler is going to be now teaching us advanced photo retouching, which is one of her specialties and what she is known for so you guys are in for a treat lindsay adam okay, so the way that I want to structure this is probably will likely go over the heads of people that have no retouching experience I'm going to try to catch a few people up to speed, but I wanted to go a little bit more advanced just because I don't see that a lot many places so we're going to dio ah retouching technique that is used in all the beauty magazines, all the beauty advertisements it's called frequency separation, so I'll make sure I take you through that explain how it works I'm also going to direct you to somebody that has some presets there some actions that will help you out and so, uh, I think I'll just get started with that and please, if you have any questions I would mean about, oh there's this particular skin that I try to retention doesn't work I mean, anything you have unhappy to help out. ...
All right? So I am going to gonna close out the files that I have here and I'm going to open up an image, ok? So first of all, what I want to say is that I am going to be working in sixteen bit you can obviously retouch in eight, but it's not like you know it's going to be horrible, but when I look at a photo like this there's so much gradation in those warm brown tones, I need as much information as possible. What happens is when you go down to eight bit, you're throwing out a ton of information and so that's, when you start seeing that banding that maybe you've seen in some of your photographs, especially if maybe you have ah background that's red where it's later in the middle and darker on the edges and just see that banding when you go to sixteen bit, it helps get rid of some of that problem so indifferent in a picture like this, where it looks pretty uniformly the same color, I'm going to try to stick to sixteen bit just so you know if you don't have light room one of the places you can change that is down here sirius is sixteen bit if it says eight bit, you can come in there and just change it so you can open it up through camera at sixteen bit when you open up an image for a high end retouching, you want to make sure that the color is correct right off the bat as much as possible, so this is an instance where ideally if you had a color checker or some kind of neutral point to judge off of that would be great on you also want to make sure that the exposure looks right because if later on down the line you go ahead and you start darkening things down all of a sudden you see blemishes that you didn't see before and then you have to redo your whole process so you want to try to get as close as possible and also if you have highlights that are blown out on the cheeks for example this is an instance where you might want to come over to highlights or whites and just pull them back in because you can always add contrast back and later but once you leave camera raw if there was a blown out highlight its blown out you can't get it back but if you go ahead and almost basically flattened the image a little bit it's going to give you more information to just trying to make sure that there are any any details loss in the blacks aren't any details lost in the highlights all right, so I'm fine with that and I'm going to open the image as a sixteen bit file all right? So I'm just going to start off with some of the basic retouching things for just a couple minutes and then go right on to advanced so some of the tools that we discussed before I'm just going to duplicate my background the main tools that you typically use in retouching are over here in the tools pallet on the left, and usually they're in this segment either spot healing, healing patch tool may be content aware and clone that tends to be what people use most often, so how the spot healing works if you find a blemish, whatever that may be, and I also have chosen image without a ton of rough skin, because that probably would be likely what I'm using and beauty photography, but I'm going to pick a more challenging one after this. All right? So I need to find a blemish or something in the skin that I don't like, and you make your brush just a little bit bigger than that blemish I'm using the left and right arrows to make my brush bigger and smaller. And what it's saying is you're saying, ok, this blemish doesn't belong when I click, I want photoshopped to judge the skin around it and then replace it for me in newer versions of photo shop, which I believe would be see a six and see see you want to make sure of content aware, clicked that usually does a better job than just, you know, proximity, match, or or the other options, so I click that and if you see it just kind of zaps blemishes and pimples away, so this is definitely the quickest form of retouching. To be honest, if there's something, I'll show you later on that you can tell when you're really close up. It's not really the best way. It definitely does a little bit of damage to the pixels it's not always accurate. Sometimes it creates a little bit of blur because when you're clicking, it's kind of guessing and blurs it around the edges. But as I said before, you got to judge what your retouching for if this is going to be like an eight by ten and this is the quickest way to do it, then just do that versus if it's going to be a close a beauty shot in a magazine, then you're going to want to go with frequent separation. I'm definitely like a practical person. I'm not going to spend like eight hours retouching something that is going to be a five by seven visual reason, so I'll do whatever's fastest if I need to first, okay, so it would be the first tool. The next tool down the line would be the healing brush. The difference between the spot healing in the healing brush is with this tool, I can set a target, meaning I can use my alter option key when I hold it and it gives me a target, so aiken select the area of skin I like, so for example, I could say I want this area of skin selected to replace that blemish. The reason that this works best is when you're in areas that are close to an edge or an area with a lot of texture it usually works better because in those areas it doesn't usually what to do and it might grab like if you're close to a lit bit like grab lip tone lip texture and added, so you're just basically saying ok, photoshopped that is where I want youto grab your sample from when you start blending, then click around like that in that works great. The next tool down the list would be the patch tool and the patch tool lets you select an area of skin that you don't like and click and drag it and it will replace it wherever you click and drag what's good about it is that it automatically blends at the edges so it has a little bit of an algorithm that guesses for you yeah, so if you're selecting a source for this going to be replaced oh this is just a better way to do it than a clone stamp yes ok, so for a clone stamp there's not really a way to blend edges the only way you're blending the edge of what you basically cut and paste is the softness of your brush, so what that really means is at the edges of the brush it has less capacity and less capacity when you layer it equals blur real like real high end rita cher's they basically work with clones them on one hundred percent zoomed into one hundred percent ok, I'm I don't do that I mean, I'll do it if I need to, but it takes way too much time. Um but yeah, they wouldn't use they would use clone hard one hundred percent versus this and what what's good about the patch tool is it does blend in the edges for you, whereas clone is basically cut and paste and the softness of your brush depends on if it blends and it might not I use it when I need to when everything else isn't working that's what I go to next, all right, so I would get rid of this I mean, as you can see, she doesn't really have that many major issues, but that's, what I would start with, I would definitely come down around here and try to handle these I think it's just ah caked makeup and I would try to smooth that out I'm just using the patch tool, selecting and dragging, and that works great and I would definitely have to do something about these lips I guess the move lipstick is old crumpled together around so okay so those were the basic ones in the next tool would be of course your clone stamp that we're talking about so fundamentally it's it's a cut and paste usually if you can get away with a higher opacity is actually better than a lower rapacity because you're maintaining the integrity of the pixels you're cutting and pasting loa passages just you're layering things over and that's what gets rid of the texture um as I was talking about in blood modes will save your life or whatever the fundamental change your life you can change the blood modes of your clone stamp so if you wanted to get rid of some of this texture underneath the eye I'd recommend changing it toe lighten because it'll just fill in those wrinkles underneath her eye without getting rid of the other skin texture that you want so I choose a relatively high capacity sample click and clone but sick look so it does maintain some skin texture and that's that's why you know that's a preferred method all right so everything that I've shown you so far is not what I would actually dio but this is kind of the common retouching techniques and then they're fine for those of you who also don't want to take the long form I do use one retouching plug in so I do use image a gnomic portraiture um I'm actually going to show you a version of my advanced retouching I actually use it in the advanced retouching, but not for what you think. Um and I actually wanted somebody and online had suggested this to me for the first time I talked frequency separation and I tried it and I love it and I think the person saying was like brian or bread and so thanks brian or brad like from whenever ago um, anyway, so those are the basics, as you would need to know something else. I wanted to show you a tool that you might not know it's new in c s five and beyond on the left hand side there's a little triangle here and it's called called the sharpen tool the sharpened tool used to be more or less pointless because it would just like destroy the integrity of the pixels. But I've found if I want a quick way without sharpening without going into high pass to just make eyelashes pop or give a little bit of sharpness. If you take this brush at fifty percent strength and it's the triangle that you're looking for and just kind of trace around some lashes it just pops it a little bit it's basically just increasing contrast around edges, so I just find it very easy and it doesn't I mean, I don't think it hurts the quality at all just to trace some eyelashes, especially if somebody they kind of had mascara on part of the eyelashes and not the other I can go in with a very small brush like a couple pixels and his trace some of those eyelashes to make them pop out the other thing it works great for is if somebody has a light colored eyes with a lot of detail for you just trace in the iris that detail pops she has some detail and I will be able to demonstrate a little bit but works really really good with green and blue eyes something to show I did kind of so just to bring out some of the detail if somebody has a lot of detail in their eyes, I mean, it becomes incredibly noticeable so that's further than I would go, but I want to make sure you could kind of see what it looks like all right, something like that tracing around the maybe a little less than that ok, so there's a little bit of pop a little bit of contrast alright, so that being said, I'm going to raise it all and we're going to start with the complex stuff just before glenn did anyone have any questions about that very, very basic super basic tool overview the tool but because you have light room now and it has the healing brush and those things would you d'oh like your basic kind of overall thing in light room and then go to photo shop and that's a finesse it really good question I start off in photo shot or in light room and what I do in light room is try to get as much information as possible so recover shadows and highlights I try to get the white balance correct and that's what it because the problem is is if I introduce contrast and things like that well then I can't go backwards in photo shop I can do all these different contrast layers and I can apply it selectively to every single pixel that I want for the retouching the same thing this advanced retouching that I'm going to d'oh you don't want to do any retouching first because the whole point of it is to keep skin detail so I actually for beauty retouching I do almost nothing and light room besides just getting it close to write and pulling in highlights and shadows you actually have just a workflow question so we've been impressed watching you watch your touch pad and the laptop to do all the editing but do you use amounts do you use what calm or yeah any tablet I have one of the smaller tablets at home, but I try travel so much that I just got really used to it um but what you'll notice is if you have a tablet it's much, much easier to quickly get pimples versus kind of moving around or getting rid of fine detail because you're just hitting those little details versus kind of scrolling over to them. So it's, definitely faster and you definitely have more control. Now, I could actually do a much more advanced advanced retouching them within this because with your tablet, you can change things like flow in pressure in the tablet, which changes how you retouch. So if you already consider yourself extremely advanced, but you don't use a tablet, get a tablet and then look up how that affects retouching, because that would actually make a difference to how you're handling your images. So you talk about pores and all that stuff, and people obviously skin is not perfect. A lot of the managers use now we're looking plasticky. How do you feel about that? Do you do that? I mean, personally it's, you know, it's, it makes you know, if I'm gonna shoot a plastic personal shoot a plastic person, I do both, ok? So, here's, what I would say when I do the perfectly plasticky skin, I do it so that it looks clearly on purpose so that they're supposed to look surreal. That's that's my pen if it's clear that this person's looking almost alien esque almost like a porcelain doll, then that's fine if you're going that direction, it's the in between that's kind of weird um, it's kind of a personal choice and they definitely often overdo it, but then there's a whole other side that do know very minimal retouching and try to make it look grungy so you can you can get away with both, um for this, so I'm going to give my little introduction to what this is ok, so this is called frequency separation sounds all fancy, but basically what you're doing is you're taking the skin texture like all the pores, you know, all the hairs and you're sucking it out and putting out a top player, and then you have another layer, which is all the colors and all the tones of the skin, because what that lets you do is smooth out and shape the skin and totally maintain the texture, and then if you want to retouch out some of the texture or refine it, you can. So if you've ever had a situation where somebody has blotchy skin, you do not know how to get rid of that blotchy skin, because as you do, it gets rid of texture this is how you would do it or let's say that you have somebody that has five o'clock shadow and you really want to get rid of that. You don't know how this is, how you would do it because you can keep the texture of the skin and of the hair, but you can light it up that five o'clock shadow, all the textures on one layer and then all of the colors and tone or on another, so this is basically how it works, and this is what they do in high end retouching. So, um, the numbers I'm going to give you our first sixteen bid, there are eight bit numbers, it does the exact same thing that they're just different than sixteen bit, so I'm just going to say these ones, ok? So here's the process, I'm going to do this three times, so don't don't worry, like she probably won't get it the first time or the second time, okay, so I'm going to duplicate my background twice and the very top players where I'm going to keep my texture, so I'm going to name it so that I know what it is. I know how it will work, how you might have seen if you've watched a tutorial, as they call it high, kind of like high pass if anyone's done high passes really the same thing, um and so I'm going to call this high, and I'm going to call it texture, so you guys all know what it is you do need to name it because there's a step where you have to input, what layer you're working with, so you do use me to name them something, and then the middle one is low, which is color and tone all right, so here's, how we separate them selected on the low layer, you're going to blur it because this is going to be your color and tone, and so the whole point is that you actually don't want to see any skin texture, so you go up to filter, blur, gosh and blur. Some people use surface blur, I use gosh gambler, so when you're in a blur in goshen blur, you get this little box. What you want to do is you want to put it in an area where you see a lot of skin texture and you want to kind of click around you want to set your radius just so much that you can't see any skin texture, I'll explain later a little bit. Why this number matters. A lot of people do it kind of arbitrary, but if you're too high or too low, it affects how much texture you're grabbing, basically. How much texture is pulling out of the skin? The number is too high it starts picking up color and start picking up too much texture if it's too low you don't pick up any of the skin texture so I'm looking for something like I'm going to go back ok? So I can see skin texture there so I wanted to be just a little more blurred in that maybe like yeah, I like to point out I can't see any pores anymore three point five I definitely can't so maybe somewhere around the three two range kind of see what I was looking for? I'm looking like here I can see the dots of where pores are, so I just wantto go just a little further than that another judge that some people do is they look at the eyelashes and they look for when the eyelashes become clearly blurry we're clearly not sharp and start to blend into one another. It is definitely arbitrary but all kind of demo the difference that it makes I seen ahead ok, so that was your low lair. You want to make sure you clicked on that middle there otherwise this won't work at all and this is one of those things if you don't do it exactly right, it doesn't work but then it's the same thing every time, so once you get it it's the same thing every time okay so now I'm going to click on my hiler went turn it back on and I am going to go up tio image apply image all right so this I'm going to make the this read the correct numbers and it needs to look exactly like this with a sixteen bit file if you have an eight but it won't work if anything is not the same it won't work so I'm just totally just put it out there so here's what has to be your lair you're currently selected on high the lair you need to apply as low basically you're saying you know make these to talk okay so you want to select low you want to click invert you're blending should be add your skills should be too and your offset should be zero if you want to take a picture screen however write it down this is exactly what it should look like preserve transparency should not be on mass should not be on a pass it he should be one hundred percent it's that identically and when you've done it right you see a great screen which makes it look like you did it wrong but it means you did write confuse me okay so I'm gonna do it again so don't worry about it okay now all right so I zoom in I don't know if you guys in the audience conceive but no online they could definitely see this see how now it's the texture so it's sucked the texture on sucked out all these little skin pores all right, well, if you checked out the blend mode section I talked about how contrast layers make high pass look normal again. Okay, well, all you guys need to know if you didn't see that is you need to change that top layer to a blend mode of linear light linear light is right here, not any others. It has to be linear like when you click it all of a sudden it looks right. Okay, but after all that effort when I do before and after by the way before and after is if you hold the altar option key and click on the bottom I it turned all the layers on and all the layers off the short cut for it. Okay, if you'll notice there is absolutely nothing happening and that is exactly what you want to happen because you didn't change the picture you didn't change anything. You just said colors and tones on this one and then texture on the next one and that's it okay now here's where you do your retouching so the low layer I want to start smoothing out her skin and shaping her face a little bit um just like I would normally and retouching I want to duplicate that background just in case I mess up if it's not it doesn't change anything it just gives me another layer to go back on so what I'm going to do is I am going to use my clone stamp and I'm going to use my clone stamp on lighten and I'm gonna lighten up under the eyes why would we do it a little bit higher? So when I just did that and I like end into the eyes watch that skin texture it didn't go anywhere like every single piece of skin texture is still there I just like ended up you could do the same here and it just fills in bags under the eyes so this is where gets more artful how you do this I can tell you right away the way people screw up the way people screw up is they smooth out everything too much and I don't mean detail your face clearly has highlights and shadows when people screw this up they blend the highlights into the shadows too much and the face becomes flat so for example, see how here there is kind of there's a there's a line there for where her highlights are if I almost didn't drag that highlight down now she has no job, she has no cheekbones so you do still want to keep roughly where the highlights and shadows are but you want to smooth out any blotchy nous anything like that so I could just click around you know I can smooth it out like that if I want now I am going to be honest, I'm going to overdo it a little bit just to make sure everybody can see I wouldn't maybe go this far, but I depends on the client of course it's a little strange retouching with this high lady thing, but could I can't quite tell what's going on, but I kind of can it should be another place, right? I talked about before if I have my clone stamp on lightning, one of the ways you can see textures and people skin is on their highlights so far on the highlight on her nose, aiken smooth it out and kind of just clone up and down is going to make her nose skin on her nose look much smoother, smoother you could do the same thing down here, okay, so you could stake however long you want to kind of shape things and smooth things out. I'm going to tell you my variety of this the thing that I d'oh so you do not need a plug in to do this, but I am going to use one um what I'm going to do is I'm going to use image, gnomic portraiture and what image gnomic portraiture allows you to do is select the skin tone and then choose how much you smooth it before we do that, I do want you guys to take a look and when is it weigh in? I don't know if you guys and see okay, but you see it's the texture on the cheek, you see that this getting so watch the before and after if it looks like any detail has disappeared here's why when you have pours part of the reason you can see them is the shadows, which are part of the tones. So if you over smooth something too much, it will start to look a little flat because there's no depth to it anymore. So it's like it's all kind of a balancing act, but I have every single poor still there to work with, and I smooth out any blotchy nous and all of that detail is still there. So my particular variety of this I'm going to duplicate that that layer again, it doesn't change anything and I'm going to go up to filter amen economic portraiture if you don't have this it's totally fine, you just keep doing what I was doing, so what I can do is a consuming and right now noticed the pictures totally blurry it's because I am actually on the low layer, which is blurry eye blurred in goshen blur the only reason it looks sharp risks that has that top texture layer visible to us but now that I'm retouching and doing portraiture on the low there, you can't see that texture anymore. So what I can do is I can grab an eyedropper and click and drag any skin tones I want to smooth and up here I have the options for how much I want to smooth it. Um, I just want to kind of clean up some of, like, the blotch eunice and so it's to taste like I like that you don't really want edges to start getting blurry because that's, when it becomes clear that something is not right so this christmas anymore anymore, but I can always apply this selectively, so I'm just gonna hit, ok? There's a lot more to this tool on that you can use for not doing frequency separation. But this is how I would use it just had its smooth everything out. If you look, it should kind of even it out a little bit and you can run it as many times as you need to. So let's do the before and after so far might go down. Okay, so let's talk about a couple other things. All right? So so far let's say that I'm looking here and I see these these are blemishes. Ok, well, I can try to get rid of them I'm going to emerge down my portraiture I can try to get rid of them on the lowly right, the color and tone so I can come over here and I could go to get rid of them and I can use my clones damn completely one hundred percent but that texture is still there could its on the hiler so if you want to get rid of it, you gotta switch over and now beyond high the whole time I've been on low and you can actually like, turn off and you could we see kind of what it looks like and you could re touch that way there's a couple other ways you can do it, but I usually just leave everything on and I'm going to clone and get rid of this point. You can also use your spot healing you can also use I mean, all the other tools you were using before so I'm going to try to get rid of these when you get rid of texture if you got rid of a big pimple okay using the high texture there, you got rid of it, but it still looks visible it's probably because the pimple had color and so you got to get rid of the color I didn't took me awhile to kind of figure that out, all right, so you can click around as much as you want spend however much you on this okay, so so far so you kind of where we're at all right? So I'm looking and let's just say that now that I've kind of smooth things out and trust me I would go in more carefully with a bunch of this but for the sake I'm gonna leave it here let's say I'm looking at this in like man, you know, since I smooth out her face I don't think I can see enough skin texture it's just not enough okay, well, what you basically have in this high or this top texture layer is more or less a high pass layer of sharpening you have something sharpening right there so if I want to bring back more texture in the skin, all I have to do is duplicate it and it's gonna lair that effect so if you watch it it's going to be pretty drastic actually. So if I duplicate this layer he's grabbing it down to the duplicate layer button now it hugely hugely sharpens the picture. Well, of course you probably don't want that everywhere but it's not a problem because we can come down here and holding the all option key we can add a black lerma so just hit it and now wherever I think there was enough texture aiken selectively pain to back on it's like in here and say, I think it needs more on the cheek, I can pick a little opacity and just kind of paint some texture back on to see how the skin texture comes back. We can add that is strongly or as suddenly as you want. Okay, so that's kind of where we are so far, so the things that I would do is I'd go ahead and clean up all the skin and all the dots. Honestly, a professional retouch or for a shot like this would probably spend six hours because they would zoom in and do every single poor exactly how it needs to be. I don't spend, I mean, for a beauty shot, I don't spend more than forty five minutes, it's just I not don't need to for what I'm doing, so for our sake, give me a sec and I will just we touch out just a little bit more. Is there a question in the meantime? Is there a question? In the meantime, while I kind of catch us up a little bit, it is a question related tio frequency separation this person has watched tutorials on and they were using frequency set separation, and the blending mode was subtract scale equals two off one twenty eight that's a bit. White so could you please explain the difference between using ad is the blend mode or is this just a preference? And this is a big banks for an answer from london it definitely is not a preference you have to use um add if you're doing sixteen bit and you have to use attract if you're doing a bit it just doesn't work so it's it the whole settings the numbers are different for a bit to sixteen days out of preference is just like the algorithms don't work that's it has to add up one more question record and this is mark curiosity on my part. What is a high end retention charge? Good question in new york city um often for covers it would be like if it's going to be a cover for retouching skin like this, it would probably be between one hundred fifty and three hundred an hour and then you do the math for how many hours? Um, I'm just going to tell you that a lot of times I have re touches in russia do it for like sixty dollars for an image outsourcing I tried tio tryto focus my attentions on what I do best and I'll do beauty retouching sometimes, but honestly a lot of times it's just I'd rather focus on growing my business so I do the creative stuff usually where my focus is another thing that's really good to do is to learn what's good for beauty retouching that what you're looking for so that you can least direct somebody that's a whole other discussion for beauty retouching is what's too far and what do you really looking for like these lips would not be acceptable these wrinkles underneath her chin would not be acceptable um so it's kind of figuring those things out what's ok things you you really haven't touched on and off you're gonna touch on it later is her skin you know her face and her shoulder tones are pretty much the same, but a lot of times you shoot a model and they have makeup on and it's a little darker than theirs their shoulder tones are you gonna we'll see that ok, yeah, we got that one coming that one that one was like I don't know if you guys until I'm in your face is yellow and her skin is pink and they get that all the time because a lot of times the reason for that is because they do the face but then there's clothes that they can't get makeup on so they actually can't do the body and so then it's just like this one was yeah, that was an intense version, so yeah don't worry, okay, so I'm just gonna I'm just going to say ok, something like that um all right, so if I want to go ahead and start liquefying or start making some changes there start shaping the face there's a couple of things you can do, you can actually take all these layers, group them and turn them into a smart object and then work from there you can do that, I'm going to opt to not to do that and I'm going tio flattened them and put them in a new layer and then start working if I were trying to liquefy, it would not work right now because it would be liquefying that kept the texture separately from the color and tone you got to bring them back together if you want to do smart objects that's great, I just don't want to get into it for this class in case. So um the shortcut to take everything smushed together and put it on the top layer is you have to be selected on that top layer and it is command option shift ae and we'll leave it up there command option shifty, longest shortcut ever I actually don't even know how to do it in the menus. So it's one of my other onley shortcuts that I'd really views regularly, okay, so here what I would dio isn't I would start doing liquefy would start shaping things I would come over here and clean up some of this hair and I would probably just go on light normal, because this hair is neither later nor darker it's in between kate, some other things for judging, um, wrinkles in the neck high and be the retouching they get rid of them, that wouldn't be there, you can light in it if you want to do the clone stamp on lytton, you can do that, and it works, you know, okay, to lend it, but what I would probably do is probably do the patch tool it's select that click and drag like this one could drag, and I'll have to do a little bit of blending your eye doesn't mind lack of texture on the shoulders and chest as much as it does the face, you're much is, like significantly more forgiving if there's a little bit of texture missing elsewhere as long as it's not on the face, right? So the next thing that I want to do is let's talk about liquefying and I would it's been more time, but okay, all right, so liquefy I still want to go back and work on her face later, but let's talk about look, if I she doesn't really need me, right? One of the things that's great about this image is how long that tendon in her neck is. That's the thing that we're looking for a beauty photography so there's actually a youtube video out there that talks about what we consider beautiful, like, aesthetically what is considered beautiful. So some of the things I would add to your high end beauty retouching list would be symmetry whenever someone is clearly a symmetrical, if you're doing high end beauty retouching, you need to correct it that's just one of the things that we have don't get me wrong it's really interesting in fashion photographer in beauty photography aa lot of the supermodels are in perfect, for example, that have the gap in their teeth or oversized eyes because it makes them unique. So that doesn't mean I'm saying that that, you know, not perfect is wrong, it's just for beauty campaigns, they would definitely make a face symmetrical, they're always lengthening next if someone has a short neck, they would elongate that hunch is in the back they would fix that, making sure that the eyes are white, but not to wait, making sure that there is skin texture plumping up the lips like these are all things that that you would consider for beauty photography. All right, so if I were going to let go, fine, one thing I did want to show you is if I do filter liquefy, I could kind of pull in her shoulder here. The tool that I would want to use is in the top left and it's called the forward warped tool. Um, there are a couple guidelines for using the ford work tool. First of all, you want to use the largest brush possible without affecting unwanted areas. So here's what? I mean, if I grab a really small brush and let's say, I wanted to bring in her shoulder figure of a small brush, she starts to get like little waves, right? It's it's clear that it was retouched. So what you're trying to d'oh, we reconstruct that real quick? Um, what you're trying to do is not have that, so I'm going to use a larger brush and I want to restore the whole thing, okay? I'm going to use a larger brush to try to push it down in one smooth movement, but what I want to make sure I don't do is move her face. It only moved it a little bit so it's not too big of a deal, but let's say that I needed to do something more substantial and I clique and movin all center face moves and now it's it's problematic, so the next tool that I want to make sure that you know if you don't know this and liquefy you need to turn on your advance mode a lot of people, but by default, the advancement has turned off. They don't ever explore it. It this is really, really great tool, so turned on the advance mode. What you're looking for is this tool right here called the freeze mask tool and the freeze mask tool when I select it, whatever I paint with this mask cannot move, so if I'm trying to lower her shoulder and it was messing up her face, I can go ahead and freeze in her jaw line so those pixels will move. And then I could still go ahead and liquefy her shoulder, her arm or whatever I'm tryingto like, if I wanna freeze that in place and I could go ahead and grab the ford work tool again in the top left, and now her face will stay in place and I could do the same thing or let's say, I wanted to lower her shoulder. Well, you know, messes that up so I can go ahead. I could grab the freeze mass to again, friesen her chin, and then I could lower her shoulder a little bit. All right, so a problem that you'll see let's ever lower the shoulder really far, ok, ok, so you see what happens um let's say that you have a subject on a background and you're trying to like talk in their sides or something but the background has a pattern so you go ahead and you freeze the patterns you can't tell that it works that works if you have something to liquefy with because if there's no pixels to moveon squish in with it'll take just a few pixels you give it like this and stretch and smear them and then it becomes obvious you're actually degrading pixels so what you're doing with warp is you're actually changing the shape of pixels or changing them from being little squares in you're stretching the mouth um what you're better off doing instead of clicking and dragging once it's like trying to sample from different areas you know, trying to switch it up so you're not just dragging the same pixels and you need to give yourself a cz many pixels as possible so in this instance I want to lower her shoulder I really don't have that much to work with because I'm going to start ruining the pixels very quickly so they're just things to think about um so I would definitely come into this photo and I would plump up her lips a little bit using ford work I'd give them a little more shape and I just can pull up chaffed them however I want him a little bit of point I don't usually use the blow tool or anything like that, but usually just kind of shape them this way. And I'm trying to make sure that that line in the center stays is somewhat even that looks fine if she had an uneven knows what you could do is you can or let's say, it's off center, you can click and senator her nose, kind of click and drag the whole thing. If you need teo, you could make her eyes larger. This is where if you had a droopy eye that you could come in and open up, that I would lose your all capabilities that you have with ford work. So I am basically happy with that one will come back and take a look at that the liquefy motile more time. So here's, where we are so far without the skin given her sharper lips. All right, so the next thing that I would do is I want to define a little more shape. Maybe I want like, those cheekbones to be, like razor sharp and really pop out of the photo, and you see that lot and beauty campaigns, so the tool that I would use would be those curves level occurs, it occurs adjustment I was doing before, so I alluded to it in the blender mode section, so I am going to go ahead and create a new curves layer and I am going tio light in it, way, way, way up and I'm gonna fill that in black the shortcuts to do this so you know, um but I'm gonna fill it in black and now wherever I want there to be a highlight, I can paint with white we talked about layer masks already, so where I would have a highlight, I'm going to use a really, really soft brush and really low a passage because it will start building each time you layer over if you use this one of those instances where it might be a little different if you do have a tablet, this is where we make a difference because you could set your pressure sensitivity in the flow to be more natural toe layering on just another benefit of using a tablet. All right, so I'm going to just kind of pay on ah highlight where I think they might be long, so I alluded to this briefly and I'll say it one more time. Where do you want them to be? You want them to be on the top of the cheekbones down the middle of the nose? If there isn't one, she already has one naturally one right here in the center of her forehead would she more or less has but I'll give you another one here and then and then a nice round one on the bottom of underneath the chin ok, so if you're looking clearly it's a little much because right now I just have it set on normal so first of all I'm going to set it to luminosity so you're changing your blend modes that you're not going to affect colors you're purely affecting the tonal range your highlights in your shadows I want to change it to luminosity you see like subtle change we're one hundred percent so you won't see it as much but I'm just gonna back off and so let me just show you that the highlights I added she already has awesome cheekbones but if she didn't this would make a really big difference I can also soften if you think that those lines were a little too strong you can just click on that mask and go to filter blur gosh gambler and just soften thie edges and so fights often really far you know kind of disappears so let's do something maybe here okay so I could do the exact same thing with my, uh shadows and so where shadows are are underneath the cheek bones around the jaw line on either side of the nose and then also underneath the lips because when you put a shadow underneath the lips and also in between it makes them look fuller because fuller lips would cast a shadow underneath so I'm gonna go ahead and create a new curve slur and I'm just gonna darken everything down I'm gonna fill that layer blacks I can't see it and I'm going to change it to luminosity so I'm just work with the color the total values and not the color because the same thing when I grab await brush really low opacity really really low capacity soft edge and now just kind of paint in some of these shadows of course if I go over because these air adjustment layers with their masks I can always erase fight if I go overboard so I can put shadows on the side of her nose I could make her lips look a little fuller if it goes too far I can always back it off and then you can just pay intestine and so you think it's too much or too little this works really well with for people to make their job more defined is just darkening down that edge of the jaw makes it look more defined because that's how we do it in the studio is and we raise a light higher up that cast a darker shadow under the job which is what makes their jawline look more defined so let's take a look here and let me just blur this trying to actually see on this computer I want to get rid of the effect there yes so is this your nondestructive approach to dodging a burning? Yes, exactly. So this is not destructive and it's better for maintaining true color in the skin. Um, and it's, great cause I contest undo by painting black or white and like because sometimes you're looking at it, calling out the cheekbones look great. Then you come back and like, oh, way too much. Um but if you notice, see how our faces more dimension here's before here's after so it gives her more shape and look how much bigger her lips look, check out the lips. It kind of feels things out. So if you go to the lips and you brighten up highlights and dark and down shadows, they start to pop out and then the same thing with the entire rest of the face. And so let me show you where we started down here here's where we started and that would be kind of high end beauty retouching so far, yes. So you talked about the lips earlier with lines and the lips that most times it's no good for you for your work. What is the general rule? I mean, obviously people have lines on their lips, you know, the lines, they're fine it's this clumpy stuff. Okay, that bothers me because that if its beauty retouching you should not have this so I would probably have to use the patch too old to go around and just get rid of it. I could also use the clone stamp on light and because it is a darker area and try toe lighten it up just a little bit um one other thing it's let's say that you wanted her lips to pop we'll have a little bit more contrast to them if you use the last tool you can select the lips roughly when a feather them we talked about with feathering means earlier sixteen and I'm going to create a curves layer and I'm going toe go toe like strong contrast so up here you have just different presets you can make your own but it's going to like really really popped the color there really popped the contrast notice when I popped contrast it changes color this is what I was talking about increased contrast increases saturation so I can come down to luminosity and now it just did not touch the color. It just touched the brightness and darkness and so you know, I might back off a little bit here, but now I'm making her lips look a little fuller and have a little more shine something to that effect ok, so let me take questions before going to the next one there is one quick question about summer crook wants to know is there a big difference between the curves adjustment that you're doing and dodging bern? Um okay, so for dodge and burn usually how usually, how it's done to make it work is you have to be on soft light or you're being destructive to the pixels themselves. So what this allows you to do is a you could be on luminosity, so you're not changing color like we just saw there, and b, you're not being destructive because you can always go back in a race so that's kind of the biggest differences you're maintaining the quality there? One other trick I wanted to show you a cz well is if you're ever trying to see how you did with your ski skin retouch I actually create two layers at the very, very top have nothing to do with my photo where I have it really, really dark and down and changed to black and white and then you're just paying attention two texture like I don't know, not using them for anything with then I can zoom in and just say, ok, did I miss any? You know? Ok, well, I missed that I didn't see that before, and I missed that and I can kind of see that so high and retouch is absolutely do this they have it's actually makes you do something a little more intense in this but they darkened down the image and bring out a lot of the detail and then they can see it and so little retouch one hundred percent pixel by pixel clone at one hundred percent using something really dark and down all right, so for the sake of this one um I'm going to move on tio more challenging one next and when to my last foreign after for this one and you definitely you get to be the judge of if it's too far you figure out what you're trying to do with your picture all right? So next one close this out so we're gonna do it again thea frequency separations of you missed it the first time no worries okay, so she has a completely different color face than she does the entire rest of her body so we're gonna work on that. So while before it was completely trying to maintain maintain texture here I might not. So let me explain so as we do frequency separation frequency separation as you would do it normally you maintain every texture detail and then you go onto that high passed layer and you would retouch every single one of those if you're not doing this for a beauty campaign, this is where you might be ok softening that a little bit in high end retouching blurring or like degrading the quality of pixels is always like a big no no so it depends what are you doing? Is this a portrait or is this a campaign just being practical about it? All right, so I just want to make sure that I am able to bring back any blown out highlights. Okay? And, um if you click on misses him so if you click on up here on the top right in the red the red triangle in camera rock will let you know if you have any clipped pixels. So it's telling me if I have any highlights that are blown out for retouching I mean, I have to have that detail because otherwise there's no skin detail I have to have it to work with so I could bring back my weights and I just want to do it to where I have all that detail and then the right hand of the left hand side over here anything that's blue would be a lost shadow is well back on a loss shadow. So I lost shadow detail over here but not on the face, so I'm not worried about it. I have to go pretty far before losing shadow detail so it looks good I'm sixteen bit I'm gonna open up okay, so I am going tio take us through the frequency separation one more time and then I'm actually going to tell you about a preset you can download so you don't actually have to remember it but you should anyway okay um so I'm going to duplicate the bottom there call it low duplicate that call a high I'm going to blur I'm selected on the low in a blur it filter blur gagosian blur so I wanted to take a second and to show you the difference between what happens if your number's two hired to low so when you're really really low okay and I do that whole apply image thing if you look there's like I mean you're gonna be hard pressed to try to find that detail if it's too low you're not giving it enough of a radius to grab skin detail but if I go back a couple steps okay let's say if I could turn this to high okay perfect if I go ahead and I filter blur goshen blur I blur way too much what's to say like there and I do the same thing okay, well then what's that mixed in and apply image I need the low now it's way too much like it started picking up color I mean that's not what you literally wanted to just be like you would do in high pass where just skin texture so this would be too much because all of a sudden now you're trying to smooth out some of that blotchy nous well, the blackness is in the hyatt passed layer as well and so now it's working against yourself so I'll do it one more time so anyway said stupid get the bottom layer caught low duplicate again called high you're going to blur the low layer filter blur gosh gambler and I'm going to zoom in and I'm gonna put my little square right on her face I'm going to try to find at what point I guess I see them there, so maybe maybe three point seven like I'm looking for when I really can't see any more skin texture for something like that she has pretty rough skin so is gonna have to be a little higher and then I can go ahead and go to image apply image selected on the high lair and it has to be exactly these settings the lair should be low invert selected ad scaled to offset zero and this is what you're looking for it's still have texture and her skin but not too much honestly, probably a little lower is even better on this one, so I'm going to go to linear light from my blend mode and now I concert retouching okay now here's something that I recommend um I was like last week I was introduced to this guy's web site um it's sx dash j j y I believe it is if it's wrong let me know so I think it's ff fx jay if you go to his site under um under downloads he has actions for this so you don't actually have to remember and this is what they look like see it affects o f x ray sorry f x ray I just I just found out about this guy if you go there, it gives you presets already where all you have to do is hit a button that says frequency separation and it runs it for you so you don't have to go through this whole thing over and over again that is definitely something to check out and it's totally free and it's really, really useful because it totally saves you a lot of time. Ok, so here's what I'm going to do, I'm going to go ahead and I'm going to set those two top players so I can see the texture even better and so I'm going tio create a levels or curves where everything darkens down so I can start to see this skin texture even more and I also want to do a black and white on the very top just so I'm not paying attention to color so I have that to work with and it gives me something tio kind of judge off of so I could turn those off and let's, start smoothing outer skin here. Okay, so I am going to go ahead, and I'm going to grab my blend mode on lleyton and I'm going to start smoothing out skin. And so this texture will appear to go away a bit, because as I'm getting rid of the shadows to that skin texture, it makes them less noticeable. So you see that and so actually kind of shape they're face all of a sudden he has a higher cheek bone now because I extended that highlight and made it sharper. Okay, same things. Let's. Take a look at this so far. Okay. Ready for a brand new tool that probably have never heard of it. It's a good month. All right, so it's a underbrush is it's new and cs five six. Those has got to be six it's c s six and cc the mixer brush tool. Anybody here use the mix of brush? Okay, new tool. I basically what? The mixer brush tool is intended for people that paint with photo shop that's a whole point of it. So you teach it to behave like a brush. So I selected the mickster brush and you come up here to the top and what you're basically saying is, is the paint dry? Is the paint very wet? Like, how much does it it does it spread when you when you paint you said the witness and then also the flow it just means kind of how much it's picking up the I'll say it again okay? Wetness means how streaky it'll be the load means how much does it pick up of a color when you first click and then makes it obviously how much is it mixed with other colors versus maintain the color you picked to paint with if you paint that makes sense I don't pay yeah, but it's how this brush behaves okay? The reason I'm saying this is instead of using clone stamp, you can select your brush and actually start just smoothing things out by paint so let's say down here I'm clicking around and I'm painting and let's see if I can share with it did you kind of smooth things out? But it behaves like a brush, so if you don't know what you're doing with painting like me maybe it's a little harder but aiken smooth out sides of her nose I can smooth out areas down here and where you start you are where you start your brush is where picks up the color and all those settings make a difference, so if you're using a tablet you can actually literally kind of pay on her face um as if you were painting so this is nice because I can I don't even actually need to use sick. Did you see how that, um, takes color over lip kind of behaving like a brush? Would if I do this so you can click around and just smoothed out tones, so if you have someone with blotchy nous, this is what you would use because if they have blocked eunice in the red of their skin on their chest, on their face, you drag some of the other color or tone that you like and is paint over it and just kind of blended in, so I was going toe a little more alright it's fun and let me, uh, smooth this out, and so this is called the mixer brush, so I'm kind of smoothie under forehead smoothing out over there, all right, looks good so far, okay, so now, if I wanted to, I could go ahead and use image, gnomic portraiture, that's something that I would often dio or I can go ahead to this high layer zoom in, and when all my highlighter that's the texture, I'm going to turn these on those top two things that I create that really are don't have anything to do with my photo, but then I can go ahead and switch back to spot healing or patch tool or the oakland stamp and see what it's doing I did want to show you this just watch when we see like appear we're gonna get rid of a texture with spot healing can you see that that's? Not really that good when we have color it doesn't bother us that much, but spot healing actually isn't the best tool in this is why of high end rita cher's use clone stamp on one hundred percent because it it blurred it and it definitely did some guessing in there, so ideally, what you really want to d'oh is beyond your clone stab really high up and clicking around endlessly and that's how they would do it or if you don't want to click around and just like that, you could use your spot healing I mean you're at your healing brush you click all the way around um if you want to be a little bit of a short cut and you don't want some of that texture, maybe that textures too much you can use a larger brush and just try to like smooth it out so I'm using instead of pixel by pixel or dot by dot I am using a clone sample light in and just trying to light and some of that texture the hot for like true high end retouching this would be a no no, but this picture would probably take me six hours if I really had to go and pixel by pixel, which is not what I want to do, so I'm just going to this really quick. Are there any questions at the moment? Well, I click around here, but it relates to something to do with hair hairs next, ok, cool, so stay tuned for more hair on dh we have some requests for double chin removal, and so I can tell you that's not in this class because it's a beauty retouching and beauty wouldn't have ah, double chin saying, obviously, it's true, another question was from the video around, how would you get rid of unwanted color cat from lighting to match the rest of the skin tone? Ok, so I don't have an example here, but what you would do for color caste is you could either work in curves or you'd work in channels to try to work out those color cast you have the ability to go in if you know where the color caste is, is it in the shadows or in the highlights? And you can go into curves and pick those elements and then shift the color s o I would take a look at that, and so if you're looking this up, I'm not sure which creative lives have covered that if not just look for adjusting color with curves and that would that would bring it up for you. Thank you. Let me see how far I am so far. Oh, and for the double chin I use work tool usually and another quick one from cap photo. Would this work on freckles? Freckles is is much more difficult. But what you would have to do for freckles is user are color range. So you would color range, select everything that's not ah, freckle. So when you do your your blurred people, everything but the freckles, because you want to keep those and try to smooth out with that, um, it's definitely doable. It's just not as and it's fun. Okay, s o for a time, steak know that I would spend more time on this, but I want to make sure that we get to the color changing in the hair, which I think we're doing good. All right, so, here's, what I want to do um I'm going I would get rid of more blemishes. All right, let's do eyes toe work on this for eyes. I would do command option shift e I've got a copy everything put on the top where you have to be selected on the top player in order for this to work because it takes everything below that copies and pace into a new layer, okay? Real quick about eyes her eyes are lacking luster now there's no glow to them this would be a good instance where you could go ahead and use that sharpen tool we talked about before this would work great and they do look a little bit soft so just pops it but it doesn't really look like it degraded the quality that much I like that. Um the next thing that I would do is I am going to select both the eyes when a feather it so to softer edge and command jay so now these guys are in it their own lair anybody was, um great gatsby anybody being a nerd? Okay. Um t j engelberg right? Okay, so uh that we're going to go we selected on those eyes image adjustments, shadows highlights so right now they're dull and they lack contrast they lacked details. So when I go to image adjustment shadow highlights I can kind of pop them a little bit brighter. So if you want to before after it brings out more detail and more color in them, if you wanted to go even further selected on that layer you could go ahead and apply levels just to that layer so you can pop the eyes a little more so you could go image adjustments levels and just make the eyes pop a little bit more and then I can erase their mask to make it looks a little more subtle so it's not so harsh I see a question yes, the feathering when you say ten pixels twenty pixels ex pixels that's outside the boundary of where you're at not take ten pictures from the inside it stems from the outside I know you're gonna ask me how I picked the numbers because it's totally made up I mean, I always do this outlays am it's either twenty two or thirty three or seventy seven cause I don't wanna hit two different numbers does make a difference um okay so you can get eyes to pop out just a little bit um all right let's get to the color before I forget okay? So selecting and changing the color of her body there so what we're going to dio is we're going to roughly select her body everything that was ms colored okay, I want a father just a little bit sixty six forty four doesn't matter. Okay, um and now I need to shift to the color tones there are a couple ways to do this first way is I could go to human saturation and in new saturation I could just try messing with the hue and to see if I see if I could get a little closer it's okay, another thing you could do is go into the individual color channels and curves totally different discussion so I'll show you one more thing you could do one more thing you khun dio I really want that selection good um is a tool that is new I believe is in six and cc um it's called selective color so you want to click on selective color and here's what it looks like um clicked on selective color you can go into all these different color channels and neutrals and whites and blacks and in each and every one of them you're basically mixing colors and you can represent if there's more yellow to that color or less more science or less. So for example neutrals let's say I want add a little bit of yellow here woah lavilla and maybe opposites and we're going to a little bit of a reddish there and so I would have to do something like that and I would be using the eyedropper tool to figure out what the proportion of colors are in her skin say on her cheek or her forehead compared to her chest and I would keep testing those so I could make sure that the rgb combination of colors is similar and I would shift using selective color so with ryan magenta yellow blacks just you know, with black it's not changing color changing luminosity value, so if somebody has their skin lighter or darker there, you can fix it I mean, if somebody has really, really red skin like a sunburn, you could go into your reds and you could go ahead and maybe add more sayin to that red so would counter act that and then if that starts to look a little blue, you could try a little bit of yellow you're just trying to make it look more natural and match the other tones the face so that's what I would do check with an eyedropper, what colors are in the face and then just keep tweaking like this that's how I would get the colors to be similar similarly, she's got these kind of colored tones down her nose, right? The makeup artist did the shading just a little much and it's a little strong s o I would have to do basically the same thing and I'm going to grab away brush and see if maybe it's similar color is what I had before, so maybe ah it's similar to the chest and I could just apply that and I didn't really do anything so I have to go in individually and I would select this and do the same thing it's like both sides of her nose go to selective color, which is an adjustment layer down here go to selective color and in this tweak the color balances so that it matches it's um yes so the question wass isn't it that the home is a little too dark on my screen it also looks it's also not only just to saturated but it's too looks like you need some science needs something I would just kind of dragging around a little bit but when you go into selective color for example it's like modify father if I go to select of color one of my options is for example in the mid tones in the mid tones to lighten it up a little bit so I have that option I could go ahead and say ok we lightened it up now that I've lightened it up I see that the problem still is needs a little pinky needs whatever it may be I mean that's how I would do it and then I can once I got that one side they can apply it over here as well and try to start blending that ok so I know that I need to get to hair what else before I leave this particular area she has a little more all right so perfect by the way if you really want to see what I ended up with on this one if you go to my video page I have the complete retouch of what a true retouch of this will look like to me versus I'm just kind of demo ing and I think it think it took me about an hour to get it to where it was acceptable to me. All right. Um, by the way for this, if I use frequency separation, it would still maintain all of the wrinkles. So this is one where I would go ahead. I would smooth out the skin using frequency separation, but then I would still go in and pull out some of those wrinkles as well. All right, um, let's dio here. All right, so for this hair, if you take a look here's where we started hopes, never certain that is a lot of work, I was going to try to give you a couple tips. Um, I recently put a hair photo on my my facebook page where the hair is like so perfectly retouched that it's like way over the top, it depends on if that's the point. So when some people said, well, it's to retouch, then I realized I hadn't gone far enough to make it clear that it's supposed to look fake so that's like how I kind of kind of judge it what I ended up realizing I retouched the hair so perfect that the face wasn't wasn't overly perfect, so maybe they both needed to be so that the whole point was this is beyond perfection for hair, as they really do I mean, it's cg and like the commercials like sometimes it's not even real hair. Um, a lot of times it isn't I was going to give you a couple tips it think it honestly took me like, two hours three touch they're so I'm just gonna give you a couple snippets of good ways treat a chair. I'm going to lead all this his where start off shoot was inspired by my I would call my favorite photographer solvej sons beau hey, has a shoot here? My favorite? If you don't know him, you're missing out on life. Okay? All right, so what is human he's the best? All right, so when you're looking at here, I'll tell you the things you don't want, you don't want these little hairs at all. You definitely want to get rid of those. Ideally, you don't want crosshairs. Ideally, you'd get rid of those and you definitely don't want the's spaces, so those are the main things you're trying to get rid off, and you're also trying to give a little bit more sheen and sparkle to the hair. So first let's talk about flyaway hairs and this is something that I've been doing forever that is my own personal take on this, but you have to do this what I d'oh is with my clone stamp on normal by ah two hundred percent okay I start cloning these out and I overdo it so that I actually go over the edge of the hair okay like clearly over the get in there and I also do this and others instances where another flyways or fabric that I don't want and so I don't care that I'm blurring the end because I'm going to fix it later so I am right now to susan clone on normal same thing over here trying to clean this all out and of course this is easy so I have a solid background if you don't have a solid background you have to go into like each one of these individually and use your patch tool or your spot healing brush or you're hailing brush not preferable but I don't have that problem here so okay help with the supply to like the fine hairs that air sort of on the edge of the skin as well yes ok absolutely all right going so I'm just overdoing it retouching good without these edges and I want anything that I'm going to want to have a straight line or no flyaway hairs I want that to be gone all right so probably something like this all right so overdone all the way no problem okay um only fix this area where it's a little bit blurry okay so now all I do as they go ahead and I add a black mask to that layer some holding walton option and I click adler mask so it's just totally undid everything that I did ok, but it's still there so it's not a problem I'm gonna grab my white mask I mean my white brush and zoom in at one hundred percent capacity and now wherever I paint it's basically racing but I can control the hardness of that edge so I can say okay, I need a little bit harder edge and when is presuming here and just get rid of those and if it's too uh too soft I could get a harder edge brush and go in and this is you know what a tablet come in handy when you're getting that close but then I'm not individually cloning on every hair. I'm basically just tracing the outline and smoothing it out so when their hair is on the edge of the face on the edge of the neck, this is what I do it over clone and then I draw a line and I can on ly kind to see this. I think that I'd have to smooth it out more it's a little bit of glare on my screen, so I think that that was creating a little bit of a line should have to be a little bit smoother, but that's how I deal with areas like this what will actually dio is they'll take maybe a polygon a lasso tool or something and I'll try to like or a pen tool a penta would actually be better but don't explain help works but um what you can do is something like this soften your edge a little bit like like a quick two pixels and now I could paint that white bank in and I could get myself a nice smooth line and they're trying to get in there and get the right shape will be too much hassle okay, so I would obviously spend more time doing this but you get the idea so all right so that's how I would kind of clean up the edges and I'll clean this up a bit all right? Next thing um I am going to command option shifty you're gonna merge those and create a new layer all right? So now I would go ahead and try to fill in some of those blank areas so I would use my clone stamp and I would alternate between light and and darken and try to fill in areas. So for example, if I go too late and I know right there that dark area needs to be light and not one hundred percent so I would select and I would blend to see how it felt right in so it's time consuming don't get me wrong but I could just keep clicking around filling in hair and said, the here and you're just trying to watch for repetition of patterns, you don't want it to have repeated patterns to try to sample a little bit more irregularly. So you kind of see how that works, something like that so it works pretty well. And then if there's areas that were the highlights or too intense, you could go ahead and darken. I was going to fill in there as well. All right, so I could do that for a long time now. Okay, um, but a couple other tips as well. And and notice here in the hairline, you know, trying to fill in some of the shadows, but watching out for up repeated hairs like that one, which kind of gives it away to may maybe something like that so very quickly, you know, we did get definitely better, definitely closer to where we wanted to be. Um, a couple other things, all right for an area like this trying to smooth this out, I don't even know how I would do it in that method. What I would do is I would select this area of hair again, this area of hair that I like, I would go in and try to get rid of the crosshairs, make it perfect, and then command jay not move it over here and use warp thread warp it toe look like it was the correct shape. So the shortcut for warp received the command j automatically puts the bounding box so then you just need to write a new command t gives you the transform control, right? Click gives you warp and now I can try to warp it into place to try to make it look like that hair and I mean, you can kind of fiddle with shape as necessary and then using a mask I would try to blend it with the other one, make it look realistic. So when adam blair mask grab black, just try to blend it in a little bit, something like that. So now very quickly, you know, I've improved the shape of that hair and start to fill in some of the areas of sparse hair. So the last thing is I would spend a lot of time filling it in, but the last thing that I would do as well as if you want that like high end hair retouch is you want to dark and shadows and bright and highlights you're trying to enhance that because it makes it look shiny er it makes it have more volume, so we talked about blend modes I would give myself a new empty soft light layer and I would just take a white brush and I would kind of paint where I want those highlights to be I went all the way around here and all the way around here and I definitely need more and here it was gone and I can blur it filled sir blur collagen blur and blur it so that it looks a little more natural shut out and then he would do the same thing with shadows so in about maybe ten minutes of that I can really get more towards hair and you know this is too strong back it off but you guys getting the idea of how I kind of shape and give it more give it more volume and then also fill in any imperfections so I think that's it for the advance retouching I don't know if you could take questions or I can do it later well let's see if there's any final questions in the studio audience will be quick on our he said his head was sick so I see uh okay how about it just a really easy question people who might be trying to simulate a shoot like this is it a real hair or what ah a great question so it is fake some so some of that hair's real some of it's fake what you do is actually had her name's elisa clanton and she's a celebrity hairstylist in new york and she did the hair for me in the shoot and you take basically looks like, like mash. The shapes are shaped like tubes, and they wrapped fake hair around it. Or they rap her real hair around and then shape and pin it's. Actually, half and half like this one's fake. But actually, this is a really, really common technique I've seen like I seen this hair done several times in different interpretations, but not so bad.
Class Materials
bonus material with purchase
Ratings and Reviews
a Creativelive Student
As always, Lindsay delivers the goods. Her command of her tools is just mind blowing. A terrific value.
Helen Chapman
I found this to be very informative and found it easy to follow Lyndsays instructions. Well worth the small investment of money for me.
joanne duncan
Lindsay nails it, still relevant today, i learnt so much from this, and the print out guide is a great reminder. Lindsay is a magician!