Tips for Choosing a Cleanup Tool & Manual Cleanup
Lesson 12 from: Beginner Content Aware and Clone Techniques in PhotoshopTim Grey
Tips for Choosing a Cleanup Tool & Manual Cleanup
Lesson 12 from: Beginner Content Aware and Clone Techniques in PhotoshopTim Grey
Lesson Info
12. Tips for Choosing a Cleanup Tool & Manual Cleanup
Lessons
Class Introduction
01:56 2Overview of Cleanup Tools in Photoshop
11:29 3Tips for Non-Destructive Workflow
08:48 4Using the Clone Stamp Tool
18:16 5Brush Shape for Cleanup
03:24 6Using the Healing Brush Tool
06:56 7Speedy Cleanup with the Spot Healing Brush Tool
04:29 8Cleaning on a Path
04:21Lesson Info
Tips for Choosing a Cleanup Tool & Manual Cleanup
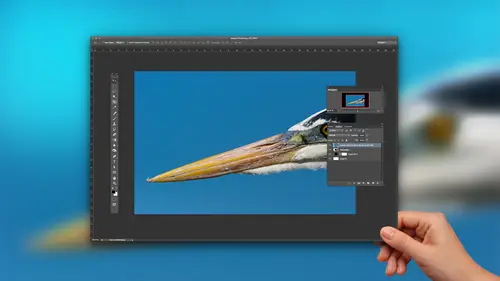
All right, So let's take a look at an image here and just talk about how we're going to choose when we're using one tool over the other. Well, in general, I mentioned my laziness. I want to use the spot healing brush tool as much as possible. And so I will set a source, and I won't set a source in the case of the spot healing brush tool. But I will set the tool up. I'll go ahead and create that layer, and I'll rename it to clean up because I'm gonna have really could work flow here, and I'll go choose my spot healing brush tool and adjust my settings on the options bar as needed. Adjust my brush size with left and right square bracket keys. Click. It's gone, and again now that I've configured things. Now, if I could go find any other dust spots, it's probably gonna be really difficult to find any other blemish. Is Adul in this image? But if I find one, we don't want that little bright spot. A cloud disappeared I can go through and just literally paints. I'm holding the space bar key, b...
y the way, another handy dandy little shortcut. We'll wait where all these dust spots come from. Oh, wait, I forgot. I added these dust spots. We'd have more things to clean up, but I can hold the space bar key to get the hand tool to move around the image. Now that I'm zoomed in and just click on that one and click on that one click on that one. It maybe I didn't want to try and get rid of trying my luck at getting rid of some power lines. Whatever the case might be, I can just paint, paint, paint, paint, paint, get rid of the spots and other blemishes. What about when things don't work out quite so perfectly? That's when I'm going to switch to the healing brush tool in most cases. And what about when things just really are not working very well, So let's just go find something that we want to get rid of. Oh, maybe I want to replace this little hole because we've got some sort of weird thing happening here, and I want to replace this with a board. Just pretend like there was not aboard missing, and so I grabbed my spot healing brush tool Watch. Now it's gonna work absolutely perfectly. Uh, no, not so good. So then I would switch to my clone stamp tool, for example, and I'll just do this really quickly without worrying about whether I'm doing a perfect job because you guys are so nice. I know that you're gonna cut me some slack, and I might do something like this to paint in aboard again. I'm just doing kind of a quick, sloppy approach here, just in the interest of time. But I might use that clone stamp tool, the copy a board and then used the healing brush tool, for example, to come into just little areas where I need to do some blending between those different portions of the image. So just mixing and matching as needed. But starting with the quick and easy quick selection tool, then maybe moving to the healing brush tool, then maybe using the clone stamp in some situations where it's necessary, but also keeping in mind. We have, for example, the patch tool, if you prefer, or if you find it easier in certain situations to use a selection or content aware fill again when a selection just proves easier for you to define a specific area, and then you can let Photoshopped do all the work for you. But then what about when the tools just let you down? It's not suggesting that these tools are not absolutely amazing, because we've already proven just how incredible these tools convene in terms of cleaning up various blemishes in our photos. But what about a situation where it's just not coming together? Well, I've got a manual technique that I like to use for situations where texture in particular is a challenge. Now here we have a sample. There's a wonderful scene, kind of, Ah, Norman Rockwell, kind of a scene out in the pollutes. Got some horses, got a nice big Otri and red barn blue sky and the grasses and the white picket fence. I mean, come on. How incredible is this? How could you possibly mess this up well, very easily if you're as skilled a photographer as I am, and you want to make sure that you're going to be able to teach cleanup techniques later, then using your wide angle lens with the sun behind you, you might intentionally emphasis on the word intentionally adjust your framing and your position so that the shadow of your head falls into the frame again for the express purpose of educating photographers later. Not because I totally neglected to notice my shadow in the frame, hypothetically speaking. But this is a good example of a situation where the cleanup tools actually had a challenges. We've got this really dark area and we have all this texture and we don't want to have anything that's too obvious in terms of that actual cleanup work. So this is where I have a tendency to go manual gonna go through this relatively quickly. It's actually pretty simple. It's based in large part on techniques that we've already seen. I'm going to first create a selection of, in this case, the area that I want to clean up. Oh, wait, What do you mean? In this case, we've already seen that with the patch tool. I'm using the same technique as the patch tool, but without the patch tool, because I want to take a manual approach in this case, just like with the patch. So I'm gonna take that selection and move it to a source of pixels that I think will work well in this case. Now I'm going to copy pixels or fill in the details of those pixels. What I really want is those pixels that I just moved this election onto. And so I'm going to copy those pixels onto a new layer. So I go to the layer menu and I can choose new, and I can choose layer via copy or just control J on Windows as a keyboard shortcut or command J on Macintosh. And now I have a zoom out just a hair and grab my move. Tool letter V is and move tool letter V. And we can move that layer around anywhere we want because we just copied. Look, Horsey, would you like to eat some grabs? Maybe she put the grass in the barn. No, we want to put the grass over the shadow. Let's zoom in again. And we want to try to line up that grass in a way that's going to both cover up the shadow, but also blend in reasonably well into the surrounding photo. Look at that. So perfect. Look at this. Oh, my gosh, that's amazing. And then we can blend in. We could use a layer mask for our purposes so we don't get so sophisticated with layer mask. I'm simply going to grab the eraser tool, Let her e on the keyboard, set my hardness down to maybe around 50% right about there and use a small brush size. And what I'm going to do is just erase along this edge and blend that area in. So just getting rid of the hard edge that I created with my non feathered selection. So we have a little bit of blending, but I'm really going to do that with the underlying layer turned on so that I can see where I'm painting, and I can know exactly whether I need to clean myself up a little bit better it set or maybe periodically turn this layer off. Oh my goodness, that is just incredible. So now let's zoom back out so we can see the image shadow. No shadow shadow, no shadow just by copying pixel. Sort of like the clone stamp tool. Sort of like all of the various techniques, the patch to all this other stuff that we've seen except taking a little bit more direct control over that process. But all of this, of course, is aimed at making sure that we're able to get rid of distractions and blemishes in our images so that we're not pulled away from something that we don't want the viewer looking at. And instead they can focus on all the cool stuff that we put into that photographic frame and obviously has just been kind of a basic introduction and intro to the basic concepts involved in image. Clean up some of the techniques, the tools, the technology that are available. But you can take all of these capabilities all these tools and techniques, and expand upon them, get better and better practice using these various tools, and then start adopting additional, more advanced techniques to take that to yet another level in terms of cleaning up blemishes in your photos.
Class Materials
Bonus Materials with Purchase
Ratings and Reviews
Linda Cook
Tim is terrific. He is so clear & helpful
Dyan Bone
Tim was an excellent presenter and spoke very clearly with precision about exactly what he was doing and where he was going with the work. He covered a lot of information but did not go too fast so people like me at home could keep up with it while I was doing the same thing in my lightroom, etc... Also, he made it very clear almost every time where the tools were at in the menu bar and shortcut keys in MAC and the PC as he was moving along in his presentation. He did this without losing time and was able to cover everything that was necessary. I hope you all can have him present more topics as he made learning a lot easier to follow than some of the other presenters.