Face Swapping, Flattening, and Merging in Photoshop
Lesson 7 from: Beginner Photo Retouching TechniquesKhara Plicanic
Face Swapping, Flattening, and Merging in Photoshop
Lesson 7 from: Beginner Photo Retouching TechniquesKhara Plicanic
Lesson Info
7. Face Swapping, Flattening, and Merging in Photoshop
Lessons
Quick Image Tune-Up in Photoshop
08:58 2Cleaning Up Skin & Blemishes in Photoshop
16:22 3Brightening Eyes in Photoshop
10:48 4The Patch Tool, Content Aware Fill, and the Clone Stamp in Photoshop
16:53 5Basic Dodging and Burning in Photoshop
08:23 6Real World Teeth Whitening in Photoshop
07:57 7Face Swapping, Flattening, and Merging in Photoshop
19:52Lesson Info
Face Swapping, Flattening, and Merging in Photoshop
if you do like products. Ah, Water lake. Let's say you want to start a net seepage or you Whatever. Um, this could be really handy. So I do crush a ah lot. And this was a hat and a scarf that I crush aid for is a And I was taking pictures of him in it for some reason. I think just cause it was cute and then I thought, Oh, that's really darling. And I could maybe, like, I made this a free pattern for the scarf andan I thought, Well, now the photos have to be, you know, they have to be nice. So people want this free pattern. Um and I love his smile in this image, but let me close some of these. We have too much going on here. Um, but I I like better the scarf here because this was my prototype scarf, and it's too big. And so here it doesn't look right. So over here, now, this looks better, but he's very serious in this image. So what I want to do is have a little smiling, cute face over there combined with the image where the scarf looks nice. So That sounds like a complicated thing, but...
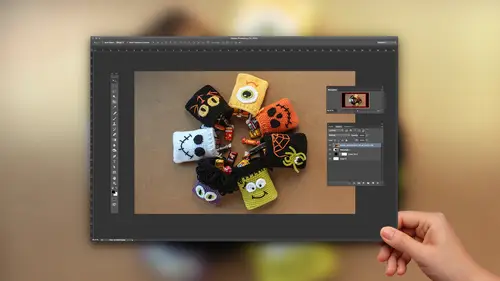
it's so easy you wouldn't believe it. So here's how you do it, and this would be the same thing. If you're trying to fix blink shots, you take group photos and there's always, you know, one person's linking in one photo, the others linking over there. So pick a couple of them and that you can merge together and it's super easy. So I'm gonna grab the marquee selection tool, and I'm just going to drag a box around the smile and I'll grab the move to also oppress V for the move tool. And then I'm gonna drag this into this image, so it's a near perfect fit. I mean, I wasn't using a tripod or anything, so and he's moving, obviously, so it's not perfect, but it's pretty close. We'll zoom in so we can see toe help line things up. Even better, I'm going to temporarily reduce the opacity here in the layers panel, so from 100% I'll drag this down to 50 ish. So now I can see the the original underneath so I can line up, you know, his eyes and his chin. Um oh, He's so cute. Um and I can see his chin here is lower. So maybe this was, you know, I might have moved or leaned in and it's closer up or something. So I'm gonna press commander Control T. And I'm gonna shift drag to tuck this up a little bit, so I don't wanna move his jawline, but I think that's pretty good. I mean, you get the idea, so when I'm pretty happy with it, I'll go ahead and commit it, and then I'm gonna bump this back up to 100%. And now, of course, we have this box around it because the exposure, for whatever reason, isn't exactly the same. So now I just need to blend it in. Um, I don't want to use an eraser, because if I make a mistake or if I erase like too much, sometimes it's tricky when you do this around the edges. If I erased too much, I can't go back and undo it because it's erased. I mean, I can I can go back, but only so far. It's certainly not a week later. If I realized oops, I missed something. So instead of using the eraser tool. We want to add a mask to this layer. So at the bottom of the layers panel, um, we have this icon. All of our adjustment layers come with built in masks. But if we just want a mask itself, that's his button right here. So I'm going to click on that. And now I can use black paint to block the parts of this layer that I don't want to see. So I'll grab my paintbrush, I'll get black paint. So flip flop these colors so blacks is on top. I'll make my brush bigger. By the way, if your brushes really tiny, it looks like this. Or if you have caps, lock turned on your brush might look like this. So I'll save you from pulling your hair out. It's just caps lock that happens. Took me a really long time to figure that out. I won't tell you how many years I yelled at photo shop for that. When it was really me, that was the problem. Okay, So have black paint and a soft, big, round brush, and I'm on the mask. And now I'm just gonna paint away this edge so we get his smile, and it's tricky because sometimes you have to make decisions about which jawline you keep. But this has turned out kind of Okay, think on. Maybe I decide. Actually, I wanna nudges face over a little bit if I grab the move tool and do this. I mean, I can do that, but it's better if I leave the mask where it is and just move the image. So I'm gonna unlinked thes and I'm going to use my arrow keys to ever so slightly nudge it over. And then I'm gonna go back to my mask and touch it up a little bit cause I see some spots I missed. There we go, and then we can check our work it up by flashing it on and off, and I can see I don't know if you guys can see this All zoom in. Do you see the spot on the scarf that's flashing ab I Ta Galis. This is why you check your work. Because there's always the leg. A little splotch like that. So what I need to dio is paint that away, okay? Because I had missed a spot. So you That's how you check your work with masks. One of the ways is you can toggle it on and off, so nothing should be moving. Except whatever it is that you intended to. Another way you can check is to alter or option click on the mask itself, and then I can see everything I'm asked. And you know, if there was, like, a big spot like that in the middle of it, I would know that that was a mistake. Um, or if this was all somehow missed, I could see that that was a mistake. So it just helps you clean up things. Ah, and make sure that you don't print something or put it in a brush or in order a 1,000,000 copies and pale that money. And then Oh, my gosh, how did I not see that I've learned that lesson the hard way, So I hope I can spare you. Okay, so they're now look at that. Now he's smiling and the scarf looks pretty good. That is lovely. So let's go ahead and flatten this or we can merge this. Sometimes people ask what's the difference between flirt, flirt flat ing and words or flirt? I'm going to make a new term. You want to flirt your image. Ah, the difference. In this case, the end result would be the same. We would have just a flat image with just a background layer, so the result would be the same. But the difference is if you merge a couple of layers, you are not necessarily creating a new background layer, so they will not flatten into a locked background. When you flatten an image, first of all, it's all of your layers and it will be flattened. And you will have a locked background layer at the end. If you merge layers, they just they just sort of melt together, but they don't get locked into a background. So in this case is the same thing. So I'm just going to flatten it, which is under layer, flatten somewhere. I don't know. I made a keyboard shortcut for this. So wherever it went, layers, it's probably down here. Yeah, flatten. So from I signed it F two. So when I hit, have to it flattens. But now we just have this background and, um, some other clean up things that we might want to do here I shot this in our living room with two pieces of foam core for the background. So, like I didn't even bust out. I'm so bad now, like I have nice backgrounds and stuff, but they're packed away and I just don't mess with them. So I have foam core and he's little. So until he requires me to get a bigger background, I just use the phone board and eso. There was no studio lights. I just had one piece of foam core that he's sitting on, and then another piece propped up with, like, furniture. Whatever was next to me, um, an end table or something was holding it up. And so anyway, that's what this like studio is, and I want to clean up this area here so I can finish filling out this frame, and it's really easy. You could probably sample this color and just paint it. We could certainly clone it. I could also do something really unorthodox. I could just select an area of this and press commander control tea and just stretch it and it's fixed. Obviously, I can't do that if there was any type of pattern here, but in this case, is just white. There's nothing. I'm not worried about it. So I could I could just do that, um, saying with this area, just pull that down. Yeah, that would be fine. Maybe we want to do a quick levels adjustment. Command L It's too. Pop that up a little bit. There we go. And he's looking pretty good. Um, so they're really simple clean up and a face swap, which is really nice. So I told you I was a Christian, a nerd on, and I am. And so for Halloween, I made these little treat bags for the neighbor kids to have. And then I was like, these a really cute and I want to photograph them. So I did. And I got I was being lazy, and I took a really not great image here. So a couple of things that I would want to do to this, uh, lighten up this area a little bit, so I'm gonna grab the Dodge Tool with low setting of 10%. By the way, um, you can come up here and slide this around or what I did just now as I pressed one, let me get out of there. Let's go back to 100 and get out of that box. All right? So if I want to just the exposure from 100% to 10 with the keyboard, I can just hit one, and it'll give me 10%. If I hit to get 20% I'm gonna hit one to get 10% will make this brush bigger with the right bracket key. And I'm just gonna gently brush this area to just brighten it up a little bit. For whatever reason, the side is looking like dead. I don't know. And also, the color is brighter over here. I'm noticing it's way worse on my monitor than that may be what you guys see. But the color is much more saturated on this side than this side. So another thing that another trick that you could do sometimes is what I'm gonna do is just create a new blank layer. I'm gonna grab my eyedropper tool. Where are you, eyedropper? Where you are? Uh, I'm gonna tell the eyedropper to sample of three by three average. Otherwise, it's sampling, like one pixel, which is not very representative of oven area of color or you can go all the way up and select bigger samples, maybe even five by five sub to you. But I'm gonna click to just sample the color over here and I'll get my paintbrush and make it large with the right bracket key. And I'm just gonna paint. This looks terrible. I know I'm going to paint that in a little bit, and then I'm going to change the blend mode from normal to color. And, yes, it still looks terrible. Not quite as bad. But I'm just gonna do some of that, and then I'm gonna fade it away. For whatever reason, it just looked like uneven on this side. I don't know if if you guys can see that, but a little bit. Yeah. So I'm not dreaming, right? It is there. I don't know what happened. I don't remember where I shot this. That there was some weird phenomenon happening. It almost looks like there's window light coming in on that white side like cooler light from outside. That's what it is. Incandescent light on the right side. Yeah, that's probably what was happening. I would have thought that I would have shut off the lights. The inside lights, but I must not have, so that's a little better. So we sort of color corrected over here in a weird, unusual way, but it works out. So that was just a blank layer filled with color I sampled and then put in the color blend mode and then dialed back. So that's that's good, I guess I'm gonna merge this down this layer into the background The keyboard shortcut to just merge your currently active layer to murder it down is command or control E. So I just merged that down cause I'm done with it. Uh, and then So I put this image together and this is the background for this was just some piece of cardboard that came with something I think I ordered on Amazon. It was like the shipping box or something, and I just the inside of it are something like that, and I use it as a little background here. And then I thought, you know what? This should really be a vertical image, like, up this way, and I want to add some type up here, so I'm gonna grab my crop tool, and I'm just going to extend it like. I don't know how big my type is. I forget. Maybe like this I'm eyeballing this, and I'm just gonna commit that. And now I have this black fill. Now, why did it fill with black? Well, let me undo. Because I had black over here is my background. So basically, by cropping it like that, I basically extended the background. And because my current background color is black, it filled it in with black. If I had, you know, my default colors with white here, and I press see for the crop tool, and I click on I don't have any settings up here. I'm just leaving this all blank. Now, if I drag up, it's gonna fill with White. So just in case you ever have done this, and then you're like, why is it neon purple or something? You had me on four pole background. So when I'm happy with that, I'm gonna go ahead and commit it. And obviously, I need to fill this in. So hopefully this place Nice. Because when I when I did this in real life, it worked decently. And when I was testing it again, it worked decently. But let's see how content aware fill is gonna do. Dio did I say that, right? Yeah. Content aware fill. All right, so select this sounded funny for some reason. So I'm gonna select that, and I'm going to include a little smidge. Or like as much as I can of the brown. Some trying to be like, Hey, photo shop, take a clue and get those brown area. So let's see what happens. Shift F five is the keyboard shortcut. So we're gonna fill it with content, aware. I'm not expecting a miracle, but I'm thinking that maybe it will do a good base coat and then I can, like, touch it up. We'll see. So it's a big area. So it's gonna chew for apparently a while. Yeah, Not perfect, obviously, but pretty good. Better than I could do if I had to just sample this little corner in, like, reconstruct all of this. Um, some other things you might think to try would be to, like, sample this area and try to turn it into a pattern and then fill it. But it doesn't work very well because it just looks like blocks it because there is, like, a texture built in here, so this is tricky. But now that's a pretty good base. So then what I'll do, Because I am going to be covering this with text for one thing, so I'm not gonna obsess about it too badly is going to be covered. But this is too bad. So add a new blank layer and I'll grab the clone stamp and make my brush big. And here's where I'm going to drop the opacity down because I don't want to clone that texture and the pattern and just want to sort of softly uh, smear, not smear like softly buffet away. I guess. So I'll drop this to 50%. I'm gonna ault or option click in this area and then I'll just brush. And I'm making really short strokes because I don't have a lot of room right to run around, and I'm just This is where you play the game now of like, where do you blended? And I'm going to go a little too far because I can mask it away. So I'm just I'm gonna lower the capacity even more like 10%. Maybe so I can try to blend these areas so it's not so obvious. How does that look on the monitor looks kind of decent here. Maybe I'm going to zoom in and add a mask to this layer and grab my paintbrush by pressing B and switched to black paint so I can block it. Because now I have obviously painted on the little crow she bags. So that's not doing them any favors. That's not bad. And then, you know, if I feel like I've overdone it or whatever, I can feed it away. But quickly it becomes bad again. So because I'm adding text to this, I'm not really worried. Ah, and in fact, here is the text. Oops, so Halloween treat bags. And then maybe I get the crop tool out and crop it in. So, you know, maybe I post this on my blogger or whatever, and then I want a vertical image. But this is the way I shot it. So I didn't want to just rotate it because it would make the lighting all weird. So I had to actually reform at it, which sometimes is very easy, sometimes is more work. This was like, not too bad. We'll go ahead and commit it, and that looks pretty great. We'll see. We can see the original. Let's add a snapshot. You guys know you can add snapshots to your history panel. So instead of me having to click up here to see what it looked like and then scroll all the way down to the current, I can take a snapshot and then I can come up and I can toggle but groups between my snapshots in the background. So there was our original with our mixed color temperature happening and this horizontal format and there's are finished piece.
Class Materials
Bonus Materials with Purchase
Ratings and Reviews
napa
I am glad I got this course. There was a lot of really good information, and it was really helpful to be able to rewind, pause and be able to study her screen at various points to see what was going on as I was worked on an image simultaneously on another screen.