In-Field Basics: Setting up the Drone & Software
Lesson 4 from: Creative Wow: Aerial and Copter PhotographyJack Davis
In-Field Basics: Setting up the Drone & Software
Lesson 4 from: Creative Wow: Aerial and Copter PhotographyJack Davis
Lesson Info
4. In-Field Basics: Setting up the Drone & Software
Lessons
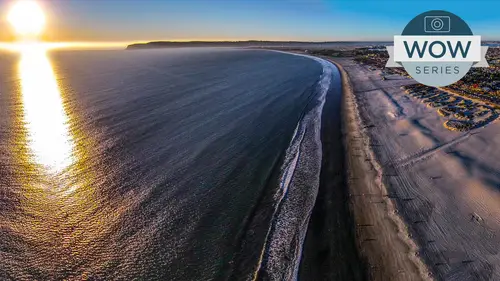
Introduction to Aerial Photography
28:41 2Aerial Introduction Q and A
28:51 3FreePreview: Gear & Types of Drones
26:46 4In-Field Basics: Setting up the Drone & Software
41:40 5In-Field Shooting: Advanced Techniques
31:27 6In-Field Shooting: Advanced Controls
34:53 7Retouching Aerial Panos
44:01 8Advanced Post Production Enhancing
40:11Lesson Info
In-Field Basics: Setting up the Drone & Software
And now what we're gonna do is we're going to if we can. We're going to project from the IOS Devices and did wanna just kind of a refresher. Um, go in. And, uh, some of the ego and, um, of the d g I copters. This is the phantom vision to and this is one that I started off with. It does have the built in camera, but you can see that it doesn't really have a gimbal set up. It has some of the bushings on there to help with the vibration, but really is not set up for shooting video, and we're not recommended. Um, this one is the one that we're using now with the can they continue to find tune in terms of extending the battery life and different elements of it. Um, it is a great one because of that ability to have a high quality gimble built into it. This is Let's actually go back to their phantom two. You'll notice that this one is the one that does not come with a built in camera. And this is the one that most people would buy to use in concert with the GoPro especially the go pro hero fo...
r because it will be bitching, um, with this new pork, a high definition video. So it's a great set up and again you can get it with their three di gimble. This one, originally is what they call the H. Three two D. It has now has an option of an HD three D gimbal, which will allow for a little bit of the yaw softening of that effect as you go left and right. This is the brand new one I had mentioned before. The F C 40 is their brand new, low cost, one that goes up to 7 20 p high def Limited high def. 30 frames a second, also controlled by IOS or Android, can be used up 200 meters of 300 feet away, so it doesn't quite have the extension that the vision to um and the two plus series has. But it's great, and it's the very high quality camera, and it does have the ability control that camera and does have a limited gimbal on it as well. But basically, this would be your starting point for under $1000 to be able to get into mobile photography. This is another little device that I didn't bring with me. It's very, very cool. Let me see if I've got the another screenshot on it. It's the, um, have it. It's the Epson handset heads up display and it's the Bt 200. I'll have to check that. But the great thing about this Aziz a necks tension, too. Um, either of the vision twos, um is that this little device right here is basically is an android mobile device, which means that it can download the deejay I app so it replaces the IPhone or android phone. So you have a complete heads up display and because it sends out a signal directly to the glasses, you don't need anything else. It immediately allows you to put on the glasses and you actually see through what's known as the heads Up display or HUD. I'm the world around you and and in terms of a true heads up display, it is showing you the video image on the inside of the screen. But it is still transparent. In other words, you see the world you're not on the r. Where you're blocked out from the world only. Inside the video you're seeing both a combination of the video as well as the world around you, which is good because that's a little scary. If you're locked into this virtual world and you don't realize what's going on around you either in terms of people or pets or property or even the drone itself and it works excellent, it's actually is. It is an excellent way you would think that it's a little disconcerting to see both the view of the copter as well as the view of the surrounding area, but it actually works out great. So this is again the Epson Goggles. I think the Bt 200. I'll check that afterward, but it's a fewer to get. What? What's your next toy that you would add to these? This would be something like this, especially since you can turn on an option in here for the orientation of the device. Teoh pan down in your in your image and you'll see that show that you in a little bit where you can actually use the orientation of the device toe. Look down so that in concert you're not tilting your head down. That's not going toe cause it thea device to look down. But you could simply move your control or slightly down, and it starts to pay. And that works whether you have the goggles or not. So, um, that is, um, very cool feature. The other thing speaking about, uh, Hexi Copters and others. This is a brand new Siri's coming from DJ I When you do want to start taking, um, quote unquote professional work using that sort of camera that does have different lens as options, either muralist camera or ah, DSLR um strong, stable, highly. These It's the spreading wings. Siri's The 1st 1 is the S looks like an awesome device again. There are dozens of companies making Hexi copter and Arctic copters some of them that are just, you know, fantastic in terms of their abilities and, um, their capabilities. But this is the, uh, one of the ones from D. J. I. Like I said, I love there. Options including this one has a nice one and a number of do the retractable landing gear. And basically, since your camera is below and you want that ability to control it through under 60 degrees. Obviously, you don't want to be able to get the landing gear in it. So they're landing gear actually retracts out of the way, giving you a complete unobstructed view of the world around. So that is, um possible and again, a very, very advanced gimbal on it as well. Let's see if there waas others that deejay eyesight. Like I said, I just love them. They do have their what they call their IPad ground station that works in concert with a their Bluetooth, um, additional little devices to use here for controlling it. But this will see a a simplified implementation of waypoint navigation built into the current APS. Right now, if you've got one of the vision choose, um uh, anything with a vision with their own camera, they have enabled in software the ability to plot out your course inside. The APP just came out just a while ago. This is an advanced version where you can actually do it, and it goes beyond line of sight. Goes a lot further distance again, puts it into this professional range where you may be using it to as they put here, you know, do something is elaborate. Is this Even though you're going to be obviously losing track of the device completely, this sort of automated flying is gonna be essential, because any time that you're losing line of sight with your device in this set up here with this WiFi transmitter, you're going to be losing control, certainly of the camera, if not the copter. And this is what's going to allow it to use the GPS, not line of sight in order to plot out. Of course, as you'll see when we do it in this app. The great thing is, if you turn over the control of the flight path to, um, the automated software, you have the ability to still control the camera. So I can still look around. I can still pan down. This is something I did yesterday where I was down in the park, okay. And some of the commenters, I don't know. This is when I saw here. The turbo ace is a huge device. Carbon fiber. Um, looked like a neat one. I don't know if you're familiar with the turbo ace, Adam. Yeah, yeah, it just seemed like heavy duty one and again. There literally are probably a dozen companies making thes. And if you're willing to make your own device pieces together, there are plenty of companies that are selling all the different component parts, and you can Frankenstein your own creation. And that's what people open to recently have been doing. There's no the idea of getting a hex, a copter or an Arctic copter out of the box that's ready to fly has been impossible up until recently. That's what I love about things like D. J. I having these sort of solutions that are kind of canned for you. Okay. And we're gonna get into that software will actually plug it in to the, um, software to show that. And let's do that. Now, this will be interesting, because we're going to let you seethe software. Um, while we're operating, it will notice that I took the blades off. Um, don't want any surprises. Want everybody know that I'm being as cautious as I can? Yes, I have had crashes before. And, uh, but anyway, I I've never had a situation where the copter has actually started up without me being the one doing so. But anyway, well, better safe than sorry. So the steps for starting off out in the field We have done our visual check. We've gotten everything set up. We've gotten the gimbal off. We've made sure that we've got a memory card in there. I recommend you don't want to change out your cards. You've only got 25 minutes of flight per battery. But I'll usually have five batteries with me so I can fly for well over an hour. If I'm shooting high def video or even the raw files, they could be quite big. If I'm shooting with the interval ometer, I can shoot hundreds and hundreds of shots. And again, I have got no problem just leaving it on the interval ometer and letting it shoot. You know, a shot every three seconds and it's just going to keep on going. And it's wonderful that synchronicity. Then I'm just focusing on the flying and looking in, getting the shot. Okay, when I find the money shot, I'll stop it. Now I'll switch over to Raw. That's one thing with the interval Ometer is you're not gonna be shooting raw files in that you'll notice we'll shoot some raw files here that it's going to be dramatically slower. The files, the raw files coming off here over 20 megabytes for every single shot. So it takes a long time. But that's just to say that having a big card, a 64 gigabyte, very fast card, you probably all know that the SD and Micro SD cards are rated based upon a SYRIZA 10 classes. The fastest class. They stopped at 10 which is kind of silly because now you actually have to find a Class 10 memory card. And then you've got to find out what is the throughput of writing and reading off that card. So there are all sorts of different flavors of Class 10 cards. You would think that they have attacked Class 10 15 but they stop 10. It's a pain in the butt because a Class 10 now is the lowest base that you'd ever want. You actually want as fast a read write speeches possible, especially with things like shooting raw file, dramatically better performance with something. I think some of them can right upto 90 megabytes a second or read off about 90 megabytes a second and lower for the right speed. But really really important for anything related to video or anything related to an interval OMETER. The same thing is going to go for your GoPro GoPro heroes or using a micro SD you're gonna be using that, um, interval ometer or the great thing that the GoPro has is it's gotta burst mode 30 frames for resolution in one second. Okay, something beyond any SLR can do That's great, but that it's gonna clear that buffer based upon the speed of your card. So having the fastest biggest card that you can afford, especially for your drone, is going to be bile import. That's if there's one thing that's going to increase the theme. The performance of your shooting up in the sky is gonna be a very, very fast card. And check to make sure that that Class 10 is not only a Class 10 but also faster than that. Okay, let me go ahead and turn on my phone because in a second we're gonna be going back and forth and we'll back out here. I'm going to first turn on their mo control, as I mentioned before, that's the first thing you turn on. Never turn on the copter first. So that is the remote controller that is going to send out a signal. I can then turn out the, uh, WiFi extender kind of pointed toward my copter. At that point, I'm going to turn on the Oprah the GoPro turned the Phantom. How these batteries work is one click is going to give you a readout of what the current charge of the battery is. It's just it doesn't actually started on one click to and hold is your start. Same thing with turning off. It's gonna be press once and hold your second click. It's gonna turn it off, okay? And just that same process of first turning on the remote control before you turn on the copter. Always turn off the copter before you turn off the remote control because you've turned off their more control. Remember, it has no parent has no brain, and it has the potential fly away. The one thing I will remember remind you is before you turn off the copter is stop. You're filming or your interval ometer because if you're in the middle of shooting a video clip and you just you're gonna land and you're still filming, you re tempted to turn off this and you'll be turning it off, you know, killing the power and the right in the middle of recording a video clip. So that's a good reminder just to make sure you get in the habit of turning off the video. So again, one click to you can see that we've got the lot there and I'm just gonna turn that. Since you know the battery, now you can see it. And with that turning it on its first gonna do a few different things in terms of the copter itself. We're turning it on its trying to find a satellite which is not going to do. I've already gone in here and looked in here, and it's not gonna find any satellite, so it's never going to get a blinking green light that's gonna allow me to fly. Certainly inside using the GPS, you can't force it into non GPS mode. So your manually flying it completely. There's really no reason why it's such a added benefit. To use a GPS. It would be like going back to the Neolithic days of, you know, manual riel men ply manual. And if you've got the facial hair that's gonna works best you believe me. Oh, it is magnificent. And again, after you get used to it, you know you'll have six satellites and you're gonna everyone 14 400 satellite links. It is amazing that everyone that you add obviously, is triangulating that much mawr. And it's allowing it because if you think about if you only have one or two it it's very limited anyway, so we've got that started on. Now the thing to do is to have the mobile device on the same WiFi channel. Is this one? Because this, like all your little WiFi enabled cameras, which you're Nikon cannons your point and shoots when we get into our macro class that we've got coming up. One of the coolest things is shooting macro with a WiFi enabled camera. So you're looking here, the cameras down in the grass, maybe even the wet grass because you're using a waterproof op Teoh TG, which is awesome. Macro shooting camera waterproof. But you're having it down in the wet do and you're up here controlling it, setting focus points, even doing focus bracketing. And don't get me started anyway. So what I'm gonna do. And now hopefully we're looking at my phone in terms of the signal, we're gonna switch over. There we go. So I am got WiFi. We're not going to use the guest here. I'm gonna go down here and you're gonna notice Phantom Davis. I have renamed my WiFi station the WiFi signal that it's ending toe have my name in it. It's normally a six digit alphanumeric code, but you can change it inside the apple. Show you how to do that. If you have more than one phantom, you'll certainly want to do that. Or if you're flying around any potential other phantoms, you certainly would want that situation. So now it is currently on that. So when I go back to my phantom software, you're going to notice at the top it says Phantom Davis. So it now they're talking to each other ever so nicely. And first, before we get into you, you could go into the camera as a starting point, cause that's going to tell you that you actually do have a riel block on the system, and we'll get into a second what I'm doing. But, um, as a matter of fact, we'll take advantage of this right here. This is what they called the accelerometer mode were. Actually, my tilting of my mobile device is gonna allow me to tilt the camera. As you can see right there, it's following my every move. I can't go left and right. That would be awfully nice, but, um and that is this mode going back to my mobile device here it's in the upper left hand corner, that little blue. When I click that it's now off. And now the arrows. You'll notice that that little arrow is lighting up, and now I'm manually control it. So this is just and I can even look all the way straight down, which is great with the current camera so you can go straight down, which means you can shoot vertical panoramas who? OK, but that was the main thing. I just wanted to make sure that I do have a true I'm lock on here. I'm gonna go back out here to the home for the D. J AI software, and I'm gonna go into settings and go through a few different settings here. I'm just starting at the top auto high the toolbar. You know, I manually it's in the lower right hand corner. So I dont auto medically hide that I pull it out as needed when connection breaks. This is actually is kind of a nice feature if you're the sort of person that pushes things to the limits. Most photographers of those sorts of people, no photographers are artists, which means they're gonna break every bloody rule and they're going to get into trouble. And there were crash it and they will send it off and they will do all sorts of crazy things. By definition, you're an artiste. That's really why photographers should not be allowed to fly drones because your personality trait is just the worst possible person to fly a spinning. You know, Blade of Death device is a artist photographer anyway, So when the connection breaks, in other words, you're usually that's gonna be Either you're out of line of sight or you're too far away from the device and you have two main options here. Start recording or start continuous capture. I like that continuous capture. Either one of those is depends upon. If you're a video person, why not? You know If you got the big card in there, why not? There's no reason to not have it if it breaks it to keep shooting or whatever. Stay in idle means it's going to stay whatever it's doing, um, or you can have it continually go into capture mode. Um, theoretically. Well, if you've if you've lost contact, you're not gonna be able to read off the card. But it could be, you know, if it's continuously capturing. If somebody steals your drone, then you'll have a picture of the thief. Of course they have the picture, and that probably won't help you. But anyway, so, um, I'll say continuous captures what I like on here camera settings display. And this is really great. And for a lot of people, they missed this one. And this for photographers, I think, is one of the most useful things to to have access to and set up as a custom consenting for your phantom one. What the's camera settings display is. And let me just jump back out and go into the camera, because this is what we're talking about here when we come back here and go into the little gear in the lower right hand corner, thes air. The settings on the left hand side is what we're talking about. And basically, these options are what you want to have access to while you're flying and you can actually have all of them access to all of them. But if you'll notice you'd have to scroll up. And if you didn't know that this would scroll some of your most important settings specifically, your exposure compensation is hidden from the screen. So if a person has never gone in here they go. I can't find exposure compensation. How do you do it? It's simply that you'd have to scroll over here on the left hand side. But as opposed to doing that, we're going to come over here. Turn that off, go back over here to our settings, go back in those camera settings display. And these are the settings that I have turned on the photo format. That's where Jay paga raw. Okay, it's essential. Remember, you cannot shoot raw in the interval ometer mode when it's shooting shot, shot, shot shot that has to be J. Peg. If you're gonna want to do the money shot, um, then you're gonna want to shoot raw. It's the adobe DMG. They're one of the first companies to really settle on adobes own raw standard, which is great for compatibility. Uh, excuse me and, um, also doing things. Excuse me? Like shooting bracketed pairs or things like that. Then obviously raw comes in handy trying to merge these shots into Ah, hybrid death file. Um, I s o the 2nd 1 here, you'll notice I have turned off. Basically, you're the default setting is auto eso and I s owes the sensitivity of the chip. It's the equivalent of the essay in the old film days. Um, I s o the higher the I S o r. Sensitivity goes in, the more noise you're going to bring in. The only reason why the I s o on the camera's gonna changes because you're shooting in lower light situations and it needs to increase that shutter speed up so it doesn't get a blurry image. It knows exactly how much I s o, it needs to bump up in order to get a shutter speed that will work based upon it being a bloody helicopter. So, auto, I s O and this is something that I think is awesome. And you guys should think about for all your cameras, pocket cameras, DSLR. So whatever the ability to have your camera, no, and bump up in minute increments. The Aiso for what it needs to get the shot because you've shut the shutter speed because you know what you need based upon the lens you're shooting with and everything else or based upon what it knows it needs. There's no reason, for the most part if you know what you're doing to have the eso being set to manual. Um, the long as you're not greedy when you understand how I eso works where you go, Well, it's black night, and I'm still able to shoot it one thousands of a second. Well, yes, you are, but you'll be shooting at I s 0 12 billion and you're going to get garbage so there's no free lunch. But once you understand, if you have that understanding of, you know, using the slower shutter speed to get a steady shot, then um, and how to use your F stop to allow as much light. And it's possible the auto eso is great. All your pocket cameras, All your IPhones, all your, um, little cameras, like the GoPro are all gonna have auto. So none of those have manual controls. For I s O I mean for shutter speed and aperture and therefore their main control that they have at their disposal is gonna be I s O They will change shutter speed, but they're going to be using eso is the main control. That being said, auto is so there's no reason for me to have that in my display, so I'm able to get rid of it. White balance. White balance is really good to know, because if you're gonna shoot a Pano as you go from shooting toward a light two away from the light, you don't want that color to shift during the panel process. So whether you're shooting with a DSLR or whether you're shooting with a drone or pocket camera or whatever, white balance is one of those things. That's probably good to set to some sort of manual setting sunlight or cloudy. Either one of those is usually going to be fine when you're shooting. The nice thing is, as you change it in the APP, you see the results, so you can just say I want it to be X. You know, whatever is pleasing to you, um, exposure metering. That's whether you want spot center weighted or a matrix metering. Three different types. Typically, you won't need access to that. It's nice toe have. If there was a specific subject and you wanted to meet her on that, you're shooting something that has multiple different exposures. Something's very light, some things dark and the, um, dark green grass has got the bride and groom on it. Then a spot meter is going to focus on what's the center of the scene and will expose for it, even though you have a black parking lot or white building or something else. In other words, it will blow out that white building, but it will correctly exposed the green grass and the bride and groom on it. So spot metering is really important because it says, whatever I'm focused on is what you should meet her. The center weighted or matrix metering is taking into the entire scene, and that may under exposed that White House, and therefore you got this dark, dark green grass, and now you're gonna have to use exposure compensation to get the correct thing. So metering is good to know, but know that if you have something like spot metering turned on as you move around every single time that center situation changes, its gonna be changing that metering. So it's not something you'd probably have on for video? Certainly not if you're, you know, doing any sort of painting or moving through a scene. So the default setting of a matrix me during a Senate waited is gonna be a great default on what you should have, um, exposure, compensation. This next one down here in the center. Awesome. That is your control. You are a photographer. You will, you know, set that based upon what you want. Um, yesterday, it was overcast and I could bump up that exposure. Remember, most of your information in the file is in that upper quadrant of your image. You don't want to under expose an image if you don't need to. As long as you're not clipping the highlights, you want your image. Actually. Excuse me as close to the brights as you want. The vast majority of information is in the highlights, not the shadow trying to pull out shadow from a too dark image, which is what most photographers do. They don't want to get anywhere close to clipping the image so they under expose everything not going to give you good quality. You're gonna be fighting noise the entire time. So have no matter what camera, whether it's drone or otherwise kind of this concept of leaning toward the right leaning toward the bright portion of your history. Graham is what you want as long as you don't clip. OK, so that's up to you. You go well, I'm shooting and sunny clouds. And if you're shooting white puffy clouds, you need to keep him. You'll notice that shot of the canyon. I got white puffy clouds and there was a very challenging I'm shot, this one right here, and I'm blowing out some detail in the clouds. But that allowed me to maintain detail in the rocks of actually darkened the rocks to hide that, because my story is the water in the cliffs in the distance. So anyway, exposure compensation is vitally important. You definitely want that control. And, of course, that's how you're going to bracket. There's no auto bracketing turned on. So basically going to set up a shot, overexpose it metered exposure and, um, under expose it whether that's, you know, a full stop full to stop. Some people do. Two stops exposure to three shots for a bracket. Exposure five. A lot of people do five individual shots. You could go to stops over two stops under and half stop increments on the Phantom software. Awesome. Great. Cool, sharpness, sharpness. If you're shooting J Peg, that's gonna be built with shot. You have. You know, low, medium and high standard is fine if you want to do post crossing your shooting a lot of J. Peg, you could take that dental lowest possible setting, and then you're in charge of it. But it's not something that I need to change. I can set that up once in the camera and be done with it. I don't I'm not going to change that in a poor shot basis, and her flicker is for your video. And again, I'm going to set that up once, and I don't need to set that up again so you can have these old turned on set up your parameters and then turn off the ability to see them when you're done and having a reset and formatting of the card again if you need to reset everything well, in your in the midst of a flight, usually you don't need to do that. So by turning off all these, that means that all of these things these four things mean that when I get back over here to my camera and click back on my little gear, um, I have all of these things at my disposal. That top one right there is my interval ometer. That's where I'm gonna turn this one on here. You'll notice that it is, um, going to go unlimited times on the right hand side there and this is set. It's giving me only because I'm in a raw file format. As I mentioned before, you have to be in J Peg in order to get this interval ometer. Now it'll shoot three frames a second for unlimited, okay? And then basically it's gonna be every like, 30 seconds is what that was telling me that interval ometer of raw. Actually, you can used to not even have it as an option. You couldn't shoot this interval ometer in a raw file format at 30 frames. There's really not a whole lot of benefit. I can't imagine playing copter and every 30 seconds you're gonna be looking at something else anyway. So that is the interval ometer setting. Here is your different options in terms of the size of your file. Um, either for video, this is your compression for I believe that's compression. I don't think somebody said that it's 10 12 and 12 10 and eight megapixels. It may be a reduction. The pixel size. Usually that's a compression it could be. Do you know if it's a It's compression? Yeah, somebody was saying that it was final size. Usually it's compression, so you would never do never have any camera to shoot anything other than the largest J pic file. But you can. There is your, um, video settings, and you'll notice that you can take it up to a 10 80 p on this vision to plus at 60 frames a second, which will give you a little bit of a slow motion, which will make things look a little bit smoother, so that may be something that you want to do just as a default. That's up to you. Um, whatever. That 30 frame is real time, and you can do less. Um, and you can choose either ah, large size or your typical letter box. You know, 10 80 p in terms of the format J. Peg. And they said this is that we you can switch it over to raw for still images. Um, white balance. You can see that. I've got it set to cloudy. You know, I don't know where you have artificial light, but typically it's gonna be either. You know, sunlight or cloudy cloudy is gonna be a bit warmer. The automatic white balance is fine for standard shots. It's just that with the panorama, you have the potential of its shifting as you shoot. Okay, here is your meeting. As I said before, this is matrix metering. It's looking everywhere. This is center weighted, and then the bottom one is your spot metering. Okay, so the overall matrix metering is great Default setting for your scene. And here at the bottom, you'll notice I don't even have to scroll up. There is my exposure compensation. Okay. All the way to under or two over in actually third of a stop. Roughly third of stop increments. Okay, clicking the check box makes sense. Those of the camera settings, those The fact that you have all of those at your disposal is one of the main reasons for doing something like this. Phantom vision to plus as opposed to a GoPro GoPro. You're not gonna be able to have things like your exposure, compensation and things like that. You still can have access the has me tearing. It has white balance. It does do a lot of things, but exposure compensation is not one of them. Okay, back to our settings. Any questions out in TV land, you know, as Jacqui Bald guy will something out here? Okay, so let's see. I would like to ask this one. Um, Rohan says, Hey, Jack, I've heard that there's a great app toe learn how to actually fly a drone. Are you familiar with any of these apts Or could give us a heads up? No, I'm not. It sounds great in the sense I would have to. That's a very good question. I'll have to research it. Maybe I could try it lunch. If it waas I have seen in, people do and we'll do a little bit actually, before we take a break. Some tests that I would recommend do some little exercises that a person can dio. It would be interesting how that app would work in with the APP. Work in concert with an actual say, you know, display a first person view of what the drone is seeing. Interesting concept. I'm not quite sure how that would work. Um, have you heard of, Ah, an app that would work in concert with, like, a simulator later. It sounds like right to help you learn how toe like a video game. Maybe. Well, from that standpoint, yeah, I think that's a great idea. If it's a simulator as opposed to actually working with the actual drone, then that's a great actually. That's a I highly recommended that Do you know this specific? And there's a couple different ones out there. One of them is called Real Flight, and it's ah, popular simulation is a drone specific? Uh, yeah, its radio control. And I believe they've added multi rotor type aircraft. So would be the exact same thing rial flight, we will look at Riel flight. Thank you, Adam, for that great idea, because that is the thing to get familiar with, because you can get disoriented in the in the flying process. And if your brand new is a lot of us are too remote control flying. You're not used to the joystick scenario. Of course, if you're a teenager, if you're if you're in your thirties or younger forties or younger, if you're not practically dead like me, you probably were weaned on joysticks. Every last person thing that a person who's been weaned on a you know PlayStation needs is help, you know, with. But this is we are working in, you know, four to mention, you know, ya pitch roll scenario. So I think that would be great. So we'll look into it. I highly recommend that what happens when the d g I phantom two runs out of battery in the air? Is that the current the current set up? And, um, we've got C low battery auto. Go home. Okay, so this, which isn't letting me do it right now for some reason, But it will. The current firmware update for the Phantom Siri's has a auto go home and we'll give you there's a color thermometer. When we come over here, you'll notice when we get into camera. And there is that at the top, that green bar and not is showing me. I'm completely fine to go. That's how many minutes I could do. It's not because I've turned off the remote controller, but the, um, that thermometer bar will show me as it goes toward red and orange, and it will automatically instigate a return home when I start running low on battery. And the return home is another one of the huge benefits of having a GPS enabled device because it knows exactly where it took off. That's one of the reasons why, when you set it up, actually leave it on the ground while it's doing this blinking scenario and it will look like its own location usually went about three feet I've found. If it returns to home, it's really, really close, which is excellent, you know, if you're flying around cliffs and beaches and things like that, I had to use that before when I've lost line of sight, and so anyway, it will automatically return to home. Same thing. If you are doing kind like what I've done here, this has turned on if you're out flying somewhere and you just guy, I don't know what If you turn this off and it breaks a signal to the copter, it will use GPS, and it will bring it home. So that is the easiest way. How to instigate a return home is just simply turn off the controller. Same thing as if you're running low on battery. Great question. Continuing on in the settings are preview quality. This is for the first person view that we're getting with our app. If you're running into issues, you can, you know, take down the size of the frame per second, you're only using. It's not affecting anything related to the quality of your photographs. So it really doesn't matter. It seems to do a great job with, um, most scenarios at the maximum of 6 44 88 30 frames a second. But if for some reason it's not catching up, you certainly can, you know, take that down and look a little bit more jumpy. But, you know, you know of a scenario where you would be a big benefit. Take this way down to change that. If you're pushing your limits of your range often the bandwidth required Teoh stream that video needs to be diminished. So if you're trying to go out of past 5 600 feet away from yourself horizontally, okay, so again, that's the distance. If you're running that the camera is going to be losing it, you can still have control, and you'll still find all your compass and other things work. You can still orientate the copter and still fly back manually. Even if the camera can't hook up, I usually haven't run. I know the current one can go out to 2000 feet with the current one, so it could be if you're not getting close to your 2000 feet, limit that taking this down and again. It's not that big of a deal if you wanted to take that down. So if you're if you have the artist persuasion pushing the limit, then that may be a situation. I haven't run into that, but it could be that I just got a really good field of view
Class Materials
bonus material with purchase
bonus material with enrollment
Ratings and Reviews
Antonio Cuellar
It's really nice