Lessons
Lesson Info
Paper Choices
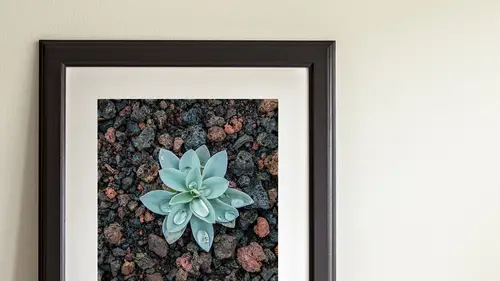
I brought a lot of different types of paper today. Canon provided us with, well, (rustling) I already showed you the semi-gloss. We've got, let's pull this one out. This one here is the pro luster, the photo paper pro luster. Then we've got some other types of paper. We've got this other brand. It's called Hahnemuhle. Probably saying it incorrectly. Hahnemuhle! (laughing) There we go! And this is a pro luster as well. So anything with a luster has, it's a little bit of a gritty surface to it, just a little bit. And then anything with a gloss, well, that kinda makes sense, right. Gloss is truly glossy, shiny. So I like using glossy paper for shots that have incredible detail. You know, this type a shot. Oh, these look great in a glossy type of paper, because glossy really shows all the detail, all the texture, the grain structure, all of that. If you have photos that you want to be a little bit softer and kinder, maybe you use something like the luster. Or maybe, then, you go to somethi...
ng like an art paper. K, so this is Hahnemuhle, and this is a matte fine art. So I wanna show you the difference between two images, and show them to you side by side so you get a feel for what this fine art looks like. Alright, this photo here is the Photo Rag ultra smooth, and this is a really heavy, almost like card stock, okay, whereas this one is the luster. So it's a little bit brighter and shinier. And maybe, it's kinda hard to see the difference on the camera. But what you get is, you know, the fine art papers are more muted, less crisp. (chuckling) That's probably improper English. But you get the idea. Whereas the shinier papers have more contrast; the blacks are darker, the brights are brighter. So what I like to do is for this, the fine art paper, is maybe something more like a soft portrait, maybe an infant, a newborn, painterly flowers, macro, you know, that type a thing. Think like... (snapping) watercolor painting, that type of look. Whereas anything with action, sports, even portraits of younger people alotta times, people that can stand the scrutiny, you know, don't have alotta wrinkles, I use something more like a luster or a glossy. And sometimes it's real subtle. Sometimes it's not subtle. Alright, this'll be our last hanger, our last hold. You can pull those two down. And in the next class, I'm gonna show basically why these two photos look so different and how to get over this little bit of a mistake. K, so this one's a big one, so we'll put that right there. (clacking) Cool. And this one. So, this is one of my mistakes that I get to show off and explain how I made the mistake! So, the one on the left, that is the, what is this one? That's the pro luster. And then this one is not the pro luster even though I (chuckling) wrote that on there. This one is the fine art paper. So look at the contrast difference between the two. You know, this one is much more muted, much more subtle, but it doesn't really look right, does it? Yeah. And this one really does look right. That one looks fantastic. But this one definitely is more muted and it's too grey, the blacks aren't very saturated. We can solve that by doing something called soft proofing, and I'm gonna show soft proofing in the next segment. But soft proofing would've allowed me to preview that look and see oh my gosh, that's what it's gonna look like when I print it on that paper! I don't want it to look that way, so I'm gonna change things up and I'm gonna re-edit the photo in this soft proofing mode. So be careful with printing with these fine art paper; they take a lot of effort to do well.
Class Materials
Bonus Materials with Purchase
Ratings and Reviews
Dennis Walsh
This is a good fundamentals class. Mike is an excellent teacher. If you are just starting printing, this would be a good choice. If you are more experienced at printing it is probably too shallow. I thought the price of the class was high for the time and detail of the lessons.
Jul
Good solid fundamentals class for beginners. If you're a fairly seasoned pro wanting to refine your output techniques, you'll probably find this class too general. It concentrates on the basics of achieving a good image with a basic overview of printer settings and Adobe output dialog boxes.