Lesson Info
5. Posing Parts: Shoulders, Chin, Eyes & Hands
Lessons
Introduction to Posing
15:20 2Expression and Interaction Posing Tips
19:28 3Posing Guidelines
46:37 4Basic Posing Demo
14:28 5Posing Parts: Shoulders, Chin, Eyes & Hands
26:29 6Posing Parts: Men, Feet, Elbows and Nose
22:57 7Posing Guide Contact Sheet Examples
14:17 8Posing for Body Types
27:54Posing and Shooting Flaws
16:15 10Male Posing Guidelines
17:06 11Essential Male Poses
21:38 12Essential Female Posing: Standing Poses
35:11 13Couples Posing Guidelines
25:40 14Shoot: Female High School Senior Poses
46:17 15Shoot: Male High School Senior Poses
26:11 16Shoot: Mature Male Poses
10:55 17Shoot: Mature Female Poses
12:31 18Shoot: Boudoir Poses
28:55 19Shoot: Plus Size Poses
15:38 20Shoot: Wedding Photography Bridal Poses
14:46 21Shoot: Mature Couple Poses
11:29 22Shoot: Uneven Height Couple Poses
16:51 23Shoot: Bridal Couple Poses
26:39 24Shoot: Group Poses
25:44 25Shoot: Bridal Party Poses
30:33 26Shoot: Family Poses
11:58 27Shoot: Mother with Children Poses
24:11 28Shoot: Father with Children Poses
28:00 29Shoot: Single Child Poses
20:23 30Shoot: Multiple Children Poses
37:10 31Shoot: Maternity Poses
24:39 32Shoot: Maternity Couple Poses
27:37 33Shoot: Same Sex Couple Poses
28:57 34Shoot: Fashion Female Poses
36:50 35Shoot: Beauty Poses
30:22Lesson Info
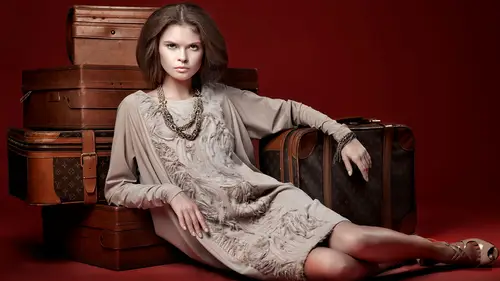
Posing Parts: Shoulders, Chin, Eyes & Hands
So the real base essentials, use a longer lens, weight back, whatever's closest to the camera is going to look biggest. What we're going to talk about now is continuing with parts. So we were talking about shoulders, and there's few more important things to talk about with shoulders. So I was saying here, whatever side is closest to the camera, remove the hair, it elongates their neck. Also watch for body language. She's leaning back. So here's another example, as well. All right, taking a look at this photo, she has a ton more shape and engagement in the picture on the right. So I can point to you all of the things why. So this is how I would like you, ideally, to train your eyes, to kinda see these things. Okay, so in this photo, the problem we have is her arm is back here. So what it's doing is, because her arm basically starts where the back of her body ends, let's say my arm is... Two and half inches wide. I added two and half inches onto my waist, onto my width, by doing that, 'c...
ause I can't actually see the back of her. So I'm making her look wider. The next thing for girls, you kinda wanna see curve. I don't see any. There's no curve, really, there at all. The other thing is she's kinda standing flat-footed, and she's leaning back. So not only is her jaw pulled her in, you can kinda see that in the wrinkles there, but she also is apprehensive for the camera. So those are all things that, if you just have someone kinda stand up against a wall, you might have a problem with. So an improvement, the things that I would then say, I would say, okay, I gotta get that hand away. There's a couple ways you could handle it. If you watched any of Sue Bryce's classes, one of the things that she often does is she takes the hand, it would be this arm right here, and she puts it on the wall. And takes the back of the hand and kinda puts it against the bum. And puts her elbow to the wall. So now you would have the arm, move just a little bit, you'd have the arm out here to the wall. Okay, but maybe I wanted to do something with her hand here, so I had her cross it over, just to make sure I could see this curve. But the next thing is, she's leaning away, so the body language isn't talking to me. So I had her put her weight on her back foot, and lean towards me, and arch her back a little bit. So that's what you had to do from here to here. And so it was a thing I said in my head, okay, I wanna see curve, I wanna connect with her, and I want my emphasis to be on her face. So that would be kinda the breakdown that I would have there. Okay, for men. Since the parts we're talking about right now, in case anybody didn't see before, we're actually in the shoulders section, so I had her lean her shoulders down the wall at me in that example. In this case, let's talk about shoulders for men. The most important thing to remember for men is that shoulders control broadness, and basically how big, or how manly, or how broad they look. So obviously, straight on, they're going to look most broad. To the side, completely to the side, they're going to look most minimized. And it's going to depend on the guy you're photographing. What're you trying to achieve? So, for example, if you were photographing a relatively puny high school senior boy that would like to look a little bigger, you would not pose him like number one or number two. Because, since we have turned him away from the camera, you see less of him, which makes him look smaller. Turning him back towards the camera makes him look broader. And a lot of guys, 'cause guys don't admit how much they pay attention to what they look like in their poses, but guys like hot pictures of themselves just as much as girls do, they just don't say it as much. But I don't know. Guys know the secret. If you ask guys, they know the secret, when they cross their arms, of pushing to pop out their muscles. (laughter) Have you seen that? Oh my gosh. Guys do it all the time. But if you did, if there was a puny guy who wanted to look a little buffer, I mean, for me, it would be lighting and all those other things, but if they cross their arms and just kinda push up on those arms and stand straight towards the camera, it gives them a little bit more in the muscle area and makes them look broader. If you want them to look a little more aggressive, you have them lean towards the camera. It's aggressive in their body language. Versus for girls, it's hip back, lean forward, guys it's almost a step toward the camera, it's a little bit more challenging. Basically challenging the camera. So those are a couple things I would think of. There's not really a right answer, it just depends on the person. Lindsay, I would love to actually reiterate that point, because I love what you're saying here, that the best angle depends on body type and the look you're going for. I think that's something that, throughout this workshop, I want people to keep in mind, is that what is right depends on what you want. The fact is that, whatever you put closest to the camera's gonna be biggest. But what you want to be biggest will depend on the goal, on the subject, on what you're doing with the picture. And so, all of this, when you're asking, what is the right pose for this, what is the right pose for this? A lot of that depends on what you want to do with it. And that's what I love about how you're teaching this, is you're teaching the principles, which they can then apply themselves. So here's a good example. I'm giving a shoutout to my mom and dad, 'cause they always watch. And I did a portrait of my dad recently, maybe about a year and a half ago. When I did the portrait of my dad, I'll put it this way, I did not have him face straight on towards the camera with his arms crossed. We went for a slightly more slenderizing look. (laughter) Tilted to the side. I think we went with about a number two for my dad, there. (laughter) Okay? So, okay? It's the tools that you have there. I know he'll appreciate that. And Lindsay, your mom was in the chatroom earlier. So I'm saying hi to everybody. My mom always is in the chatrooms. Hi, mom. Okay. Let's talk more about parts. So we have done shoulders, most importantly for kind of defining broadness and elongating necks. Those are kinda the two things. Two big things would be elongating or kind of relaxing somebody, and defining their broadness. The next one is chin. So, my dear friend and model over here, Jen. Oh, yeah, you can come do this. This was a flaw that I saw, that is not in her personality, but in her natural posing. So this is why, actually, I didn't wanna address the point when we were shooting it. She naturally holds her chin back a little. Like, when she's just sitting there. (laughter) That was really good, that was really good. But by naturally, she's leaning back a little, and she pulls her chin in a little. I mean, I can say this, you never wanna do that with your subject. There's two approaches you wanna take, but you pretty much always want chin out. And I've seen different people teach this. It doesn't have to be extreme. Some people are like. And I actually know a woman in particular, when I pose with her, she's always like this, and she's, like, gonna fall over. It's just chin out, and it's for a couple reasons, and there's a couple great reasons. One is if anybody has either a double chin or, as we age, just a little bit of loose skin, that tightens it a little bit. The other thing that it does is it actually shows the jaw a little bit better. So can you pull your chin back a little bit? And now jut it out. See how you can see her jawline? So I'm gonna do it one more time, pull it back in a little bit. And now just it out. You actually see the edges of her face more. So it actually defines the jawline more. This is true for men and for women. Now I'm gonna talk a little bit about double chins and things like that in a bit. So just so you know, that is a part that's coming up. So chin out. That's pretty much an always. Some people are naturally, like, if someone's leaning towards the camera, a lot of times they're naturally doing it, so you don't need to reiterate it, 'cause then they might strain a little bit. But especially when people are sitting, people do not have their chin out sitting. It's almost always back. So, a lot of times, I will tell my subject, I'm like, "You don't have to do it extreme, "but the whole photoshoot, whenever you're thinking, "just stick your chin out a little bit. "The whole time, whenever you think about it, "just chin out a little bit, just connect with me." Something else that some people say, instead of chin, 'cause sometimes people do this, is sometimes they'll say eyes or forehead out. So instead of it's that, it's a little bit more. It's two different ways of saying it. Whatever example makes you happy. And then down. So it's chin out. If required, down. So I don't always say this, so this is how I'd like to put it to you. Some people you just say, "Can you put your chin out, "or bring your eyes out toward me," and they're fine. But some people, when you say bring chin out, especially people that are concerned about what's underneath their chin, a lot of times, by default, they bring their chin up. Because they're thinking, oh crap, it's the double chin, it's the loose skin, whatever it may be, I need to stretch it out. And then what is closest to the camera? It is that problem area. That is now what I'm looking at. And I'm looking up their nose. So a lot of times, when you tell people chin out, you have to tell them down a bit. And as we said before, whatever's closest to the camera's largest, so when you do, right now, this, okay, chin out and down just a little bit, now the eyes are closer to the camera. So that's why the whole chin out and down thing exists. So it's more watching your subject. But yes. When she's kinda comfortable, she has her chin back just a little bit. And so I would just tell her to keep pulling that out, whether it's the eyes or the chin. So here's an example with a guy. And you'll actually be able to see this perfectly, and I have the arrows. Okay, so what you wanna watch, he's a good looking guy so he has a jawline. But you will see it much more defined. All I had him do is, he's kinda sitting back, I had him stick his jaw out. Ready? See how it's much sharper? Like, here? See this curve? It's a little bit of a curve. When he sticks his chin out, it is a sharp line. Like he has a sharp, defined jaw. Now, he already has a jaw, but if you have somebody that has a little bit of a double chin, or not really a defined jaw, it is significant. Okay, now the problem with him, is he is the problem I was talking about when I say chin out. And he reaches out too far. His chin's up too far. It looks like he's, like, peeking over something, and it doesn't look as natural. So for him, I had to say chin out and then down. So he'll bring his chin down and his eyes closer to the camera. Let's go ahead and jump in here. I've got a great one that I love from PhotoScott, who wants to know how much of the posing details are you seeing through the lens, versus looking and analyzing the pose and setup before bringing the camera up to your eye? That's a good question. I'd actually probably say it's 50/50? Because what I do is I would do the initial pose. The sit there, turn your legs, put your arm up part first. And then when I look through the camera is usually when I see the expression for the chin, and the hand, 'cause I can see how my lens is interpreting that now, versus, okay, I made sure I had negative space, she's leaning towards me, that's good, okay now I need a little bit more negative space there. So I would say almost 50/50. Cool. Carlos Ramirez would like to know, some people refuse to smile and show their teeth. How do you manage them? What's your best way? Is it situation dependent? Yeah, that's totally situation dependent. It depends on each situation. I mean, I have like... I have my super stupid jokes. Like, really embarrassingly bad. Oh, I got a good one! Okay, okay, I got a really good one. So. For certain of my clients, I have a song that you wouldn't think that I really like, but I do. It's Drake, The Motto. And I know every word to that song and I can rap it. So I let them know this, and then if they're not smiling, I start rapping it to them. And then they can't help but be really confused and laugh at me. (laughter) Like, things like that. I think this comes back to being the chameleon and figuring out what certain people need. Like, some people will like that. When it was high school seniors, I had the really dry humor, like even stupid jokes like, "What's a pirate's favorite letter?" Right, but like really stupid, and then I'd laugh at myself. For people that are just, like, nervous, I get them to laugh, and I say, "No, give me like a huge, fake movie laugh. "You know, give me a villain laugh." And then they laugh at themselves. So it kinda depends on the person. But yeah, the rapping one is my personal go-to. And then if it's really difficult, I can dance to it a little bit. (laughter) And it's impressive, I'm not gonna lie. So if the equipment keeps not working and being difficult, you might have to dance at it. But for now, it's working again. Well, do you know what would be really funny if I sang that rap part? There's a lot of f-bombs in it, and I would probably bleep out, have you ever done that, like bleep out the wrong words? Like, I went to sing it, and the first thing, swear word right away. So, anyway. I'll see if this. Uh oh. Well this one came in earlier from Gary Jones from the U.K. He says, "I shoot a lot of radio DJs, "and I really want my posing needs "to be very dramatic and kind of funky." Do you have advice for some real funky kind of posing? Yeah, okay. So here's a general rule of thumb for... Dramatic, I guess I would say. Would you hold this for me? Thank you. When you have two parts, hands, feet, knees, elbows, whatever it may be, when they're on the same level, it's less dramatic. As soon as you take them and put them to other levels, that's how you create dramatic poses. So that might be hands up. Or arm up. Or leg up, with a guy posing. Something like that. So if you're going for more dramatic, think anything with two pieces, put at different levels. And that gives you more drama. My friend Jen Hillenga, she teaches that. That's one of the things that she does when she does drama. She takes those two pieces and she can move them all around. More dramatic. I mean, that makes perfect sense, they're as far away as possible. It makes a really dramatic pose. Chin neutral. Chin out. Chin down. So you see, significantly, that makes a really big difference. So it's a solution for loose skin, double chins. Okay. Eyeballs. People forget to pose eyeballs. They need to be posed. And what I mean by that is you definitely want to avoid seeing whites of the eyes. That's a really, really big one. So if, for example, I tell Jen, can you turn to your left and just face right over there. Face towards that wall for me. Okay. Now, by default, let's say you wanted to photograph someone in profile. By default, what most people do is, when you tell them, "Okay, turn your body, "or turn your head to the left." Look at Iris for me. And then keep your chin back towards me just a little bit. They tend to do something like this. You tell them "turn to the side," and so they look to the side, and they are looking far, for example, to the left. And what you see are just the whites of their eyes. And it's super creepy. (laughter) It's definitely creepy. So my point is, if the person is not looking at you, tell their eyes exactly where to look. Always give them something to look at. You know, look at Iris. Look at the edge of this table for me, the front edge. You know. Look at this camera right here. Always direct their eyes. And the same thing is true with couples. Couples, if they're not looking, they usually try to look into each other's eyes, 'cause that seems natural, like, if they're looking at each other. And then, someone looking into your eyes from this close is like so creepy and awkward. And it's really uncomfortable. So what you do is you pose their eyes to look at somebody's shoulder. To look at their waist. To look at the ground over there. To look at their ear. So just pay attention to it, because, by default, a lot of people look really uncomfortable and they strain their eyes. So that's a big one, just watch for it. If I see whites in a eye, that's one of the few things that I'm like, I almost write off that photo. Like, instantly. 'Cause it's just creepy eyes. Okay, hands. This one is the one that everybody is like super stressed out about. How to pose hands. So we're gonna take a look at, this is mostly gonna be a lot of dos and don'ts, and then I'll just demo some with her. And I can tell you, one big thing that people mess up with hands is the posture thing. Because they put hands on the face, and then all you see is arm and elbow. So leaning forward makes a huge difference. And it has nothing to do with hands. But it does, 'cause it's what's closest to the camera. At that point. That's a big one that I see in portraits. So for women, you want soft and relaxed. For men, the most important thing for men is to keep their hands occupied. (laughs) Okay, so, at weddings, for example. Will you hold that for a second? At weddings, I see this nonstop. Guys pose like that. They look, yeah, you know. (laughs) So the biggest thing for guys is you have to tell them what to do with their hands. Otherwise it's uncomfortable, or they put them where they shouldn't be. Anyway, so women. All right, let's take a look. So one of the things I said was trying the hand caress. So if you want the person's hand to be on, say, their shoulder, I don't tell them to do this. I would say, I would have them actually drag their hand across their chest to their shoulder. Or if I want their hand in their hair. You tell people to put their hand in their hair, usually, not always, when I say put your hand in your hair, they usually do this. I mean, that's really common. They'll do something like this, or like this, and that's awful. But instead, if you say, "I want you to just "trace your index finger around the side of your face "and just rest it in your hair." You know, or "Drag your hand around the side of your hair "and then just soft, and kinda intertwine "your fingers a little bit." Like, something like that. "Or have your hand, and I'm gonna have you "put it behind your neck, and then just "drag it down low, low, low, stop there." Instead of people do this when you say put it behind your neck. I kind of give people movements for their hands, versus telling them to place it. 'Cause you don't, in real life, place your hands. You trace your hands. So that usually works out better for me. So I'm gonna just give you the big dos and don'ts of hands. And I think this is also a big one for when you are editing your photos. Like, going through and picking out what works and what doesn't work is knowing what to look for. So you can rest if you'd like. So I'm gonna point to these. Okay. So these are obviously exaggerated examples, but they're really important ones. The fingers shouldn't be straight. Because your fingers aren't straight when you're standing there. They have soft curve to them. Yeah, robot fingers. So what you wanna do is, I always have people just wiggle their fingers. I say, "Wiggle your fingers "and place them back on your face." So if someone's really stressed, 'cause some people do that, they'll be stressed. I'll say, "I want you to just wiggle your fingers "and place them down real soft. "Wiggle your fingers and just "trace them down your face real soft." That's kind of how I direct people to give me the hands that I want. Okay, another one. Watch out for hands actually covering the jawline. And I see this often in portraits of girls that are sitting, and they cup the jawline. Now, at least if they have one side of the face visible, you can see the jaw, but let's say this is the side closest to the camera. There's no jawline visible, and we want to see jawlines, as photographers, it's flattering. So for something like this, there two things you can do when the hand's obscuring the jawline. You can lower it and soften it. Give it a little bit of a cup. You shouldn't actually have your hand completely flat on your face. When you say to people, "Put your hand on your face," they put their hand on their face. Instead, I do the wiggle the fingers and set your hand very soft. It's kind of in the wording. They're trying to please you, so they wanna do exactly what you say. "Put your hand on your face," they do that. So real soft, set your hand on your face, and I always have them lower it maybe just a little bit. You can also put the hand back to their neck. Just a little bit. And then the other thing that you can do, as well, is put it on the other side of the face. So in this instance, she's turning towards me, she puts her hand up. I can't see any jawline. Plus, I mean, her hand looks pretty huge here. It's dominating the frame. So instead, if she's turned, actually just putting her hand to the far side of the frame gives you a much more pleasing photograph. So that was something I would consider, as well. Let's take a couple more examples, I know I have a few of these. All right, so you go ahead and you're like, okay, I told her to put her hand on her face, it was in the way and it was on the jawline. Okay, so I'm gonna switch it. I'm gonna put it to the far side of the camera. And then you see palm. And when you see the palm of the hand, it's really distracting, because it's as light as the face, and bigger than the face. A lot of my clients are African-American, and their palms are lighter, so when they put their hand up, that is the only place you look, because it's the lightest part of the frame there. So this becomes really important. So the big thing to do is tilt or turn their hand. So what you wanna see, basically every time that you're photographing a hand, and I'm gonna say that loosely, this is maybe, like, 9 out of 10 shots I do, I'm looking to see this. I'm looking to see the pinky side of the hand. Not the palm, not the back, not the thumb. Because it is the most elegant, and it is the softest, and it is the smallest profile. So if you want hands to be in there but not dominant in the frame, that's what you're looking for. So those are the things that I'm trying to direct somebody to do. For guys, it's a little different. But I don't pose girls with their fists, but if I did, it would be with the pinky side. Or if I was doing a soft hand like this, it would still be with the pinky side, versus, you know, whatever other way. Lindsay, that was a major a-ha moment for me. I've heard people say "don't show the back, don't show the palm" before, and I never, I was like, this looks fine to me. I don't care about, it's not ugly skin or anything. But it draws attention, it's too much. Thank you. You're welcome. Okay, so let's look at other ones. These are all dos and don'ts, hopefully you guys aren't overwhelmed by the dos and don'ts, but another one is right angles. And this applies not just to hand on the face, but hands on the hips. I see people, that they're trying to be really dramatic, so they put the fingers going up their hip. And that is a right angle, and it's jarring, and it's not smooth and natural. You want soft lines the entire time. So if you're gonna put your hand on your hip, see how it's the pinky? It's kind of going across. Versus, like, this is a right angle. If, in this case, I wanted to actually still have her hand underneath her chin, I've just softened the fingers, and I've elongated her hand. So if she was going like this, and I said, "Soften your fingers," and she did this, I said, "Okay, just copy me. "Just do this." I mean, I try to do as much mirroring as possible for people. Okay, so this is the same thing. Watch for locked joints. Okay. I don't like the back of the hand, even though it's not terrible. It's side of the hand that you definitely prefer, especially for women, it's much softer. Oh, okay. So this is a really, really random one that I don't think I've ever seen anyone else mention, but it's my pet-peeve, and I even have it in my own work. I see it all the time. This one's subtle, but people's thumbs. Because what you're looking for are soft curves, right? You're looking for soft. And then you have a little, like, thing jutting out. (laughter) I don't know, it creeps me out! So I see that a lot, where someone will have their hand posed, and then they have the thumb sticking out. I mean, if you can, I usually just tell them to keep their thumb against their index finger. And just kinda hide it from me. It just breaks up, I think this looks much better for me. It's much smoother. This is nit-picky. Like, if you're just starting off with posing, and you see a thumb, don't freak, it's not a big deal. But if we're going for curves and for softness, that breaks it up a little bit, and it makes another angle to distract. So that's my random one. But I get creative with hands. So I just gave you the general rules, but, you know. The soft whisper. But, again, it has soft fingers. I'm looking at the pinky side of her hand. Look here. Pinky side of her hand. Soft fingers. Not covering the jawline. Not obscuring her face, and not looking at the palm. I mean, I do a ton of things with hands, and none of them fit these exact rules, I just try to keep that in mind. So I'm gonna show you a couple clips from a beauty shoot that I did recently where this girl, she was trying really hard for me, but her hands were all over the place, and so I was just trying to grab just the right ones where it actually looked good. But related to hands, another problem that I see is foreshortening of hands. Sorry, I'll move this, I can see you can't see. Truly, for a good pose, you wanna avoid the fingers, which is an appendage, coming at the camera. So here, it's a right angle, because it's at the camera. Or because it's weight on her hand, and it's at the camera, so she looks like she has short fingers. Better is if she turns her hand to the side, and instead of right angle, put it out just a little bit, so it's soft. So when I have somebody sitting, I'm not gonna sit on the floor, but when I have somebody sitting, I don't have them do right angle, I'll have them soft. Versus leaning. And this does two things. First of all, when someone leans like this, this is a big one I see. She knows. Okay, my arm. Well, I'll say it for me. It's not that it's fat, it's muscle. (laughter) My muscle is being emphasized. I would say this is the number one sitting, or floor pose, problem I see, is people get down on the floor and they wanna pose comfortably, so they lean. And so the problem that they have is weight here, and then that right angle. Right angles are abrupt, if we're going for soft poses. So I'll have someone, and they're not putting weight, it's soft. Really soft hands, no straight lines, no right angles. And no fat arm. Muscle arm.
Class Materials
bonus material with purchase
Ratings and Reviews
user-305e84
I would highly recommend this class! I have been shooting for some time now and I've been pretty satisfied with my pictures from each session. A few weeks ago, I happened upon this class and thought it would be nice to get some new ideas. I then took the ideas from this class and applied them to a maternity shoot. I must say it took my pictures from good to amazing!!!! My clients bought them all😊 Thank you Creative Live for offering such amazing classes to help any level of photographer learn and grow!
Ruth Ganev
Lindsay is such a great teacher. She doesn't overcomplicate things - so that you can really learn. She also reviews things again and again - only in different contexts - that make total sense. I have learned so much from watching this course of lessons. I went to a natural lighting portrait workshop a couple of weekends ago - and was able to put into action what I have learned. The models loved my photos, too. She keeps things moving, is clear and to the point. I highly recommend this class to anyone wanting to become better at posing. It is so rewarding to look back at my previous photos and understand what doesn't work and why, and also to see things improving. She is a natural teacher - the course is not boring - you will learn tons!
Maya Tleubergen
I really love it! Thank you, thank you, Lindsay! Beautiful girl with a huge talent to teach! I absolutely love it! Worth every penny!