Lessons
Placing and Scaling Images in InDesign
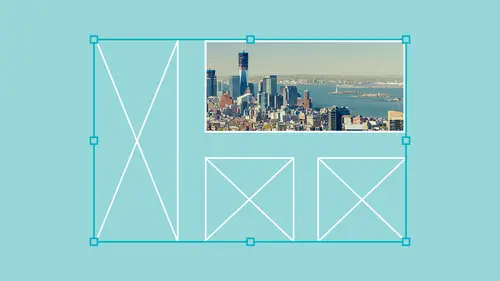
19:39 2Fitting Images in InDesign
10:21 3Display Performance in InDesign
03:39 4Using the Links Panel in InDesign
07:15 5Modifying Original Files Outside of InDesign
09:39 6Creating a Contact Sheet and Captions in InDesign
12:24 7Autofitting Images on Master Pages in InDesign
07:25 8Working with Layered Images in InDesign
07:19Lesson Info
Placing and Scaling Images in InDesign
and here we are ready to show you how we can go ahead and work within design and import images and in design work with a lynx panel and show you several other interesting things that you may not know about in design. So, of course I'm Jason Hoppy, and we're gonna lead you through this little tutorial to go ahead and clarify a whole bunch of things and show you a lot of different hidden items that you probably don't know about. So I've started up my in design file, and I have some images that I have placed in my in design file to work with. We're gonna walk you through right from the very beginning on how we can take these images and place them into in design. First of all, to get images or graphics or logos. Whatever you want to place into in design, going to go to the file menu and are going to choose place navigate to where I have my list of files and we can pretty much import anything you could imagine into. In design. J pegs layered Photoshop files, Illustrator files, PNG files. Pd...
f's You name it if you can find it. There's a good chance that you can go ahead and bring it in. No place my file choose the file that I'd like to place and I'm going to click open. And every time I place an image I get a loaded, cursor loaded cursors gonna show me what I have in my file. And in order to place my file, I simply take my mouse and I'm going to click and drag while I click and drag. You'll notice in the lower right hand corner. I'll get these little X and Y percentages that are telling me the percentage of the actual size of the image. Now, this is just a really nice reference here. You can try to get it exact by the size that you want. It's not particularly easy to do that, but I'm in a click and drag, and I'm going to end up placing my image. Now. I can also do the same thing by taking my file, and I'm going to delete this real quick and I'm gonna go back under file place, which is gonna be Commander Control D. And I'm going to navigate back down Teoh another image click open. And instead of clicking and dragging with this file, I am simply just going to take my mouse and I'm going to click and one of the things when you simply click and you place a file when you click your bloated cursor, it's going to come in at exactly the size that the file was built. Now this could be a real benefit, but also you could end up with an absolutely huge file that could end up being way off the page like this. And that's one of the issues that you run the risk of just by taking your loaded cursor and clicking. So if I back up here and I take my loaded cursor and I simply click and drag, this allows me to set that size of my image exactly or close to the size that I would like. Once I've placed the file in here, I Congar ahead and work with this image and the container in this file. Now a couple things that I want to point out to you. With what we see on screen, you'll notice when I hover my cursor over any of my placed images, I get what looks like one of those little old focus wheels on the cameras, and this is called the content grabber. This is a new addition to the creative cloud files, and what the content grabber allows you to dio is take your selection tool and hover over the little content grabber, and this allows me to move my image around and move the immigrant image around. But it doesn't move the container now. When this. When this first came out, this was supposed to help people better navigate the use and the size of images. But I found, is when I go to move an image and its container, I click and I just so happen to click in the middle of my image and my container in order to move it, thinking that I'm going to move my image with my container and I click on that and I move it and I dragged my image right out of my container, and that gotten very frustrating. So if you do, he keep your content grabber turned on. Just make sure you grab any place around the content grabber. If you would like to move your image and the container together Now we have the two different components of a placed file. We have the image itself, which you can see when I get the content grabber. I could move that all around, and I can also move my container as well. So two different components. When I bring an image in or place an image, I'm always placing it in a container. So I have two different components. I have to deal with my image and my container. This content grabber is really helpful to some. It can be a little bit more annoying to others. You can go into your view menu under extras, and you can hide the content grabber I've been using in design for many years, and I have a habit of grabbing my image right in the middle. And so I go under the view menu under extras, and I end up turning off that content grabber. And by turning that off now, when I click on my images, I will no longer get that little content grabber. Do I need the content grabber? No, I can function fully well without this, but it's just one of those little added features, and it's up to you whether you want to use it or not. But once I turned off that content grabber, how do I actually get into work with my container and work with my image? Well, because I have the two different components here. Zoom in and I have my image and I have my container. When I click on my container containing my image with my selection tool, you'll see that everything highlights in blue. This is my container. If I take any of my poll handles on that container and I resize that container, I can crop or un crop my image. My image is separate from the container. So when I do this, I can crop into my image. Could it crop? Just like I want Teoh without having to go in and edit it and photo shop or illustrator? I've now crop my image, but I would also like to go in, and I would like to move my image around or even rotate my image. So to get access to my image, I'm gonna take my selection tool double click inside the container and you'll notice that it now highlights the edge of my image. Now it could be a little bit disconcerting is when we first important image into our file and say, I've got this image here and I double click on my image. It very subtly changes to Brown, and the reason why it does that is because brown is the opposite color of blue. Now this could be confusing, cause it looks like it's exact. Same size is my container, and it just looks like the container changed colors. Well, it didn't. The Brown indicates that I now have my image selected, which, if I move that around, I can keep my container in its place and Aiken move by content around. If I double click again, you'll notice my container is now selected, and when I move that round, it moves both the content and the image. If I make my image larger or my container smaller and I double click and I access the content, I can now see that my image is much larger than my container here and I get a good reference. I can move this around anyway that I want Teoh and I access that simply by going in selecting my container, double clicking on my image to get back out of it. I can either hit the escape key or if I have that selected, I can very easily double click. And if that doesn't work for you or you have issues remembering that one of the great things is we can go under our object menu and weaken select the content or the container. Now, clearly, I have my container selected. So the only thing that I can do is the content. So if I select the content, you'll see that I can access it that way as well. Double clicking works quite easily works quite fine. So why would I want to access my image separate from my container? While a really good reason is I may want to rotate my image, but not my container. Double click on my container. I get the content activated and I can then go in and rotate my image. Independent of my container works Great. Double click back on my container. There I have it. Now there are times will you be getting other files from people and you don't know if the image that you see is actually the full image. Somebody may have gone in and may have selected their image. They may have sized up their image and put it inside the container, and I would like to see if this is the entire image as it was shot or it's been cropped in in design via the container so I can do a couple things. I can always double click, and I see the full on bounding box. But I would also like to see the entire image without having to take my container and make the container larger on all sides to see the image. So if I double click on my image and get access to my content here, I'm going to click and hold my mouse down. And it takes a split second for this to kind of get the ghosted image to show May. Now I see the entire image. I can see the ghost in areas that are outside my container on I get to see the entire image without having to change the size of my container, make it larger or un crop it. Now if I do want to get my image back to the exact size, I like the size of my image, but my container isn't the right size. I can keep opening this up further and further until I think I get to the edge, and I'm not quite sure if I actually get to the edge of my image or not, and I'd have to do it on all four sides. So the quick and easy way to set my container to be the size of my image, whether my images larger, smaller than the container I can go, we in and I can double click on the right hand, lower corner of my container. When I double click on that, that is going to expand my container so that I get it to the full size of my image. Do that again. So my container smaller. I know that because I select my content, I see a much larger border around there. If I click and hold, I get my little ghosted image. So I double click again. Click on the lower right hand corner DoubleClick in the lower right hand corner of my container, and it's sizes it up perfectly. Works really good now. This is also true. If I have a container that is much larger, then my file. If I open up my container and my container is much larger than my file, and I don't want all this extra space around by image. I can always go in, select my container, double click on the lower right hand corner of the container, and that's also going to resize to my image. Whether it's larger, smaller, it will always re size to the size of the image. Now, when it comes to going in and re sizing my image and my content, it could be a little bit tedious if I want to go in. And they would like to size my image if I just simply click and drag my container here. If I can make my container larger or smaller, then if I want to size my picture, I have toe obviously get to my picture by double clicking, and then I have to go in and size my images. Well, if I want to go in and size my image, one thing that you don't want to do is you don't want to just go in and resize it, because what happens, you will go ahead and distort. It's no longer in proportion, so I'm gonna undo that, and I want to make sure that when I size my image, I aside, I size it, keeping everything in proportion. So I'm gonna hold down my shift key, and I'm going to click and pull on my poll handles for my image, and that allows me to proportionately scale my image. I could move that all around inside my container, get it positioned the way I want Teoh. And then I can either double click to get back to container or simply click off. And I d select that if you do suspect that an image is not scaled appropriately and the width of the height isn't in proportion, you can always go up into your control bar here and you'll see this is the percentage of scale of my image. Now it goes to like 20 decimal places. So if I did want to make sure this image was scaled appropriately, I could simply just go in and set it to a preset size and make sure the width and the height is set to be the same percentage. And then I know that my image is going to be scaled in proportion, so it's not distorted. That's a very common thing that happens. So that's the long way around. By selecting the content and scaling up, selecting the container and scaling it, selecting the content, going back and scaling it and then going back, selecting the container and snapping back to it, I want to scale both of them at the same time. So this is a shortcut that if you don't know I was going to save you lots of time. I want to scale everything and keep it in proportion. So I'm gonna hold my shift key down while I do this. And I'm also gonna introduce the command on the Mac or control on the PC. Then, with the shift key held down to constrain and the command of the control, I click and poll and that is going to size both the image and the container at once. When doing that, I don't have to worry about re sizing the container separately, re sizing the image separately. It keeps them both together. So shift is going to constrain command on the Mac. Control on the PC is going. Teoh, do them both together. Very important. Good to know. Great shortcut shift commander. Shift control, click and drag. And as you do that you can see in the lower right hand corner, we get our little tool hint there. That shows us the overall size at which we're scaling it. You'll notice that when we scale anything larger and smaller, we go back to our percentage here. And once we let go, it's always a 100% because this is showing us the measurements for the actual container. Double click on the content, and that's going to give us the size of the content inside the container. So that's the basics of going in and just placing and scaling an image in in design. But there's a whole lot more to that than just bring an image in one of the things. Select these and get rid of these just selected hit delete. One of the things I don't want to dio is I don't want Teoh open up a Photoshopped file or any other file like an illustrator file and simply go into my file and then choose paste. So if I go in and just paste a file in here, I always want to go under the file menu and place a file and we'll show you that shortly. Everything that we do was going to create a link, which of course, will see the little link up in the upper left hand corner of our container. But here's one other thing that I want to dio for. Go under file place and I place a file Every time I place a file, it's always going to draw a container as a place. The file. Well, what happens if I'd like to go in? And I would like to place this into the container that is not a rectangle or square or matches the proportions of my file. I can do that. That just simply requires me to draw another container, and I'm gonna draw on the lips. And with that selected, when I go into the file menu and I choose place, which is command D, I can then go in and I can select a file that I like. But in my place dialog box, it says, replace selected item, which means anything that's in that container is going to be replaced. This is checked by default. You can always turn it off. What I'm gonna show you what happens? So I click OK, and it brings my image in there now. Whenever I draw an existing container and I bring an image into the container, it's always going to come in at actual size, so you'll see when I place that an existing file and I just click and drag. It always scales my image and my container perfectly together. When I draw container and I place a file in there, it places the file at 100% so I may see a lot of the image or virtually none of the image. In this case. There's a lot of the image that I don't see because of the size of my original image. I double click on the content and I click and hold my mouse, and I can see that goes to back image so I can see what else there is in this image so I can bring that into position. Now if I would like to import another image and I inadvertently have my container selected and I go back under my file place, command this replay selected items simply says okay, Whatever you have selected, I go in and I'm going to replace I click open and immediately my file gets bumped out of there and I panic. And it's like, Oh my gosh, I didn't want to lose my first file. They're not a problem. The escape key is going to work for you really get actually, not the escape. Sorry, it's gonna be Command Z. I'm going to get out of that place. Smelled there, and you'll notice that in design is smart enough to know that there are times where you actually have your content selected. I didn't mean to have it selected. And when I do the command Z for the undue, I get my loaded cursor back. It replaces my existing file, and now I can simply click and drag and place my image just like I want it to be. It's something that's going to happen. It will also happen, and it doesn't matter what type of container that you have. If I have some text in a container, one of the things if I inadvertently have my text container selected and I go under file place and I choose an image, it will automatically replace the selected item. That's what it says under the place menu, and it doesn't remit. It doesn't matter if it's an image or text. Whatever it ISS, it will replace the selected item. I didn't want it to do that. I do a Command Z. I get back to my loaded cursor here so I don't have to go through the place process and they end up placing my file, which is quite nice. I do it several times when I get moving quickly, so no need to go through the whole place process again. Just undo what you've done by using Command Z and right back into your file. So if I do end up placing a file, I can always draw any shaped container that I want. There's nothing special about the shape and then keep that selected and place it in there. However, I could also taken existing container, and I could just change the shape after I bring my image in so either created before and bring it in and then have to resize the image or simply place the file. Then I'm going to go under the object menu and I'm going to go under the convert shape, and I'd like to change this into a triangle and I can convert my shape afterwards, makes no difference. The one advantage is if I place my file in a rectangle or the size of my placed image, it's going to place it at the exact size that I draw my container. If not, I have a file that's going to be actual size, which could be very big, and I won't be able to see it, and then they would have to then go in and size down the content, replace it and then change my shape afterwards, that's going to fit everything to the container.
Ratings and Reviews
Gemma Kelly
This was great. Clear and nicely broken up into options. I thought I knew plenty about using images in Indesign, but this taught me some really helpful tips and tricks to make my workflow a lot smarter and faster.
a Creativelive Student
Very informative. Includes all the details that are needed as well as at a good speed and repeated often enough to remember. Great teacher!
The first Night
Student Work
Related Classes
Adobe InDesign