Lessons
Lesson Info
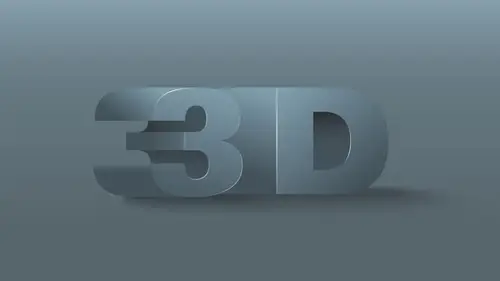
3D Lighting Angles & Colors
Even when you go in, you take a very basic shape, no matter what it is. There's so many things we can do with this. When I go in with my three D and I use my extrude and bevel and I pull the whole thing out here, I can go ahead and just create dimensional blocks that I can use to build going in and setting these blocks to be whatever I want and having these so that I can rotate these blocks if I want to create a three d block. If I want something as simple as this and I want to be able to work with this afterwards, I don't have to keep it in three D mode if I just want a building block like this. And I want to set this all back to right where I started right here so that everything is going to be right back where it was. There is my block. I'd like to just break this out into simple basic shapes. If I click OK and I go back under the object menu, I can expand the appearance which, in something like this is simply going to take this and break this into the very basic building blocks tha...
t it ISS. Now, the reason why I use this square, the rectangle is because then I can take these building blocks and I have three different shades here that I can use. So if I'd like to do basic building blocks for any type of chart or any type of just basic building, I'm not fighting with the three d effect here. I can actually just break it apart into those shaded areas and the block being the most simple thing. If I go with it and I use a different shape and I take this shape and I would like to do some type of effect with this and maybe I do the extrude here un extrude this into you kind of a tube shape when they do something like this. In the end, if I'd like to render this into the very basic shapes right here so I could change this, that I don't want to be messing with my three d effects, I could go into the object menu. I can expand the appearance, and now it will break it apart as that actual shape by going to preview mode, you'll see all the blending that it's done on this shape right here. It's no longer edible in three D, but it gives me that kind of basic three D shape. Now, those stair step effects that I see on here are just the actual steps of color right there. And this may be a little bit too crude in my end result that I want. So I may want to do something a little bit different with this. Well, I could do a lot of different things with my shadow and my shading When I draw shape, I'm not stuck with having it just be a very basic shadow or shade render. When I go, we in and I extruded bevel this object. I can set this to anything that I want depth wise. And if I want this to look a little bit different, I can go into my surface and I can change it to be a little bit more diffuse shading, which is gonna help blend out those. Or I can do a little bit more plastic shading gonna give me a little bit more of highlights, but I'd like a few more options with this. So if I click on the more options dialog box, I can go in here and I can change the lighting position and I can grab a little highlight here. And I can drag this around my object to be able to change the actual place where the highlights are hitting, that I can contain the light intensity right here. I could change the ambient light around here so I could have less ambient light, which is going to give me much stronger shadows. And I can do it much higher intensity so that it's going to go ahead and wash it out a little bit more. And it's all going to depend on where my highlights are going to be coming from. I can change the intensity of the highlight and the highlight size so I can reduce that down. So I have less of a highlight area on my object. Not so visible here on just extruded object. But definitely if we have a more complex object, we could see that we could go ahead and change the shading color from anything we could just say. OK, I want a custom shading color which could get downright weird. If you want to go ahead and do that just by clicking on that and you can pick whatever color you want and then it's going to shade in that particular color as you go. Very simple thing to do on extruded object. If we take an object where we're going to go ahead and we're going to revolve this, I'm gonna switch this over to a stroke, going to take my three d effect and I'm going to revolve the whole thing so that I get this. This is gonna be a lot more dramatic when we go and we change the lighting on something like this because with this surface, we've got a very complex surface in here. So you'll see when I change the highlight area there that will start to gravitate and create a lot more dramatic effect around any of our revolved objects. Short of just a simple extrusion, the ambient light we can adjust the highlight size. I could get larger, smaller on the highlight size as well to kind of knock that down as we go. We're still using a plastic shading which is going to give us a much hotter looking light with a lot more fall off. I can go and I can do much more diffuse shading, which is going to make this look a little bit more realistic. If we've got a surface that isn't going to be a very highly reflective surface. So doing the diffuse shading. This could be an object that is going to be kind of like a Matt finish on here. And as I change the direction off the light, you'll see that it's much less hot and much less reflective, and then adjust that. Now I can also adjust the number of blend steps, and if we zoom in here really close, you'll be able to see kind of the stair step effect as this goes through and renders thes colors around this object. If I were to click OK and I were to expand the object, I would get those very definitive stair steps in my final object. Well, I would suggest going through here and getting all the lighting and all the rotation and angles, just where you want them to be with the highlights and shadows. Then you can go in here and you can click on the number of blend steps to be a whole lot mawr in your final render to get a very smooth looking render. Don't do this first, it's going to really take off a lot of of your memory on the computer. So if I then set my blend steps to be substantially higher, your concede that that is going to go well, I'm just going to do a lot nicer job off the blending as you go through and smooth these things out and create a much smoother effect. I'm gonna go back to my plastic shading here. It's gonna be a lot more dramatic when I go in and set the blend steps much higher here. It's going to provide me with a lot nicer blends overall on that. So when I click OK, if I were then to take this object and expand the appearance, it's going to go when it was going to render that in a lot nicer blend overall so I won't have as many visible steps on here. I still have the steps. They're less visible. They're still there, but you can see all of these steps are going to be much closer to each other to provide a much more seemingly realistic blend on the objects right there. There's a lot of points in here you can see when we go into preview mode. It's completely filled in because that's got hundreds of shapes rendering this whole thing. And now if we select the whole thing, we can go ahead and reduce or enlarge that. And this is all simply vector shapes. So it's totally scalable, and it's no longer in the three d mode effect because the three D is just in effect that we have. Once we render this, then it's going to reproduce without any problem as we go and look just fine. A couple cool things about creating objects that are both transparent, that are gonna be open and closed if I go in and create something really simple, like this, like a rectangle, and I want to create a water glass, I can take this and I can just simply render it like this. Move this over so I have half a glass here. Gonna put a blue stroke around the entire thing because I have a stroke across the top of my object. When I render this whole thing and revolve, it's going to go ahead in the top, is gonna be blocked off because I have a path across the top. So when we see this and I use the revolve and I do this, it's going to go we and and it's going to give me this shape need to render it from the right hand edge. And you can see here that I can't see end to this shape because I have provided it with an actual path across the top. So if I want to edit this shape, I'm gonna go into preview mode. And if I get rid of the top portion here and the actual inside when I go back into outline mode, you'll see that that will now give me the actual rim because I have no closed top right there. Now, this is going to give me that particular path, and I can see what's going on inside that shape right there, which makes it really cool, because now I can create any object that I want and have that shape. So I'm gonna do that one step further here. I'm just gonna use the pen tool. I'm gonna create kind of my cup as it goes in right here and go right in. But then I'm going to create kind of like a little lip coming over at the top of my cup like that. So when I take this object and I now do this, it's going to give me this little lip over the top of the edge, folded in. Take my effect. Three D revolved around this. Make sure it's from the right edge. I don't need all of my extra options and click fewer options. Preview how this is gonna look and you'll see how that gives me kind of the folded in edge over the top of it, right there any shape that I draw, that's what I can get so I can change the curvature of this, and I can make this all happen really quickly. And just that ever so slight change in that particular curve right there. It's pretty awesome. I can get in there, and it allows me to go in and change that shape right there. And these shapes can be made from the simplest things. You want to make a nice little Christmas light or a little light bulb. It's always a fun one concerned with the Ellipse tool, and it doesn't matter if it's a stroke or a feel like this is just going to be solid. I'm going to go away and use my direct selection tool. I'm just gonna bump this up and to kind of like a little shaped like their of my light bulb is gonna take off half of it, because it just need this half to go in and extrude the entire thing or rotated. Actually keep using the wrong words. Effect three D on the revolved This round. Make sure I do it around the right hand edge because we do. In the left hand edge, it looks like that, which is a great base, but it's exactly the opposite of what I want. And by the way, have you ever won a vase? It's the opposite of a Christmas light bulb, I know. Go figure. If I render this around right hand edge, you'll see a turn it into a little light bulb right there so kind of cool how that can actually change from that to that. So a nice little chalice right there or switching it to the right right hand edge. Gives me a little light bald right there, kind of cool. You do lightbulbs anything like this. It's pretty simple as you go through, and there it is, just a basic shape rendered right around there. In this case, it doesn't matter that my stroke was that color. I could put no stroke on this and then add a fill to this. It's going to do pretty much the same thing because I'm not seeing what's going on in there. And now that I've changed that, I've got to go back in, got to re render this, involve the whole thing around there. You'll see it really doesn't matter if I do a filler. A stroke is gonna provide the same overall field. If I would like to show the hollowness of it, then I'm going to do just the stroke. Is the stroke just gives me the outside edge of my object? If I wanted to do something a little bit more complex, say a glass with some water, I could go in and I could create just a basic glass shape using my pen tool, and then I can take this shape, and I'm going to simply make this a blue stroke around my glass and bump up the stroke. Wait right there. I'm also going to go in, and I'm going to put a little bit of fill water in there and fill that little bit of water slightly different color. I can have that shape and this. I'm definitely going to fill and not do a stroke with this great little bit different color water in there. And I can touch the edge. Exactly, because that's where I want all my content to be to make sure that the edges come out to each other so that I don't have any kind of overlapping or any little space in between the bricks. If there's a space, we will actually get a little bit of space rendered in there. And here's my shape. I think I'm gonna cap that line. A nice little edge on the cup right there. Help! That will work because it's gonna revolve around that. Pull that out to there so I can see that. Okay, there is my half. Take that effect. Three d gonna revolve the whole thing. Surely do it around the right edge preview and there's my water glass right there. Now it's kind of weird with this is like OK, so I've got my glass and my glass is kind of in front of this. Well, each one of these items can have a transparency. So right now, because I drew the water second, it's in front. So if I take my water and I put it behind, of course it disappears. But if I bring it to the front, it's like, Okay, now I kind of got this. It's not really inside the shape. Well, illustrator doesn't know what's inside and outside the shape we drew them together, but the water fill was the second thing that I drew. So it's in front of, Well, I'm gonna send the water to be back and I'm going to select my glass again here, and I'm gonna go with it, and I'm going to set this so that I have my glass is going to be translucent. So I go to my opacity slider and I'm gonna make my glass translucent. Which kind of gives you this glass effects. You can see this water inside. Now, when I do this translucent effect here. It's pretty cool because I can set the glass to be kind of transparent right there. And if I want to take it one step further, I can click on my opacity and click on the blending boat here and do a multiply. And the multiply is going to make anything totally translucent, even if it is 100%. Multiply is just like when you take those little bags or the zip, seal them and the yellow and blue, yellow and blue make green. That's what Multiplies is taking those color values, and it's putting them together. So even with the capacity of 100% set to multiply, it's going to make anything solid look transparent plastic or glass. Really cool effect. I could set the opacity of this to make it look more realistic. Or it could just simply change this stroke color of this to be anything that I want lighter or darker. And it's still going to give me kind of that glass effect, showing the water through this. So if I go back to the water and I kind of pull the water a little bit, I can adjust the water or I can adjust my glass so that it fits to the water a little bit better right there. And then I could also grab my water, too, because that's behind there. I have to get to it as well. Sometimes it's easier to go into preview mode. We grab my water right there, and it can change that color to or that opacity as well, so that it becomes a little bit more translucent. And so I could set my water inside the glass right there if I wanted to do something like this. So a lot of cool things I could do with this three d effect, and because I did these both together, it allowed me to revolve them all around. But I do have to adjust the placement because, unlike most three D programs, where things come north together, if I took two spheres and put them together, I could just have them come together while an illustrator one is always in front of the other. I can't like, go in and just mesh them together. It just doesn't work that way with Illustrator. Unfortunately,
Ratings and Reviews
Nelson Mueller
Good course! It does exactly what it says, teaching 3D in Illustrator. He explains the different kinds of features very easily and what they do when applied. How different shapes transform when using different kind of options. It is a small course, but it was definitely worth it. I wanted to understand 3D in Illustrator and it fully delivered that.