Lessons
Lesson Info
Make Your Skies Look Awesome
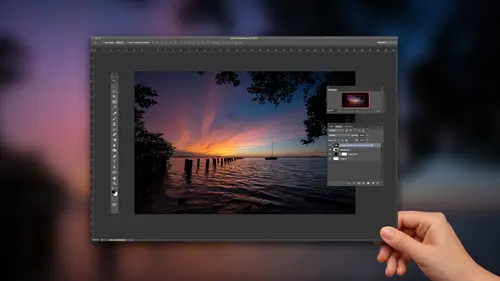
So let's talk about sky really, really, really popular or common? Um, problem in landscape photography. So polarize er's there. There are filters that we can fake in photo shop. It might mean there's filters that I recommend. You think I would know I would no longer carry a warming filter with me? It's not worth the hassle and time Sunrise and sunset happens way too fast, are good Light goes wide by way to fast There's no reason to carry warming filter anymore because, you know, I've got this temperature slider over here. I've got plug ins that do it. I think those do it better than in the filter we can put on, um, graduated neutral density filters where we want to You know where we want to go to the sky. And, um, I've got a preset one, which I'll show you what it does. Darken sky. Do you have the darkened sky? Um, Expo use guy saw before exposure and shadows those air filters that I've taken out of my back because I think I can do just as good or better inside of late Roman Photoshopp...
ed A polarizer always in my back. Okay, because a polarizer does Mawr then just makes the sky really blue. I want to show you the UNP polarized version of this See how? See how block all that looks right? And now look at the polarize version. Look at the trees down here flat They look so what you're polarizer does is it also helps remove, reflect around remove reflections and that has the appearance of making things look sharper and more contrast e So the problem comes from putting your polarizer on you turn It's a circular polarizer you turn it and what'll happen is is it over? Saturates the sky That's a fakes guy. That's there's no way the sky looks that dark blue. Um but what happens is we put it on We look in the camera like who? You could see change and everything like that. And then you take that picture and you come back and something doesn't look right. So what do you do? Because now you got that Which is unp ola rised and that which is polarised. Well, what I do is I'm gonna develop this photo. No, there's not really much I have to do with it. Um I'm gonna go to lens correction because I can see some vignette ing in there, but I'm really not gonna do anything else to it. Maybe add some sharpening to it. Ah, little bit of detail here. It's probably even one I'd use my, uh I've gotta brush called packs sharp. That's gonna be a little bit of clarity and sharpness in here. And I just go inside of there and paint that on so you can see turn auto mask off. All right, so that's before that's after. So I would just go through again. They do really quick and paint the sharpness onto the mountain here. Okay? And then I'll go over to this photo. I'll do the same thing. I'll paint some sharpness into the mouth. I'm just gonna do really quick, and then I'll go turn on the lens Corrections check box. So now I've got that photo in that photo. Got a good sky in this one, and I've got all the good sharpen stuff. I don't even know why I painted sharpness on for this one, because we're gonna get rid of it. It's second anyway, but I've got good mountains and good, all good foreground. Everything's well saturated. Everything's nice and sharp. No glare. So what we'll do here is I'll shift. Click on both photos, okay? And we're gonna go photo edit. In this time, we're going to use a different option. We're going to choose open his layers and Photoshopped because what that will do is it'll take both of those copies of foot in of those photos and we'll stack them on top of each other and Photoshopped. Okay, so we can kind of see the progression here as we go along, We just kind of building on everything. And about 7 to 10 minutes, we'll have We'll have two layers in photo shop, thes air, big files, by the way, these I shoot, I shoot it out with the A seven r two, which is even bigger. But these air, like 36 megapixel files. Okay, so not too long. So there is well, even label. This will label this good sky, and then we'll label this good foreground. All right, So take a look at a couple options If you're brand new to photo shop. All right. Brand new photos up. You barely know how to use photo shop. You've got in here you have one layer on top of another layer. There is a top player. There's the bottom layer. Really simple. Press the e key for the eraser tool. All of you nondestructive people out there like wincingly. He said The F word. Um, press the e key for the eraser tool and you can just erase away. Right? And you have to use your You have your brush size up here, you got all the sizing and everything like that. You have to zoom in and you get really meticulous really close and go down in here and erased that skyway. Okay, that's if you're brand new to photo shop. Just started to use it. If you're a little bit further along, we've got a tool over here called the Quick Selection Tool, and what you'll do is just drag, and it basically paints a selection onto your image. I want to zoom in and you'll see it's kind of encroached in on the mountains here if you hold down the option or the key is always the subtract key. So it's like the opposite Google minus in it, and I'll just click right along. Some of those edges. Try to get that selection looking better. All right. Iss right about their cool. So now we have a good selection. One of the things we can do is we have something called a layer mask. Even if you don't know what layer masking is, it's actually really simple to use because think of it this way. I have a selection. When I click. There's a little layer mask icon down here at the bottom. Okay. What? I clicked that layer mask. Whatever selected will stay. Whatever is not selected goes away. Right? So look at this photo. Is that what I want to happen? Because this is the bad sky, right? That's what selected. I'd actually don't want the sky to stay. So all I've got to do is just go to select in verse. Okay? Now I have what I want to stay. I click the layer mask icon, Watch what happens to that. So it's the same thing as when I took the eraser tool on Just erase the sky. I just did it in a nondestructive way because that layer mask means I can go back and Aiken change it. I could tweak it. I can adjust. I can do whatever I want. Okay. Two different ways to get to the same place. Um, but now I've got the normal sky, and then I've got that. Ah, that better, foreground. That has all the nice sharpness and polarized effect from it. So when you're out there shooting these air things to keep in mind when you're shooting, that's the reason why I mentioned it. Is that when you're shooting, remember? You know, you're sitting there on the tripod Turner polarizer on. Turn it off. Take both of those shots. Okay, cause chances are especially in the sky like that. Chances are if you turn the polarizer on, you'll get a lot of good effects in other parts of the photo, but it's gonna make the sky look too fake. Okay? And just like before we just go to file, save close it and just head back over the light room and it shows us are are saved file
Class Materials
Bonus Materials with Purchase
Ratings and Reviews
Alex
One thing which does not quite work for me - final edits in last lesson look a bit oversaturated. But still good course for beginners.