Lessons
Lesson Info
Stylizing and Coloring Your Photos
just about every photographer out there has a has or wants a style, and I think that's that's kind of the next level. You know, once you once you get past the basics when we're editing our photos, I think we want to work with some kind of of the signature style on our stuff. And the best way that I can explain that is like I remember when I was learning how to play guitar years ago. If somebody told me I sounded like Eddie Van Halen, I'd have been jumping for joy. But yeah, high five and ever. But really and so the same thing for photography. I think when we start, we tend to mimic a style of whoever we like, whatever we see. But that's OK, you know, if somebody tells me, you know, um, if I'm a portrait photographer and something tells me how your photos just like Joe McNally's, I'm pretty happy. But as we mature, I think we want to develop our style. So most of those styles are coming from extra effects and things like that. Most people aren't getting a style just inside a late room a...
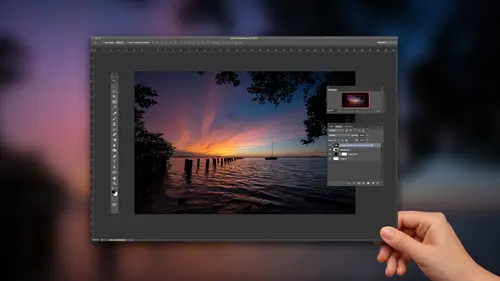
lone, Um, so let's go through and kind of edit this photo here and I'll show you what I'm talking about. Uh, first things first here. Overall, I think it's a little too bright. I want to bring it back to me. There's a lot going on in the clouds. I want to bring that out and I want to bring out a silhouetted look to the photo. So I'm gonna pull back on the exposure here, pull back a little bit on the highlights. I am gonna open up the shadows just to bring out some detail on the rocks, whites and blacks. I'm not gonna find a white point, cause that's gonna be our white point, right? We just made the photo darker. We don't need to go that far, so I'm not gonna not gonna do that. This is one of those. This is one of those circumstances I said to get in the beginning of class. Your taste has to become involved at some point. Got to develop a taste. How do you develop that? Find photographer friends. It's tough to ask your family because most of the time, unless they're really meaning to say Oh, God, that's awesome. Great. So It's tough to go with family, but find some photographer friend. You got to find people you trust. You find people that want to see you get better. Um, but find some friends, find a community online where you can post photos and ask people. But that's the only way you develop that taste like, Hey, guys, how does this look? And hopefully you can get a feeling if you overdid it or under did it. Same thing here on blacks. Go down here to, ah, black point and let's see here a little bit of clarity. There's not too much detail that we want to get from this photo, so I'm not gonna worry too much about it. Um, color wise, I'm fine. Detail wise will go into the sharpening panel here and crank up my amount Slider radius 1.5 and get away with a lot of detail. I'll just check the sky. There's a little bit of texture, but not not anything that would ever worry about. Okay, this give me another chance to talk about something to here. So we had We have to lens corrections issues here. One. You see the little vignette thing you going on up there? That's the official term, by the way. Vignette thinking. So that'll get rid of that. Is that check box? The other thing is, it's super super techy. They call it chromatic aberrations. All right, It sounds like a horror movie, and it's that fringe that goes around edges. So some people, it bothers some people, it doesn't. Some people never see it. If you're over the super techie type and just things like that bother you, there's a little check box right over here. Remove chromatic aberration and it's gone. Okay, if you really need toe, get involved with it. There's a whole panel for it that will allow you to really start to adjust some of those edges. So if the check box isn't enough for you and your like that much more techy, you can go to the sliders and do all right cropping. I'll go to my crop tool. I'm gonna get Thea the angle. The level here. I'm just going to crop. I'm gonna straight. And according to that edge right there, I think we'll believe the crop as it is. And that's gonna be about all I'm gonna do. Um I want to go, I want Oh, I want to get this more like I wanted to have more of a twilight feel to it The blue hour. And so this is where style comes in. I call this the stylization phase. So we've done all the nuts and bolts for the photo. If that in fact, you know what? Let's let's do this. One thing that I would fix before we get to stylization is let's take this into Photoshopped. I'm gonna try to get rid of some of those footsteps on the beat. Some stupid photographer left them. They're not sure who that was. Um, As I was working my way up, I kind of trampled on the beef. It's not real pretty beach as it is, but I'm gonna grab that spot removal tool and just see if I can go in there, just clean it up a little bit. The beauty of that spot removal told with that content aware is is you don't have to sample you don't do anything. It doesn't really good job of just, like, clean up. Okay, so now that I did that, um, I've got I've got two ways that I could go with it. The easiest way is I went from light room. I went to photo shop. I could go back to light room again because stylistically, there's one more thing that I want to do. But it's in another. It's in a plug. And most most photographers were using plug ins for this there, so I got a few people in the audience. How many guys use plug ins? So 80% of the audience uses plug ins. It's just that they kind of attack things that light woman Photoshopped don't do effectively so I could do that from Light Room. Or I could do it from Photoshopped. I'm gonna come appear to the filter menu, go down here. I use on one I use on one for two reasons. That's reason number one I worked there. Reason Number two. I like them, Um, and here's a thing before reason Number one happened. I always use the plug ins so I would never have gone to work there if I didn't love the plug ins. But I use on one effects is for years has been the place where I go to get my style from my photos. So I'm gonna jump into their It's gonna open up another window, and it's actually already got my filter cause I was practicing this one earlier. I'm just gonna hit, reset, and it's got, you know, a ton of presets you can click through. There's all these different landscape presets. There's warming gives it a warm feel. There's a cooling feeling to it, so there's a lot of a lot of different presets in here, but one of my favorites when I just want, um, types. I just want a blue. Our cold type of a feel is graduated lavender, and the only trick is, is that it's a graduated filter. Apparently my photo disappear. Come back. It's a graduated filter, so goes from lavender to clear. But all I've got to do is like every filter that I add. I can do it as a graduated or I can just click on solid and and applies it to the whole photo. Now I think it's a little too much, so I'm gonna pull back on the strength. But for me, that's that's kind of giving me the feel that I wanted for that vote. I wanted that predawn blue type of Ah, blue magenta. Those are the colors that are pretty popular before sunrise or after sunset, and that's what I was going for in this one. So click on Save, um and incidentally, if if the filters that I just showed there, so there's actually a free version on one dot com slash free and you can download a free version of the effects plugging that I just used in there. So it's got a whole bunch of filters you can play with. OK, so that's before that's after. And now remember our workflow, our workflow from light room in the photo shop. Now all I gotta do is hit, save close it, hop back over the light room. Now I got a copy of the file, so let's go to the original on a hit reset. So that was our before photo nuts or after so before, After and hopefully this style izing thing hits home because that really is, that's that's kind of that next step, it's okay toe to try toe follow someone else's style, But I think as time goes on, we want to develop your own style and at whatever it is I don't mean any plugging out there. The cool part about it is there's a ton of presets. And as you click through, I think you start to find like, Oh, that looks cool. And you find yourself gravitating towards certain presets. And that, to me, is where the experimentation comes in, cause that would be very, very difficult to do in Photoshopped. Photo Shop doesn't have built presets like that. So you'd never be able to click through and get to see a bunch of home. Okay, everybody get out here in a real life situation. Are your workflow if you took a photo like that and to light room, did the filter put it back in light room? Would you then get rid of that original one? Or would you keep the original one right next to the photo shop one and then get so confused later that you wouldn't know? Good question. So So basically the enters the question is, is I'm gonna start to have multiple versions of the photo, have my raw photo, and I'm gonna probably have unedited PST or something like that. What I do is in my workflow part of my work clothes to create an album or collection. So I go out on a photo shoot. I take 200 photos, I come back. Maybe only seven of those photos or photos I want to really work on. Okay, um, I'll put those into a collection in light room or an album, whatever in a whatever program you're using. And that way, my seven favorites are saved in there. Then as I work on them now, I've got a PSD, and I got the original ofall usually pull the raw file out of the collection at that point because the PSD is usually named you just by default. White room names at the name of the photo, I think slash edit, which is good for May. I'm good with that. So now I know if I ever wanted to find the original raw file, I could I just have to look at the name of my PST file. But that way, all I'm saving in my collection, which is like my album, is my final photos. If I ever need to get back to the other ones, I'm probably gonna go archive them off. Just put him on a hard drive and and put it away somewhere. But at least I know we can get back to I wouldn't delete it cause it's like your negative, right? You never Really. You never wanted the leader, but but most of the time to ever go back to it now, very rarely. The only time I go back to it because I have to teach so but most of the time, for a lot of my portfolio photos, the the original raw files are backed up on a drive somewhere that I never touch. Your skies. Yes. Could we go over? Could you go back over a workflow for working with skies? From what you dio? Yeah. I will, in fact, are our next, um what do we got? We've got about 20 minutes left. So my next example is going to be a very common landscape thing with sky. Okay on. Then we're actually going to finish up with a sky replacement. Awesome. So you know what? Those since I have this photo up, I will show you there's a couple of little tweaks I will make sometimes. Okay. Generally I'll go to the brush tool inside a light room or again camera works exactly the same. And, um, generally, I'm gonna go to have got a couple here. So darker, darkened sky got a light brush. That'll do that again. You're gonna want to turn on your your auto mask settings over here, which will help mask that out. And then once I get away, will turn it off. So a lot of times will go in here and darken the sky. So that's one of them and all that's in. So I know these air, my preset brushes. But all that's in there is I open up the shadows because what I don't want is I don't want to take the dark parts of a cloud and make him darker. You know, you see a lot of clouds that have a little bit of dark gray. What happens is if you dark and everything, those clouds start to look black. We generally don't want black clouds, so that's why I crank up the shadows. But I do pull back on the exposure. So pull back on the exposure dark in it, push up the shadows to keep the darker parts of it from really getting affected. So that's one of them. And when we reset that one, another one that will use here is going to be, um, blue sky. So that'll go in there and kind of enhance the blue sky again. I'll show you the settings. I know the presets Air at matt. K photo dot com But I'm I always just share my settings with the If you want him blue temperature, pull back on the highlights because you want the bright areas toe to kind of go away and then under color, I give it a little bit of a blue color tent. It's actually pretty cool. I didn't think of it for this photo, but actually kind of like it on this photo might be a little too blue. Aiken, tweak the temperature there for that. That's another one. And then I'll show you one last one here for skies. And that is I don't have the photo here. I'm gonna open up a photo of ah, just white puffy clouds. And there's a brush that I have called white puffy clouds. Where does it go? Here we go. And on what I'll do is I'll paint all paint in the clouds. You see how it brings out some depth. So go in there and I'll just paint in the clouds. Try to keep it out of the blue. But take a look at that. This is this is always a good 14 after So clouds, clouds and skies like clouds and skies make a landscape photo. You know, great locations. That's kind of like fact number one, right in the absence of a great location, cause we all can't get the great locations all the time. You can go to a OK looking location, and if you get an awesome clouds and an awesome sky, people go, Wow, you know, it's just it's a fact. Look, it think of look at photos as you scroll through your Facebook feeds and the really striking ones have great skies in him. Cool, great tip for beginners to It's just like if you just focus on the simple things, I just focus on the sky and your photos. I get it. I get it. We don't you know, not everybody. I don't know if you guys know how lucky you are where you live, but I mean you live in like a haven for landscape photographers in what you have here near Seattle within just a couple hours. But in Tampa, Florida, I've got a beach, and it's not even really interesting beach. It's just flat sand and water. We don't have rocks. We don't have elevation. We don't have pills. We just have beach. And they all look the same after a while. So, um so, yeah, that's why I go to the beach a lot. And I just try to get really great skies.
Class Materials
Bonus Materials with Purchase
Ratings and Reviews
Alex
One thing which does not quite work for me - final edits in last lesson look a bit oversaturated. But still good course for beginners.