Lessons
The Importance of Adobe Camera Raw (ACR)
03:03 2Adobe Camera Raw: Tool & Filter in Photoshop
13:50 3Crop and Compose Your Images in Adobe Camera Raw
07:34 4Improve Exposure in Adobe Camera Raw
20:19 5Enhance Color in Adobe Camera Raw
19:04 6Sharpen and Reduce Noise
07:07 7Output and Save Your Work
10:38Lesson Info
Improve Exposure in Adobe Camera Raw
looking at? How do we fix exposure and make her images snap and come to life and add sort of I don't just add that life to our images here. I'm in another folder where I'm gonna talk about basic tone adjustments. And while I'm saying the word basic that May to some people seem like, Oh, it's not that important, but it's hugely important. This is the foundation of making your images come to life, and I'll just select. I don't know. I'm gonna select a little set of these files. Maybe I'll go with these guys here. Press Command, are you know the drill now? Right here. I am inside of camera. Make sure I'm it. Full screen mode. Have my stuff over there. And I have this greedy in. And I have this guy here so that we can look at how our sliders work without looking at an image. Just looking at a grayscale, and I want to deconstruct the basic controls here. We're gonna get to color in a second right now. Really? This group here notice the sliders are grouped together color up top white balance...
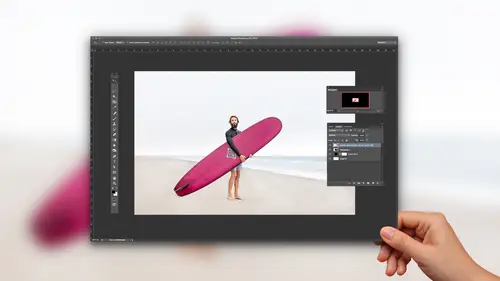
and temperature intent, then basically our exposure adjustments and then down here clarity and vibrance and saturation, Some other fine tuning contrast in color. So I'm in this middle zone right here. Exposure I like to think of kind of like a heavy sledgehammer. My dad built homes, you know? So I was always on job sites. And if you have a sledgehammer, yuk unduly lot, you can go completely, almost completely black or completely white. So this slider, you need to be a little bit careful with as far as how it works, then contrast that's gonna make her whites wider, blacks blacker. And you can see how I'm modifying that. Highlights is interesting. Highlights air up in this range. You can see how I can recover detail in highlights. So that's often what we need to do. Or I can say I need to give a little boost to them. But most often, highlights are going this way because you want to, you know, bright sky in the backgrounds. Too bright. You'd knock that down a little bit, and that slider could do that for you. Shadows. This will bring a little bit of boost into that shadow area, and then whites is similar to highlights. but it's just a little bit more powerful as faras its reach, Black says. There's a deepest tone, so you can see how we can use these in order to hit different parts of our images. All right, let me show you what this looks like on a photograph. Tears photograph, body down it. One of my favorite beaches. I love surfing live in Santa Barbara. It's an amazing place, right on the coast in California, Drew. My friend over here is a surfer as well, which is really fun. So anyway, capture this moment of this guy. But the bummer about it is he's too dark, right? And so he's in the what? What? What's too dark? Shadows. So you're like, Oh, nobody. I go to my shadows and I'm gonna open those up, and why not use exposure? Let me just open up my exposure. So, yeah, now he's good. But then the rest of the skies bad, right? So it's always a combination of sliders. If you modify sliders like I'm doing here and realize I've made him made a mess of things hit, default will go back to normal if you made a mess of a single cider double click and it goes back to zero. So again, we have flexibility built into the way that way that this one works. So with this type of an image, I know my exposure is gonna need to come up in general a little bit worried about the highlights over here. So I'm gonna drop those guys down. You see, I'm recovering that I may exaggerate a little bit because this is a demo. If it were really my image, I would find tune my adjustments. But you gotta You gotta learn the concept, right? Shadows. I need to bring those up whites. This is gonna be setting my white point. You can see how it can control that up top, and then blacks is air those deepest, darkest tones in the image. And let's just say I'm gonna bring it to here for for the sake of of the demo. And I pressed the peaky which gives me my before and then the after, and you can see how it's crazy fast, really high quality results simply by knowing what each slider allows me to do. So this is a little bit more of Ah, maybe a dramatic example, But let's go to one, which is a bit more subtle. This is one of my friends trying to create this image is the concept was this? I don't kind of this adventure of life, and he's holding this little sailboat on this breakwater and a wave was coming. I said, Just stand still. He was like, All right, the wave crashed over him. It was so much fun. That's one of things I love about. Photography is just these experiences adventures that you have, you know, that you wouldn't have otherwise have. I'm just trying to find a good zoom right here. Well, actually should zoom out so you can see more of the photo, but shadows again. So we know the shadows, right? Starting to see the shadows in the photographs. I'm saying, Hey, I'm gonna put a little bit in there. If your photographer and you're usedto adding lights either bouncing light in or using to do it's up, fill light, right. It's just getting light into some of the shadow areas, so that can help me out. Um, contrast. It's adding a little more interest. What contrast does which is intriguing? Check out. Take a look at the colors, not not the look, but the colors go really saturated and then they lose all their saturation. So contrast effects are blacks and whites, but that's also going to deepen or kind of make those colors richer. So we have to think about how the sliders are affecting each other. Exposure as well. Right is I go brighter. I'm losing colors. I go darker, adding density, changing the color characteristic as well. So it's never one slider to combo of sliders, and you tend to walk through these different controls with the, uh, with the highlights here, which is all the ocean. I want to have a little more of that in there. So I'm gonna drop that down and then also maybe drop my blacks down is well, so I'm again walking through my exposure basic adjustments in order to make some changes. Yes, yeah, great. Is it? Is it a surfing question? It's not a question I wish I was. So ask your surfing questions you have. If you plan on editing the photo in Photoshop after, would you still crop before? Many photographers say that you should keep his many pixels and play toe edit. But there are. But are these crops nondestructive? Yeah, you can crop non destructively and Photoshopped as well. Okay, So my thought, which is a great question, cause it's really a workflow. How do you How do you deal with all these things? This camera, when I'm using is it gives me a 40 meg file approximately So it's a huge gigantic file. So if I'm bringing, you know what I think of the weight of a fire? Almost like lifting furniture. If I'm you know, let's say I'm lifting my dresser of drawers, you know, because I'm moving house or whatever. I empty them first before I move it. So that kind of thing. So I'm trying to get it down to a size. Then I'm sending it to photo shop. So that's my own workflow. And I think that tends to work. If you're on the edge about why might need that or it might do something without area. By all means, keep it in. OK, but what I found is software that makes us all flexible. We can do all these crazy things, right? But the good photographers get decisive. They say, you know what this needs to go. It's gone. I'm at the next step, so nondestructive. While it's great, it can also feed our uncertainty. And so learning to develop that to real quick way to develop your voice. So anyway, long story short, I say crop in raw, you know, whether you're like room camera, whatever it is, head over to photo shop and then do do more work there. Any other questions? Or should I think we're going to have any questions in here? All right, let's keep going. Okay, let's keep going. Alright. Exposure here is common scenario. Overexposed. It happens all the time and you may have noticed there's a little auto button and you can hit auto by my reply. Auto adjustments by clicking on it. Or you could use a short cut. Its command you, which is a weird shortcut, control you on windows. But either way, auto and default, you can see how I do that. Sometimes you click auto and you say yes, it saved me Other times it kind of did nothing. I think my it just couldn't figure out the file. And so what I know needs to happen here is my overall exposures to too much my highlights. The shirt down there is too much, so I need to bring that down. Once I brought the image down, it lost a little bit of its edge or snap. So I need contrast, right? Because let me just exaggerate for a moment. You see how it's like, you know, it's like, muddied it up. I didn't go that far, but I lean that way. So of course I'm gonna need I need a little bit of that, you know, back, back in there. And then also maybe I'm gonna bring up my shadows. There are some ways to really evaluate, and I'll get into this more in my advanced class on making sure good detail in your highlights in your shadows and all these things. Right now I'm eyeballing it and just saying What is looking good visually to the way I'm processing the image Now what you can do inside of this is you can hit the cuchi and that toggles through these different before and after views. And so I'm hitting Q to look at our before and after one exposure was just too hot, too high, and then I'm bringing that down, and I'm bringing that down, walking through those sliders, but always saying to myself, It's never one side of that saves the day it's over exposed. But I'm gonna need three or four little adjustments there to get it there. You with me on that and that gets the photograph in a much better place. In another scenario, um, you hit the cuchi to get out of that before and after view, so I'm just hitting up multiple times. If you forget that shortcut, let me just let me wreck the image for a second. I know it looks about, but if you forget that, you can find these down here so you can click on this little icon, and that allows you to get through those same before and after views. I just like using Q. Because it's a real quick way. Teoh, snap through those. This image is under exposed, so I made. The mistake of this happens a lot doesn't capture right cause you're LCD and back. Your camera looks so good, you know, maybe because of the brightness surrounding me, but not because of you know, the actual detail I captured. It's hard to evaluate your screen, so I just I miss my exposure. So in this case, I could try. Auto does a little bit for me, but not much. I need toe open up this image. Just so we have a question, actually about auto, cause you just clicked. Auto. Why does clicking auto always seem to over exposed the image? No matter what image you bring into camera, do you find out to be sure? I haven't found that to be true. Um, let me see. Let me just go to another one, see if we can get that like this one. I feel like it did a good job. Um, so, yeah, I don't know what I That's why use that little shortcut command you because auto is, you know, it's kind of like that. What's what's the analogy? You know, it's it's like that good friend you can't rely on all the time. Yeah, there's still great, but they're not amazing, you know? And so, um, if it was, then we wouldn't need to use the controls, but yes. So I I don't know specifically on that situation. Why? It's kicking the exposure over, but, um and that would be an interesting question for, like, an adobe engineer. Like where? How are they actually building that? You know, how are they analyzing the image? Um, I don't know, but, um, command you. You don't kind of kicks that around and you could give it, give it a shot and my own workflow. Maybe even better. Do I use auto? Except when I'm teaching? No. So maybe that's thrill to you. I don't use it occasionally. I'll throw it on, but not very often. All right, so this image So you kind of see where I'm going with it. Maybe I went a little hot start to see what you guys are saying. That you get the vibe. I'll hit the peaky to do a preview. Just straight preview. Not a side by side. And you see, Yeah, it was down. And now it's it A happier, better place showing the subject more and trying. You're thinking about your vision If you want dark and moody and deep Go that way If you want. You know, a little more high key and bright and you know you can You can do things to really bring up. You know your your tones and some unique ways and create these different looks. And then when we start to mix in color, which I'm kind of cheating here a little bit then Now we're even getting further into our workflow. But I want to stay away from color for a second toe stick on exposure or stay on exposure. Let me dio amore normal kind of workflow with this image. Here we saw this image as it was finished. This one, When you're shooting the ocean, you're really careful not to over expose the whites. Because if you do than the wave just is gone So different scenarios we'll require, at least for me, shooting in different ways. When I shoot Black and white Portrait say I almost over exposed a little bit, but I always like him a little bit brighter surfing. I'm under exposing anyway, so I'm thinking of my capture. I'm also thinking of the tool how I can use that after I've captured it, right? So this image I pressed the Seiki for the crop tool and I'm gonna click and drag out my crop and and then drag in a corner and what I realize is the wave isn't actually write, the wave should be tilted up a little bit more. So I'm gonna change the way that the the angle by grabbing that corner point and dragging this down a little bit. And so what that's doing is changing my angle of that particular crop. And once I've done that, then I'm gonna say, Well, maybe I'll try auto, you know, might as well just see and actually not bad with this image. So again, it's not. It's not that I probably I don't know if I overstated that. I don't always use it, but I'm fine tuning that, and I'm trying to look atyou crafting the look for this this picture. And I think for this image that's probably pretty, pretty close to finished. And the reason why I want to show an image like this is with camera raw. You don't have to feel like you need to take a 1,000,000 steps to finish a photograph. I've had some photographs, and I think I'll show that one in just a second, where I really didn't need to do anything at all. I'm just a few minor adjustments. It also depends on how you're capturing If you're capturing J pegs, they need a lot less than raw files. Need depends on your Cameron Lines combo in the light. All those things as well, too. But what I find some students they get in this mindset who have used photo shop a lot, and they say, Well, it took me two hours to do this. And so then they think it needs to take that time. No cameras. Fast and furious. You get through it, be effective and and get to those results really quickly. All right, if I want to apply all these I hit done, and then that one those those are applied. Um, let me just jump back for a second up. This. Here it is. Um, this was the one that I said Trade of the camera. I don't need to do a lot. There's a photograph of, ah, have a great surfer. Crazy guy. Yeah, I hit. Ah, Crop. Too old a shortcut. What? Shortcut for crop out there. You guys see keys? Yeah. Thank you. Um, I am kind of bringing it in because I think this shot sort of about his hair in his face. And so I'm just looking at trying to have him fill the frame a little bit more and and that gets the composition, at least for me. I like that feel like it's a little bit touch stronger. And then as far as my my changes, I might bring a little bit of light a little bit of contrast. The highlights are interesting, real subjective. Do I want the background a little bit higher key. We're going to bring in a little bit to detail and then a touch in his shadows. Maybe, and then maybe a little bit is blacks. But you can see my movements here really small, and I just kind of got lucky, perhaps with my exposure and the capture in the light and the look, so I didn't need to overdo it again. So sometimes that happens. Other times I feel like you're saving the image from the dead, you know, and you really have to go through it, really work your things. But I just want to let you know there's overexposure under exposure. Maybe you got it right. Here's ways we could use these controls. All right, well, there's one more topic I want to hit here But before I do that, we have to stay awake. Alive, alert. Happy What I want you to do Even if you're watching, Maybe just stretch for a second. Look at your notes. You guys ask your neighbor. Have you learned anything? And if so, what was it? I learned the shortcut for full screen is F, or I learned that you apply the crop. You double click inside of it. Or I learned that whatever it is, go for it. 10 15 seconds. Drew, Did you learn anything? You guys talking about? Your work flow When you're working on stuff, you take brakes, Do you? Are you, like, work in super focused than your like stretch? Like get out bought ground? Yeah. What's your work? You dio? Yeah, I take breaks. I'll have a pair of drumsticks next to my desk, OK, because a trick with computers. I watch all these college students work on him. Yeah, they start off like this and they sit there for hours and they leaned forward. And the hunch on there like working on the photographs like you guys, like, breathe like let's get it going. And I find that actually adds creativity to the images. If I stare at it too long to consistently my touches is a heavier versus that light touch, you know, if you want. So yeah, yeah, I want to get in before we keep going. I'm new to this. So what's the difference between raw tiff in D and G? Okay. Yeah. Great questions So raw is just the cameras will have ah, native raw format. OK, D and G is something that Adobe came up with its called digital negative. Think of it like a Tupperware, which you put the raw um, you put the raw contents inside of There's some advantages to it as far as moving. If you eventually getting the light room as far as it can help to make your file size a little bit smaller. And if you don't without because I don't have slides to kind of get into all those things I would say Just do a quick search on what is DMG and you could read through some of those and then a file like the raw and the D and G you can't have layers in were like a tiffin a J peg. You could a J peg is a more of a compressed, smaller file. Um, if you set my camera to shoot on JPEG, then it's gonna have contrast applied to it, sharpening applied to it. These different things, which could be good but also gives me lex less flexibility here. So if that answered, it may be that kind of answer it. Yeah. Okay. We keep going. Just keep cruising, okay? All right. I figure we got to get to the good stuff, right. So this one, I'm gonna talk a little bit about presets. Um, and here's ah, file. My kids hang out in the snow up in Tahoe, California. And there's this little panel called presets. Have a handful of presets in here. You can create your own, you can find them in different places. But what you can do is you can have some different settings, like I have one which is called Begin, which is just sort of like, hey, bring this image to, like, a decent starting place for me because what happens with a lot of raw files is they're always going to come in flat. They're always gonna need a little bit of contrast. And so for me that begin, You know, maybe has these type of adjustments. I find that I dropped my highlights a lot. I bring my shadows up. I add some other adjustments here is you can see as well. And so the advantage of that is it can just get you places a little bit quicker. You can also have creative presets. I don't know if any of these air gonna look out on this image will just try to click on one. You can see how I could have a different type of a look with how the image appears. These particular presets all share length later. But I have on this this this link where you guys can can get thes but you can also create your own. So let's say with your images like this one here, you say, you know, I'm almost always bringing my exposure. I didn't just a little bit of contrast highlights. And I find this almost image highlights almost always needs to go down. Not like hugely, but almost always the way I shoot shadows almost always need to go up. Blacks almost always need to go down. So I'm gonna say this is a pretty gentle touch of the image, right? It's not like I'm processing it crazy, and I want to save this out as a preset go to presets and just click new. And I'll just call this one begin dash CEO for Creative Life and say, Save all these different settings. So basically anything I've done so far in camera just save that. I'll click OK and then have the ability to access and use that. You can also even apply these inside of bridge and other places. But I just wanna at least introduce this concept that you can use presets to speed up your creativity, try out different looks or just get your images to certain places, or to do things like recover highlights and shadows in a more advanced way. Again, I'll cover that my advanced class, but know that there are ways because some people think, like gosh Okay, how do I work? Flow This. This is one of those ways that you could do that
Class Materials
Bonus Materials with Purchase
Ratings and Reviews
Pamela Richardson
Highly recommended!! I have watched some classes taught by Chris Orwig before, and really appreciate his excellent teaching style. He truly is a master of his craft in both photography and in teaching. He taught at a pace that allowed me to take notes and absorb what he was saying, which I really appreciated. He was well organized, and thoroughly explained each step that he was taking. I have been editing photos since early 2002, but always worked with jpeg files. Even just nine months ago, I had no idea what to do with raw files. However, with the classes on raw processing taught by Chris Orwig, I have realized that shooting in raw and then processing in raw is vastly superior to working just with jpegs. I have even been strongly advising my friends to shoot in raw!!
Camerosity
I watched several of Chris’ tutorials elsewhere, before I discovered CreativeLive. Chris is a very student-friendly teacher, and he always seems to teach more than he intends to. For example, when he’s talking about software and retouching, you can get new ideas from his creative eye and unique view of the world and just seeing some of the creative concepts in the photos that he uses. That’s the main reason why I watched this video. However, although I’ve been using Adobe Camera Raw for about six years, I learned several “new” (to me) things about the software. As an introduction to ACR, this video will teach you more, in less than an hour and a half, than I learned in the first 6-7 weeks, when I first began using the software. It’s a very simple, logical and orderly presentation that’s easy to follow.
user-9f5c01
Chris Orwig is a great teacher for Photoshop. He is very engaging, very well-paced and gives you the information you need without being boring. :)