Lessons
Lesson Info
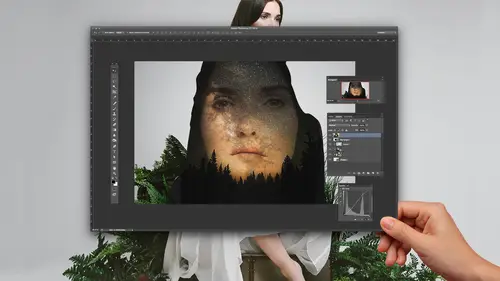
Small Panorama Merging Demo
let's move into light room and Photoshopped. So let me give you a few examples of creating panoramas and software. Uh, I'm going to start off today in light room. I love light room light room. The new panorama feature in light room is excellent to do that. I'm going to go to my red boat photograph here, and I'm just gonna talk through the process a little bit, talk through developing the files and preparing them for the final panorama merged. So here we've got I'll just I'm gonna cheat. I'm going to show you the final image. This is what we're after here. So there's the final panorama Gig Harbor. Then I'll go here and I'll show you the individual images. So I'm in Photoshopped. I'm just typing the I'm sorry. Um, in light room. I'm just typing the letter after goto full frame. So I just want to show you the individual shots that's comprised at full photo. 12 34567 Before class, someone asked. Hey, Mike, how many photos should we take? Per panorama. And I think the best answer is whateve...
r it takes. Take as many shots as it is. It requires to get the breath that you're after. So these these photos here exhibits a typical the typical problem that we have when shooting panoramas. If I look at this 1st 1 I'm gonna point here the screen this area is really bright. You know, the sun was going down in the sky. It's behind these clouds, so this area is actually washed out, and I'm hoping I can pull detail back from there. And then I've got shadow information down here that I want to pull out as I scroll across and I get over to like where the boat is, you know, the boats actually in the sun. So I got a pretty wide dynamic range. So the first thing that I do when I go to develop my photos is I find the most difficult file toe work with in that sequence, and I use that as my starting point, and then I I basically move those settings across the rest of the photos so that they mimic what I did on that first image. So let's do that. So now I'm in the library, I'm going to go to the developed pain. So Cruz, over here to develop, and I'm going to reset this image just so it's actually default. You know, when you bring photos in tow, light room, it defaults. This stuff, it defaults, contrast and colors and saturation. So your photos look pretty flat, so we'll start with this. The way it actually took it. This was a Nikon D four s. So I'm gonna throw my my favorite four slider adjustments at that, and I call it Mike's Magic Sauce or something along those lines. Really nothing special about it. It's just highlights, shadows, clarity and vibrance. Those four things and I've made a preset and that you guys can download that after the class if you'd like to. But I start with the highlights. All right, so I'm gonna go over here on the right hand side, all zoom in so you all can see that. So I moved The highlights down in the highlights is to retain or pull back detail in the clouds. And with with the new versions of light room, you can really move that highlight slider quite a bit and still get a good result. So I'm going to move it down to like, minus 80 somewhere around their shadows. I'll move the shadow slider up, try to pull out some detail in those trees in the foreground. Then I moved. Clarity, a move. The clarity slider up. A little bit of clarity goes a long ways to give your image that pop returning the pop and so clarity adjust mid tone contrasts. It's better than then contrast. So I really love the clarity slider. And then I want to get those colors back and I want to punch the blues, especially, so I'm gonna move the vibrant slider up. Gotta be careful with vibrance, you know, Don't go too much above 50 plus 50 and light room. If you do like a Harold just to go above plus 50 the thing starts looking like Disneyland, and that's just not cool. You know, real photographers don't use 100 vibrance. Remember that. All right, so there we go. Those first, those four sliders. Most panorama is that you take will really benefit from adjusting those four things, bringing the highlights down to get detail back in the clouds, bring the shadows up for those of darker areas, and then a little bit of clarity and vibrance the last thing that I want to do before I, uh, propagate these changes across the rest of the photos is I want to turn on my lens profile. Correction. So that's down here on the lower right. It's called lens corrections, and I'm going to enable the profile corrections. So do that, and you guys can watch the photo click. So what it does is it straightens it out. Basically, it makes your your lines vertical again. But the most important thing that it does is it helps remove in yet ing in the corners. Because when you do, panorama is the last thing you want Is this photo to have a dark corner and then your photo your final prints like dark, light, dark, light, dark light. So turn that on. Excellent. Now I'm going to select the rest of the photos and my sequence, so I'm gonna hold down my shift button and click on the last one. And now all of those photos air selected by them I'm going to go over here to sink and synchronize the images so that all the settings are common across the photos when you hit synchronized this little window comes up and this is a very important window. I want you all to pay attention. What settings should you synchronize? You know, maybe, for some reason, you on one of those photos you are cloning out dust. Or maybe in a different photo, you're brightening an area with a brush. Well, those are local changes, and it's only local to that one image out of the seven. So you don't want to synchronize anything like local adjustments. Rather, you want to synchronize all the global adjustments. So white balance, color saturation is tones. Those types of things just synchronized that. All right, so here we go. Hit, synchronize Pau. It is now propagated across all those photos. Then the last thing that I do before doing the actual photo merge is I just review them quickly just to make sure I've done everything I need to dio. So look at him. Make sure the overall brightness is okay. Did I miss anything during the developed phase? And I'm looking pretty good. Maybe just hit it with a little bit of brightness. Go back to this one here just to brighten it up a tad, and I'm going to do that with the exposure slider. And I'm just gonna move it up by, like 0.4 point five. Something like that. And since I did that, what happens? Well, I I blow it the clouds again, So I'm going to reduce. Uh, I'm going to reduce my whites this time because I've already moved my highlights down. So the whites adjust Just the tail end of your of your hissed A grams. I'm gonna move the whites down just a tad, OK? And now I'm going to re synchronize and done. Now it's time to do the photo merge. Now, these photos here that I have here these air Like I said, these air full resolution Nikon D forests, raw files. So if I did the photo merge here, we have to wait a little bit. So what? Instead, what I've done is I've made some smaller images that have exactly the same settings in a sub folder, that 2000 pixel folder and I'm just gonna do the photo merge on the smaller files, so it's faster. All right, here's how we do it. I'm gonna right click on the image, and then I'm going to go down to photo merge Panorama. So right, click photo merge Panorama. There's a keyboard shortcut. Command our shift em. And then there's also you can do this from from up here, you can go Photo photo merge Panorama So all of those methods work. All right, here we go. See how well this turns out. So this now opens up the photo. The panorama emerged preview. And the first time you open up this window, it's going to be kind of small, and so don't be afraid, you know, to pull your window in the corners to make it bigger so you can actually see this image that you've created Now that the the adjustments that you can make here are fairly simple, the top section here is determining what projection you should use. And then the bottom section here is this new thing called boundary Warp. So let's start with the projection. Okay. Spherical projection. Basically, what this is is this is useful for big 360 degree panoramas. I think spherical, when I'm thinking, you know you know Cincinnati to the rest of Ohio, you know, this big, huge wide panorama, um, spherical tends to result in a thinner or more squatty type of a panorama. Let me click on that and show you You see, I was going to squat it down. There we go. Cylindrical usually results in a little bit of, ah, of a taller panorama. Ah, higher panorama. So I like cylindrical for my shorter panorama is like this one. This is a pretty short panorama. I also like it for buildings in urban environments. Cylindrical perspective. You're not gonna use perspective very much. But here's the idea with perspective. Let's say you're going and you're photographing the White House. You've got a photo in the middle. You got a photo off to the right and then a photo off to the left. So three images. Now, if you merge those three images together, basically that the ends of the White House, the building are gonna, like fade off like this in perspective, right? Well, what the what this perspective does. It bends those out so that the White House is actually rectangular. So this is useful for architectural photography, but not really more than three photos. It won't work on this image. It will actually give me an heir message. They cannot do it. Pick another projection. So this is a shorter one. I'm going to use cylindrical. And then the next thing is this auto crop. If I choose auto crop, it automatically crops the photo and gets rid of all the non, uh, nonuse pixel areas. So it gets rid of all the white automatically. Um, the truth is, I kind of like the crop on my own, so I very rarely used the auto crop setting inside of this tool. Now, the next one is very cool. Lovett Boundary warp Boundary warp is a brand new feature just out with the newest version of light room CC. And let me explain a little bit of background here. You know, if I made this photo in the previous versions of light room, I would have had to bring it back in the light room and then just do some cropping and that was it that was done. Or I'd have to ship it off the photo shop and then do all kinds of warping and pixel mapping inside a photo shop. Well, now all I have to do, it's almost too easy to have to move the slider, so check this out. It's so neat. I moved boundary warp off to the right and automatically warps the edges, pulls him to the corner of the panorama window and done so cool. I like that. That looks good. And I don't have to go into a separate program to to do more work. Now, what I'm gonna do is I'm gonna hit merge! And now you see in the upper left hand corner, Light room is creating that panorama. So now we have this new panoramic image and let's go full frame and look at it. Beautiful. I see it. Something I need to fix their and we'll talk about that in a second. But was there a question? Yeah, I had the question When you do that, is that not the same as during that nado? Great question. So he basically saying, Well, what's the difference between the boundary warp and just the auto crop? All right, let me redo this so you can see the difference there. So I'm just gonna go back in and I'm going to pick those same images and redo the panorama. Okay, So look at what auto crop does right here. So the sea, Let's just look at this. Pick a point here in the screen like the bottom of these pilings. Okay, so you can see auto Crop is right now, it's just gonna go Pau to here, and then they're OK. So we had all the crop, and it just gets rid of anything. That's white. Boundary warp, on the other hand, actually uses the bigger frame, and it's taking these pixels, and it's wrapping and bending them outwards. Maybe this would be instructive. Check this out. I'm gonna click on auto Crop, and now I'm going to do boundary warp. So auto crop responds to the boundary warp. And once boundary war brings all the pixels to the edges well, then there's no reason for auto crop anymore. Now, does that make sense? Okay, cool. All right, well, let me let me finish up this light room discussion here, and let's just go look at that photo one more time. Uh, I just want to point out that the in terms of the Panorama Stitch light room did a really good job. And you can always tell if you did a good job by looking at things like polls, you know, is there. Just one poll, you know. Are there two poles? Polls are always a good indicator of the The photo merged worked. Well, I'm pretty happy with this. The one thing that I do want to fix here is the contrail. So we'll go in and just do a real quick fix in light room. I'm gonna do somewhere sophisticated stuff in photo shop in just a minute. But for now, I'm going to go to the develop panel, are develop module, and I'm just gonna zoom in here a little bit in the sky. There we go. And I'm going to use this tool. It's in the upper right hand corner. It's called the spot removal tool. Very simple to use. I'm gonna click on it. I bring it over here, And if you can see the size of my brush, I want my brush to be just a little bit bigger than the contrail. And I'm just gonna drag down like this. Let go! And basically this brush takes good sky from here and moves it there where the contrail was. Soon I will click done and go back to full frame view and great. We have great Panorama print it, you're ready to go. So there's light room, and I thought that would be a great time to ask some questions about light room. So when you were showing us you were doing the adjustments before emerging in light room, the global adjustments And can you tell us again what the advantages to doing that versus merging first and then doing the adjustments? Great question. Um, so but there's really no it did advantage either way. And the reason why is because after we create this new panorama, what what light room does is it creates a new D and G file. So we were working with raw files and I made all the adjustments. And then I did the merge and then, after the merge light room spits out a DMG file and what's a DMG file? A raw file so I could do all the same adjustments after the merge or before the merge. So maybe maybe the best answer to your question is what's the most efficient in terms of my time usage? Well, sometimes, like if I shoot my panoramas with my 36 megapixel camera like the D 800 the D a 10. It could take forever to merge that panorama. You guys have done this before? It can take minutes and sometimes up to 20 minutes, depending on how many. Uh, how many images you got so I could do my adjustments pretty quickly, and then I can hit merge sometimes the final panorama. You don't like it like you do all this work, and then you get done 20 minutes later. You're like, Ah, it's not all that great. So I would say spend the least amount of time up front. Most amount of time that it takes just I don't know. I think the answer is whatever is gonna take you, the less amount least amount of time. So thank you. When you were doing the overlap on the ah Panorama, it seemed to me on this particular picture, you doing like, 55 or 60%? Yes. And is that typical? Yeah. The second part of that is you asked you earlier about the wide angle lens and you said you had to do a lot more. What percentage would that be if you could pick, you know, an area. Okay, great. So this photo I took with a full frame camera. This is the D four s, The Nikon and I use the 24 to 70 millimeter lens. And I was right at 24 So pretty wide angle. So, like, if we look at this photo that go the crossed, I don't know like this, this motor on the back of that boat there it's right on the edge there. And then the next photo it's in the middle. So that's maybe 45 to 50% this next one. Yeah. So about 40 50 50%. Again. The wider angle Lindsay used, the more I want you to overlap. So there is no hard rule. It's just I've been bitten too many times by not overlapping enough. I've never been. I've never made mistakes by overlapping too much, you know? So don't go like 90%. I think that's overkill. Great. One more light room question. This is from the sale guy who says, How does light room handle ghosting caused from moving objects, for example, like if the boat was moving? Great question. And the truth is you as the user of light room, you don't get a lot of say and how light room makes these decisions. I mean, you guys saw all the adjustments. There's basically three choices. What your projection is, what the auto crop is, and then the warp thing, right, that's it. That's all you got. So light Room just uses its own internal algorithm. If you have ghosting from like a moving boat or something moving across the scene and it ends up being at multiple places, then you really need to be often to photo shop and dealing with layer masks and getting rid of or cloning it out. You know, so light Room doesn't have a lot of sophisticated tools for that.
Class Materials
Bonus Materials with Purchase
Ratings and Reviews
Pamela Richardson
I enjoyed Mike's friendly style of presentation, and detailed explanations of his technique. I learned a great deal from this course, and would highly recommend it! I am very grateful to Creative Live for providing Photoshop Week 2016, and also grateful to the many amazingly talented and knowledgeable presenters for graciously sharing their knowledge and experience.
a Creativelive Student
At first I was not sure if this class would be worthwhile; I've been using photo merge for several years. How happy I am that I watched this class. There were so many small tips that make all the difference - saving time and getting better results from the camera and the software. Thank you Mike and thank you CreativeLive.
a Creativelive Student
Watching now. Thank you for providing an excellent instructor for panoramas providing easy to learn procedures for amateur and professionals alike. Really enjoying this presentation.