Basic Shadows Using a Paint Brush and Layers
Lesson 2 from: Creating Realistic Shadows In PhotoshopJason Hoppe
Basic Shadows Using a Paint Brush and Layers
Lesson 2 from: Creating Realistic Shadows In PhotoshopJason Hoppe
Lesson Info
2. Basic Shadows Using a Paint Brush and Layers
Lessons
Floating Object Shadows and Anchored Objects
10:02 2Basic Shadows Using a Paint Brush and Layers
05:26 3Creating a Mask Layer Drop Shadow
06:50 4Using Highlights & Shadows to Create Dimension
05:14 5Using Warp and Transform
04:32 6Drop Shadow Effect on Real Objects
17:37 7Creating a Dimensional Object
04:15 8Using Drop Shadow Layer Effect
09:09Lesson Info
Basic Shadows Using a Paint Brush and Layers
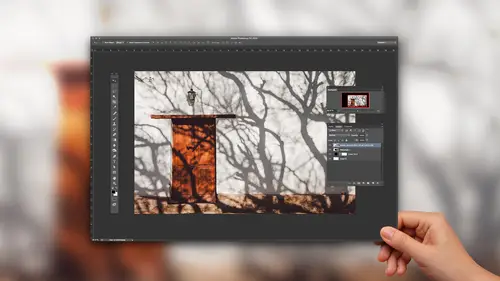
So let's do the sphere. Thought a coin was fun. Spears were fun to so same process. First of all, I want to always create a layer behind so they can see what I'm doing. So I'm gonna go to my layers panel on I'm going to command click on my new layer, which gives me a layer here and in order to fill it with my foreground of my background color whenever I have my layer selected command delete will fill it with my background color right there on my color picker option Delete fills my layer or whatever I have selected with the foreground color. So there's my sphere. I'm going to use my trick that I just taught myself. Select my sphere, layer. I'm going to command click on that sphere. I get my selection and my selection doesn't actually exist on any particular layer. My selection just simply exists If I click on another layer that allows me to go ahead and add it on that layer. With that selection, I'm just gonna turn off the sphere layer so you can see and if I go in and I go ahead and pi...
ck a really dark blue here I get a darker blue and with this layer selected, I can option delete and fill my area right there. Command D for D Select. And I've got my drop shadow. Now, with this, I can go several different directions with this drop shadow, I could just pull it down And of course, I put it on the wrong layer. Here, let me back up. Let me creating new layer here so that my drop shadow is really on its own layer. There we go. You think with all this practice, I get it right? No, but you'll do the same thing. So now it's on its own drop shadow layer. And I can pull this any direction that I want. I could use my command t for transform, and I could flatten it or another fun thing to do was to pull it off to the side. If I want to buy going to transform and then right click inside my transformation. I have all of my transformation options right there. I could transform and then go into the edit menu here and do with long way around. But no need to As long as you have your transform bounding box, right? Click inside and you got it so I could pull this off to the side. I could distort the whole thing. I could pull this off here to have this lay off to the side. However, I want to have this and I can park those items right there and hit return to rotate this a little bit so I can go Shadow cast off to the side here. Probably casting it off to that side because nothing like paying attention to the highlight on the sphere in order to have the drop shadow going the other way to do the same thing with this. With this layer, filter, blur, Gaussian blur. And I get my shadow. So I'm gonna blur that off substantially more. All right, there. Now, this is fine. If I want my little sphere floating, I can kind of pull this off to the side to do that. But what I want is I want just a little bit of an anchor right in here, So I'm gonna create another layer, and I'm going to use my brush tool. I'm gonna add a little bit of anchor right in there. I'm purposely going to lighten up my drop shadow a bit here so we can see this how this anchor is going to work and then put my little anchor shadow right here. The anchor shadow is going to be a very dark, very centralized shadow that's going to meet right at the edge of the object where it sits on the surface. Because right now it doesn't quite look like I've got this just right. So with my brush tool selected, I'm going Teoh, select my new layer, Select. My brush tool right bracket is going to make my brush. Bigger left bracket makes it smaller, but I also want to reduce the hardness of it so that I don't get a super hard shadow here. I want something really soft. So shortcut for that is shift left bracket is going to create a very soft shadow. And then I can just go in under here and I just touch right underneath here to give just a little hint now because it's on its own layer, you don't have to get it perfect. I can go back to my move tool, and I can always move that up or down to get that anchor shadow toe look just right. And of course, I always want to go in and multiply these layers. So whatever color I go on and do, it's always going to multiply to have surfaced through quick shortcut in order to go through your blending boats. Here is if you ever want to get to multiply, it's going to be shift option. Emma is going to go and jump your layer to multiply. In order for that to work, you have to have yours move, tool selected and your layer selected, and then shift option M is going to set it toe multiply shift Option N is gonna bring it back to normal for you. Simple stuff. Now, if you ever did want to go ahead and create something that is floating, well, that's easy. You take your object, you take your drop shadow here, and it's just a matter of applying more of a blur. I'm just using command f here because that was the last filter that I used so we can do anything that's floating by going in and working with it this way. And of course, a lot of people out there it's like, OK, know how to do a floating shadow? All my shadows look like floating shadows, but just in case you never done it, there you have it.
Class Materials
Bonus Materials with Purchase
Ratings and Reviews
a Creativelive Student
Loved the basic information Jason provided. Directions were clear and easy to follow. My only suggestion for improving this class would be to demonstrate how to add drop shadow to a person. When you Photoshop a person into a picture how do you make the shadows realistic? Thanks Jason. Now I need to get to work on my shadow practice.
a Creativelive Student
It’s really this simple?! Then why didn’t I figure it out myself? This gem of a course is entertaining, succinct, and clear. Every composite needs consistent and realistic shadows, and this is the answer for creating them. Highly recommended.
a Creativelive Student
I've been struggling with shadows in my fine art portrait work. Jason makes the process easy to understand. I feel like I now know exactly what to do. Highly recommend.