Lessons
Floating Object Shadows and Anchored Objects
10:02 2Basic Shadows Using a Paint Brush and Layers
05:26 3Creating a Mask Layer Drop Shadow
06:50 4Using Highlights & Shadows to Create Dimension
05:14 5Using Warp and Transform
04:32 6Drop Shadow Effect on Real Objects
17:37 7Creating a Dimensional Object
04:15 8Using Drop Shadow Layer Effect
09:09Lesson Info
Using Drop Shadow Layer Effect
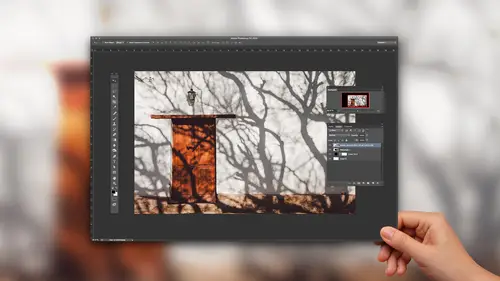
so onto other fantastic drop shadows. The hard won something like this. Oh, my gosh. How do you do this? Well, in all seriousness, we could just duplicate that coin that we did. And I could go in and I could create a layer right here, and I could use my brush tool, and I could go in, and I could just kind of paint underneath here a little bit on each one of these. Like so I kid you not. I mean, this is exactly what you could Dio, and you could go in and you could just kind of puddle underneath these, like so and doesn't have to be perfect because, thank goodness, Rick, Ozzie and Blur. So I could go under filter blur and do my Ghazi and Blair and blur those out and get those little drop shadows under there and tweak them around. Now it does look like I just have little puddles underneath there, and I want much more specific shaping of these. So while that was a great idea, I don't think it was that great of an idea. Just let you know, that really wasn't my idea anyway. So again, I need ...
to put a new layer underneath here and fill it with a color so I can see my drop shadow in this case, What I want to do is I want to take this and I want to use my glasses of my shadow. So again I'm going to select my layer and I'm going to use my layer effects. And I'm going to create a drop shadow and again, don't care how the drop shadow looks right there a few little holes in my mask, right click on that layer effect and turned it into a layer. So now it's its own layer. And now with this, I actually go in, and I'm just gonna transform my layer, and I'm just going to flatten it down, and I'm actually going to rotate this a bit and tweak it into position. So go in and rotate it like so and kind of get the bottom of my glasses right there with this section right here. I'm gonna go in with my lasso tool. I'm literally going to chop this off and repast it So it's on its own layer. Just did a command excellent. The command V for paste. Now this is its own layer. So I can go in here and I can work with these arms right there. In fact, I'm just gonna copy this arm, and I'm just going to move it over here too, because help. But he's kind of now when I do that because everything's on its own layer. It looks like I'm totally butchering this whole thing. And you're like, Okay, seriously, I thought, this is a classic. To get something out of it will be Get rid of this. So something like this, we're really only concerned about the shadow where it actually touches. So I could go in and I could actually do these arm shadows that are casting. But the reality of it is when they're dis far away from the surface and this brightly lit, we aren't gonna even see these. So with that, I'm going to use my filter and do my ghazi and blur right here. And I'm gonna apply one heck of a blur to this right there. Grab my eraser, and I'm gonna set the eraser to about 50%. And I'm gonna race a little bit with a soft edge here. I raise about 50% a little bit more, a little bit more, just to kind of get the quick little shadow like that. So instead of trying to do a great aunt or something on there, it's just going in and setting a lower opacity, erasing most of this and then starting again, erasing it again, starting again, erasing it again, starting again, raising it again and again until I just go in and a kind of taper the whole thing off now because I use the Gaussian Blur before that's always active in my filter menu at the top. And that's my shortcut command F so I could just simply reapply. I know that filter worked really good for the other one. I can do command F for this one, and it works really great for that now. It looks really good right now. Of course, I need that little anchor shadow underneath there. Not a problem. I know how to do anchor shadows. So one thing I do know how to do that's what it is. Go in and I can drop that anchor shadow in there. Put that in there. Drop that in over there as well. These also need to be blurred, so I can just do my filter again. Get those in. I see part of the problem again with my eyeglasses. Here is that little white reflection. So I need to go in and paint those edges. But now I've got my little puddle here and the way this is actually shot. I may want to go in with my eraser tool and just kind of erase a little bit here so that I kind of cheat the drop shadow out to the other side. I don't want it on the left hand side. It's being cast off to the right. When I grab my glasses here again, do my command f for that. That's looking not too bad. I could go on, do my command t for transform. And I could also warp thes if I wanted Teoh to get it. If I wanted to pull some of these out a little bit Mawr or wanted to kind of get the curvature of the shadow right there, it's like, no way. It's like, yeah, really. You can do that. I can curve those in. I'm actually gonna curve those right onto themselves right there. So I could get that shadow, and I can actually begin to curve those shadows right with it. Eraser tool right here in the middle. I'm not going to see much here. This drop shadow really doesn't look realistic. I'm gonna have a little cast. There are. Probably have some here coming out a little bit over there as well. Certainly would not be dark in this corner. We'll be going through the lens. Is there this I'm going to erase a bit more. Take that out through there and starting to look like some shadows in there. Not bad. We used to work for Hobie sunglasses or I did. And so we had to do drop shadows, which sunglasses all the time. And it seems like an absolute rocky ride to get to this and actually make this work. But amazingly enough, you get really good at seeing this. And when I tell people, if you can't figure it out, just jumping into Photoshopped doesn't work. Actually, put the object on the desk in front of you and light it and see where the drop shadows fall. CIA's. You pull these things further away and as you get closer, how the drop shadow changes. Now, with something like this, I probably would want to go in and add a slight anchor shadow to the bottom here, even though these don't touch right here, I still want to add a slightly darker look to this right here. So when you want to draw a straight line here, I simply click. And I hold down my shift key, which is going to connect the dots together so I don't try to go in. I don't try to draw like this. I simply go in, click once shift click to the other, and that's gonna allow me to draw a line in the great part about this is it doesn't need to be perfect. You're gonna blur these anyway. So, of course I can blur this and I go into my filter menu and choose Blur realized of Blurred it way too much. Another cool feature is this Any time that you perform any filter function and you've performed it too much. If you go right to your edit menu, you can always go back and you can always fade. The last thing that you did so I can take this and I can actually fade my blur here, and I can actually see what the right dialed in amount is going to be based on what I'm doing. So even though I applied my filter full force, I can actually go instead of trying to dial in to begin with, I can always dial it back afterwards. This is something that you have to do immediately after you've gone in and perform the functions right there. Now, of course, because we have a slight curve to this is going to taper off a the end. So I grabbed my eraser tool and I do a very light opacity. They're just so I can kind of just nibble off the ends there, so it just kind of tapers out. And I may need to do this a little bit more as we go through, but that's going to give me the realistic looking shadows for my object. Do we have any questions there? This question came from photo maker. If the light is coming from multiple directions on an object like if you are, say you're the object is going to be in a museum or specifically lit environment, how do you figure out what light direction and where it will cast. How would you approach that? Well, it's funny because you'll actually see this when I finish up with my light ball. The fact that the because I knew somebody's gonna ask me that because nothing is let right from the same angle, like the shirts just basically lit. So it's like you add your own drop shadow, but we will show you that.
Class Materials
Bonus Materials with Purchase
Ratings and Reviews
a Creativelive Student
Loved the basic information Jason provided. Directions were clear and easy to follow. My only suggestion for improving this class would be to demonstrate how to add drop shadow to a person. When you Photoshop a person into a picture how do you make the shadows realistic? Thanks Jason. Now I need to get to work on my shadow practice.
a Creativelive Student
It’s really this simple?! Then why didn’t I figure it out myself? This gem of a course is entertaining, succinct, and clear. Every composite needs consistent and realistic shadows, and this is the answer for creating them. Highly recommended.
a Creativelive Student
I've been struggling with shadows in my fine art portrait work. Jason makes the process easy to understand. I feel like I now know exactly what to do. Highly recommend.