Lighting Approaches For Individuals & Groups
Lesson 8 from: Introduction to Flash for Children and Family ImagesMike Hagen
Lighting Approaches For Individuals & Groups
Lesson 8 from: Introduction to Flash for Children and Family ImagesMike Hagen
Lessons
Class Introduction
06:37 2Gear For Flash Photography
19:00 3How to Use a Flash Meter
13:57 4Shoot: Flash & Light Meter Single Subject
10:42 5Setting Your White Balance
13:35 6Light Modifiers & Backgrounds
11:59 7Camera & Flash Settings
03:00 8Lighting Approaches For Individuals & Groups
11:13Shoot: With One Child
23:58 10Shoot: With Two Children
10:14 11Shoot: Create a Pure Black Background
04:05 12Shoot: Freeze Action
18:43 13Group Lighting & Posing Overview
05:38 14Shoot: Flash with Mom & Children
16:15 15Shoot: Flash with Dad & Children
08:14 16Shoot: Flash With Family on Couch
16:26 17Lightroom® Post Processing Overview
13:01 18Lightroom® Post Processing For Family
08:39 19Lighting For Black & White
06:14 20Shoot: Black & White Child Portraits
17:44 21Shoot: Etherial Child Portrait
07:41 22Heirloom Portrait Overview
05:04 23Shoot: Heirloom Portait
09:46 24Black & White Post Processing
22:50Lesson Info
Lighting Approaches For Individuals & Groups
Yeah, so we're gonna start shootin' pics in just a minute. Before we do that, I wanna talk about some considerations when you're photographing people, what you need to think about with glasses, what you're thinking about with shadows, so just some preliminary stuff, and then we're gonna get right into photographing kids, so that first couple of scenarios that we're gonna do today are we're gonna photograph a single kid, we're gonna photograph two kids together, brother and sister, and we'll see how that goes, and then we're gonna do how to freeze action with kids, it'll be our last photo adventure. What do we need to think about? What are the concerns that need to be going through your mind as you're preparing to shoot maybe your first official photo shoot with families and children? Well, one of the first ones is shadows. Dealing with shadows is a much bigger deal when you have multiple people in the scene because now you've got maybe twice as many shadows to worry about or five times...
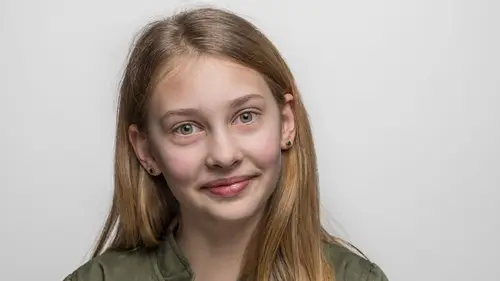
as many shadows to worry about, and also you have to think about where do you position your lights so that the shadows aren't casting, let's say, from mom onto one of the kids. You have to pay very close attention to that, which is why I like to use a handheld light meter a lot of times for my family portraits because I can go up to the mom, click it, go up to the dad, click it, go up to the kid, click it, and as long as they're pretty close to each other from an overall exposure standpoint, I know there aren't any significant shadows on each of those kids or the parents. Another thing to think about with respect to shadows is the background, the backdrop. Today I'm gonna show, with the single portraiture, I'm gonna show a few different images with a white backdrop, with a gray backdrop, and then with a black backdrop just to give you a feel for what that looks like with respect to distance from the backdrop, lighting styles, and then of course with the shadows. So proximity to the background matters, and I'm just gonna move over here physically and just explain that when your subject is close to the background, let's say within a foot or a couple of inches, there's nothing you can do, you're gonna cast a shadow on that backdrop, okay? So just think about that. Shadows aren't necessarily bad, you just have to understand where they are and plan for it. The farther away you move from the background, the more the shadow is gonna fall down below and be out of frame. You always are casting shadows, you just have to figure out where the shadows are falling and how far away from the background or what angle of light you have to use to not show the shadow in the frame. That's an important thing to understand. A lot people say, well, how do I eliminate shadows in my photography? You don't. You always have a shadow. You can control where it falls, though. So usually, for single portraits, groups, I'm usually a minimum of four feet away, so that's about here. Like if I was to sit on the stool, that's about four feet away there, and if I've got more space in the room, then I'm more like six feet away, eight feet away. And now you can start to see issues with the background. If I am six feet away or eight feet away, my background, that doesn't give me much wiggle room for camera angles, and that's why a lot of times we go to muslins which are 12 feet wide, 10 to 12 feet wide. It just gives us a lot more space and width to deal with. So those are going through my mind, shadows, proximity to background. Let's talk about glasses. I said I was gonna do a little tutorial on glasses. Do any of your kids have glasses, Brandon? No? Would you be willing to run up here real quick, and I just wanna do a quick tutorial on glasses just to show you all how to deal with them. Okay, go ahead and grab a seat back in the same position. Move that way a tiny bit, right. We are going to produce reflection in the glasses. And most of my settings are still set up from the previous session here, so I'm not gonna remeter or anything like that, but I am going to go to Tethered Shoot, Escape, Command + Tab. Bear with me as I, oh, looks like I'm still fired up. I'm fired up ready to go. So Brandon, what I would like you to do is, actually, I've got this, is to look, to tilt your head a little bit more into the light. Yeah, like that. Start there. That's a little too much. Nose towards me a little, little more, right there, all right. So I'm producing a reflection on purpose. (camera clicks) Let's see if we get a reflection, and we should, unless, did you buy of those fancy glasses that don't produce reflections? Probably. Probably, thank you. (laughs) Yeah, I think he has the non-reflective glasses. They were expensive. (laughs) Yeah, he said they were expensive. Let's do this, 'kay? (camera clicks) And look up right into it this time, with your eyes even. (camera beeps) (camera clicks) And now look at me. (camera clicks) Okay, let's see if we're gettin' the reflection. So lesson number one is have your clients all buy non-reflective surface glasses. There should be a big old massive reflection on that one, but there isn't. Okay, all of my planning was foiled by expensive glasses. Let's assume that right there there's this big old reflection, okay? Just pretend. If that's the case, then the answer is you have to change the angle. You have to change the angle from the flash to the glasses. If I shoot like this, if I go flash, glasses, camera, it's all in line and you're gonna get a reflection, so you have to figure out some way to cause that light to reflect away. It might be, just follow my finger with your nose, it might be doing that, and then look at my eye here, so his nose is going off that way, which means his glasses are angled. Now you can see the light's gonna fall over there. Or, one of the things I like to do, go ahead and do this for the camera, tilt up the back ever so slightly, just enough, yeah, it doesn't feel quite right on your head, that's probably too much, but you get the idea. The idea is just a little bit of tilt in those glasses will cause the reflection to go down. And then when you get a group of people up here and they're all wearing glasses, (groans) that's really frustrating trying to manage all of those reflections all together, but you can do it, you just have to pay close attention again to the reflections and the angles. All right, cool, thank you. Go back and wrangle those kids. He's gonna come up here in a few minutes again with his kids. So rotate, so the idea here is to tilt your glasses or to rotate the head. And as the more you do with your photography, the you practice with your photography, you'll get very comfortable with this process. You're always watching for the reflections, always making sure you can see sometimes a little bit of reflection on the side of the glasses, that's okay, but if it covers up the actual eyeball, not okay. You wanna be able to see the actual retina, the middle part of the eye. Lighting positions. The more people, the harder it is to light the scene. I think you kind of get that conceptually, but the more people you have, you can't do as much directional lighting, and what I mean by that is kind of that dramatic look where you got the strong side lighting. You can do this a lot of times with an individual where one side's lit and the other side's in shadow, this dramatic look. You can't really do that as much with a big group of people unless you have a gigantic light source. I'm talkin' really, really big, or here's another thing, or your light source is a long ways away, because then the light pretty much falls evenly on people on the left of the scene and the right of the scene. For most of our big family photos, my suggestion with one flash, if you do shoot one flash, is to keep that flash on-axis with the camera. So what does that look like? It means put that flash maybe up here, nice and high, shoot underneath the umbrella or underneath the flash this way, therefore light's falling equally on the left side and light's falling equally on the right. If you have multiple flashes in your setup, then, okay, then you can move the flashes off to the side, kind of get even lighting left and right, but when you're doing one, keep it in the middle for the most part. I'm gonna show you both today. I'm gonna show you when the light's off to the side, and you'll understand oh yeah, that's not really what we want. If you do decide that you want this directional lighting, this a little bit more dramatic effect, then you have to pull in a reflector to bounce some light back in the shadows. Generally, your flash is gonna be higher for your big groups, and then of course, the big flash, the big old umbrella. That's why I brought that one today. Make sure in those big group photos to meter across the scene, so meter the mom, the dad, the kids, the left, the right, the top and the bottom, the front and the back. (laughs) That's a lot of metering just to make sure that you've got it, but you don't want a brightness issue from the front to the back of the scene. So more, when you shoot off-axis again, you get more drama, when you shoot on-axis, you get flatter light but you get even illumination. What do we need to think about when we're shooting a single subject? Well, the world is your oyster when you're shooting a single subject 'cause you have all of the lighting capability and flexibility that you want. You can put the light on the left and the right and the top and the bottom, you can go with a beauty dish or a soft box or an umbrella, you can do whatever you want with a single subject, and so a lot of times, you know, as portrait artists, we like to shoot with a single subject 'cause we have all of this flexibility. That photo there was taken with, I'm looking at her catch lights, I think I shot that with a soft box and a reflector down below, if I recall, and then she was close to the white background, but again, that was a single flash photo, nice-looking shot overall. Now when you start thinking about families and groups, with families and groups, well, now we're more restrictive with the lighting. The lighting generally needs to be on-axis like this. You can tell, if you look closely at their catch lights in the eyes, you can actually tell that the light was a little bit off to the right. Just a little bit though. It wasn't hard right, it was a few degrees off camera, and that's what's giving me a little bit of that shadow detail on the face. The reason why I was able to get away with it though is because I used a big umbrella. There's that term again. Very big modifier.
Class Materials
Bonus Materials with Purchase
Ratings and Reviews
user-182390
Great course really love the way Mike teaches so informative with very useful tips and tricks to use in photography
Dortohy Lyner
Loved this class. Great basic essential information. Mike filled in many gaps concerning my knowledge of studio photography.
Martin
Love the natural way Mike has to explain and to work on the studio. Plenty of tips and clear knowledge transfer for me that I manage quite well natural light but that I still mess with the on-camera flash.
Student Work
Related Classes
Lighting