Shoot: Black & White Child Portraits
Lesson 20 from: Introduction to Flash for Children and Family ImagesMike Hagen
Shoot: Black & White Child Portraits
Lesson 20 from: Introduction to Flash for Children and Family ImagesMike Hagen
Lessons
Class Introduction
06:37 2Gear For Flash Photography
19:00 3How to Use a Flash Meter
13:57 4Shoot: Flash & Light Meter Single Subject
10:42 5Setting Your White Balance
13:35 6Light Modifiers & Backgrounds
11:59 7Camera & Flash Settings
03:00 8Lighting Approaches For Individuals & Groups
11:13Shoot: With One Child
23:58 10Shoot: With Two Children
10:14 11Shoot: Create a Pure Black Background
04:05 12Shoot: Freeze Action
18:43 13Group Lighting & Posing Overview
05:38 14Shoot: Flash with Mom & Children
16:15 15Shoot: Flash with Dad & Children
08:14 16Shoot: Flash With Family on Couch
16:26 17Lightroom® Post Processing Overview
13:01 18Lightroom® Post Processing For Family
08:39 19Lighting For Black & White
06:14 20Shoot: Black & White Child Portraits
17:44 21Shoot: Etherial Child Portrait
07:41 22Heirloom Portrait Overview
05:04 23Shoot: Heirloom Portait
09:46 24Black & White Post Processing
22:50Lesson Info
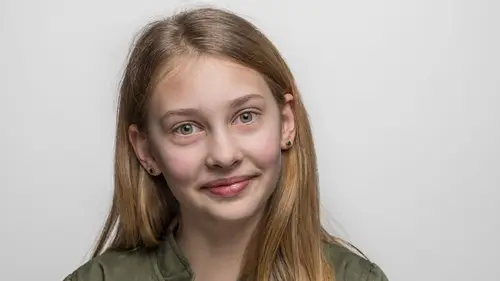
Shoot: Black & White Child Portraits
Just because we're gonna go down to a single portrait now with a single kid, I'm gonna reduce my ISO. I'm gonna bring my ISO down to 200, like we had it earlier today. And then I'm gonna be shooting around F8. The reason why I'm choosing F is because eventually we're gonna get to the new backdrop, and I want to include some detail in the new backdrop that's behind our seamless. Alright, so let's call forward Lily, Rory, and Olivia, right? Why don't ya'll three come up here Come on up, girls. And I just want to point out their dresses, their mom, Monica, right, made their dresses by hand. So come on forward, this is great, these beautiful dresses. And so we talked about this ahead of time, we kinda talked about what we wanted to wear, I told her what the concept was, mom was behind the concept of these black and white photos. So I think what we'll do is while we're taking these, I'm just gonna have one of you at a time, and so who wants to go first? Anybody wanna go first? Why don't you...
go first? And then while she's going first, you guys can sit over there on the couch, and then I'll just kinda pull you in when it's time to get you, alright? Okay. Alright cool. Alright my friend. I think what we'll do for you is we will have you sit on a stool and we'll try clamshell lighting for you, alright? We'll pull out our awesome stool here. Here we go. And I want to center her over the gray backdrop, and what I'm thinking as I'm positioning my stool is how much light do I want to bleed on to that backdrop? You probably saw me sliding this back and forth, and in my mind, I'm thinking, well if I go out here that becomes a really black background, if I go back here it becomes nice and gray. I want it about middle tone for this. Kind of a gray backdrop, it is gray, we'll keep it gray. So that's about three or four feet away. (drumming on stool) Alright, you wanna get up there, you want me to help you or do you think you can do it? Yeah, how about I help ya? It's hard with a dress. Ufta, that was my Norwegian background coming out. How do you feel, do you feel okay? Are your legs okay? Do you want me to bring something in that you can sit on, or put your feet on, or are you comfortable with that? I'm comfortable. Yeah, you look comfortable, good. Alright, so what we're gonna do is we're gonna have your hands up here like this, and you can fold your fingers like that if you want, or you could also put one hand on top of the other, whatever you're most comfortable with. And then, I'm gonna pretend that someone's pushing you right there, so what that does is cause you to sit up nice and tall. Yes, perfect. Aww, look at that! Fantastic. So we're gonna start with a clamshell scenario. I brought in a really big softbox, because that was a question that was asked in last session. So I brought in this one here. This is a three foot by four foot softbox. You can get away with a lot of mistakes with a giant softbox like this. So I'll turn on my flash, I'm gonna raise up the lightstand, and you know what? I forgot to grab a sandbag, are they still over there? Big honkin' softbox, easy to fall over. So I'm just gonna kinda thread it in here. Shoulda done this beforehand. Maybe it's not fat enough to fit. Okay, that's gonna work. Cool. Gonna rotate it like this, because I'm going clamshell. I want it to be a little bit higher overall, like that. Raise it up. Cool. Yeah, you look good. Then as I always say, let's build the photo step-by-step. So we'll start with this big softbox, we'll take a picture, and then I will bring the reflector below to show you this clamshell light. Okay we're at quarter power there. I'm at F5.6, oh I meant F8, at a 250 F, eh, might be a little close, to be honest with you. There we go. Now you turned on me, you rotated your chest. I'm gonna rotate you back this way, like that, perfect. And then I'm gonna have you, uh-oh. Did you do that? (laughs) These are nice and heavy, so you gotta really crank them down. There we go, hopefully that stays. Go ahead and look right here at the camera. Cool. (shutter clicks) Nice. Oh, it didn't fire because that is turned off. Okay, and now I'm just gonna do a quick check, there we go. Nice smile. (shutter clicks) Wonderful, let's look at that. See how that comes out, I gotta turn off my filter here. Yeah, my filter is currently on. Cool. Alright, my exposure's a little hot, a little bit bright overall. So I'll reduce the power on my flash from a quarter power, I'm gonna bring it down maybe two thirds of a stop, down to a quarter minus two thirds. And we'll take another quick check, you ready? Alright, sit up nice and tall for me, oh perfect! (shutter clicks) Oh, look at that! It's like she knows what she's doing (laughs). By itself, oh my goodness. I'm looking at the studio audience, and they're all smiling, it feels good to take photos like that. That's just a really special nice looking photograph. A lot of times as I'm shooting if I'm tethered into Lightroom I will very quickly type the letter V, as in Victor, I type that on my keyboard, and this obviously isn't the finished black and white conversion. But it just helps me understand if I'm the ballpark. I'm kinda liking that, not kind of, but really liking that. So now that we're doing clamshell, isn't that a funny name? We're gonna pull in this one, and we're gonna fill in some of the shadows underneath just to see what that looks like. Okay, this won't hurt ya. It's just gonna come in kinda close. You wanna help, don't ya? Here we go. Bring this in. Rotate it (laughs). Did I hit ya? No, alright cool. And I have to have some space to shoot through, right? So it's gonna be pretty tight. Okay, we'll call that good. I see you! You see me? Yeah. Go ahead and put your hands together on your front leg. Super! Yeah. (shutter clicks) Alright how about a little bit less smile? (laughs loudly) That's natural. And I'm gonna go vertical, nice and tall. (shutter clicks) Cool. How did that change the look? Yeah. Beautiful, and then here's the vertical shot. And then real quickly I'm gonna type the letter V. (equipment banging) Uh oh! Good thing we put those sandbags on, huh? Alright, that's nice, that's a good looking photo. So let's now look at another shot. Let's pull over Rory? Are you Rory? Alright, cool Rory. Let's look at a different lighting scenario for Rory. We're gonna go a little bit more split lighting, okay? A little bit more side-to-side. Do you want to sit? Cool, can you get up there yourself or you want my help? Sometime, I should bring in those apple boxes. Oh, this is such a pretty dress. I like the sparklies in there, that's wonderful. For you, I'm gonna have you turn this way, like that. And we'll go vertical on the softbox for this one, because we're going a little bit more of a split light scenario. And you can see since the softbox is so big, we don't have to work very hard as photographers to make these photos look special. Am I hitting you? Nope, you're good. So for this shot, we're just gonna shoot one softbox, and then I might bring in a reflector, I might not. Okay. Cool, here we go. Nice. (shutter clicks) Great pose. (shutter clicks) Alright, sit up nice and tall for me. Like almost like somebody's pushing you right there. Cool. Nice smile. (shutter clicks) Cool. And now I'm gonna have you rotate your body just to show what it looks like when your body's pointed this way. So go ahead and point your knees right towards her in blue jeans. And then you're gonna look right at me. (shutter clicks) Super. Little bit overexposed, a little bit bright for my tastes. So I might bring down the power a tiny bit. So that's a nice looking photo, that's a little bit hot, little bit bright, so I'm gonna reduce the power and then I'm gonna bring in a reflector on the other side. I'll type the letter V on the keyboard (mumbling). Can only do one thing at a time as a photographer. If you try to do too many things, people get hurt, photos get ruined, photons are lost. Here we go. That looks good, huh? How do you feel, feel kinda lost in there? No? You okay? Mmhmm. Alright, your sisters can still see you, can you see them, they're over there? Go ahead and move your hands back a little bit and sit up nice and tall for me. Nice job sweetie, wonderful. (shutter clicks) And remember how earlier we had your knees pointed towards the light, this light? Go ahead and rotate your knees that way again. Mhmm, a little farther for me. Cool, I love it! And I'm gonna take that photo. One, two, three, nice. (shutter clicks) Well I forgot to reduce the power, I realized, but that's okay. You can probably pull some of that out, pull it down a little bit in Lightroom. Let's go V, for black and white. And it needs to be a little bit darker overall. So I should probably take about a third to two thirds of a stop out of that. And I'll do that again, not gonna talk about it, I'll just actually do it. Take one more shot. Beautiful. (shutter clicks) What I'm doing is I'm getting as close as I can to the softbox so that we get a little bit less of the whites in her eyes. So go ahead and turn your nose towards me, right there. Nice job. (shutter clicks) And go ahead and tilt your head that way a little bit. Perfect! Like I said, you've done this before, I think. Nice job, alright. We'll let you down, and we'll pull big sis over here. Big sis. That's a pretty dress. Thank you. I think for you, rather than being on the stool, I think we're gonna have you stand, because you're already pretty tall. But before I take your photo, I want to look at a couple of these real quick, so just bare with me. Nice big catch lights in the eyes. Yup, a secondary catch light from the reflector, wonderful. I type the letter V to see. And this is, I somewhat did this on purpose, and now I'm realizing it's a good teaching moment. Now a lot of times with black and white, you like a little bit more dynamic contrast between one side of the face and the other. And when using this reflector, we're filling in the shadows, so it's a little bit of a flasher shot overall. That's okay, just recognize what you're doing. If you want a little bit more dramatic shot, like sometimes with men, sometimes with women also, who have higher cheekbones, you want a little bit more shadow on the side to really illustrate that dramatic look. But these are kids, and a lot of times even with black and white you don't want it to be super dramatic, like a hard shadow going over the shade, so that's what I'm looking at overall. For you, we're gonna do a little bit different look, and what I'm gonna have you do is your back is gonna be towards me, and you're gonna be kinda looking back, so I'll pull this reflector out so everyone can see how I'm gonna pose this. I just want it a little bit different look. Okay, go ahead and turn like this, let's go the other way. Right there, alright, yeah. Like this? Yeah, like that. So you're gonna look right back at me. Let's try it the other side. Yeah, let's do that. Yeah, and that serious look, I like that serious look that you have right there, 'kay? So to do this shot, what I'm thinking through is should I put the key light on this side of the face, or should I put the key light on that side of the face? And I'm thinking I'm gonna put it more over here, so that this side, so it becomes more of a short lighting, so we're darker on this side, to give a little bit more of a mysterious look. And this one, I'm going to shoot initially with no reflector, and that's kinda my thought process, is I might not even need a reflector on this picture. I love it! That sandbag is really heavy! (laughs) Really heavy. Okay, up we go. And this light's really gonna wrap around her, because it is so big. It might be fun to do this same picture with a giant umbrella, too. Yeah, great. Okay, pretty close to her, how close is that? That's about a foot and a half away. Does it feel like it's gonna fall on ya? Mmm-um. No? Okay. (shutter clicks) Since it is so close, I might have to adjust my power again, we'll just get a feel for what that looks like on the screen. Oh. Mmmm. Came out real nice, really nice. I think I just like it. There isn't a whole lot of change to make there. And so you know, sometimes you're lucky, and sometimes it's skill. I'm gonna chalk it up to skill. But I talked through my thought process there, and my thought process was, I wanted the short lighting. In other words, the side that's towards the camera, I wanted that to be in shadow, to kind of create this mysterious look. Nice. Here we go. (shutter clicks) Beautiful. (shutter clicks) And then another one, with the hair over the shoulder. Even more hair over the shoulder. Cool. (shutter clicks) Right on. Yeah, I think I like it with the hair back. You know, that's the thing about us photographers, sometimes you just get blinded by all the tech, by all the gear, and we lose sight of the art. And for me, personally, Mike Hagan, that's my struggle. Everyone's got a different struggle in photography. I don't struggle at all with F-stops and apertures and ISOs, but I struggle with the art side of things. So one of the things that I, how I force myself to get around that is I just change things all the time, and I just try it. Don't be afraid to try to change it this way, or change it that way. Do the hair different, have her look over the other shoulder. That process will help you be a better photographer.
Class Materials
Bonus Materials with Purchase
Ratings and Reviews
user-182390
Great course really love the way Mike teaches so informative with very useful tips and tricks to use in photography
Dortohy Lyner
Loved this class. Great basic essential information. Mike filled in many gaps concerning my knowledge of studio photography.
Jayne Fletcher
Amazing class! Lots of information
Student Work
Related Classes
Lighting