Lessons
Lesson Info
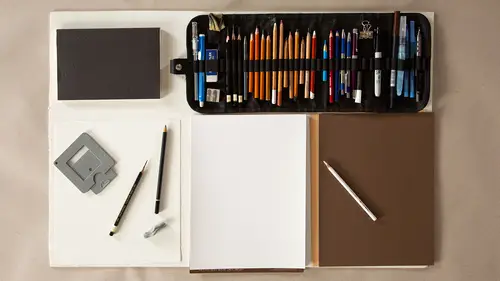
Three Dimensionality
A big part of drawing is making flat things become three dimensional, and there's some strategies for this, some simple strategies, that I'm gonna show you with everyday objects. So we're gonna be using a regular old coffee mug. We're gonna be using a block, which from the front, or from the top directly, might feel more like a square, or just a flat rectangle. Gonna talk a little bit about how you can pop that out, and make it look more 3D. And then we're also gonna use an egg, which is a classic drawing motif, and talk about how we could wrap lines around that, to create more of a three dimensional quality. So, I'm gonna start talking about the coffee cup, and I'm gonna take you through a series of diagrams highlighting some really key concepts that have to do with three dimensionality, and then later on, if you wanna learn more about it, you can check out my Drawing Basics course, where this is really elaborated and full. So this is sort of a primer, and then from there, you can tak...
e that introduction, and expand it. So, with this coffee cup, depending on how I'm viewing the coffee cup, whether I'm looking at it from above, or from the side, or from high or low, depending on my vista, which is evident in these images here, the top image, clearly the cup is being seen really from the table level, and then I'm rising above it a little higher. A little higher still. Higher still. And in this one, I'm really kind of looking right down into it. So what's happening to the opening, the mouth of the cup, the opening of the cup, is that as I rise above the cup, the opening is expanding, and I'm seeing more into the cup. And that might seem really common sense, but then when you come to actually drawing that shape, from directly above the top of the cup is probably gonna be almost a perfect circle, but as we start looking at it from the side, that circle becomes what we call an ellipse. And an ellipse is like an oval, like a continuous oval that changes its width, depending on your vista. So I wanna show you how the ellipses that construct the top of this cup actually change, and that's something that you'll really wanna look for, if, let's say, after seeing this lesson, you say, "I'm gonna go home, "and I'm gonna draw my coffee cup, "and I'm gonna practice ellipses." Great. But these things I'm gonna show you here are things that you're really gonna wanna watch out for. So, I'm gonna compare actually two images. I'm gonna compare this middle image here, and I'm gonna actually just trace around the ellipse, the opening of this cup. That is definitely an oval. It's not a circle. When I come down to this image, just for comparison, this is much more circular, and almost symmetrical, and that's because I'm really viewing it from above. So let's take a look. In this middle image, where it's a narrower opening, the distance from here to here is definitely narrower than the distance from here to here. And in constructing proper ellipses, this is the thing you really wanna look for, as opposed to this here, where the distance from the front to the back lip of the cup is really pretty similar to what's happening from side to side. So, constructing ellipses, depending on your vista, to whatever you're looking at, in a way that's believable, is really gonna help take something from the side view, like a cup, and start to pop it dimensionally, and believably. So that's definitely something you should definitely practice at home. Another classic motif is the egg, and an egg can be actually a pretty daunting thing to draw. You think, oh it's so simple, but if you actually practice drawing an egg, and I'm gonna support this egg by having it lean against that block a little bit there, you actually go to draw an egg, it's sort of so perfect that it's difficult. So, I'm gonna give you few strategies, going from the oval, to something more three dimensional. And what we're gonna use in this case is something called cross-contour line. So, in this image here, this egg actually has an elastic band around it, and the way that that elastic band wraps around the egg actually really helps us believe in its dimensionality, rather than a flatter sort of form. So, what I'm gonna show you is, you can create the oval of the egg, and that might be enough for your preliminary drawing. So we're gonna try that first, is just to try to ... And I'm mimicking the shape. I'm just gonna kind of create the oval of this egg. And we all sort of know what an egg shape is. There's sort of, the symbol for an egg is an oval, and we might say, "Oh, that's pretty believable." But if we wanna take it a step further, and really try to make this believable sense of three dimensionality, what we can do, is we can make a contour line that crosses around the form, that wraps around the form, mimicking the direction of the elastic band. So if I take this image, and I take my red line, and I start in from a place that I'm not really seeing it, I'm wrapping it around. I'm coming across, and because I'm looking up the egg, this is curving in a particular direction. And then I'm coming down around the other side. That arc of a line really helps move this flat drawing to something more dimensional. So, I would absolutely recommend taking an egg, maybe wrapping an elastic around it, or a cylinder, and putting a piece of tape around it, and playing with these cross-contour lines. The direction of them are absolutely gonna pop these flat images into something more dimensional. And in my Drawing Basics movies, you'll see how that can actually lead to tonal rendering in a way that really creates a sculptural form. The last shape that we're gonna look at is a block, and again, looking at a block flat-on, it's not gonna seem 3D, but as you start to turn it in space, in different angles, you start to see three sides, or two sides, and that's a situation where some perspective's gonna come into play. I'm gonna show you some really, just one really basic rule, one having to do with one point perspective, and then I'm gonna show you a two point perspective scenario. Really quick overlay, just to give you a taste of what starts to happen when you're trying to create a more dimensional, kind of cube-like shape, really from a really basic, sort of straight on scenario. So, right now, in this diagram, I've taken this block, and in the center of the diagram, it's as if I'm looking at the block really dead-on, like I can't see the top or the bottom. In the bottom diagram, to my eye, it's as if I can see the block is below my eye level. This line is my eye level. So I can see a lot of the top of it. As I raise it up above my eye level, I can see a lot of the bottom of it. And to make it feel believable in a three dimensional way, I'm gonna show you something that's really important to understand, in terms of what the top and bottom of those surfaces are actually doing visually. So, we call this one point perspective, because I haven't brought it out where I'm looking at the corner of a block. I'm actually looking straight on at one of the facades. And what can happen, let's just try to work with the bottom one here. So, this block, I have the facade coming at me, the front facade. It's below my eye level. And the back edge and the front edge are parallel to each other, however, if I look in my eye level here, and I find my vanishing point, which is basically one point on the horizon that all lines diagonally converge to, then I can take the side edges, and I can create a line that connects back to that single vanishing point, therefore one point perspective. And by doing that, it helps me accurately create the angle of the top side edges of the block. So that just popped from something super flat, to something dimensional. And that's really basic one point perspective, which again, you can explore further in Drawing Basics. The last thing I wanna show you, is what happens when there's two points, two point perspective. So in this case, rather than looking at a block with just the facade facing me, I've turned it so I'm looking at the corner of the block. The corner of the block is coming at me. Putting the overlay on here, in this case, there's two vanishing points. When the corner's coming at you, it moves to two point perspective, rather than one point perspective. Those two vanishing points are on the horizon, and let's take the lower block again, because suddenly we've turned it, the corner's facing us. We can see the top of the block, like we saw before, but it gets just a little bit more complex. So the first step is just, and you can apply this to the other ones as well, the first step is sort of deciding where that front corner is. A point at the front corner here, and a point at the front corner here. Then maybe asking yourself, if I drew a line from this corner, back to that vanishing point, would that help me establish this block in space? So let's try it. These outer edges are going to come back to the vanishing points. Same thing is true from this top point of the corner, going back to the same sides, but now we can start to establish what's happening on that top ridge. I'm just making dotted lines to help your eye travel back to the two vanishing points in this two point perspective diagram. So now we have the front corner established. We can see as these lines are going away from us, they're converging towards the vanishing points, but we're not done. We then need to establish where the back corners, side corners of the box is, and then from this top point, and this top point, we can do the exact same thing, and notice how they also, if we hook it up to our vanishing point, help to establish really what the top of the box is doing. And then on this side. So, here we have a box in two point perspective. We've just briefly looked at how all of these lines converge back to two vanishing points, and this again is something that's super easy to practice, working with an everyday object, like a block in your home, and putting it in different positions, and really trying to work with that. So, everyday objects. A block, it could be a book, right? It could be one of your kid's blocks on the floor, you could pick up and put in different positions. Most people have eggs in their fridge, and most people have some kind of cup in their house. Most people have some kind of pencil to work with. So, I encourage you to take everyday objects, and see if you can amplify their dimensionality by applying some of these basic concepts. And if this feels like this is great, it's a great introduction, to start thinking about these ideas, again, you can really elaborate these ideas by watching my Drawing Basics films.
Ratings and Reviews
Juliana Lugg
Amy is a talented artist and a very effective teacher. I have the pleasure of having her as a professor, however these online classes show her passion and expertise just as much as in our in-person classes. If you are intimidated by drawing, like I was, her teaching helps to simplify the process of learning how to draw while also inspiring her students to take more risks with their artwork. She will help you realize that studio art really can be for anyone, and that drawing can be a meaningful tool for expression, relaxation, and growth. I highly recommend any course that she teaches, online or in-person!
Alisha Weiss
Great introduction to drawing and sort of the key skills to develop if looking to improve or starting. Not a lot of hard and fast skills but definitely a great first building block to what someone can expect. Great job Amy!
Myndi Quirion
This was an excellent class. As a beginner I learned a lot of great techniques that I hadn't even considered. It really changed the way I view drawing! She's great, I'll definitely watch more of her classes!
Student Work
Related Classes
Illustration