Lessons
Lesson Info
Introduction & Materials Overview
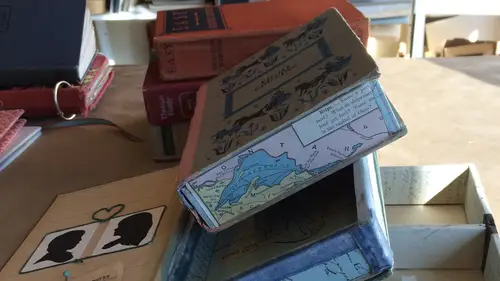
Hi, I'm molly manning, I am a paper artist in downtown los angeles and in today's class we're going to be making a book box it's, one of my favorite projects because I have such an obsession with books and old paper in general and have been collecting old books since I was really young, and what we do is take a book a basic, beautiful book with all its insides and turn it into your very own curiosity box there's all different levels of the curiosity box that you can go with all different variations on themes that can be had, but we'll take out the beautiful guts of the book and we'll actually turn that book into a box will build our own little box inside. I love this project because it allows you to retain the vintage book itself, but give it a whole new life as well as used the guts for something else and have the pages of the book have its own new life within this there's a number of tools you need in order to achieve this, and you may have seen book boxes before that kept the guts i...
nside and had the whole inside drilled out and carved out, and then you put it in this is a much easier way to achieve a book box and a little more fun and that you get to build your own box so what we start with is the phone court. You can use foam core or you can use balsa wood. Either thing works really well to build the walls of the book. This whole part here is built out of the film corps in the balsa wood. Of course, you'll need a box cutter. Really? Good. Sharp blade is always key to cutting anything like this, especially the foam core in the balsa wood needs a really good, sharp blade. But mind your fingers and an exacto knife is also really helpful for cutting corners again. Always keep your blades really sharp is an important part. Scissors, rulers. I used to different rulers. One is a non slip ruler and the other one is a handy ruler because it's an inch thick and when we talk about the books, I'll tell you why. That's handy pencils. A pencil is always a great measuring tool, basic. But you need it blue. I tend to go back to the kindergarten level of blue. I still really like my elmer's glue, which is a liquid based adhesive. But it works well for some things on this project and a good old glue stick. I also really like it works well with the paper onto the foam core. You're gonna want to get a glue card there's a lot of sticky adhesive that goes on so something an old postcard or an old piece of paper and old piece of cardboard just so you could have it all ways for your glue that states with your glue you might want some kind of stick popsicle stick it could be a toothpick something kind of tiny that allows you to spread the glue not for glue spreading but really great for allowing things to be adhered to one another the paper and the foam core is a bone tool it's often used for bookmaking so it's kind of great in a book box project but it allows us to really get that paper straight and clear so that's a nice tool to have it's not absolutely necessary but it is a nice tool to have and then again on that kind of low pro it he sieve area I tend to use a double side tape either a dock glue or an actual sticky sticky glue depending on the kind of paper you're using and we'll get into that later depends on the kind of adhesive that you'll want to use so finally a glue gun which allows us to actually put the walls into the book it's the quickest and hardest drying for this project but we're only going to use it on the hearing of the walls so extra glue sticks and a glue gun is a great thing to have this well I also have a breyer this handy but it's a similar tool for me as the bone tool which allows me to kind of really get that paper down tight to whatever we're adhering to the walls the inside of the book so those are your basic tools finally a cutting matt is really really important as well if you don't have a cutting man you can use kind of rubber that you can't get all the way through the things that go under your chairs that you often used to protect the floor they're really kind of hard plastic rubber those also work well but something that you can cut on that it won't matter if you cut all the way through when you're using your box cutter or your exacto knife on any of the materials you're cutting all the way through and you're cutting pretty hard so you want to make sure you have something underneath to protect whatever surface you're working on so the final piece you'll need for this project is your special paper I tend to choose older paper because I love the way it looks around the edges of the book but that's what you're going to need in order to collage when you finish cutting the foam core or balsa wood of your walls you're gonna end up collage ing all the all the walls of your book so I go through a lot of my old collections and find some great old paper. Maybe you want to use something that has your own handwriting. Or if you're making it for someone, you know something that has their handwriting on it. You could even use the pages of the actual book, which are a great addition to keeping that book kind of together. And the theme of that book. So that's, your final piece of the tools that you're going to need a swell, which is the paper that you're gonna collage.
Ratings and Reviews
user-cea155
I learned so many things by watching this class that I always wanted to know. Molly gives great detailed instructions and fascinating suggestions for what you can do with these boxes. I got the sense that she is incredibly excited about doing this and it makes me want to do it to. It sparked a lot of ideas for me even though I doubt I will do exactly what she demonstrates.
Elizabeth Haen
This is such a fun project, can't wait to try it all out! I love Molly's calm and professional manner and upbeat approach to teaching as well.
Mia Reeves
I love the clear step by step directions. I also love the fact that she uses pretty basic tools and materials. The possibilities for creating some very unique book boxes all start here!
Student Work
Related Classes
Paper Craft Ideas