Drop Shadow Effect on Real Objects
Lesson 6 from: Creating Realistic Shadows In PhotoshopJason Hoppe
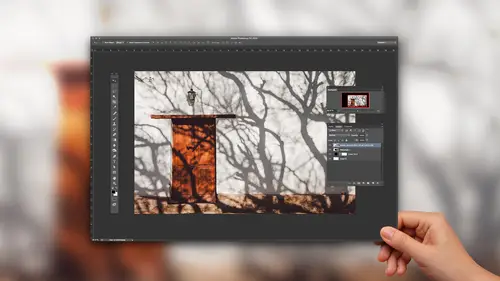
Drop Shadow Effect on Real Objects
Lesson 6 from: Creating Realistic Shadows In PhotoshopJason Hoppe
Lessons
Floating Object Shadows and Anchored Objects
10:02 2Basic Shadows Using a Paint Brush and Layers
05:26 3Creating a Mask Layer Drop Shadow
06:50 4Using Highlights & Shadows to Create Dimension
05:14 5Using Warp and Transform
04:32 6Drop Shadow Effect on Real Objects
17:37 7Creating a Dimensional Object
04:15 8Using Drop Shadow Layer Effect
09:09Lesson Info
Drop Shadow Effect on Real Objects
So now I want to show you what is going to look like when we actually have a real object. Okay, so with Israel object here. This shirt I've got my drop shadow layer underneath, and I see this shirt had been mask out. So what I'm gonna do is I would go and I would command click. And I put that in a layer, but I'm not gonna do that. What I'm gonna do is I'm going to use the drop shadow effect. So I'm gonna click on my shirt layer to go under the effects portion of the layers panel, go down to the bottom, and I want to choose my drop shadow effect. And so it calls up my layer style and people dial this in and they say, OK, you know, I want this drop shadow and we start running little sliders back and forth and they see how this looks. And I get my drop shadow on my shirt and they try to get it just right and make it look good. Do all this. Don't worry about it. Okay? Just go and create a drop shadow. Max it out there. Even if it looks horrible. We're not actually gonna use this exact drop...
shadow. One of the biggest problems with creating a layer effect drop shadow is that it just gives you this cut out effect. It gives you the exact shadow of the exact object. And worse is that if you try to go in and edit this, the only way you can edit this is, of course, by changing the shape of your object. And when you do change the shape of your object here it goes in and you have to get rid of your object in order for the shadow toe work. And it doesn't look right. So what we're going to do here is we're not even the use the drop shadow effect as it was intended. But it saves the hassle of creating a drop shadow by hand and putting it on another layer. So now that I've created my drop shadow effect on the layer here, I'm going to right click on my effect in my layers panel, and I'm gonna turn this into an edit herbal layer. Right now it's just in effect, and the effect on Lee gets adjusted. When I edit my object, I don't want that I want This is a separate object. So I right click on the effect on I'm going to choose create layer to create a layer out of this. And it tells you that sometimes when you convert these special effects, it doesn't work. And it's like I understand, but I know drop shadows always dio and look at that. We now have the drop shadow effect as its own separate creditable layer, which is great. This is perfect. This is exactly what I want. So now I can, of course, move this around. If I select that layer, I could move this around and I could get my drop shadow here. But I do need to fill this with a background color so that I can see what it looks like. And now that looks totally ridiculous. You know, it doesn't look believable at all because it just looks like, you know, ring around the collar kind of thing. But now that I have it on my own layer here, this is perfect. So what I'm gonna do is going to go in here much like we did the bacon, and I'm gonna work with this. I'm actually going to shrink this down a bit because this drop shadow sticks out a bit too much. So transform gonna hold down my shift key and I'm gonna bring it in a bit and then set that transformation. So now I'm going to see how this looks. So there's my drop shadow, and I need this to conform a little bit better to my object. So with this, this is exactly where I'm gonna go in. I'm gonna use my eraser tool, and I'm going to erase those areas that are not going to be as far away from my background. Boost that capacity a bit on my eraser. And I can just go in here and I can kind of go in and just hand select those areas and just erase a little bit. You know, if your race a little bit too much, not a problem. It doesn't take much to make it look realistic. The places where the folds get a little bit taller. You have a little bit more shadow casting right from their simple and easy. When you have this, you know we have this. I know these lump up around the edges a little bit. I can just go in there kind of take out a little bit. I'm not erasing at 100% because they don't want to just get rid of the shadow. And I just want to get it so that when the sleeve curves around a bit lumps up a little bit. There we have it. This gets a little bit more tricky in here. I'd have to go in. And I know there's this big pile of stuff in there, so I could with a softer brush, kind of make that work. Eat those away a little bit more, and before you know it, you've got yourself a very realistic looking shadow around your object. The key is wherever you see a lump on the object, just leave more shadow where you would like it, Teoh look like it touches more on. What I use is I just use the reference of the material. So here I just looked like this caves in a little bit right there. Even if it isn't closer to the surface. Guess what it is now, So I'm just going to erase a little bit in there, and I'm gonna see that so wherever it goes in a little bit, just erase and leaves me with my little shadow. I always work with a very large brush. I always work with the very soft brush and very low opacity here. So sometimes you may want to go in the race 2345 times instead of trying to hit it all at once so that you don't have everything going away. And in the end, this is exactly how that's gonna look much more realistic. Shadow around your object. The great thing is on its own layer, so we'll go ahead and pull it larger or smaller and go ahead and transform that anyway, that we want to. If you want to use your warp transform, you can pull a little bit of the edge there to pull it out as well. So that's how you have it. But that's actual realistic fund stout and years ago, when I got into this business, this is one of the reasons why it actually got me the job. I had never done drop shadows like this before, and they're like we have all this clothing to Dio. Just go ahead and do it I'm just like, uh okay. And so I went in there, he started hand painting it all with a paintbrush. Yeah, I literally did that. I had my own layer and I took the paintbrush, and it kind of painted more or less. And it's like, Oh, my gosh, this is actually a lot of fun. And here we are today, doing the exact same thing. Except now I'm erasing it instead. There we go. We have any questions there? Yeah, Let's check in with the folks at home. Photo maker asked for the kind of work that's required to touch up the shadows. Do you recommend using a mouse or do you Would you use a welcome tablet as well? So the wack, um, tablet is great if you arm or artistic when you're working through these files, I don't do a lot of actual drawing of shadows, so I'm more comfortable with the mouse with it, But you certainly can. I don't see a huge advantage using a wacom tablet. So a couple other fun things. This hat. Oh, my gosh. Okay, well, this is a crazy one, because now you have this object that doesn't fit the surface you're gonna have light coming in from underneath the ends are gonna be touching. You've got these little things, and all of a sudden the world of craziness just comes down upon us. Well, actually, no, not at all. Okay, this is so ridiculously easy. And it's funny because I was gonna leave one of these photos and just, like, do it writing class and, like, I'm just gonna run through this. And this is actually one of the easiest ones to do ever, And I'm gonna show you why. So what I'm gonna do is I'm going Teoh also go in here and I'm just going Teoh put a drop shadow effect on my hat layer. So drop shadow effect really don't care what it looks like right there. The interesting thing with this is that I had done my mask right here, and you can see how this looks going all the way around by mask. It looks kind of weird because there was little hairs that were sticking out. This is fine. It's all going to go away when I blur the entire thing. So I do this so right, click on the layer effects in my layers panel that I just created to turn this into a layer and then with my object on its own specific layer, I'm going to go into the filter menu. I'm gonna blur this substantially. So that is gonna blur it out quite a lot, a lot, a lot. And you can see those little anomalies go away. And then I'm gonna do my command t for transform, and I'm gonna take my drop shadow on a park it down underneath the object. Okay? Now, with my transform still active, I'm going to use my distort to bring up the tail here kind of touch this right here. And then I can go back to my warp if I want. Teoh and I can kind of bring this back down so they can grab my handles here. And I can kind of bring this around and actually warp this to fit my object. Pretty sweet, huh? So now I have my drop shadow right there. The one problem that I do have here is this looks like it's sitting on the top and something needs to be sitting back there as well, which isn't a problem, because I can always go back into my transform if I want. And I could warp any of this because now I've got my warp tool so I don't have to ruin the rest of my shadow here. I could actually have my shadow cast, and I'm gonna cut the opacity of this back here so we can see kind of what we're working on right here. Now, in this case, I would want to go in and I would want to put a little bit more shadow under the back of this. So of course I'm going to introduce another layer. And I'm going to use my brush tool here and going to go in, and I don't worry about trying to get everything perfect. I can always erase later. So I'm gonna go in and I'm gonna set my brush to say, 50% opacity. I'm gonna go in and I'm going to do a little bit of shadow behind here right there. But I know it's coming out. The back don't care, because I can always go in and erase this very easily and get rid of all that extra shadow that I don't need right there. The reason why I do this on its own separate layer Here is so of course I could then go in and I could duplicate this portion, scale it down, and park that back under there to get a little bit more of a shadow. I'm gonna lighten this original shadow a bit, so you can see. And then I just go in with my transform tool a lot, and I just kind of tweak and Poland spindle full mutilate, rips after up, down shape. Luck moisturize everything as we go. Now, this is working pretty good. This needs a little bit of a shadow right there. So I'm gonna put another layer in here. I'm gonna grab my brush. This is gonna be a very large brush. No, not that large sticky keyboard right there again. Very light opacity. I'm probably gonna go, like, 20% when I throw a little bit in there. Just so I get a little bit of extra shadow keeping in mind that I'm doing this on its own separate layer? Yes, it's going beyond everything. I don't care. I can always erase. So I get a little bit more extra shadow in there and I do that almost to the point where it's hard to see where the original shadow is. And then if I have to go back with my eraser, I go back with a soft eraser, large eraser with light opacity. I can take a little bit of that off right there. Get rid of that as well. So it's kind of odd, because now I've got this weird shadow. I don't really care what it looks like behind the scenes right there. As long as it's behind my object, I paint everything on its own separate layer. If something doesn't go right, throw it away. Plain and simple. Because if you try a couple times and it doesn't look quite right, toss it, get rid of it, then I'm just gonna add a little teeny anchor shadow right at the very front here. So we get that to touch right there, another one right there. Grab my brush tool smaller. Want I'm gonna do a fairly paintbrush, but that in there being a little darker shadow right there at the edge. I need to do that so I don't have my spacing or else it's just gonna keep dropping little nuggets right there things we forget. I had a little bit in there. Doesn't look great. Don't care. Lower that a little bit. Not that much. Blurred that out. Use my move tool. Kind of tuck it right in there as well. Now one issue with this and we're gonna go ahead and extend this to other things. One of the problems that we have is this edge right here. Part of doing realistic shadows is not just doing the shadow. It's actually making the object look rial. And because this was shot on a white background, even though the masking that I have done, I tried to get the felt texture really good. We still have a little bit of reflective highlight coming off the surface, and that's part of the problem. So no matter how good we do these shadows, we still have this white little outline. So you would think, Oh, let's go in and make the mask a little bit smaller. Chew off a little bit more of the hat. Absolutely not. It looks good the way it is. I just need to get rid of that little edge. So on top of my hat layer, I'm going to create a new layer, but this layer, I want to make sure that all of my painting stays on Lee within the edge of my hat. So this is where I'm going to in between these layers. Hold down my option key an option click between the two. So this layer is going to be clipped. So the only place that I see my hat is the only place that I'm going to see by painting right there. So as I go in and I grab my selection right here, basically it's not my selection. It's my mask right there. I'm gonna go in with my brush tool, and I'm gonna paint on this layer in black gang or a dark brown. I should probably sample that color and get the very dark brown there. So now on this layer, I go in and I paint on this layer and you can see that I get that nice dark edge taking it out. But this looks totally hooking because, as you know, you can't paint with one single color and photo shop because you're dealing with millions of pixels. So what we do here is we create a very soft brush and I'm going to go in and I'm going to paint just a the very edge here, just enough to get rid of that edge. But I don't want to go ahead and lose all the detail. So what I dio is I go with it and I set this to multiply here or try different blending modes will walk you through that, and all they want to do is they just want to catch this very edge right there. As I paint along that edge, it helps fill in that little section. Grab my eraser here, and I just want to go in. And I want to erase any extra of the painting that I've done on that edge so that I don't add extra color to my object. So if I didn't have this active, what this would look like, is it just like that look like this big hot dog of color going over the edge there, which doesn't look realistic, but because I've clipped that to the edge. I can go in and I can set the opacity of this as well. And because I've got this set to multiply, it's gonna blend in with the object right there. And the key to this is going in and using a very soft brush and creating a just an ever so slight edge right along there, just enough to paint that edge on that separate layer. You want to paint it dark because you want that drop shadow cause it's gonna re floor, reflect off the surface and then you see very quickly how this doesn't look realistic here, but all of a sudden this hat blends in right down there. Same with this over here. Totally not realistic. Yes, we are going to get some white reflection off the surface here. But down deep in here, which closer to the surface, no. So that's going to require a much larger brush to do a very low opacity, say 20%. And I can just go in there and kind of touch those areas with a little bit of darkness to help bring that in. And now that looks like a whole lot more realistic area. And that basically takes it from being highlight and fakey looking. Even though we're on our way to creating a nice shadow, this on a separate layer goes in and darkens it as well. This is a totally separate layer, and some of you may know this is actually creating a natural layer group. And you can do this here in the layer menu where you can go in and you can actually go in. And there's your clipping mask right there. Okay, so a clipping mask is literally option. Click on, Eclipse them together. Option click, and it unclip them that we don't have to worry about staying within the lines of painting. I don't have to put a selection around it. This is my selection right there. So I look at this. Now I have something that's going to look a whole lot more realistic. That's where it started, and that's where we have it. But that highlighted edge just doesn't look riel at all. And now it certainly does. If I were working on a different colored surface and I was having a blue or an orange come up, they're this layer. I would then paint in that color in order to get that reflection on the under brim there to make it look like it's more realistic because this is shot on a white background It looks fine on a white background. You introduce a darker color, any other color and that white edges not gonna look realistic.
Class Materials
Bonus Materials with Purchase
Ratings and Reviews
a Creativelive Student
Loved the basic information Jason provided. Directions were clear and easy to follow. My only suggestion for improving this class would be to demonstrate how to add drop shadow to a person. When you Photoshop a person into a picture how do you make the shadows realistic? Thanks Jason. Now I need to get to work on my shadow practice.
a Creativelive Student
It’s really this simple?! Then why didn’t I figure it out myself? This gem of a course is entertaining, succinct, and clear. Every composite needs consistent and realistic shadows, and this is the answer for creating them. Highly recommended.
a Creativelive Student
I've been struggling with shadows in my fine art portrait work. Jason makes the process easy to understand. I feel like I now know exactly what to do. Highly recommend.