Smart Filters & Smart Objects for Faded Blur
Lesson 10 from: Creating Realistic Shadows In PhotoshopJason Hoppe
Smart Filters & Smart Objects for Faded Blur
Lesson 10 from: Creating Realistic Shadows In PhotoshopJason Hoppe
Lesson Info
10. Smart Filters & Smart Objects for Faded Blur
Lessons
Floating Object Shadows and Anchored Objects
10:02 2Basic Shadows Using a Paint Brush and Layers
05:26 3Creating a Mask Layer Drop Shadow
06:50 4Using Highlights & Shadows to Create Dimension
05:14 5Using Warp and Transform
04:32 6Drop Shadow Effect on Real Objects
17:37 7Creating a Dimensional Object
04:15 8Using Drop Shadow Layer Effect
09:09Lesson Info
Smart Filters & Smart Objects for Faded Blur
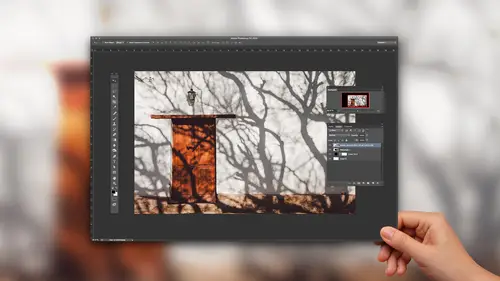
what happens if we have something that's being cast off into the distance? Okay, well, casting something off in the distance Well, we could do that with anything. That's where our light bulb comes in and they're it iss so casting something off into the distance. So this layers panel looks like a whole lot more complicated. And it iss because when you do this doing it non destructively, I've shown you how to use the eraser tool because that's how a lot of people are going to use it. But I want to show you how to create this so that it actually looks riel. And when you get more than one light source, you're gonna have more than one shadow casting with different intensities. But as the shadow gets further away from the object, it not only gets lighter and dissipates, but it also becomes less focused. So that's what this whole conglomeration is right here. So what I'm gonna do is I'm gonna start off with my white bulb and I'm just going to dio my basic drop shadow effect on their great. Th...
at's fine. A right click created layer out of that and there's my layer Now what I want to do is I want to take this layer. And I would like Teoh basically just lay it down command to you for transform right click inside and I'm gonna distort And I'm just gonna lay it down the direction that I wanted to go plain and simple. Now I know that I have to anchor the shadow and I have to make this work. But I also want to dissipate it as it goes out on. They also want to blur it as it goes out, because it's going to be more focused. The closer it is to the object, the further it gets away from the object, the more blurred it gets, the more ambient light comes around in the last shadow I have. So it's very difficult to blur this and a whole lot more and not blur this end. And that's where a smart filter comes in. So with my drop shadow here, I'm gonna go into the filter menu and I'm gonna convert this for smart filters. This is the exact same thing is converting it to a smart object. They just put it under the filter menu because it's for smart filters. It's a smart object to convert this for a smart filter. And it gets this little icon in the corner here, which means if I go in and try to erase or brush or edit the pixels, nothing happens because it's protected. It's acting gonna like a placed image. So with this, I'm now going Teoh, fade this out. So I'm going to actually blur the whole thing. So filter blur, Gaussian Blur And I could go in and I can blur this, and I'm going to blur it to the maximum point where this is going to be where I want it. I don't care about this right here and you'll see why I'm gonna blur this. So this gets blurred out to the point where there really is no definition because it just simply fades off into nothing. But what I'd like to do is I'd like to have this sharp focused here, and this completely softened all the way out here. Well, when I create my smart filter, it's actually provided a mask for me, a mask in which I can hide portions of this blur. Well, if I go in and I do a mask. And if you know about masks, black conceals, white reveals. So if I paint on this filter or this mask in black and I take my brush and I paint on this filter or on the mask right here in black, it's going to mask out the blur filter. OK, Well, what I want to do is I want to create a nice, continuous effect. So I'm actually gonna grab my Grady in tool and with my Grady int, I'm going to go from black to white, Black conceals, white reveals. So that means if I painted in black, it's going to hide this Gaussian Blur filter. And if I created Grady int, it will then eventually show this filter Black conceals White reveals. So there's my mask. I take my Grady int I've said it to be black toe white and wherever I click, that's what's going to start. So black is my starting color here Black conceals its gonna hide the blur filter Got my mask selected and I'm gonna click on the end here and I'm gonna drag it out And I can reapply this this Grady int filter in any way that I want. Teoh on my mask right there. And I need to not do it as a radio filter. I need to do it as a linear ingredient. And I could go and pull that out to get my filter to apply. Like so. So now I can have it more focused at the front. I think I've blurred this out too far. The wonderful part of a filter. When you do a smart filter, I can go in double click on my filter that I have applied Gonna cut that back a bit. So it's not so blurt out as well. I'm also going to cut back the intensity or the capacity here, so it looks a little bit better. And now I've got my filter applied so that it comes out and it begins to you fade off into the distance right there. And I can always adjust this Grady int anyway that I want to. So it falls off really quickly, or it falls off a little bit slower and kind of gives me this soft, blending us right there. That's a whole lot better. So I can set the opacity. So I've got my drop shadow right there. That's the great part. With this, I can always turn my mask off. I can always turn my blur off here, and I can get that now because I've done this. All I have to do is recreate the same process here, going a different direction. And this is a pretty intense shadow right here. So I'm gonna cut back the capacity way back here as well. I will need to put little bit of an anchor object in there, but I could then repeat the process, going the other direction in a much softer town. So one way of doing that is to take my object option click do a transform. Gonna shut off my smart filter, flip that horizontally so I can put that over there like so and that I could set my opacity different. But I could also go in and I could transform this and I could right click. I could distort or warp this in any direction that I'd like to create a shadow going the opposite direction. Now you notice when I do this, it keeps it in my smart object mode. So all they have to do is line these up and my blur simply stays applied. So this one, Aiken, blur out Mawr, if I'd like to apply may filter to this so that I have it tighter up here and Grady int fade all the way out. I can do that. But I can also shut my filters off completely or my masks off completely so I can get those going different directions. Not bad, huh? This one's a little bit more complicated to dio because once you introduce the smart filters and the smart objects in the Grady INTs there, but I had to throw that in there just in case.
Class Materials
Bonus Materials with Purchase
Ratings and Reviews
a Creativelive Student
Loved the basic information Jason provided. Directions were clear and easy to follow. My only suggestion for improving this class would be to demonstrate how to add drop shadow to a person. When you Photoshop a person into a picture how do you make the shadows realistic? Thanks Jason. Now I need to get to work on my shadow practice.
a Creativelive Student
It’s really this simple?! Then why didn’t I figure it out myself? This gem of a course is entertaining, succinct, and clear. Every composite needs consistent and realistic shadows, and this is the answer for creating them. Highly recommended.
a Creativelive Student
I've been struggling with shadows in my fine art portrait work. Jason makes the process easy to understand. I feel like I now know exactly what to do. Highly recommend.