Lessons
Floating Object Shadows and Anchored Objects
10:02 2Basic Shadows Using a Paint Brush and Layers
05:26 3Creating a Mask Layer Drop Shadow
06:50 4Using Highlights & Shadows to Create Dimension
05:14 5Using Warp and Transform
04:32 6Drop Shadow Effect on Real Objects
17:37 7Creating a Dimensional Object
04:15 8Using Drop Shadow Layer Effect
09:09Lesson Info
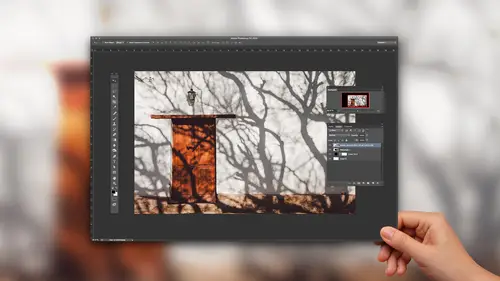
Using Warp and Transform
so because we started off with lasagna noodle and we kind of faked you into believing there actually was dimension there. We're gonna take it to the next level of faking it. And so now what I'd like is I'd like to have this tag here make it look like it's actually curled with a drop shadow. So again, I'm always gonna put in a colored background behind my image. So, command, click on the new layer. I'm going to go ahead and option delete to fill that layer and create a new layer above that for my drop shadow right there. So I want a drop shadow that's gonna match this tag. So I'm going to command click on my tag layer toe, load my image and turn that off so we can see what's going on. I'm gonna select him my shadow layer here, and I'm going to fill that shadow layer with a fill Command D for D Select. Now I'm going to go and Gaussian blur this under the filter menu. I'm gonna blurt a fair amount here. I can see how that looks turned my tag back on, but now I want to make this look like ...
the tab is The tag is actually curling off the page. And the funny thing is, is, I don't actually curl the tag. It's all an illusion. We can curl the tag, but you'll see it wouldn't illusion this actually is. So I'm gonna click on my shadow command T for transform But when I get my transform up, I'm going to right click inside the transform bounding box and I'm going to choose Warp and Warp allows me to pull points and handles. So I would like to make this look like this tab is actually curling a bit just by pulling the drop shadow ever so slightly, I'm going to tuck it in in the middle, pull it out on the sides a little bit as well, just to give that a fact that it actually is mawr curved than you really think it ISS and I can pull these handles and these mesh points anywhere that I want you and then hit return when I'm done when adjust the opacity a bit on this and now it looks like I have kind of this warped tag. I can also transform this. Go do a command T and kind of tuck it in a little bit further so that I get certain warp sections sticking out from here to actually make it look like you have this warped tag. This doesn't look realistic inside here. It looks like too much of a shadow. That's where the eraser tool can come in, and I can erase it to a certain percentage. I don't erase it completely. So when I have my eraser or my brush tool, if I just type in a number on my keypad, say, like, four, it's going to go in and it's going to bring me right to 40% capacity with my brush or my eraser and I could just go in there and I could delete a little bit of that shadow. So now I get this realistic curling shadow right there, and if I did want to take it one step further, I could then select my tag and with my move tool, I could go in, and I could also work my tag ever so slightly to really give the effect of that shadow to make it look like I've got this really curved tag. And it looks quite convincing that it's actually coming off the page. What's interesting is that we didn't move the tag very much. The drop shadow is actually what's giving me a whole lot more information. Now, if I were to go in with this drop Shadow and I were to warp this substantially to make it look like it's really coming off the page, The shadow isn't going to look realistic because it's gonna look way too dark. So I needed to fall off fairly quickly, which is where I would take my eraser tool. And I would set the opacity to be a very low opacity, maybe say 10 15% there. And I'm gonna have a very large brush, very soft brush, so it's going to create a very large area, but it's going to do very little erasing. And as I get to those outside edges, I can kind of click on those outside edges several times, and it just helps to take away that shadow there. So the shadow falls off substantially faster right there and now it looks like I've got this tag this curled, and really, I didn't curlett very much or at all, in some cases, like lasagna noodle
Class Materials
Bonus Materials with Purchase
Ratings and Reviews
a Creativelive Student
Loved the basic information Jason provided. Directions were clear and easy to follow. My only suggestion for improving this class would be to demonstrate how to add drop shadow to a person. When you Photoshop a person into a picture how do you make the shadows realistic? Thanks Jason. Now I need to get to work on my shadow practice.
a Creativelive Student
It’s really this simple?! Then why didn’t I figure it out myself? This gem of a course is entertaining, succinct, and clear. Every composite needs consistent and realistic shadows, and this is the answer for creating them. Highly recommended.
a Creativelive Student
I've been struggling with shadows in my fine art portrait work. Jason makes the process easy to understand. I feel like I now know exactly what to do. Highly recommend.