Lessons
Class Introduction
04:01 2Get Started With Page Setup
15:51 3Setup Type & Styles For Layouts
17:45 4Add Color Palettes
15:23 5Add Images & Graphics
06:41 6Page Transitions, Export PDF File & Presentation Mode
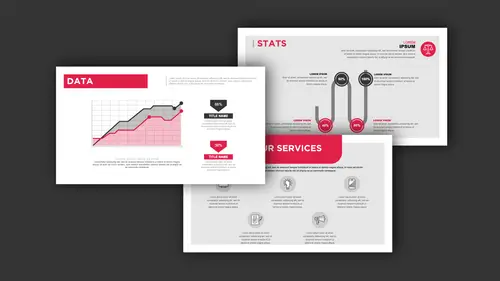
20:56 7Buttons & Forms
19:12 8Add Hyperlinks
03:19Lesson Info
Buttons & Forms
This part of the video, we're gonna show you what we can do with more advanced things in InDesign for your cool presentations. So, what we have is the first part of the video was all about just building the basic file with a grid structure and layers and setting up your paragraph styles, what I want to show you now is how we can go through this and we can take the files and we can bring them to the next level. So animation. Actually, using videos as well as going in and creating some animated effects too. Doing rollovers and pop-ups and baking those into the file so that you get the next level of presentation. So then at the end, we're gonna show you how we can go ahead and fit other formats here, two other page sizes and some of the common things if you were to run into issues with font usage, we'll wrap that up at the end and show you how we can deal with that. So with a typical presentation that I've put together here, I'd like to have a little bit more fun with this and I would lik...
e to add to you some rollovers and pop-ups here to be able to just add a little bit more interest to it. So what I've done is I've gone ahead and I've got my content placed here and it's all been placed on the grid structure, you can see all my copies here and in the grid and everything fits to the grid very nicely, but what I'd like to do is I'd like to be able to roll over these little images here and be able to have these little wings kind of pop up from the sides. So what I've done is I've created all this content just like what anything else and InDesign, if this was gonna be a static layout or a PDF or for print, I'm gonna go about creating the content in the exact same way. But because this is gonna be a presentation, what I want to do is I want to have a little bit more fun with this, so I'm going to go in and I'm going to call up my interactive content. So on the Window menu, we're going to go Interactive and we're going to call up our Buttons and Forms and this may be kind of an odd thing; buttons and forms, they seem like two completely different items but what we're gonna do is we're gonna turn certain things in the buttons so that we can make things happen based on just very simple click and have things show up. So what I have here is I have my content and these are my little wings that I've created and these wings are nothing more than just a container and then I text container and I group them all together just to make it easier for me to work with this so it just works as one unit. What I'd like to do is I'd like to go in and I would like to be able to say click on the blender and have this little wing show up on the side. So I'm actually going to put this over here and move this into the side here and move this into the side here and I'm gonna go into full-screen mode, so you can see, this is what it's going to look like in my presentation when I decide to click on either one of these. I want these to fly out and then when I click on it, I want it to fly back as well. So a couple things when I'm setting up a file like this, one of the things that I typically do with any type of advanced content like this is I usually go in and I usually put the content on a different layer and that way I'm not stumbling over this when I am working on the file and having things get in the way, so I'm going to create a new layer by going to my Layers panel and clicking on the new layer button and this is going to be my animation layer. So these are the items that are going to be on that layer. I'm going to grab my content and I'm going to select that content and I'm gonna grab that little crouton and slide it up to that layer, so that's on my animation layer so I can turn those on and turn those off so they don't get in the way. Now, the way buttons work is pretty simple. It's kind of like a light switch but we're gonna do a little bit of wiring in order to make this work. So we need to turn these things into buttons. So I'm gonna select one of my wings here and I want to turn this into a button which is just gonna be a little push-button thing and there's my first one I want to name this, and you want to name all these because as we get into a long list of buttons here, you're going to want to make sure that you have exactly what you're looking for named correctly not just pizza because this is a pizza as well and you're gonna see very quickly if you don't go in and be very specific about your naming, you could have a long list of items that can become confusing. So I'm gonna grab my blender facts and I'm gonna select that object, go on to the Button menu, choose the Type, it's going to be a button, I'm gonna name this and click Return, so I've got the content. So what I have here is I've got my buttons. Now, I don't want these showing up so one of the things I'm going to do is I'm going to hide these for now and not like turn off the layer when I create a button and by the way when you create a button, you'll see that it goes and creates a heavy dotted line around the file here, I'll zoom in really big so you can see it create a very heavy dotted line showing you that it's a button. If you're in normal mode here and you'll see with your outlines and your frame I just turned on, you see a little hand with a little button over that right there when you're working in normal mode where you see your text frames and also your margins. I'm in preview mode just to kind of clean it up a little bit. So with these items here, what I'm gonna do with these items is I'm going to turn to middle button, I'm gonna name them, but I am also going to go ahead and check the hidden until triggered because I don't want them to show up until I trigger, which is going to be clicking on the actual icon, actually triggers them to be revealed. So I'm gonna go in and I'm gonna select these and I'm gonna choose Hidden Until Triggered. Now, they don't hide in InDesign because then we wouldn't know they were there, they hide when we are working on our file or when we actually export our file as we go. So there's my buttons, my pizza facts, it is hidden until triggered. My blender facts, it's also hidden until trigger. Well what's the trigger? It's the button that we push that's gonna go ahead and say, "Okay, when somebody clicks this button, "what's going to happen?" So I'm going to turn my blender into a button and that's going to be my on and off switch here. So I'm gonna click on my blender and you can turn anything into a button, if you can select it at InDesign, it can become a button. So I'm gonna select my blender and I'm gonna turn that into a button by going into my buttons panel, choose a button right there. I hold this under icon. I don't want this hidden until triggered because if it's hidden, you won't see it, you won't know what to click on, so that's just gonna stay a normal button. I'm gonna click on my pizza. Again, turn this into a button and I'm going to go ahead and label this something very clearly, and there's my content, okay. So now I've got the basic wiring setup here. I push a button, this is what happens. So how I wire this up is I go to my blender. What would I like to happen when somebody clicks on this blender? Well, I can go ahead and set this up and so because my button is a... my blender is a button now, I can go and I can do a couple of things. Now here's the tricky part with what you're going to decide as an action that's going to happen with this. If I'm using something that's going to have a mouse and I can simply click on this or I can roll over, I can go ahead and have this show up. But maybe I'm working on a tablet. There is no rollover on a tablet so I have to make this conscious decision now about how this is going to work. So in this case, I'm going to say that this presentation is going to be on a screen or a video or a laptop or a computer that is going to be activated by a mouse. So I can click on things but I also have the ability to roll over something. If this were on a tablet, I would have to choose on click or on touch or release or tap so you tap on it and you let go because there is no rollover on a tablet. So I'm going to choose the action on release or tap which means when I let go of the mouse, or I tap something, so it kind of gives me that blend of both. If I am on a tablet and you tap it, it works or if you go ahead and click, that's what you get as well. If it's just on roll over and we're gonna show you both, if it's just on roll over, you roll your mouse, this good thing pops up and then comes off. So right now we're gonna do one release or tap, so it can go on a tablet or just a normal presentation. So, when I take this blender and I release my mouse or I tap with my finger, what's going to happen? Well, I need to apply an action to this button. So the action is I'm going to go in and I'm going to show or hide a button. Now, I'm going to choose Show or Hide the Button and this is my blender facts button that is hidden. I click on this, remember that this blender facts it's hidden until trigger. This is the trigger, clicking on this by releasing my mouse or tapping on this with my finger, it's gonna go in and it's going to show or hide the buttons. The X is next to each one of these buttons here and this is the reason why you clearly name each and every item exactly what it is. Here's my facts, here's my icon, so they don't get confused. What I want to do is I want to set the visibility state of this. So when I click or release on the blender icon, it's going to show or hide the forms, so what do I want to do? Well, I'm gonna go next to my blender facts and there's three different modes here. There is X which means it simply leaves it alone and it ignores it. There's the eyeball which says when I release, it's going to show this right here, so that's all that I want to have happen. All the X's just mean everything stays in the exact same way that it is and it doesn't get included in this action. Three different ones, X, which is leave it alone, don't touch anything. The eyeball which means show that one or the eyeball with the slash with means hide it. And we're gonna show you all of this. So blender icon, when I release my mouse or tap it, it's going to show or hide the form, it's gonna show this blender fact, this is what it's going to do. Awesome, okay, There it is. Now, how do we see how this works? Because before we get too far down this presentation here, I got to know that I'm doing this correctly before I go in and do my whole presentation and find out that you know I may have misinterpreted what one of these things meant or assumed it worked a certain way and it didn't. So I want to go in and I want to see how this actually works. So under the Window menu, under the Interactive portion here, I want to go and they want to call out my preview panel to see how this is going to work just to make absolutely sure. So I call up my preview panel and it shows up. Now, I have a textured background in here so this is really showing up in kind of a funky way here. I'm actually going to go and I'm going to take this and I'm going to just delete this for now, chop it out of there so that I can see this background a little bit better. I like the texture in there but the animation preview just doesn't work very well. So here's my page right here and I want to press play so that it's actually loaded and ready to go. Now if everything works okay, I should be able to go and hover over this item here and when I click, my little panel shows up. Awesome, that's exactly what I wanted to do. It's like okay, that's working right there. But do I want this up all the time or do I want it to go away? Well, I could have it go away if I simply click on the blender again and I could have that go away as well. So how do I set that up? Well, here. If I go back in to my blender here, I can have more than one action. So I could click on that blender and I could go ahead and have it release and then I could go ahead and I could go ahead and show another one where I could go and I could do another click on that too or I could go in and I could turn off my blender. So if I click once which is my first action, it shows it and if I click again, then it simply unshows it. X does not mean it goes away, X just means it ignores it completely. So the eyeball what the slash takes anything that is visible, and then goes ahead and makes it non-visible. A lot of people think the X is it shuts it off. Not in this case, the X just means it's not touched at all. So did I interpret this correctly? Well, let's check. So Window, Interactive, call up my preview here and I'm going to press play. I click on the blender, it shows up and what happens here, there it is, so unfortunately my actions are it shows it it hides it with that one click, so not what I really wanted. So here's what I'm gonna do, I can subtract that and I can hide that right there so I get my button right there. Now what I'd like to do is I'd like to go in and I would like to click on the pizza icon. We're gonna get rid of this because what's gonna happen here is kind of cool. I can either click on this button right here and have it go away if I'd like it to go away because once it shows up, then I can go ahead and click on it and have it disappear. So in this case if I'd like it to disappear here, I can take this button and on release or tap, I would like to show or hide a button and in this case by clicking on this, I would like it to hide itself. So if I go to the blender facts here, I'm gonna turn it on and I'm gonna turn it off which means when I click on this right here, it's gonna turn itself off. So that's one way of doing it here, the other way is clicking on the pizza and having that go away too. We're gonna show you both. So then I'm going to go to my preview here and calling up the preview is Shift, Command, Return which is a quick easy way to do it. So now if I click the play button, I click on my blender, it shows the blender facts and if I click on the blender facts flyout, I click on it, it disappears. So that worked, that's great. That's one method that I can use, it works really good. Now I'm going to jump over and do the same kind of thing with my pizza and what I'd like to do is by clicking on the pizza here, I would like to go ahead and have an action to show or hide the buttons and I would like to show my pizza facts but if for some reason I didn't send my blender facts panel away, I'd like to send that away. Instead of having to click on it there, I'm gonna set this up as a kind of a dual button. So when I click on the pizza, I would like the pizza facts to come and show up but I would also like the blender facts to be hidden. Whether they're there or not, I would like to hide it. Somebody may have clicked the blender first and brought up the blender facts, they may have clicked on the pizza first, don't know how that's gonna work but I can go in and I can do multiple things. So by clicking on the pizza icon, releasing the mouse or tamping on my pad, I can show the pizza facts and hide the blender facts, right there. Okay, let's give it a shot so Shift, Command, Return is gonna call up my preview, I press play. I click on my blender, there it is. I click on my pizza, oh my gosh, it now brings up my pizza facts, closes my blender facts right there. If I click back on my blender, oh, I see a little trick here, I need to shut off my pizza facts because you don't know how this is going to be called up. This is why we test everything, you can start to see how this goes. It goes pretty quick once you get into this process. It just takes a little bit of time to kind of wire your brain how this works. So I'm going to go back to my blender icon and my blender button. I'm going to go in and I'm going to click on the pizza facts. So I gonna do the slash in the eye to hide it whether or not it's showing, I still wanted to be hid and now we're good to go. Now we got my little panels flying out right here and I'm gonna go ahead and do Shift, Command and Return, call it up. Either one that I start, with click on the pizza, shows the pizza facts, click on the blender, click on the blender facts, click on the pizza, click on the blender, and I can click on that and have it go away. Pretty awesome. I forgot to make this one go away, so I'd have to click on this pizza facts and when I go in, I hide this button so if somebody clicks on this, it's going to hide the pizza facts and now I'm all set. Really, really simple basic pop-ups here. It's awesome, I absolutely love this kind of stuff and now we have it all set up here. Really quite simple. Just one more preview here to make sure it all works. Click on the blender, I could click on the side panel, click on the blender, I could click on the pizza, that goes away, I could click on the pizza, it goes away. Blender, pizza, whatever, awesome. That's what I want, really simple way to go ahead and do that. Turning it on, turning it off. It's fun, you should try it sometime. Now, what do with this file when all is said and done? Well, because this is basic animation here and not really animation in the sense of we think you know animating something, this is just simple clicks right here. I want to go when I want to export this so I can actually see how this works. So I'm going to go into the file menu, I'm going to export this like I have before and I'm going to choose my Adobe PDF for interactive, right here. I'm gonna call this my pop-up and we're gonna try and see how this works. I'm gonna save this. I'm gonna do page 7 because that's the one that we're working on here. And, I don't want any page transitions at all right there and what I want to make sure that everything is included here, single mode, full screen, okay, everything should be good. I'm gonna click Export, exports the file. We can go into full screen mode, there it is. And now, if I click on my blender, awesome, it pops up. If I click on my pizza, that hides right there. I can click on either one of these. I can click on the blender facts, click on the pizza, click on the pizza facts and it all works. Pretty sweet.
Class Materials
Bonus Materials with Purchase
Ratings and Reviews
Patricia Green
I've taken several Creative Live courses taught by Jason Hoppe. In fact, I would say he's my favorite Creative Live instructor. This course is just as successful as his other courses. I learned a lot about InDesign and presentations in general. I wish the tech was flawless in the video, but sometimes that stuff is unpredictable. He did present some solutions. Overall, I was very pleased with this class and will take more from him in the future. I highly recommend this class.
marianne
Jason Hoppe is a fabulous instructor. I have been designing for many years and I learned so much; from a time-saving way to make a grid to creating animated InDesign files that can be published online with automatic updates. Excellent, clear instructions and valuable methods for creating files. You will be so glad you ordered this class.
carlos Álvarez
So great, athough the instructor should have included icons and PNGs for the student to follow along the class easily and not just the InDesign templates. Notwithstanding, really useful tips, tricks and advices to boost your InDesign knwoledge. Thanks!
Student Work
Related Classes
Adobe InDesign