Build & Shoot: Bellows
Lesson 16 from: DIY Photography: Lens Attachments, Filters & Creative EffectsMike Hagen
Build & Shoot: Bellows
Lesson 16 from: DIY Photography: Lens Attachments, Filters & Creative EffectsMike Hagen
Lessons
Class Introduction
02:19 2Build & Shoot: Soft Filters
11:20 3Build & Shoot: Star Filters
14:56 4Build & Shoot: Ethereal Filters
21:53 5Build & Shoot: Sunglasses Filters
14:55 6Build & Shoot: Half Double Exposure Filters
12:04 7Build & Shoot: Heavy Stop ND Filters
18:14 8Build & Shoot: Tilt and Shift Lenses
09:19Build & Shoot: Bokeh Shapes
20:32 10Build & Shoot: Coffee Cup Sleeve Lens Hood
05:51 11Build & Shoot: Body Cap Pinhole
17:16 12Build & Shoot: Mirror Under Lens
05:17 13Build & Shoot: Reversible 50mm Lens Mount
17:04 14Build & Shoot: Free-Lensing
10:23 15Build & Shoot: Fisheye Lens
20:14 16Build & Shoot: Bellows
08:46 17Build & Shoot: Toilet Roll Macro Lens
05:23 18Build & Shoot: PVC Extension Tube
06:49 19Build & Shoot: Rail System
18:45 20Build & Shoot: Macro Flash Brackets
25:54 21Build & Shoot: Field Macro Light Box
15:47 22Build & Shoot: Chip Can Macro Diffuser
07:07 23Photo Review
10:45Lesson Info
Build & Shoot: Bellows
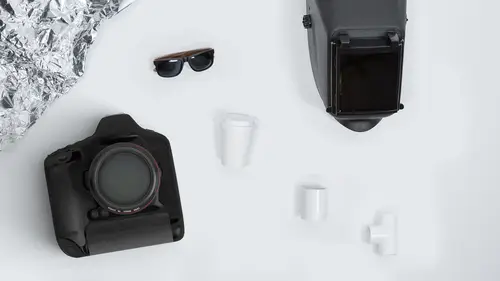
- [Instructor] We're getting into potty mouth now because I'm going to be talking about plungers for the toilet, and then in a little bit, I've got toilet paper roll tubes that we're going to do some macro work. All right, so I know you're looking at this like, really? Yeah, really. So here's the idea. I'm going to show you how to make a little bellows attachment so you can put your lens on this end and you can move it forward and backward for focus. And also you can kind of create some tilt and shift effect on your camera just like this. It's very simple to do. This I bought from my local hardware store. Let's make sure there's no logo on here. I'll just close that away. And it was like I think it was $7, seven bucks. The key is to get a plunger that is... What's the right term for this? Articulated, bellowed? I don't know. Whatever. The key is to get something like that. The diameter, you want the diameter to be at least big enough so you can kind of put a lens in one end and that le...
ns will fit. I'll show you how I did that in just a second. All right, so that's the thing that you buy from the store. Here are the components that I used to start constructing the lens. Would you like me to go like that? I'm getting you to move all around. All right, so you can see the first thing that I did was I chopped off the handle, okay? I just cut that off with a hacksaw. All right, now, the next thing that I did was, of course, I cut off the backside, right? So I cut that off. And this is just experimenting so, at one point, I had this other section on there and I just... I keep moving. Sorry, man. There. At one point, it was too long, so I cut this off and it made it a little bit shorter to work with the lens that I was working with. Okay, the next thing is this. This right here is a lens cap, and I bought that lens cap, again, I think I got it from Amazon. Remember earlier today I was telling you about the lens caps. I think it was like $1.50 or $2. Then I had to drill out the middle of the lens cap. And what did I do that with? I have these little hole drills or these holes saws. You don't have to use this, but I have a garage full of tools and I like to use them. So basically this is a hole saw, and you can use anything you want to basically drill that out. You can just use a drill with a smaller bit and just go womp, womp, womp, womp, womp around in a circle to drill up the middle of the body cap. So I just literally drilled it like that. So now you have to somehow get that attached to the bellows, and I used my favorite product which is super glue. And I just literally super glued the cap onto the end of the bellows. $7 bellows, $1.50 cap, I already had the drill, and then a little bit of super glue. I think the super glue cost me...I don't know a couple of bucks, maybe a buck. And now we're ready to mount the lens on there and to do some freelensing and macro work. So let's see. I'll just use this lens. This is an old manual lens that I have. This is my old 35-70. It's probably 20 years old. You just mount it right there on the lens cap just like that. And now I can push that right up against the camera and set focus and move it all around. So let's go shoot some photos. And I think for this one we'll do a live view so you all can see what's happening in real time. Turn this towards the studio audience so you all can see how I'm going to mount this. Well, there isn't really any mount. Basically, it's just pushing the thing up against it. And then moving it around like that. A couple of things. Remember the aperture thing? Someone is asking about the aperture. How do you control the aperture? You still have to control the aperture manually so make sure the lens that you're doing this with you're able to control that. I'm going to, just for the sake of ease and brightness, I'm going to choose f/5.6. I'm going to set my zoom at about 50 as just a guess, and then I'm going to set my focus more towards infinity. And we'll just see how this works out. It's always a gamble to see what your images turn out to be. All right. Turn on live view with the camera. I'm at ISO... Where am I at? ISO 640. That's fine. Okay, we'll see how this works. All right, I'm going to have to decrease my shutter...actually, increase my shutter speed. There we go. We're starting to get something happening. Let's loosen this up a little bit. Yeah, I should really be higher than this. Let me try something here. I'm going to take a rose out and put it right on the table so I can get a little bit better view of that. Just go like this. And reduce the tripod height. Okay, and we're getting in closer, a little lower. Most of the time these types of things you're just handholding, right? Because it's just hard to manage all this stuff. So handholding makes it a lot easier. All right, here we go. Bring in that sucker. See the bellows? The bellows help me focus. Pull this back a little bit. I actually have to go closer. And maybe go more towards 70. Okay, it has all combined together. Kapow! Yeah, I know, I'm live viewing. I'm not Lightroom-ing. But you guys can see the photo. How does it look? Yeah. I don't think I need to actually take the photo into Lightroom, but you guys can see the effect. So I can move... if I was handholding this, I can move the camera closer. I can move it farther away. I'm changing the angle and getting differential focus, so this side is in focus, that side is in focus. The downside to doing this, though, is you do sometimes get light leaks. And so I was thinking through this. I was actually thinking, "Well is there a way I could actually mount this to the camera?" And the answer is yes. I would find a way. Maybe I'd like glue on a card like a heavy duty stiff card on the back. I'd super glue a card, drill a hole in that card, and then just mount the body cap on this end. And then you could just mount it right on the camera. And now it's sitting there and I can just physically hold the camera in one hand and not worry about this thing falling off or getting light leaks from the other end. So yeah that's pretty cool. Inexpensive. Another way to do macro. Right on? - [Woman] When you were manually changing the focus and the aperture for that one, you mentioned focusing towards infinity. - Yes. - Can you explain that? - Yes, so every lens has a focus range from very close, let's say, a half a foot, in this case, that's a half a meter, all the way to very far away which is infinity. So I just had set the lens towards infinity because, back to my pinhole example earlier, when the pinhole's farther away, you get a little bit more macro effect. And so now that this lens is farther away from the camera, I actually have to be focusing farther away for it to focus on the sensor plane. So most of these special macro tools that I'm showing you today, you have to keep that lens focused out towards the infinity mark and that's the sideways 8. Great question.
Class Materials
Bonus Materials with Purchase
Ratings and Reviews
a Creativelive Student
It's a fun course, with a lot of interesting ideas presented in a way to help spark the creative juices in anyone wanting to branch out and experiment with different ideas. Mike's presentation style is fun and easygoing - perfect for this type of discussion. If you're not afraid to color outside the lines and see where the road takes you, this is a very enjoyable bit of inspiration.
user-ee46bd
Love it!! Very creative and full of inspiration. Mike Hagen explains the different effects in a great way, he is precise yet easy-going so he makes learning fun. I recommend this class to all who wants to take their creative photography to the next level without spending money on expensive accessories.
Fotomaker
Mike has an easy-going, pleasant & fun personality. He explains things clearly. Rolls with whatever happens. And, he's very good about answering audience questions in an understandable, positively reinforcing and non-judgemental way (which can be rare for some established pro photographers...).