Build & Shoot: Body Cap Pinhole
Lesson 11 from: DIY Photography: Lens Attachments, Filters & Creative EffectsMike Hagen
Build & Shoot: Body Cap Pinhole
Lesson 11 from: DIY Photography: Lens Attachments, Filters & Creative EffectsMike Hagen
Lessons
Class Introduction
02:19 2Build & Shoot: Soft Filters
11:20 3Build & Shoot: Star Filters
14:56 4Build & Shoot: Ethereal Filters
21:53 5Build & Shoot: Sunglasses Filters
14:55 6Build & Shoot: Half Double Exposure Filters
12:04 7Build & Shoot: Heavy Stop ND Filters
18:14 8Build & Shoot: Tilt and Shift Lenses
09:19Build & Shoot: Bokeh Shapes
20:32 10Build & Shoot: Coffee Cup Sleeve Lens Hood
05:51 11Build & Shoot: Body Cap Pinhole
17:16 12Build & Shoot: Mirror Under Lens
05:17 13Build & Shoot: Reversible 50mm Lens Mount
17:04 14Build & Shoot: Free-Lensing
10:23 15Build & Shoot: Fisheye Lens
20:14 16Build & Shoot: Bellows
08:46 17Build & Shoot: Toilet Roll Macro Lens
05:23 18Build & Shoot: PVC Extension Tube
06:49 19Build & Shoot: Rail System
18:45 20Build & Shoot: Macro Flash Brackets
25:54 21Build & Shoot: Field Macro Light Box
15:47 22Build & Shoot: Chip Can Macro Diffuser
07:07 23Photo Review
10:45Lesson Info
Build & Shoot: Body Cap Pinhole
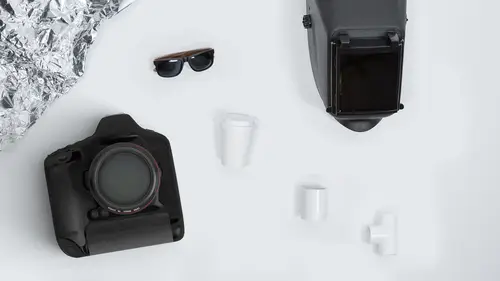
- [Mike] Let me show you the next project, and the next project is way fun. I love pinhole photography. Let me make this work for you guys, so you can see it. Pinhole photography has a long and storied history. Pinhole photography is really where photography kind of started, you know, and it's very simple. Basically, what a pinhole camera is, is a box, literally, it can be a cardboard box, and you take some film and put it on the back of that box, and then you poke a little hole into the front of the box, and the camera basically register... or the camera, the box basically registers what's in front of the pinhole. We've been doing pinhole photography for 100-plus years. And it's a lot of fun. Now, it's not going to render sharp, crystal clear photographs, it's going to render kind of an old-timey look to the image. If we could go to the presentation notes. I just want to show a photo. And if you're far away from the scene, looking at it like the studio audience here, it all looks fine...
. It actually looks like just a normal photograph. But as you come in closer to the image, you'll notice there's...it's not exactly sharp, it's a little bit blurry. We're going to take a few photos here to illustrate exactly what that looks like. But pinhole photography... I actually created a six-frame panorama with this pinhole. All this is, is a body cap for the camera. I used a little bit of aluminum from a pop can, and then I poked a hole in it with a little pin, and I'll show that whole thing here in just a second. I literally poked a hole in the aluminum can and now I photograph through that tiny little hole. And that's all you do. You literally replace the lens on your camera with the body cap and now you have a pinhole camera. It's way fun and I'm going to shoot a portrait here in just a minute and show you how we do a studio portrait with a pinhole lens. Cool? So first of all, let me show you how we build it and then we'll take a couple pictures. So one of the best buys on the internet that I found for do-it-yourself-photographers, you can go onto, like, Amazon and you buy body caps and lens caps. Okay? And I bought a whole set of these. I bought like eight sets for this course that I'm teaching, because they're extremely useful. You can use them for all sorts of purposes. You can mount lenses on these things, you can mount other stuff to the camera, you know, through this, and I'll show you in the third and fourth segments how we do that. But the general idea is, is that you want to drill a hole through the body cap. In fact, I'll show you this one. Am I holding this at an okay place? So you can see here, I drilled a hole through the body cap using...oh, I would say like a three-eighths inch drill bit or maybe a half-inch diameter drill bit. Then, once I drill that hole, the next step is to get a can of pop, okay, drink it. Then use some scissors, you can use any scissors that you want because aluminum is very soft. So your steel scissors will work. And, basically, what you do is you just cut out a little square of aluminum. Like that. You don't have to be too precise about it. All right, so there's the aluminum. Then you grab a pin, a little pin. I don't know, I'll set that there so the camera can see it. Little pin. Now, this is the important part. The important part is that your hole is tiny, tiny, tiny. And I mean it. Tiny. Even smaller. It has to be so dinky. So what you want to do is you want to not actually push all the way through. But you just kind of want to move it around like this and you take the pin away like... No, it hasn't gone through yet. Try to get back to the exact same spot. Go through. No, it hasn't poked through yet. I'm just being really careful. Why? Why does it have to be small? Well, the smaller the hole is, the sharper the final image will be. Okay? If you make a mistake... Like this one, because I'm actually not going to use this one, this one, I will make it too big on purpose. So if your pin goes actually all the way through like that... I'll just show that difference in size here between these two. Can the camera... Can you make that out? Yeah. So the one on this side, that hole is way too big. The one on this side is just about...is perfect. And it's hard to see, I know. So don't poke the pin all the way through. Basically just get the tip of the pin so that just barely pierces both sides of the aluminum foil and that will give you a much better image. So just to be clear, this is the good one right there. And some of you, I can see people writing in, maybe saying, "What about a Dremel?" A Dremel is this little hand tool that has these little tiny, tiny drill bits. Even the smallest drill bit on a Dremel is too big for this, so you got to use the tip of a pin. So what did I do next? Well, now, I basically just take that hole that I made, I put it here on my body cap, and then I just tape it on there. I tape it on with black tape. So here we go. And to do this, I want it centered. So if you can get your hole centered, that helps you a lot. Then you just kind of line-of-sight it. I'll look up here into the light, so I can see if it's centered, and it is. Okay. So there we go. Cool. Now let's take a picture or two. In fact, to do this... I'll just show you live view first, I'll plug in my live view camera, and then we're going to do a real quick studio portrait with pinhole photography. Okay. Why don't you go ahead and stand over here? And as I'm building this photograph, what I want you to notice is how dark it is. I mean, it is... This really restricts massive amounts of light. And so if you're trying to look through the camera in real-time, you're going to have to give your eye some period of time to get used to what it's seeing. Okay. Let's see here. Oh, yeah, live view is not even showing because it's so dark. I'm sometimes able to use live view out in the real world. Let's see. Let's increase my ISO up to 12,000. Okay. So live view, that isn't going to work for us. It's just not showing enough. Sometimes I can see it in the real world with live view. Right here, notice I'm covering this up to try and see. All I can see is just a tiny little bit of the lights behind her. So I'm just going to be guessing for this photo. And that's part of the fun of this. Oh, no wonder. I came undone. Sorry, guys. I'll do better next time, I promise. Okay. We'll go back to this camera here, and for this, I'm actually going to end up pulling the holiday lights away just to get a shot. My first test shot there, I'm not going to worry about it. I'll turn off the flash and I'm going to be... I'm just in aperture priority mode or just auto mode. That's fine. Any type of auto mode on the camera will work. I closed down the eyepiece here in the back to block any light coming in from the back of the camera, and you don't have to do anything, I'm just going to take the shot. Okay. That come through? Let's see. No camera detected. I keep stepping on cables. Sorry about that. Okay. Come on, camera. Connect. Turn it off. Turn it on. Let's go. Let's do this. There we go. We're connected. Okay. Here we go. Pinhole photograph number one. Let's see what happens. Okay. So we got a shot. We got an image. It's a starting point. And the thing with pinhole photography is... Oh, I'm going actually end up using that. Thing with pinhole photography is you never really know what you're going to get because it's hard to compose, and that's part of the joy, part of the fun of pinhole photography. So let's try this again. So we can see that photo, it's a little bit dark, okay, a little bit dark overall. So I'm just going to actually switch over to manual mode and do this thing manually. And really, the only thing we have to control now is ISO and shutter speed. So I'm going to... My ISO is currently at 1,600. I'm going to actually increase my ISO to 3,200 and I'm going to set my shutter speed for about 1 second. All right, ready, set, go. Let's see how that came out. Okay, cool. Now, you can see how sharp or how unsharp it is, and it's basically going to be that same amount of blurriness no matter where she stands. So I want to do another shot. Go ahead move forward. Yeah, right there. And we'll take this picture again. Okay. There we go. And then one more. I'm going to have you kind of move even farther back. Yeah, right there is fine. So pinhole photography is kind of independent of distance because the aperture is so small, you don't have to worry about focusing. In fact, you can't focus. It's impossible to focus. All the light's doing is coming through this tiny little hole. All right, so let me show a studio photo. I'm just going to do a quick studio shot. I'm going to get rid of this. - [Woman 1] Does it have to be aluminum? Like does anything that's... Is the color important, like if you used plastic that was the same density? - Good. The goal here is that you want the hole material, the material that you're putting the hole through, to be as thin as possible. So like you could use some other metal, you could use some other metal, but you really want aluminum. I think the best that I've had experience with is the thin aluminum can. You don't want to do thicker metal. Otherwise, you don't really get a really tiny hole. The hole actually becomes kind of elongated, almost like a tube. And it sounds funny, but light will actually bounce around inside of that thicker hole and give you all this diffraction and aberration. So I would highly recommend aluminum. You could also do aluminum foil. The problem that I have had with aluminum foil is it's just not quite durable enough. Right? It just basically falls apart after using it a few times. So excellent question, by the way. Okay. So I'm just making this up here. Just, I'm at a 64th power on this remote flash. I'm guessing I'm going to have to bump up the power. I'm just going to go to half power. Let's just see here, half power. And now because the light will be coming from my flash, I don't really care so much about the ambient exposure. Like, I don't care so much about the light coming in from the outside. So I'm going to set my shutter speed pretty high. I'm going to set my shutter speed up to, like, I don't know, a 60th of a second. We'll just see how that works. Again, just totally guessing and experimenting here. All righty, make sure I'm connected before this works. Yep, we are. And here we go. Well, I can't see anything. What am I doing? All right, one, two, three. Let's just see how that turned out. Okay. So right away, we can see we got it registered just a little bit. I was at half power on the flash, wasn't quite enough. You think? Yeah. So what's my solution? Well, my solution is more ISO. That's really all I've got to work with. I can add a little bit more flash, and I'll do that, but I'm really going to increase the ISO. I'm going to go to ISO 12,800, and I think I need to come down a little bit of the composition. All right, here we go, one, two, three. Let's see how that works. Oh, cool. It's coming through. Now I'm going to go to full power on the flash, and for this, I'm going to have you take like three inches closer. Yep, right on. All right, cool. Nice. I keep...habit looking right in there. I can't see anything. Ready? Sweet. It's out of focus, it's blurry, it's gritty, it's 12,800 ISO. But it is so much fun doing pinhole portrait photography. I think that's pretty cool. And, you know, it's a different look. It's a totally different look to your photography. I love doing this type of thing out in the field, I love to... In fact, everywhere I travel in the world, I just take this lens cap with me. It fits in my camera bag. There's another reason to use the aluminum, that won't bend and get all munged up over time, whereas, like, the aluminum foil will. So this is fairly durable and I literally just throw this in my camera bag just to try something different as I travel around the world. Makes for fun Instagram stuff, too, you know. So right on. Thank you. That was good. - [Woman 2] Yeah. - Yeah. Pinhole portrait photography. Oh, hey, one more thing I wanted to say about this. And this is kind of techy, so all the techy people out there will actually enjoy this. Pinhole photography is highly dependent on the sensor size that you have. So this is a full-frame camera, and, therefore, I get a decent field of view. When I'm using a pinhole lens body cap like this, I end up being about a 50-millimeter equivalent focal length, so about 50. If I shot the same lens cap on a DX body, you know, like an APS-C sensor, this is like a Canon Rebel or like a Nikon D3400 or D5600, it would be more telephoto. It'd be more like a 75-millimeter lens. And so for the people listening who are like, "I want to do pinhole photography, but I want to get it really wide-angle," what you have to do, and this takes a little bit of engineering, which I'm okay with, but what you have to do is you actually have to somehow get that pinhole set back farther into the cap. And so maybe what you can do is you can find like a little plastic cylinder, like maybe a centimeter-tall cylinder, glue that to the bottom of the cap, and then put the pinhole at the back of that. So what's happening is the farther back the pinhole goes, the wider the angle of view. The farther forward the pinhole goes, the more telephoto the view. So you could like do pinhole telephoto photography. And I actually tried this on my daughter. I had her running around the yard on a bright sunny day, kicking her soccer ball around. I set my ISO to sky-high, on this other camera I have it will go up to, like, one million. So I set my ISO, like, say, 100,000, just pick a super-high number, and I was shooting sports photography of my daughter with the pinhole lens. Fun stuff. Cool to try. All right, so that's pinhole.
Class Materials
Bonus Materials with Purchase
Ratings and Reviews
a Creativelive Student
It's a fun course, with a lot of interesting ideas presented in a way to help spark the creative juices in anyone wanting to branch out and experiment with different ideas. Mike's presentation style is fun and easygoing - perfect for this type of discussion. If you're not afraid to color outside the lines and see where the road takes you, this is a very enjoyable bit of inspiration.
user-ee46bd
Love it!! Very creative and full of inspiration. Mike Hagen explains the different effects in a great way, he is precise yet easy-going so he makes learning fun. I recommend this class to all who wants to take their creative photography to the next level without spending money on expensive accessories.
Fotomaker
Mike has an easy-going, pleasant & fun personality. He explains things clearly. Rolls with whatever happens. And, he's very good about answering audience questions in an understandable, positively reinforcing and non-judgemental way (which can be rare for some established pro photographers...).