Build & Shoot: Macro Flash Brackets
Lesson 20 from: DIY Photography: Lens Attachments, Filters & Creative EffectsMike Hagen
Build & Shoot: Macro Flash Brackets
Lesson 20 from: DIY Photography: Lens Attachments, Filters & Creative EffectsMike Hagen
Lesson Info
20. Build & Shoot: Macro Flash Brackets
Lessons
Class Introduction
02:19 2Build & Shoot: Soft Filters
11:20 3Build & Shoot: Star Filters
14:56 4Build & Shoot: Ethereal Filters
21:53 5Build & Shoot: Sunglasses Filters
14:55 6Build & Shoot: Half Double Exposure Filters
12:04 7Build & Shoot: Heavy Stop ND Filters
18:14 8Build & Shoot: Tilt and Shift Lenses
09:19Build & Shoot: Bokeh Shapes
20:32 10Build & Shoot: Coffee Cup Sleeve Lens Hood
05:51 11Build & Shoot: Body Cap Pinhole
17:16 12Build & Shoot: Mirror Under Lens
05:17 13Build & Shoot: Reversible 50mm Lens Mount
17:04 14Build & Shoot: Free-Lensing
10:23 15Build & Shoot: Fisheye Lens
20:14 16Build & Shoot: Bellows
08:46 17Build & Shoot: Toilet Roll Macro Lens
05:23 18Build & Shoot: PVC Extension Tube
06:49 19Build & Shoot: Rail System
18:45 20Build & Shoot: Macro Flash Brackets
25:54 21Build & Shoot: Field Macro Light Box
15:47 22Build & Shoot: Chip Can Macro Diffuser
07:07 23Photo Review
10:45Lesson Info
Build & Shoot: Macro Flash Brackets
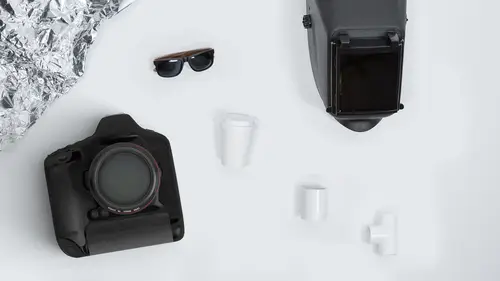
- [Mike] This one is a handful. The next one I'm going to show you, it requires a lot of dexterity. So, I'm going to head back over the table, and talk about how this system works. And this is pretty fun. This is a really fun construction project for those of you who enjoy screws, nuts and bolts, and all that good stuff. All righty, this is what we're going to build. This is a macro flash bracket, a macro flash bracket. The goal here is, so that you can mount your camera on this little bracket, and then you'll have these little arms to swing around, and position your flashes. And so, real quickly, just so you get a preview of what this is going to look like. I'll just show you, you basically mount your camera on here, and then. Where is one of my flashes? Here we go, got that. Then, you basically mount a flash onto that. So, you put a flash here and then, you put another flash over there. And I'll pick this up, so the cameras can see it a little bit better. Cool. So, that's the macro f...
lash bracket. And I'll go through the nitty-gritty after I finish showing it off, go through each step. It's a piece of art, isn't it? Very inexpensive. Let me talk through the construction of this. Would it be better for you if I came closer? Or you're good where you're at? Okay, cool. So, let me talk it through, piece by piece, show you how we build it, and then we'll actually take some photographs with it as well. And, by the way, this is all laid out in our build kit, our instruction kit. So, what I have here, I've got some ball heads, these mini ball heads. So, I bought two of these mini ball heads. I bought them on Amazon, and I paid I think, six bucks a piece for the ball heads. Make sure you get ball heads that are all metal, don't get plastic ball heads. You definitely want the metal ones, because they're going to have to hold up a little bit of weight. They're basically going to have to hold up a big flash. And then in a little while, I'm goin show you how you put a little soft boxes on these as well. So, we need two ball heads. Next is, we need these brackets, these metal brackets, these galvanized brackets. This part here, is the Simpson Strong-Tie. Simpson Strong-Tie, it's a company that makes this stuff, it's for the construction industry and this is the 88L. So, the Simpson Strong-Tie 88L. And I think this one cost me, I'm going to say three bucks, maybe $3.50, something around that. These angles come in various sizes. There's a real short one, this one, and then an even bigger one. I found this one to work well. So, if you don't have a Simpson Strong-Tie 88L at your store, just get the one that's about eight inches on the side. So, about eight inches. So, that's the first thing. Then the next, also, Simpson Strong-Ties. You need to get a couple of these little arms and you can see exactly how I mounted them. I mounted them so that they can pivot in that hole. So, these are also Simpson Strong-Ties, and this is the LSTA9, the LSTA9. And these were like a buck a piece. So, you need one bracket here, and you need two of these buggers, just like that. Whatever you decide to use, if it approximates this look overall, it's going to be fine. It's going to be just fine. So, then the next thing, and I didn't add this on here, but you can see it conceptually. See, the camera, the way that I have it set up, the camera is going to be mounted horizontally. But this, this little angled bracket, I thought, "Well, maybe you can mount the camera vertically, as well. " So, I just put another screw through this hole here, and now you can move the camera. And you can shoot vertical orientation macro shots, or mount it down here, and you can do horizontal orientation macro shots. So, getting another bracket like this, I think this is also Simpson, is it? There's no label on. Oh, yeah, it is, the Simpson Strong-Tie A66. And that's for the vertical mount for your camera. Next, we have to get the whole thing to mount together. So, you just need to get some bolts, and some screws, and some nuts. So, basically some bolts, and some nuts, and some washers. The size doesn't really matter, honestly, as long as you can get it so it all screws together. I used washers on the top side, and then also washers on the bottom side. And the reason why is because that then allows me to rotate this around, while still having friction. So, it doesn't like flop forward, or flop backwards. So, get some washers for the top and bottom, and then also what you might consider, is getting a lock washer for the top nut. A lock washer will prevent that top nut from unscrewing over time. So, let me summarize the nut here. I got a standard nut, I got a washer on the bottom, I got a single washer on the top, I got a lock washer, and then the nut. So, you're going to need two of those set up like this. And I'm just using the holes that they provided, I didn't actually have to drill any more holes. Let's talk about how the ball head attaches. So, the ball head here, I just basically, you can see, I just found the appropriate three-eighths inch nut, I put a couple of washers on the base there, and mounted that right on to the Simpson Strong-Tie LSTA9. And then, I did exactly the same thing for the other side. So, next, we have to figure out how are we going to mount the camera to the plate. And there's a million ways to do this. The very simplest way would just be to get a quarter by 20-inch screw, put it on there, and then screw it right onto the bottom of the camera. Well, I use these plates. The plates that I use for most of my photography, I use the Arca-Swiss Standard. That's just an industry standard in the photography world, Arca-Swiss. So, my tripods that I've been using all day, those are all Arca-Swiss Standard. So I can just snap basically any Arca-Swiss plate onto my tripod ball head, or unto this. Well, this specific little doohickey is made by a company called Peak Design, and it's their Capture Clip System, it's Arca-Swiss Standard. And so, I just had an extra one of these laying around. It's designed actually to clip onto my belt, so I can actually mount my camera to my belt, click. Well, I thought, "Hey, how cool would it be just to mount it on this?" So, there's a little hole in the bottom, a little screw mount, so I just screwed on a quarter inch screw. And now, I can move my camera in and out of that very simply and then it locks. It basically locks with this screw there. And now, I can actually pick up the whole entire macro kit like that, and it's very stable. It isn't going to go anywhere. Cool, huh? Pretty neat. So now, let me simplify the views, so everyone can see what I'm doing. Now, we're going to mount our flashes. So, how do we do that? Well, you can see these little ball heads, they have a quarter by 20 threaded screw on there, and when you buy your flashes, they usually come with these little flash feet. And in the Nikon world, it's the AS-20, the AS-22, the AS-23. But you can find these anywhere, not anywhere. But you can find them on the internet, just about any any camera store. And so, I'm just going to screw the base of the flash foot onto the ball head. Awesome. Screw that on there and I'll screw it on the other side. Same thing. Cool. And now, any of my flashes that I have, I'm just going to mount them here. And you'll notice I don't have wires going to my camera at this point. Most flashes these days will work in a wireless mode, and that's what I'm going to do today, is I'm just going to trigger them wirelessly using the Nikon wireless system. Or you could just trigger them manually, just with like a manual of slave. And I'll show you how I do that in just a minute. So, let me go grab another flash, actually, another couple of flashes. They're in my bag over here, I forgot to grab them. Yep, there's one, that'll work. And my third one is up there in the Pro Photo Box. Let me go grab that. So I've got an SB910. I've got an SB900 here. And then, this one that'll be on top of the camera, that one is an SB5000. And you don't have to have these higher end flashes. You can do this with very inexpensive flashes. I taught another flash class for CreativeLive, and I was showing how you can get these Amazon Flashes for like $27.99, 27 bucks, 28 bucks, and they'll work just fine for this set up. Okay, I keep walking around because I keep forgetting to grab stuff. Let me grab my macro kit, my macro camera. There we go. So, I'm just going to mount this onto here, onto my little peek design capture plate. Oh, you know what? I've got the wrong plate on this camera. How can I quickly do this in a way that doesn't interrupt flow? I'll tell you what, I'm actually going to swap this out, because I need to do it with this. I'm going to get my Allen wrench. Bear with me. Never go anywhere without an Allen wrench. I'll just show you this other clip here, it unattaches from my arms, from my shoulder strap, and I'm just going to screw that onto here, and now, this'll actually work on that capture clip system. But again, it's not so important that you use the capture clip. Just find some way with a quick release that makes it easy to move your camera forward and backward or to insert the camera into the clip mount. Okay, there we go. Now, we're back in action. Cool. Okay, now, I'm going to set up the flashes and this flash, this one here, is actually going to be the trigger for these guys. So this one, I'm going to do this old school. So there isn't a whole lot of technology that you have to worry about. I'm going to set up these little flashes, these remotes, so that they will trigger whenever they see a pulse of light from the big flash, okay? And so, that means that these are just going to be in standard slave mode. And so, we go to Menu, and go here in this flash. It's just going to be in, come on, find it, wireless mode. In the Nikon world it's called SU4. So, SU4 mode, SU4 remote, and that basically puts the flash into manual flash mode. The same one over here, it's already set up that way. This is set up for SU4 mode. And now, my big flash here, I need to set that one up so it's just going to be manual as well. And so, this one's just going to send out a pulse of light, and it would if the batteries worked. Oh, hey, there's no batteries in this one. How about I go get some? Too many moving parts. - [Woman] These are all fabulous teaching moments. - Oh, yeah. The real world with Mike Keegan. Let's do a reality TV show, Mike's Real World. All right, there we go. Hey, we got power. And now, I just am going to set the mode on this for manual mode. And the only purpose is so that triggers these other lights. Let's just do a quick check. Sure enough, they both fired. We're in business. Okay, now, let's take a picture. I'm not going to do live view on this one. Instead, I'm just going to take pictures so you guys can see. Let me point this at the camera and check this out. I just want to show, I'm actually holding the whole thing with one hand on the camera body. So, it's actually fairly strong. The downside of this is it's not so stiff. Maybe that's the right word. So, all this stuff is kind of moving around. But that's okay. I think that's going to end up being okay. And I can move these arms forward and backward as necessary. And when you're working in the field, this is actually a set up, you can set it on the ground and then adjust things while you're on the ground as well. So, let's go take a picture or two and see how it works. I'm just going to double check that everything is connected still to Lightroom and it is, fantastic. All right, I like seashells by the seashore. So, let's go photograph that. Everything is currently similar as to the last shot I took, so I know that the lighting is basically going to be from these flashes. So, I don't need a really long shutter speed. Rather, I need something more like a sixteenth of a second or a hundredth of a second because I'm hand-holding. I just don't want everything to be shaky and soft. So, let's try this out, get in nice and close. Oh, man, that's really close. That might be too close. I might have to go to a different type of extension tube. All right, let's see what we got. Did I blow it out? What do you think, good exposure? Yes, so very, very bright photo. All right, so why is that? Well, my aperture is at f5.6, so I'm going to reduce my aperture, going to go to f8. Let's check my ISO, my ISO is 800, so I'm going to bring that down. I'll bring it down to 200. My power, I'm set for 132nd power and 164th power. I'm okay with that. Let's see if those adjustments that I made, lower ISO, smaller aperture, let's see if those impact the photo. And here we go, one, two, three, and a half. Okay, we're getting closer. Still a little bright, right? Still a little hot. So, my trigger flash, I actually don't want to contribute really to any of the light, so I'm going to reduce the power on my trigger flash. So, I'm just going to rotate that down to like 1/128th power, so that reduces some light from there. I'm also going to reduce power here just by a little bit, put a 64th, and we'll call that good. Try that again. Cool. Yeah, that's better. It's still a little bright. Bring my ISO down to 100. So, now that we're so close to the subject, the lights, the flashes don't have to work that hard. And so, you notice I'm really bringing the power down on my flashes, and I'm bringing down the ISO, because everything's literally inches away. So, I'm actually going to reduce the power one more time on each of these flashes. I'll go to 128th power on that one, and I'll keep it as 64th on that one. Okay, so where am I at? I'm at ISO 100, I'm at a hundredth of a second, I'm at 128th power, and 164th power. And I'm at f/8. And just to keep things consistent, I'll go back to the shell, and take that shot, and then we'll start shooting a few other things, a flower. And the way I'm focusing is I'm actually just moving my body forward and backward. I'm not actually focusing with the focus system, or with the lens. Okay, cool. Nice and close. Let's do a flower shot here, just to keep things interesting. We'll do that one. Oh, and as I'm looking at this, let's see what's the best way to show it? Maybe if I set this on the ground. I'll just set this on the ground so you can see it. And let me get a little ducky. We got to photograph the ducky today. All right, so there's a ducky. So, really, what I want to do is I want to set this up in a way that these lights illuminate the ducky, or the thing, right? So, I have to set the arms appropriately. So, I might actually have to move this arm back, and then change the angle in a little bit with the ball head. There we go. See that? That's what I'm talking about. I was kidding. I said you shouldn't name your cameras, shouldn't call them Larry and Samantha, but I still talk to them like they're my buds. "Good job." "Way to go." "Looking good." No. She said, "So you're not actually talking to the model you're just talking to the ether." Yeah, you're exactly right. All right, here we go. And this is actually what you'll look like when you're doing field photography. Wear your knee pads, wear your waterproof pants, look for the little miniature ducks out there in the field. This is for my friend, Jamie. Thanks, Jamie. You're awesome. Oh, yeah, look at that duck. Duck face. Fun stuff. So, that's using just these little flashes, it's using the big flash as the trigger, and this is what I would call my field macro photography, or field flash macro photography arm kit. There's a bunch of names for these. But you can buy commercial models of these, you can buy them from companies that manufacture Macro Kit, and it's very expensive. They can be hundreds and hundreds of dollars. So here, for just a few bucks, you can see, we're approximating the usefulness. So, cool, man. Questions. - We have a couple of comments come in PhotoMaker, this is very conceptual. Very much enjoying watching you make these. So, one of them was, could you make this flash system, this is from James, so that it goes on a tripod? - Yeah. Great question, James. Let me pick this up. Try not to break anything. Basically, all you need to do is figure out a way to mount a plate onto the bottom of this. And that's very simple to do. You basically just get an Arca-Swiss plate, or a Bogen Manfrotto plate that works with your Ball Head, and basically, put the tripod plate screw through the base of this, and then put a nut on the top, and you're good to go. Now, the downside of that is that, the plate you may have to offset it, so that the camera can actually mount in a separate hole. So they may not be perfectly aligned on the tripod head, but I actually thought through that ahead of time thinking. Yeah, I should do that for the class, but more work, I ran out of time, I had to be here in Seattle. - All right. Well, great answer. This question had come in also from PhotoMaker, who said, "Is it ever an issue that the brackets are silver, because they may cause flare from the flashes?" And then, two, "Does it matter if we use different brand flashes if we have miscellaneous ones from over the years?" - Good. Both questions are excellent. Sure, the silver on the mounting stuff, I don't think it's going to be that big a deal because it's behind the lens. However, if you use a shorter extension tube, then, yeah, they very well could reflect stuff back. So, let's see. What are our solutions? Well, you can use spray paint if you wanted to. That'll probably wear off over time. Maybe what you just use is black Gaffer Tape, it's kind of a matte tape. I think I would do that. I just put black tape there on the top. The downside is it might be hard to move the thing around. Okay, I going to stop talking because I can keep talking on that one for a while. The second half of the question? - Does it matter if we have different brand flashes? - Not at all. In fact, I have a ton of flashes. It's kind of my bag. It's one of the things that I do. I have lots of flashes from lots of different manufacturers, and so you can use any flash, anything like an Amazon Basics Flash for 30 bucks. The Yongnuo flashes. I know Amazon. I'm sorry. Adorama and B&H both have house brand flashes, they work great, and I have flashes from the 1980s, the 1990s, the 2000s. As long as I can get them to all speak the same language, whatever language that might be, I'm good to go. So, to his point, one thing I might suggest is to get the really inexpensive Radio Triggers. You can get these little Radio Triggers where the flashes don't even need to be connected by wires and they, regardless of the flash product, it will speak the same language as your base Radio Trigger. - All right. One more comment from Bruce, who had asked, can you use angle iron for the swivel arms? And I'm not sure what angle iron is. - I'm with you, Bruce. My Ironworkers, you're all out there with me. So, angle iron, great. You can use anything that you want, as long as it's stiff enough and strong enough to hold up the whole system. So, why didn't I use angle iron? Well, because it's big and heavy. I've been standing here answering this question for what, two minutes? My left arm is about to fall off. It hurts. With all the flash, the camera, the lens, all of the stuff, this thing here probably weighs 10 pounds, maybe 12 pounds. So now, if you use angle iron, you're going to add another pound and a half probably to the whole get up. So, I don't know that I'd use angle iron. Plus, it's hard to work with. You have to drill holes in it with a drill press. It's not an easy thing to manipulate or work with. Oh, I mis-focused on the duck, you guys. I'm focused on the lips. I can't let it go by. I can't do it. I have to get a sharp focus duck photo, l have to do it. - But that's great because producer, Jamie said she really wants the photo, so you got to get it right for her. - All right. Jamie, this is for you. You got to nail the focus. It's something that I'm always trying to do. Oh, yeah. There it is. Try one more. Did I get it? Yep, I got it right there. All right. Thanks for holding my feet to the fire.
Class Materials
Bonus Materials with Purchase
Ratings and Reviews
a Creativelive Student
It's a fun course, with a lot of interesting ideas presented in a way to help spark the creative juices in anyone wanting to branch out and experiment with different ideas. Mike's presentation style is fun and easygoing - perfect for this type of discussion. If you're not afraid to color outside the lines and see where the road takes you, this is a very enjoyable bit of inspiration.
user-ee46bd
Love it!! Very creative and full of inspiration. Mike Hagen explains the different effects in a great way, he is precise yet easy-going so he makes learning fun. I recommend this class to all who wants to take their creative photography to the next level without spending money on expensive accessories.
Fotomaker
Mike has an easy-going, pleasant & fun personality. He explains things clearly. Rolls with whatever happens. And, he's very good about answering audience questions in an understandable, positively reinforcing and non-judgemental way (which can be rare for some established pro photographers...).