Paper Mache: Pendent Light Base - Part 1
Lesson 20 from: Paper Crafting: Skills and TechniqueRobert Mahar
Paper Mache: Pendent Light Base - Part 1
Lesson 20 from: Paper Crafting: Skills and TechniqueRobert Mahar
Lesson Info
20. Paper Mache: Pendent Light Base - Part 1
Lessons
Day 1
1How to Make Your Own Paper - Part 1
23:24 2How to Make Your Own Paper - Part 2
34:33 3Using Paper Additives
23:54 4Invitations and Luminaries
20:36 5Signage & Streamers Garland
28:51 6Creating Your Own Rubber Stamp
17:14 7Stamp Carving Techniques & Design
33:26Making Roller Stamps
07:30 9Paper Marbling - Part 1
25:44 10Paper Marbling - Part 2
26:29 11Marbling Stationary Set
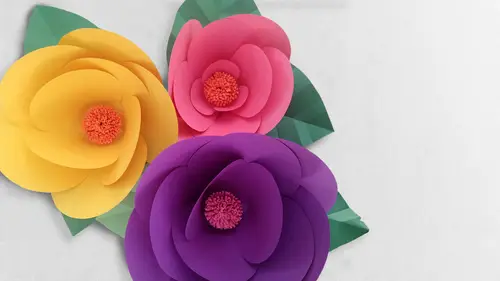
16:27 12Making Paper Flora
24:40 13Giant & Miniature Paper Flora
29:26 14Crate Paper Flower Varieties
32:06 15Paper Boutonnieres & Centerpieces
23:43 16Photo Backdrops & Lanterns
26:16 17Paper Mache Fruit: Pulp Method
21:18 18Paper Mache: Creating & Waxing Leaves
24:09 19Paper Mache Fruit: Finishing
15:23 20Paper Mache: Pendent Light Base - Part 1
26:25 21Paper Mache: Pendent Light Base - Part 2
21:30 22Finishing Touches: Decoupage & Cord Kit
26:27Day 2
Lesson Info
Paper Mache: Pendent Light Base - Part 1
We're going to go old school and nostalgic with this session of paper mache a this is most likely the method that all of us remember from elementary school I remember it was one of my earliest crafting projects, mixing the flower in the water into a batter, dipping in recycled paper, blowing up a balloon and putting it around the exterior. I can't remember what we did with it, but I remember that that was the project, so but what we're going to do today is very similar in form and function, except that we're going to end up with a beautiful pendant light at the end of the day, so I am going to be sort of bouncing back and forth with some of the steps with the ladies in the audience today, I'm going to take care of a little bit of the messy portion of it for you and all of you have a nice dry swap outs that will address in just a little bit now for this format of paper mache, eh? The traditional mixture that you use for your paste is really just one part water, one part flower uh there ...
are some people that use something that is a little bit more akin to perhaps a deck, a posh solution where they're mixing glue and water, watering it down slightly and using that. But I still just like this traditional mixture a lot s o, I'm starting just with the two cups of flour, and to that, I'm going to add in a couple cups of water. Um, mel, the production designer, said that when she opened up the box for all of the swap outs that I had shipped up, that it smelled like bread, which I kind of love that so we're just going to give this a good whisk. Now, not everyone enjoys the smell of of water and flour, especially as it dries, and I have had some questions in the past about ways of scenting it. And I know some people have successfully added just a couple drops of an essential oil of some sort. Two it just accorded, sort of give a different odor or sent to it. And so that's, certainly something that you can consider. Traditionally, there have also been recommendations of putting clothes essential oil in it as a means of preventing mold during the drying process. I know other recipes also recommend adding in perhaps a tablespoon of salt for the same purpose. I honestly and I think this is in part because I do live in southern california and it's a warmer climate and sunny most of the time, I don't have issues with the dampened moisture that you might have in other parts of the country in the world, so that is just something to consider. So as I said, this was two cups of water and it's two cups of flour mixed together if you do want to do that extra step just to prevent any possibility of mold, perhaps consider adding in about a tablespoon of salt to your mixture. So now that I have done this, I am going to set this aside and let's talk about what we're going to use when I was a kid making these we just ripped up pieces of recycled newspaper and that's absolutely acceptable form and it's easy to dio I happen to have a lot of unprintable news print it's an inexpensive material you can buy a large ream of it you know we've used for several projects during the course of thiss paper crafting workshop together eso it is essentially the same paper that newspaper is printed on and I do have to say that one little added benefit to having it un printed, it just keeps your hands a little bit cleaner, but you're constantly going to be running to the sink anyways while you were doing this, um, today, I'm just going to be wearing some latex gloves, which I normally would not do it home, just to try and contain the mess that I'm going to be making up here, but if I were home, I'd be doing it the counter and just going over to the sink every now and then in washington, of the mixture off of my hands for our today, we're going to be making pendant lights, as I have said, and so, in order to do that, you want to pick an object to use as your mole old for these, I'm just using an inexpensive metal bowl from a local house where store I like the shape of it. I also like that it has this very little flattened bottom. It allows it to sit up straight, but that's, actually almost the perfect shape that I'm going to cut out later in order to it, insert our lighting kit are pendant lighting kit, but I have also seen these done in a variety of shapes, people have used mohr, cylindrical shaped trash cans that create almost more of a canister style light cover. I've seen people even use something that's a little bit more conical shape that tapers perhaps more at the top. So the possibilities are really endless. So I would just start rattling around in your cabinets and trying to find something that might work for you. As you can see, I am using a metal bowl, and I've used this for all of the swap outs that we have here in the studio today. I can't say that I think that there might be some benefit to using a little bit more of a flexible material, perhaps a flexible plastic bowl on lee because during the process of releasing the paper mache a from the exterior of the mold it's. Nice to be able to put a little pressure on the inside, and it would have been great if this particular mold had had a little give to it. So it's, a lesson learned, and you're always learning when you're working with new materials. So first thing you want to do is pick out your canister, your your bowl, your whatever it is you want to work with next little trick is to have something to stand it on now when I'm doing this at home in my kitchen, the reason I do this it's nice to have it a little bit elevated above your work surface, and as I am going to be applying the stripped to the side, I'm going to have them hang down over the edge. If I were doing this flat on the surface, I would kind of end up with a goopy mess all the way around the perimeter of my bowl and would likely end up sticking to my surface, so this is a little way to prevent that. When I'm doing this at home, I'm typically using a note meal canister. What we have today are just simply yoga blocks their large foam pieces that are a perfect height and size for this. Now, if I were to apply the paper machine mixture directly to the bowl when it was dry, it would likely it here really tightly to this surface. And so, in lieu of using some sort of spray or releasing agent, we're simply going to be using plastic wrap. This is just standard plastic wrap that you likely have in your kitchen and I find it sticks best if I just take a damp sponge and run it around the exterior first and I'm also just going to kind of run it around the inside of the lip um you know, plastic wrap can be a little tricky to work with sometimes and this just gives it added incentive to stick to the surface of the bowl so I'm going to pull out one sheet place this over the top it's not gonna cover it completely I am gonna end up meeting a couple of pieces we're going talk that down into the interior and one more piece I'll do in the opposite direction to cover up any of the exposed areas we didn't get with the first sheet and so this is going to act as our releasing agent if you will and you'll see when we get teo taking the mold off of the swap out that I have underneath the desk here there's still going to be a little muscle involved there's going to be a little technique and trying to get it out of there but this definitely is an aide and without it it really will stick quite tightly to the surface of your bowl. So let me position myself here put on a pair of lovely surgical gloves I know writes it does feel very official and oddly faux medical I don't know yeah craft examination see ok now I don't know if I mentioned this earlier, but you're batter when it's mixed together properly, it really is just sort of the consistency of a runny cake a pancake batter is sort of what it looks like. I prefer it to be a tiny bit on the runny side versus the thick side, and you'll see why as we begin applying it to our strips of paper. Um so what I have done here, you typically want to just rip or cut all of your paper in advance of starting in on this project if you were to begin tearing a piece or strip off of the largest sheet of paper, dipping it into the solution, putting it on your bowl and then going back to rip another piece of paper, you're really going to end up with sort of ah sticky mucky mess. This is a messy project to start with, and we're just kind of trying to, like contain most of that, so I have taken this newsprint and I've cut it into strips that air roughly an inch and a half wide. I do find that the smaller the bowl, the narrow where the strip on dh that's primarily because as I'm working my way, layering it around it's going to sit flattest against the surface of the bowl I when I was experimenting with some of these, I used some stray there were about three inches wide and it just ended up with a lot of overhang and the surface of my bowl ended up being a lot more lumpy in finish so application wise like I said, I just kind of tend to keep my pile of paper to one side my bolan my mold form on one side and my bull of the paper machine mixture in the middle and I just kind of dab it in there on one side flip it around and then just use my fingers is a squeegee and kind of get a lot of that excess moisture off you can see I don't know if you can see but it's really it's immediately permeated the paper it's I was almost made it a little bit trans lucien lucent I'm just laying it down on the surface and I'm letting it hang down you know maybe inch to two inches over the side and there a couple of reasons for that the primary one being that once I've covered the entire bowl and I want to go back and finish off my edge it then gives me some wiggle room so I can kind of cut a really clean edge versus dealing with the rough edge of the paper if I tried toe line all of these up specifically with the bottom edge of the bowl you would end up wanting to rip your hair out it really would just be not a fun process so it's much easier this way um paper machete it's one of those super nostalgic I remember when kind of projects and like I mentioned it was one of the earliest craft projects I remember doing I do remember when I was wass a little bit older probably junior high using it to make elements for halloween costumes I specifically got one of those giant balloons was probably twenty four inches in diameter and I blew the whole thing up and I covered the entire exterior and paper machete and cut a hole that was big enough from my head and then they proceeded to decorate the exterior to look like a giant chicken had I cannot remember why I wanted to be a chicken for halloween but that's what I ended up being that year and I decorated the exterior that much like he would a pinata sort of taking strips of crepe paper streamer infringing it and wrapping it all the way around and gluing it in place it was a fun experience I really wish I had a picture of it or not I don't know maybe it's a blessing I don't have a picture of it I'm not sure that thing's stuck around in our basement for years I'm not really sure what ended up with it um I'm sure my mother and a good sense decision put it in the trash which was probably the right thing to dio so as you can see, what I am doing is each time I laid on a strip I am slightly overlapping the previous one almost in a wheel like pattern working my way all the way around. Um it's actually gonna ask rachel do you want to give this a try with me? I've got a pair of extra gloves here which you are welcome to dawn on me in the medical office here um there right down here on the shelf right let me get this one additional piece on while you're putting on that she's scrubbing in exactly she's prepping for surgery I like it and you can see as I'm laying down I'm doing my best effort to kind of like maybe run my finger along the previous seems there are going to be lumped there are going to be a mumps there's going to be folds in the paper a lot of that we're going to be able to disguise with some of our finishing technique, so don't be overly concerned with that don't necessarily make it feel like you you know ruined anything so you just go ahead and start with your first piece it's a little unwieldy once it gets what is a little unwieldy yeah and not to worry I mean it's ah it tends it will, you know, fold over and stick to itself slightly but it's usually easy enough to peel apart and rachel's doing a great job just sort of using her fingers this squeeze to get off all of that access so I notice that on our on our tradeoffs that the top was a lot thicker because where it is and that's a really good point because every time you're laying down a strip it is overlapping in that central point at the very top of the bowl and it actually works out well in this particular project because you don't want a little bit of extra thickness at the top because we're going to be adding our pendant light kit there and so it is being the thickest of any portion of the walls of the bowl is going to be the sturdiest but another thing is that it also takes the longest to dry so often I found that even I was as I was cutting those holes out for the pendant light kits I was finding some moisture in that portion so it's good to have had that removed so it just it really kind of works out perfectly for this particular type of project batter into like a tray or something too like a shallow cookie sheet without him or like a jelly roll panya you absolutely could maybe would be let well, I think it might be a little drive here as faras like the no not necessarily because I think it would probably end up being about you know and half inch in thickness maybe in the pan I think it probably would be easier for application I it's funny because I'm always thinking like how can I dirty the least amount of pans in my kitchen so that's why I always tend to stick with just one bowl but that absolutely is a great idea especially if a dishwasher you just throw in the dishwasher magic it I am the dishwasher though so in my life I'm gonna step just around rachel a moment and you can see as we're working we're just slowly going to kind of continue to shift you do want to make sure that your work surface is covered obviously because we're just you know we're going to continue to make a mess it's going to drip down but that's all of the part of the fun and the process of it it's just going everywhere it's all good and you'll find teo I had to sort of like learn to take my time when I'm squeezing the excess off because I was doing it really quickly and it would get flung across the kitchen and, you know, end up on my floor in my cabinets so bc rachel's doing a great job overlapping each piece slightly if she goes along and it also is it's almost a little bit of a meditative process because you really just kind of have to take your time and go through the process to get it on because you also need to realize it's, not just one layer of paper we're going to be doing on these. We need to do multiple layers in order to make the walls of the bowl thick enough paper. Machete when it dried, is shockingly strong, though onda, as I had mentioned at the top of the last segment, when we were dealing with the paper mache a pulp in times past, it's been used for furniture, making it often was used as an architectural element, which is really quite fascinating. It was used to mimic like decorative panels for ceilings and that sort of thing. They would use multiple layers of the paper machine and then multiple layers of lacquer on top of that. In between those two it's not only was incredibly lightweights, but it was very, very strong. I do know, at least in the case of, like old school stamped ceiling panels with the advent of tin and aluminum that ended up replacing the paper mache, eh? Because it was as equally lights and a little less labor intensive to produce. So do you remember the last paper mache, a project that you did? I think it might have been middle school, and I did, what did you make? I think it was a siri is like a tiered bowl things was bigger ball, smaller bowl and a tiny bowl and had, like little things in between. Sweet, kind of like a tiered serving trips and e I don't know why I did that. I think about fifth grade we made a pig. Okay, I don't know why everyone made pigs, you know. Well, I think that balloon shaped sort of lends itself to that. If you're covering it with e way, just use crumpled newspaper was weighted the crumpled paper. So it's the same sort of idea that we used in the last segment with the paper pulp, where we created that sort of mckay under structure with just some crumpled up paper. I love that I love that, but that bowl idea that's actually pretty sophisticated. Yeah, like that versus a chicken head. Well, that's brother unique. Supposed so, um, but that old school method of covering the balloon, it really does have a lot of fun applications. And I know if you're interested in making, say, your own pin yacht is that's really where you start with that, you blow up a balloon, you mix up your mixture you cover the exterior with the paper mache et and the newspaper allow it to dry, and then the crepe paper that is typically used for those I have to say is the standard crepe paper streamers you confined those in almost any party supply store. They're incredibly inexpensive. You just go along and you fringe the end and you start wrapping it around to kind of get that beautiful layered fringe effect. Of course, leaving yourself a little bit of a hole to fill it with the candy and the treats and string it up if your parents remember to put the candy in it oh, it's a personal experience. Oh, that would be a little disappointing. My parents thought me how did it well, oh yeah, that is a little disappointing. You ladies remember the last project that you did with paper mache a we didn't want an elementary, but I think that a classroom did it and we made this giant dinosaur like a garbage program we were doing at the school in it wrapped kind of around a garbage can think one of the parents probably did the chicken wire form, okay, so they killed the armature, the under structure of chicken wire and they were just pasted it, but I've done a you know, I found a thrift id dress form. You know, it's a newer one, but I don't want to look old, so I did it with dictionary pages here of actually it's mine wasn't dictionary pages. It was from an old book that had hand writing. It is really pretty. But I see it a lot of dictionary pages. Yeah. That's this would have been really nice this color of the flower versus I think I did sort of the white glue. They just have a little bit. It gives it a little bit of a patina. I think when you're using the flower the way it's sort of like yellows a bit as it hardens. It's supposed to remember the last project that you didn't yeah, we used to make easter eggs on you decorate the inside of the lake. You have the whole in there, and then you decorate the little panoramic eggs. A little of that. So which you, when you did that, you covered the exterior of a balloon? I'm assuming yes. I try to get the balloons that would shape to look as much like an egg tapered a little bit. One end, sure. And then you cut the hole in a hotter than you decorate the end. Sad for the panel that is charming I love that and I actually think if you go back and visit my pinterest page which we had mentioned earlier for the paper machine there are a couple examples of people that have done not the panoramic eggs I think they've left them solid but decorated them and film roles with that much is really beautiful but I do love those panoramic eggs and it just so charming madeleine you remember your last paper machine projects yeah I was in grade school I can't remember what great but my dad helped me and I was a giant pumpkin I think I have a picture of that once it was like this big and helpful straps wow do you remember what you used for the under structure when you when he's creating handy so I don't like chicken wire probably is the form genius yeah way uh one of our first years together my husband I went is cave people and he did the bone for my hair and what he did and then the big club oh sure hey I love that yeah oh how old do you think you were when you were doing the pumpkin costume that's playing third grade great they made out of construction paper oh my heart of bowl cut I love really love it that's so to be that tiny to be would actually wear paper machine acosta it's not gonna happen that well could yeah, I still could. You still could. Excellent. Well, rachel is on the very last strip of our first rounds. Thank you very much for your system. They'll let you finish that, and then I'm gonna go on to a little bit more structure and let you take off your surgical gloves. All right, doctor. Dr kraft, you name dr kravitz. Craft paging dr kraft. Doctor. Your help. Scoot around. You want a hand, you a paper towel to at least get those gloves. Off you go. You are very welcome. Thank you. So once we get to this stage where we've completed our first round of paper, kind of applying them all vertically overlapping slightly thank you again, rachel. No kind of going through. Just sort of maybe smoothing the sides a little bit. Kind of pushing down any of the excess mixture onto your work surface off of the mold form. What I like to do is I like to take a couple of strips and then position position them vertically just to add a little bit of additional structural integrity to it's. So just, you know, wedding the paper the exact same way. But this time I'm going to kind of, like, wrap it around in this direction. Smooth it up a little bit, you will likely end up with a little bit more wrinkles around the seams on this one, but not to worry, because we then have to go back and add an entire second round of the paper mache, eh? So I was kind of in prepping for the class. I spent a little bit of time going through, not only on pinterest, but other websites kind of doing a little bit of research and reading about what other people had been using paper machete for and, you know, I think that I knew this at some point, but had forgotten about it as a usage for creating a lot of parade floats, so you'll often see those enormous, you know, structures be they animals or what not that are that probably have a similar under structure to chicken wire or something along those, perhaps even with ah would base as part of that, and then being covered in paper, machete, and I think the beauty of it is, is just because it is so light. If you were to build some of those forms in other, more solid materials, transportation what obviously become a little bit of an issue as far as mobility and moving them around, you can see I'm just kind of working my way around just a little bit. You don't need to overdo this step. But just because all of the other pieces are going vertically, I think having a couple of them going in the opposite direction just sort of helps. Hold everything together and a little bit more nice, neat and uniform way. Okay.
Class Materials
bonus material with purchase
free bonus materials
Ratings and Reviews
user 1400000665814257
This class if filled with new and fun ways to use the paper that we have in stock. In addition, the paper technique that utilizes Suminagashi Ink is mind blowing! Anyone who loves to create beautiful things will enjoy this class. Robert is one who is an exceptional instructor, in that when he is demonstrating a new technique, he has an ability to use clear concise language. I have enjoyed the class, and plan to use the gorgeous floral pieces in my studio and home, along with creating a lovely party. Thank you!
a Creativelive Student
Really enjoyed watching this two day Paper Crafting course with Robert Mahar. It was full great paper techniques and inspiration. Roberts has such a calm and positive teaching style. Watching him work through step by step of each project you really pick up lots of wonderful tips and tricks of the trade. Highly recommend it.
~user-608648
Mr. Mahar is a wonderful teacher. His teaching style is as artful as his creations. I appreciate the beauty of the simplicity of his projects and delivery. Bravo!
Student Work
Related Classes
Paper Craft Ideas