Lesson Info
4. Camera Menu Settings & Exposure
Lessons
Class introduction
04:35 2Field Techniques, Camera & Lens Choices
08:15 3Selecting Gear for Great Panormas
10:44 4Camera Menu Settings & Exposure
09:58 5Troubleshooting Environmental Obstacles
04:04 6What Contributes to a Great Panorama
11:32 7Shooting Vertical Panoramas
04:57 8Shooting Techniques for Black & White Panoramas
04:59Handheld Technique for beginners
05:10 10Tripod Technique for Intermediate Photographers
07:43 11Advanced Technique for Panoramas
09:58 12Navigating Moving Subjects in Panoramas
04:04 13How Time of Day Impacts Panoramas
13:28 14Workflow in Lightroom
08:59 15Developing Images in Lightroom
11:54 16Merging Images
13:44 17Finishing Techniques
17:31 18Saving Images for Print
05:41 19Controlling Your Environment
05:23 20Profiling & Calibrating Your Monitor
20:54 21Wide Gamet Color Settings
12:37 22Soft Proofing Images
13:49 23Selecting the Right Paper for Prints
08:05 24Sharpening Images
28:33 25Printing with Lightroom
17:07 26Printing with Photoshop
05:46 27Black & White Printing
05:59 28Best Practices for Printing your Image at a Lab
07:10 29Analyzing & Displaying the Print
05:19 30Reviewing Panoramas Printed in Class
10:20Lesson Info
Camera Menu Settings & Exposure
What about camera settings? You know, what do we need to know in the camera, setting up the menus, and the systems within the camera, so let's watch that video next. All right, so setting up your camera properly for panoramas is very important. There's a lot more to think about when you're shooting in panorama because when you take your picture, you're really starting on the left side, and then, you're panning off into the right. You don't always have to go left to right, but I like to work that way. So in other words, you know, the colors, the white balance, the brightness, all of that might change actually as you take the photo of the entire scene, so a lot of panorama photography is knowing what settings to set, or what settings to lock, and what settings to allow to change. I like to lockdown most of the settings in my camera. Things like ISO, things like white balance, exposure, all of that stuff, so let's go through the camera. I'll point out some of the most important things to ...
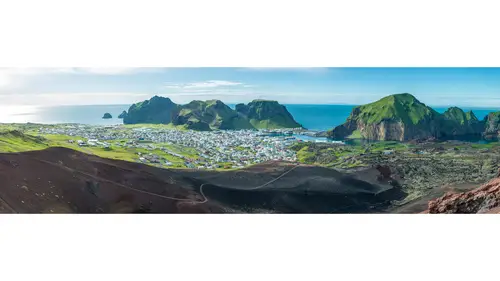
set beginning with white balance. So all cameras have auto white balance, and auto white balance is cool to use, but recognize, you may have to go back in after the fact and change white balance from photo to photo to photo in Lightroom, and the reason why is because maybe the left side of the scene has more fluorescent lighting, and the right side of the scene has more daylight, so I like to set white balance. For example, today, it's sunny out, so I'm gonna set my white balance for sunny. Next is image quality. I like using RAW. I think RAW makes the most sense. It gives you the most dynamic range, and allows you the most flexibility in image processing later on, so I'm gonna set my camera for RAW capture. Next is bracketing. You know, most new cameras have a bracketing feature. I don't recommend bracketing for panoramas if this is your kind of first go. Later on, you can do some more sophisticated work with bracketing, and you can do kind of like HDR panorama photography, so for now, let's just turn bracketing off. The next thing to talk about is auto focus. Generally speaking, setting auto focus is simple for panoramas, and that's because you don't want your focus to change from picture to picture to picture, so what I typically do is I will actually focus out into my scene, and then, I will flip my auto focus to manual, or if you use something like back button focusing, maybe you've heard that term before. Back button focusing allows you to focus once, and then when you let go with your thumb, it won't re-focus when you take your subsequent photographs, so either way of those will work. Just make sure that your auto focus doesn't switch, or doesn't change from image to image to image. The next thing is exposure compensation. Let's make sure your exposure compensation is zeroed out. In a minute here, I'm gonna talk about setting your exposure and we can do that manually, or in aperture priority mode, but when I start, I like exposure compensation to be zero. Mode, that's your exposure mode. I generally like shooting in aperture priority, or in manual mode. If I shoot aperture priority mode, I like to lock the exposure before I shoot my image sequence, so you know, I'll get my exposure setup properly, and then I'll lock it with the AEL button. On the other hand, if I shoot manual mode, you don't have to lock the exposure because that's what manual mode is, it just locks it. The next thing I want to talk about is not necessarily anything on the outside of your camera, but this really matters when you go to do the final print, and that is setting the right color space, so in your menu system, you're gonna go to your shooting menu, and you're gonna setup your camera for Adobe RGB. That's important because it allows you to collect the most amount of information. The most color data is Adobe RGB versus sRGB. So let's now talk about exposing for a scene. So over my shoulder here, we have Seattle, Seattle, Washington. It's a bright, sunny day, lots of puffy clouds, so as I think towards the future, as I think towards, you know, creating my final print, I need to think about not blowing out the highlights. That's one of the most important things we need to worry about. So, here over the city, we have puffy clouds, like over there over Space Needle, and over the Columbia Center. Those white puffy clouds, I'm gonna be paying very close attention to during my exposure, so I'm gonna meter for those, so I don't blow those out, and as long as I've got detail there, great. Now if you look at the scene also, you'll see the front of the buildings. They're kind of in the shade right now, so that's gonna be a wide dynamic range image, but that's okay, because I'm gonna show you how we pull out detail in the shadows in Lightroom in the post-processing segment. So, I'm gonna go to aperture priority mode, and then, I'm gonna set my ISO pretty low. You know, it's a sunny day, so I'm gonna go ISO 100 here, and for this example, my cityscape is a long ways away, so I don't have to think about, you know, maximum depth of field. I don't have to shoot like f16, or f to maximize depth of field, so I'm gonna shoot at f8. For most lenses, f8 is a sweet spot. You get the sharpest quality photo around f8, so now, I'm gonna aim the camera over here at the scene, and just look at my exposure, and I'm showing f8 at a 640th of a second, so I'm just gonna snap a single picture. Great, I got that shot, and now I'm gonna look at it on the screen on the back of my camera, and I'm gonna assess whether or not I've blown out the highlights, and the way that I do that is I activate what's called the highlights screen, and this highlight screen is showing no blinkies right now, which is great, so the fact that it shows no blinkies means I've got detail in those clouds, and it might even mean I can expose a little bit brighter. I've got a little more room to work with on the exposure side, so I'm gonna now shoot that scene again, but I'm gonna add a little more exposure, maybe two-thirds of a stop, so since I'm in aperture priority, I'll just go exposure compensation, and dial up plus .7, and I'm gonna shoot the same picture again. All right, picture number two, exposed a little bit brighter. I'm looking at my highlights screen. Again, no blinkies in the clouds. I could go even further if I wanted to. The reason why I want to expose, it's called exposing to the right. The reason why I'm exposing to the right, or exposing that histogram brighter, is because I need all the shadow detail I can get, especially on a contrasty, high contrasty day like today, so I'm gonna add a little bit more compensation, maybe go up to plus one. I'm gonna go even more, 1.3, and last shot. Go back to my highlights screen. Okay, cool. Now on my highlights screen, I can see some blinkies in there. That means those clouds are a little bit too bright, too hot. Now I've got my range of exposure so I'm gonna bring it down by 1/3. My overall exposure here is at a plus one. I'm good to go, so now, the next thing is, I need to prepare for the actual panorama sweep, so I'm gonna bring my camera back up there. I'm gonna lock the exposure with my AE lock button, pow, and now when I shoot my panorama, one, two, three, four, five, six, I've got a good exposure for all the photos in that panorama sequence. Okay great, so here's the result. This is the resulting image from that. You see it was a handheld image, and I shot it in horizontal mode. I had the camera horizontal. We'll talk a little bit later about shooting vertically-oriented panoramas versus horizontal panoramas but you can see that this actually turned out quite nice. I think the total width of this image is about 17,000 pixels, after it's all merged together, so this is a big, giant image. I pulled out shadow detail in the software. We're gonna show that in the next segment, and I also tried to push back detail here in the clouds, but the most important thing when you're making your exposures is, I guess, the cardinal sin is blowing out detail in the clouds. Do not blow out detail in the clouds, because when you print it out, in fact, this photo, I blew, I broke my rule. I blew out detail in the clouds here in Iceland, and what that means is that no ink falls down on the paper. No ink gets put on the paper. You just have white paper, and people who view your prints may not know that it's bad, but they, they'll look at it and go, ew, you know, something is incorrect with that image, so the cardinal sin, don't blow out the clouds. One final thing before I get to the next video is I just want to give you a quick tip. I was talking about setting up all the stuff on the camera and locking all of that out. There's a lot of things to think about when you do panoramas. So one of my great tools that I've been teaching for years, and for those in the audience, or in the internet land, have heard me say this many times. I do what's called the white button tour. On our cameras, typically, it's the white button that impact the settings that we're most interested in, so I just literally go through the camera, and I push those buttons. Like ISO, push it. Okay, good, I'm at ISO 100. White balance, oh, I'm on, whatever, auto white balance, and I really should be on sunny white balance. I literally go around the camera and push all the buttons and make sure everything is set and locked out. That also includes my auto focus settings, so a little tip for you, white button tour. Don't forget it.
Class Materials
Bonus Materials with Purchase
Ratings and Reviews
Fred Morton
Get it, get it and get it. I bought Mike's Speedlight course and this is on the list after watching it on line. The course design by Mike with the Creative Live staff is a successful blend of content and presentation. I absolutely loved how Mike took us on location for several shoots, where we could see the setup and problems that he had to resolve. This is a must have course for photographers interested in landscape work. Another powerful part of this class is Mike's willingness to demonstrate and show us what didn't work. The practical experience in his course was just like being in the field with Mike.
user a5f3c6
Mike combines two characteristics of a great teacher: he's obviously knowledgable and competent about his subject matter and he's relaxed and confident in how he presents his ideas. This class covers everything I need to know about photographing and printing panoramas. But, it is much more. It is a class that shows the essential skills involved in shooting, post-processing, and printing photographs and how to apply them to a specific application: panoramas. I learned a lot! Thanks, Mike.
Sue Sirius
This workshop was terrific! I learned so much about taking, processing and printing panoramas (and photos in general). I found the presentation very easy to follow with great examples and instructions. Highly recommend this!