Lesson Info
12. Adding Music
Lessons
Class Introduction
03:37 2Exploring the Interface
11:29 3Meet Premiere Pro
08:43 4Building a Rough Cut
06:11 5Setting up a Project
07:10 6Importing Media
10:55 7Working in Timeline Part 1
15:21 8Working in Timeline Part 2
18:44Refining Your Edit
10:00 10Trim Tools
30:47 11Working wth Audio
13:28 12Adding Music
10:47 13Working with Music
16:53 14Basic Transitions
17:02 15Advanced Transitions
12:07 16Working with Filters & Effects
25:30 17Working with Nests & Sequences
13:09 18Motion Effects
26:03 19Rendering & Positioning
06:03 20Titles & Graphics
18:50 21Basic Color Correction
11:33 22Exporting & Archiving
23:30Lesson Info
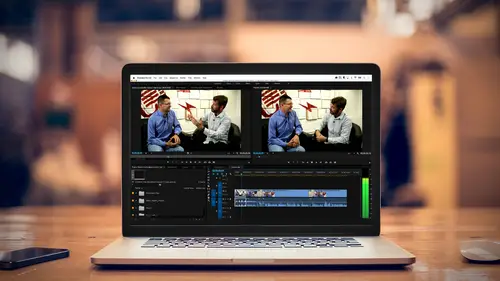
Adding Music
Let's talk a little bit about bringing in music and also doing a cross-fade between that music and the interview. I'm going to go ahead, I want to reset this. I'm going to click on all of this, hit my reset buttons, life is good now. I'm going to hit the G key. I'm going to set the game to where it should be, minus 12, hit okay. Now, I'm going to bring some music in for the beginning of this show. You have this sound. It's all silent. I do have some drone sounds here, a lot of different drone sounds. So let's fix that first before we bring the music in and this directly addresses the question was I want to stretch the audio out, so I kind of like to start with the loudest one. Now, if I hit the command plus key, it makes my video track taller. If I hit the option or the alt plus key, it makes my audio track taller. And I'm going to hit the plus key just to zoom in a little bit, so there I have three different levels and I want to choose the sound I like. Okay, that's a lot of beach. I ...
think actually this middle one might be the best one. So, what I want to do is I want to extend the audio, and we're going to leverage a couple of the tricks that we actually learned earlier today. I want to get rid of the audio for this clip so what did we learn? We learned if I held down the option key, and I clicked, it wold just select the audio and I can hit delete. And I'm going to do the same thing here. If I don't hold the option and select both, if I do hold the option, it's just my audio, and hit delete, easy peasy, right? Now you're going to go ahead ad say I want this audio to move. And You go and you drag it, nada, won't let you move it 'cause you have clip collision above I say, ha, I'm going to do bring with 'cause you're clever and you grab it, position it, your fine tune mouse control and you still can't do it because when you go to bring with, you're going to have clip collisions or it's going to move the video and the audio at the same time. What you want to do is you want to be in your regular tool, zoom in here and you want to be able to select the edge. I'm in the bring with tool still, there you go. And I want to break the connection between the audio and the video temporarily. Okay, so I can make the audio longer without having to stretch out the video. I want them to be independent of each other. Now you might read on the web, some people say, go in, right click, unlink the clips, move them, relink the clips, too much work. We learned option breaks that relationship so with the right tool selected, I hit the option key and now I click because the option key is held down, I can move the audio and stretch it independently of the video. Now I am running out of media because these are short clips. But I stretched it as far as I could. And I can do the same thing on the right side. I'm holding down the option key and stretching it as far as I can so now I have the audio from this clip overlapping the previous and the subsequent clip and that's going to actually give me the feel of no edit. It's going to feel like, Ah, this is continuous. That's a great trick. It was a great question 'cause it's a great trick because the whole object of editing is to make it seem as if your show is not edited. If people are seeing every one of your cuts, you're doing it wrong. You should be enjoying the show and not perceiving the edits because there's a big jump in sound as you cut from the wide to the close. So we'll go ahead and, once I've let go of that option key, these things are connected again. I don't have to worry about them going out of sync. It's a temporary break so if I go to try to shorten this without holding the option key down, it's going to effect both, but that's the beauty of this, it temporarily unlinks them. Let's go ahead, bring that back. I'm going to hit play and let's hear what it sounds like (droning sound) It's just very continuous. It's just droning on. I kind of undid that one too many. So that would be one of the tricks that I do if I wanted to extend the audio beyond the video or sometimes I want to extend the video with the interview, do a great trick called the J cut or L cut. You'll also notice something if you're watching while I'm talking that occasionally this auto save thing comes up. Premier will automatically save every 15 minutes if you don't manually save. I generally get into the habit of hitting control or command S whenever I do something that's really valuable and I don't want to lose it if it crashes and you should just get in the habit of hitting command or control S as soon as you have done something great because it's inevitable, you'll get so focused on creating this magical edit, that you forget to do that and, boom, spontaneous crash and you're like, Ah! Premier is pretty good at catching that and it gets better and better with each version but it's a good rule of thumb, old school, to remember to save and you saw that it dido an auto save. You can change the frequency, but it's every 15 minutes for a back up of an auto save. Okay, so I want to bring the music in. So we go over here and we're jumping into our main bin. We have stepped inside the interview bin and if I want to get back to the top level, if you look, there's a little folder with an up arrow here and that's how I would get into a higher layer of my project bin. So there we are at the top level. It's green now and I want to go into the music. And here's our music, double click. I have two cuts that we're working with and we'll take a quick listen to them. If I just double click them, load them into the view and hit play, starts off very nice. I'm going to mute it. I want you to not be deafened. I want you to look at this here and I want you to look at the wave form, so it's muted (music clip) Mute you silly computer. Hmm, I guess because we're going out through the broadcast thing, it doesn't let me mute it. It's really loud, believe me, okay. You can just seethe wave form there, it's hitting the top and bottom. This is expected whenever you have music. When you have music, they want it to be as loud as possible when you turn it on and listen to it through the radio of your car or listen to it through one of the Bluetooth devices that you have all over your house. So they want it loud so you hear everything. I don't want it that loud. I don't want it to blow out my ears when I first listen to it so I'm going to use that same trick that we used with the interview and before I even work with it, I'm going to adjust the gain. Now I know I'm probably going to want to make it lower so it doesn't compete with the voice but if I want it full volume, I want it minus twelve. And I probably want it full volume for the beginning of the show and then bring it down but if it's ultimately going to be music under, I may say minus 20. So, before I even bring it in, I can select a clip or I can select all of my audio clips, hit the G key, and I'm going to say set gain to minus 12, hit okay, now my wave form is telling me good news. If I hit play, the crew in the studio will not kill me so that will be good news. And I'm ready to bring it in. (music) Really nice, so I didn't have to blow out my ears. It always comes in at minus 12. I can make it lower when I bring it in. So let's go ahead and bring this music in. We've zoomed in and zoomed out a lot. There's a great keyboard shortcut that I use all the time for my track heights, it's shift plus and minus. If I hit shift plus, and you need to make sure you're in the active window, so I want to be in my timeline. So if I hit shift plus, it goes to a pre-defined height and shift minus goes to another pre-defined height. This is a great way to toggle if you just want to get back to where you want to see things. I'm going to go ahead. I now can see the second space. I'm ready to bring my music in. So I want the music to start at the beginning. I can see that visually. Okay, I don't want that boring stuff. I'm going to simply hit the I key and I know how long I want my music to last. I know how long I want it to last in my sequence. I want it to start at the beginning, then hit the I key, mark the end point and I want it to run, probably til he starts talking and then duck under so that's my out point. So we did something a little bit different here. Instead of marking an in and an out in our source clip, cause that's the whole clip we want to bring in, and just like an endpoint in our time line of the playhead, I define the duration down here. And I only put an endpoint here. There's no- Well, there is an out point so I want to remove it, okay. How do we remove an outpoint? Well, out is O, option O removes the out point. So I have an in point, have an in and out. I have my audio track targeted to the second track, so it's not going to overwrite and now I can go ahead and hit the period key and what happens is the clip will go in for the exact duration that I set here because I set my in and my out points in my timeline. If I had an outpoint marked and I tried to do that, if I hit the period key, it will give me a warning and say, Oh, you have an extra point here, which one do you want me to ignore? And I'm going to say, ignore the source outpoint so even if I've done a bad thing, I can click and hit okay and bring that in.
Ratings and Reviews
Maude Colin
This class is exactly what I needed! I've been trying to understand Premiere Pro for a year now and I've never been able to do anything with it. I had the feeling that I would never succeed and yet... Abba Shapiro is not only a great teacher, but also the kind of person that makes everything looks so simple. I loved that class and even though I've got everything I needed from it, I really want to do the Premiere Pro bootcamp this year. I want to go further and learn Premiere in depth, just for fun cause that's what it was! With Abba Shapiro, I had fun learning this super-complexe program! It was fun, easy and super rewarding!!!
perrault095
One more amazing class from Abba! The is a fantastic teacher who would explain complicated issues and make it souds so simple. Lots of information to work with. Really great speaker and his humor is brilliant. Love his class!!! Will be rewatching it again and again.
Yevhen Byelyakov
An awesome class that makes the initial hoorays to Premiere Pro so much less intimidating and is guarantee to save you a lot of time. I've created about a hundred clips over the last year or so and after this course identified a huge amount of productivity boosters and also learned a few things to improve the quality of my produce. Looking forward to more in-depths courses. One last comment -- it is basic and gives cursory overview of the topics listed. Do not expect anything too deep or advanced but if you're self-taught, Youtube-style person who still drags the clips around or copy-pastes attributes across all clips, this course will be a great way to improve many of the routine tasks.