Lesson Info
9. Quick Portrait Smooth & Sharpen
Lessons
Class Introduction
02:06 210 Tips and Techniques for Shooting Wedding Portraits
22:13 3Shoot: Groom Portraits
21:28 4Shoot: Bride Portraits
25:07 5Shoot: Wedding Couple
10:57 6General LR Base Tone Recipes and Batch Processing
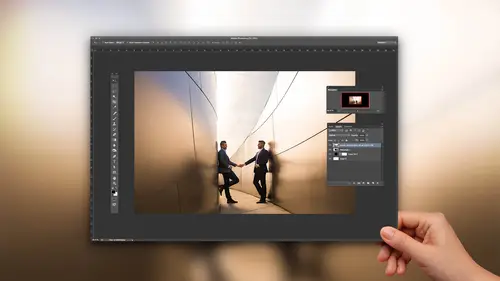
27:41 7Cloning and Simple Compositing in Photoshop
11:13 8Color Adaptation, Content Aware and Median Blur
07:48Lesson Info
Quick Portrait Smooth & Sharpen
This is our next cheat. Check this out. I'm gonna not save this. I'm gonna close it out. Let's go back to like room. I'm gonna grab this image. Let's go ahead and just do a little bit of a quick edit on this. I don't know what lighter mistake. What are you doing right now? Transferring files. It's still tethered. Transferring What? What is this? You're crazy. All right, so it's like this image. I'm gonna go ahead and let's manually process this. So we're gonna dio I'm gonna brighten up the image. By the way, is it interesting that I like to reduce contrast most. Most people air, usually boosting contrast I, like, actually reduce. I'll add my contrast back via tone curve via shadows and blacks. And you can selectively choose where you want contrast. This guy puts it all over the place. It's a very just kind of unrefined tool. So let's pull back our highlights. Pull back the whites a little bit. I want to bring up a little bit of shadows. But now I'm adding the contrast back. So you see ...
how I can just target the blacks and add contract with just the blacks. Look at my history. Am filling out have so much information here. And this all comes back to shooting it. Right? So you have as much information as possible. Okay, let's grab a white balance selector tool by pressing W. And I like to do this little trick where I'll select something that's relatively neutral. The cool thing about the white bound selector is you don't need to find something that's white. You need to find something devoid of color. Okay, so a dark suit. Dark suits sometimes have color in them, but a charcoal or black suit works. You know, the whites of our eyes have a tent, but they're still fairly close. Ah, white wedding dress is fairly close. These will all get you close. So if you click See how it takes me to a neutral tone right away. So press w click. I get to a neutral tone, and this is all based on you. This is where you add back in the temperature of the color that you want, right? I like my stuff a little bit warm, so I'm gonna bring it back to around 40. 400 killed him. Okay. I like the tent where it's out gonna brighten up a little bit. Cool. I'm going to reduce the look of that contract clarity just to kind of soften things up. And look at this. We haven't even gone past this section up here and we're already by press before and after. It's already pretty dang good, Right? Let's keep going. So I'm gonna hit my tone curve. Check this out. We're gonna go ahead and do our Matt Curve boost a little. The highlights Pull down the shadows. Matte. Finish the bottom end back with more blacks again. This is targeting the areas that I want. Contrast. Want more contrast in the face is a little bit right about there. This is awkward reaching over my Wacom tablet. Just thought I'd say that in case you're wondering. Ok, cool. I'm gonna do some local adjustments in a second. Let's keep moving down. I want to tackle all these things. Check us out. Grab this little picker Are color picker okay with this selected anything that if you're in Hue Saturation or Lew minutes So what is Hugh? Changing color values. What a saturation changing brightness. Valor. Sorry. Saturation is changing our actual color. Like the saturation of that color, right? Luminess is changing the brightness values, so just think of what we want to target right now. I want a target saturation. I kind of don't want these blues to be as Poppy was gonna grab him and pull down a little bit. So what I'm doing is I'm toning down his jacket, so it's not. It's not grabbing visually. So we we edit stuff like this, we look into the color scheme of what they're wearing and so forth, and we and we see Okay, I love the blue suit. I just don't want to be as blue because it draws a lot of our eyes naturally drawn to things like highlights, strong colors, patterns. Those are all visual weights. I want the focus to be on her. So the next visual wait right here is this. See the yellows and the and the yellows and greens and okay, I'm gonna shift those down. We're gonna go, Hugh. Now, I'm gonna start doing some color grading This stuff is so much fun. I love the stuff because this is color theory. So what I'm gonna do now is actually want the entire image to have a sort of warm through it. So we're gonna get that by shifting the blues more towards the awkward like the green side, which is kind of going we're taking the We're taking everything to these different directions that are closer together on the color wheel. So everything has more of a matching tone to it. We're gonna take The AUC was down. We're gonna bring the greens a little bit more towards so check us out. So the blue start dropping towards this teal right? The greens. If you go to the right, they go to teal. So if I pull the greens to the teal and I bring the blues to the teal, I'm shifting those two tones together that cool. So there we go with do the same thing with the yellows I'm gonna bring the yellows and oranges are gonna bring all my like my Hughes on my oranges and reds all towards the right side, a little bit, kind of blending. Okay. We don't really have much purple magenta near. And now we can target Luminous. And what I can do is with the reds with the oranges. Do you see the skin tones. Look at the skin tones. Look this Do you see that? Do you see that will shift. So watch you can shift tone a little bit. Cool shift, own shift tone shift home. All we're doing now is adjusting the brightness of skin tones. Cool. Okay, I'm gonna pull down the blues a little bit. I want the blues in the awkward, darker, everything darker. Awesome. Cool. Okay, so this is, by the way, a great tool. When you are photographing like a mixed race couple like we have, a lot of couples will have ah, black and Caucasian person together when you have different ranges in the skin tones. And this isn't like this is a situation that everyone's gonna If you're a portrait of harbor, you're gonna be in this situation. This is the magic sauce right here, because you can adjust their color values of skin tone and the brightness levels of skin tone. So you're be working a lot in your hs l toe blend and to balance things together, that kind of makes sense. So I bring up that joke because it's not really a joke. It's like you're literally gonna be shooting those scenes. So we have tons of mixed race couples. And that's your tool. Cool. Okay, to tie everything in together, I'm gonna do this. I'm gonna cool the image down just a tiny bit. I'm gonna go down my split toning and I'm gonna add in my warmth into my highlights. Let's go to 60 and 10. Let's add in that teal into the shadows I'm gonna go teal, But more towards the blue side Around 2 40 Let's go, 10. Oops. Yeah. Scroll Back down there. You balance this. What the heck just happened under that, I think was on temperature still. Okay, balance this over towards the highlight side. Perfect. And now go back and adjust. Your temperature is needed. Okay? This is looking fantastic. Okay, let's do a couple targeted adjustments. I'm gonna go ahead and select my adjusting brush. So remember, a dozen breast could do anything. Watch. I'm gonna just take the highlights down. Rumor. We said skin tone highlights are in the highlight range. So all this does, is it targets highlights. And I'm just gonna drop this right across the front of his face right there. Okay. Now, if the other areas aren't being affected. Then all that happens is we get a little bit of a shift. Now, it looks like this area might be more towards the whites because it's so bright. So let's pull down the highlights and the whites a little bit. Okay? Look at that. On and off. You see that? So And a beautiful thing is I'm still working with my mouse right now. We're still inside of lightning right now. We haven't even done anything. If we want to do color ships, won't do everything. Wanted to paint something. We can do that all from this area. The last thing you do is I'm gonna go ahead and put in a radio filter with an exposure burn. Let's pull this out. Okay? I'm gonna burn in. I'm gonna burn quite a bit. But the one thing I'm gonna do is I don't like my burns, you know, is how arm right here is kind of darkening down towards the bottom. I don't like that Look over skin. So what? I usually do that. Balance that out. I'll add one additional dodge. So I'll flip this to a 10.5 dodge and just pull a graduate filter up from the bottom. So now we still burned the rest the image. But we kind of just kill that little piece right there that we can keep everything that natural brightness.
Ratings and Reviews
Ahmad Mostafa
Very nice class and very nice instructor, a lot of information is presented in a cool and easy way, you will love to follow along with the instructor. Thank You.