Lesson Info
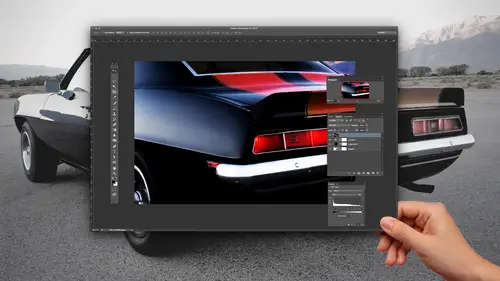
8. Realistic Scaling for Compositing
Lessons
Class Introduction
01:05 2Compositing with Tonal Range Selection
15:33 3Compositing Water Bubbles inside Bottle
16:36 4Compositing Clouds Behind a Bottle
12:29 5Textures and Layer Mask Adjustments
18:45 6Making Water Look Realistic
06:47 7Adding Realistic Bacon to Your Image
09:00 8Realistic Scaling for Compositing
06:57Lesson Info
Realistic Scaling for Compositing
one of the things that was talking with Dave Cross about today was actual riel compositing and one of the things that was brought up waas. Okay, if I'm going in, I'm actually putting in real life scenarios here. This was all fun, actually. Being able to go in and put people or, you know, put something in a tree in front of our house, you know, do some type of rendering and be able to make this. And he had brought up a really good point of When you have images and you want a composite them how do you make sure that everything is the right size in relation to what you're doing? You know, So he actually had touched on this and I said, You know what? This is definitely worth it, So I'm gonna show you. This is well to, um So you can actually use this in a realistic way. Not that this isn't realistic. I mean, this is really fun, but nonetheless wanted to do this. So one of the things he had done was he actually goes in and he takes these images and he brings along this little collapsible ora...
nge cone and whatever photos he takes, he actually puts the orange cone in the photo, which is absolutely great, because what happens is this allows him to go in and take the images here and put this and use this as reference for sizing things and people. Whatever it is. Take a picture of a fire hydrant house, a car, a dog, a family, whatever, A lot of times, you can't get everybody together or get all these components. But you want to go in. You want to make it look all realistic. Now, in many cases, you may be doing compositing. That isn't You don't know these people. How tall are they? How shorter they and, you know, you make them the wrong size and people have issues. So this is great. This is actually a little collapsible cone that he carries with him. And this works awesome because then you can take and you can put your images into your document, transform these down, and I can go in. How's that for scaling? When you do the six million times, you get pretty good at it and you can go in and scale everything so that it's going to be realistically scaled the same code. Use that his reference. Then, of course, you've got this. And now I can go we and and set the opacity here. If I want to make sure that the cone is actually the same size and put that in. And there's this whole website compositing stock dot com, where people now carry this orange cone. That's kind of like a sign that not only your photographer, but you're a composite er as well. And of course, what's great is that Then you take the picture again without the cone in there, which is what he did. And now you have your object. And then, of course, you have to spend all your time getting rid of the background of these people, which is where you go in user channels and select it and do well, another great staff get rid of the cone. And now you've got these people that air right there. Yeah, so I'll just show you because I just feel we have the time. So here's one other way that you can go in and you can get rid of hard to select backgrounds. I could spend time going here with my pen tool, my selection, my magic wand tool, whatever and go through and do this. But this is one way that you could get items out of the background using your channels. And here is an actual real life scenario. Eso this is shot and I go through my channels here and I'm going to see which one is gonna offer the best contrast between my foreground and my background. And what I'm gonna do is I'm going to find the one that gives me the best contrast a duplicate this layer right here. And with that duplicate layer, I'm gonna go in and I'm going to adjust this using my levels. And I'm going to make the dark starker on the lights lighter here. And basically all I'm trying to dio is I'm trying to define the edge between my object and the people. Literally. What I want to end up with is I want to end up with a very high contrast image, okay? And this works great with this. I could then go in with my eraser tool. And of course, I could erase all those areas because the black and white is literally what is going to be selected and what isn't going to be selected. So with this, I would obviously spend more time and go around her feet and everything else. Guess what? They're going to be chopped off with my brush. I could then go in, and I could just paint all these areas in black because I don't want this to be selected. I want just the outlines. Okay, so this is one of the ways that you can go in and do really awesome selections of things. I'm not going in and doing a great job. I just want to show you I don't care about her nose mouth because I want just the edge. That's it. Just the edge. So with this now, if I do a really good job of painting here, that's my selection. I command click on that channel, go back to my Composite Channel right there is him out. I have to invert my selection. So I get it around them if I go back to their layer here. So it all looks like there's my selection. Create a mask and there Iwas. Now this is just masked out. So if there's any little problems that I have in here, like the fact that they lost their feet. I can go in into the mask here. And, of course, black is gonna hide their feet. White is going to show their feet. So if I go in with the brush, I can then you know, brush their feet back out and then use my breasted bring it back in. I see that little fringe all around the edge there. Well, I double click on my mask. I can use my awesome refine mask, which allows me to go in and refine it just like I would a selection. And I could move that in use my smart radius, feather that whole thing a bit. Get that. And in no time I can actually make this look like they're actually there. Other than the lighting. Yeah, yeah, And he has no feet, you know, and the lights coming from a different direction. But you know, something useful, you know? So that was a really cool thing that he had pointed on. I thought, you know what? That's a really great idea. You Something is reference and everything that you dio that you have that and also take it out. So you do a shot and then take it out of the shot. So something like this, you don't have to sit here and clone and clone and clone that all out there. It's a whole lot easier.
Class Materials
Bonus Materials with Purchase
Ratings and Reviews
Tomas Verver
:) Some nice ideas about how to make advanced compositions. I don't use the channels for things Jason does. I don't use often the channels for selecting though. I liked the ideas the instructior has for nice compositions. Is it a complete course? No, is it still fun and nice to view when you have an account for full acces? Yes it is!
Oscar Javier Gallardo
Awesome! i learn a few cool tricks that definitively i'm going to use on my next projects. Thank you a lot.
Kimberly DeVos
Jason Hoppe is so easy to understand and explains things so well and in an interesting way. I have several of his Photoshop and Illustrator classes. He's an awesome instructor.