Using the Healing Brush Tool
Lesson 6 from: Beginner Content Aware and Clone Techniques in PhotoshopTim Grey
Using the Healing Brush Tool
Lesson 6 from: Beginner Content Aware and Clone Techniques in PhotoshopTim Grey
Lesson Info
6. Using the Healing Brush Tool
Lessons
Class Introduction
01:56 2Overview of Cleanup Tools in Photoshop
11:29 3Tips for Non-Destructive Workflow
08:48 4Using the Clone Stamp Tool
18:16 5Brush Shape for Cleanup
03:24 6Using the Healing Brush Tool
06:56 7Speedy Cleanup with the Spot Healing Brush Tool
04:29 8Cleaning on a Path
04:21Lesson Info
Using the Healing Brush Tool
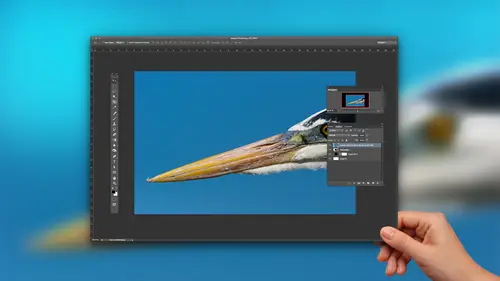
all right, so let's take a look then at the healing brush tool. This is really just a variation on the clone stamp tool, and so the workflow is essentially the same, so really weaken work relatively quickly here in terms of understanding the healing brush tool. Because really, you already know how to use the healing brush tool. It's essentially the same as the clone stamp tool, with one minor change in terms of behaviour. So I'll go ahead and create a new layer and double click. You guys could tell me all these steps at this point if you wanted to, because it's all the exact same thing. Adding a layer using it is our clean up. Later, it could be the same layer that we were using for the clone stamp if you want to. Sometimes it's helpful to separate things out, even if it's just logically for you. I'm cleaning up the sky on this layer, and I'm cleaning up the bird on that other layer, whatever works for you, and then I'm gonna choose my healing brush tools on the toolbar. Now the healin...
g brush is actually hiding below the spot healing brush tool, so any of these buttons on the toolbox that have that little triangle, the bottom right corner. That means their arm or tools hiding beneath the top layer of tools. If you click and hold your mouse, you'll get a fly out menu where you can choose the appropriate option. In this case, we're gonna take a look at the healing brush tool, not the spot healing brush tool, and we can see that we have the options for very similar to the clone stamp tool. I actually use a 100% hardness setting with the healing brush tool, though. But wait him. You told us that we should be worried about these hard edges. When we're painting, we're gonna have an obvious edge to the paint stroke. Yes, but this is the healing brush tool, and it is automatically blending into the surrounding area so there's no need to use a softer brush setting. We can use a 100% hardness value, and the brush itself will do the blending, and in fact, the tool will often perform a little bit more accurately and a little bit more quickly with that 100% hardness setting. Because you're giving it solid information as opposed to blended informations. I leave that hardness at 100% normal blend mode. The source will be whatever we sample as opposed to a pattern in the image. The aligned. Sure, you could turn it on or off. But again, from my standpoint, it doesn't really matter because I'm choosing a source for each little blemish that I'm cleaning up. Well, you can see that I have the all layers option established, and Aiken turn on that ignore adjustment layer buttons, essentially the same settings that we had for the clone stamp tool that we're using with the healing brush tool. So now I'm going to clean up these dust spots now I should hasten to add that all of these dust spots were added in photo shop. These were not dead spots on my image sensor. Hopefully, somebody believes that because, as we assume and you'll start to see more and more of them eso I blame somebody for borrowing. My camera couldn't have possibly been me, but the problem here with these dust spots in the sky seems so simple. We could grab the clone stamp tool and take sky pixels and paint them over dust pixels. Easy. Except even in this case, we have a pretty even overall sky tone. But if you pay careful attention to see its darker up at the top than it is down toward the bottom, which of course is very common, and so we'll have this variation, this gradation in total value. So if I took a pixel from way down here and pasted it in up here with the clone stamp tool, it is not going to work out very well. So this is where the healing brush tool could be beneficial because it will blend so I can set a source and then paint into my destination was a slightly larger brush in this case and just paint and it's gone and my source pixels magically blend in. And in fact, because of this behavior, I don't need to be as careful about setting a source. I do still like to be careful about setting my source, but if we take a look here, for example, gonna choose a bright pixel. So again, how do we do the setting of the source? It's the exact same thing is a clone stamp tool Ault or option key on the keyboard. Click on the source and then let's zoom in and find ourselves on area up near the top. There's a real faint little dust, but you might not be able to see it very well. You can tell just by hovering my mouse. I have that clone source option turned on. Just by hovering my mouse over this area, you can see that my sources too bright. Clearly, this is not going to work out very well. Except as soon as I paint in that area, it magically blends in. That's pretty cool, and so I can actually blend the source into the destination, which means I don't have to be super careful. I'm not suggesting that you get lazy or complacent about setting that source, but it does mean that you can have a little bit more confidence that the blending will cause the destination area to match up. Now, in a moment, we're going to take a look at the spot healing brush tool, which is exactly the same yet again. Except I don't have to set a source. So why would I use the healing brush tool if I could Instead, just use the spot healing brush tool and let Photoshopped set that source for me. Well, let's see what kind of results we end up with image of just jumping really quickly. I just want to let the folks out there know whether you purchase this individual workshop or the entire photo shop week bundle. There are a ton of great bonus materials, and Tim has very nicely for this particular workshop. Has is giving us all these images. So every image that he uses in this workshop right now you will be You can download them, we'll provide them to you. So if you've already purchased the class, you can download them right now and potentially follow along with the instruction. Absolute. So, yes, we have an image here once again where I very carefully painted dust spots and water spots and other blemishes onto the image sensors so that I would have an example of an image full of blemishes. And there are so many blemishes. I work so hard to add blemishes to this image, like it demonstrate how to get rid of. And I don't want to have to set a source and painting the destination and set a source and painting the destination. And I want photo shop to do a lot of this work for me in terms of blending. We already saw the healing brush tool recon blend the texture in the detail into the surrounding area. But it gets better because with the spot healing brush tool were actually adding a couple of additional benefits. Number one. We don't have to set a source. Photoshopped could do that for us. Will it always choose a perfect source for every area of the image? No, of course not. It does a pretty good job most of the time, but every now and then you might need to take control and go back to the healing brush tool. Or you might even go back to the clone stamp tool. Get rid of the blemish now. It doesn't blend in very well, but we can use the spot healing brush tool to blend things in so we can mix and match a little bit.
Class Materials
Bonus Materials with Purchase
Ratings and Reviews
Linda Cook
Tim is terrific. He is so clear & helpful
Dyan Bone
Tim was an excellent presenter and spoke very clearly with precision about exactly what he was doing and where he was going with the work. He covered a lot of information but did not go too fast so people like me at home could keep up with it while I was doing the same thing in my lightroom, etc... Also, he made it very clear almost every time where the tools were at in the menu bar and shortcut keys in MAC and the PC as he was moving along in his presentation. He did this without losing time and was able to cover everything that was necessary. I hope you all can have him present more topics as he made learning a lot easier to follow than some of the other presenters.