Creating Basic Animals
Lesson 4 from: Cake Decorating: Modeling Chocolate for BeginnersLucinda Larson
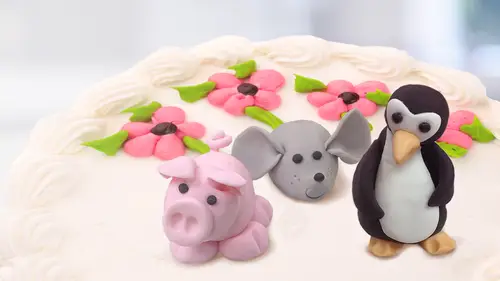
Creating Basic Animals
Lesson 4 from: Cake Decorating: Modeling Chocolate for BeginnersLucinda Larson
Lessons
Lesson Info
Creating Basic Animals
I'm going to make a little mouse so I have made some gray modeling chocolate by taking the white and adding a touch of black and we're going to start with the mouse because he's or she is so incredibly simple and again were softening up our chocolate because it's you've known from the previous our is that guess what that's what we do we stand around in softened chocolate I'm going to let's see how big of a piece of I got here if it's about the side a little larger than a golf ball ok and you know there's nothing hard and fast about this any size will work if you want your mouse really tiny you could make it really tiny could make him really large one of the things I like doing one of the things I do like about the modeling chocolate though is there's not much in the bakery industry you get to do sitting down but this is one of so let's start with our little body and I'm going to make it into a ball and then I'm going to form it into a little cone shape we want a little nose in the fron...
t little nose little pointy nose little round body use my fingers to kind of give it a little eye socket kind of shape okay so most of it isthe right there in the very beginning and that is really hard to see against that silver I've got that gray so close so let's go ahead and just set this one right here for the moment then I'm going to take the rest of that that I pulled off waken start with the tail which is our snake always like that because guess what that's the stuff we learned in kindergarten we can do it and one of the tricks to rolling the snake is if we put it on a flat surface and if we use our, um smoother we can get it really nice and I want to push down on one and so I get it a little a point on it and I brush the powdered sugar off of that your brushes are some of your greatest tools if you have a brush, you can brush crumbs off of your board if you can brush uh powdered sugar and cornstarch off of things this is one of your better tools and they're not that hard to deal with. So for the mouse if I wanted to be cute, I don't want to talk like a rat. I wanted to be cute, which it's a little hard sometimes to imagine a rodent being cute but that's what we're going to do and I don't want it that long I wanted a little shorter so trim that off and in order to make it stick I got to get this warm notice I've got it shiny and warm so let's put this down on her surface and then we'll just attach it right there. Kate now then let's take about the size of a small marble. We could even go smaller more like a p and remember what I told you about every time we have twos two ears, two eyes, two arms, two legs we want to start with one hole so let's, start with one this size and we're going to make ears cut it in half, I'll put one off to the side. I want around into a ball, one of the things you're going to realize real quick when you're doing this is that almost everything starts with the ball and then my thumb I want to press it down. I hope not too sticky make that little ear shape I'm going to fold it it's getting warm so let's, let it sit over here and get firm up modeling chocolate you got to get it to the point where you can mold it, but then once you mold it or get get it to the point, then you gotta work fast because then it starts to get too sticky so and that when I mucked up let's, do it again, make it into a ball present, and then we'll very gently remove it give it that little fold you want things to be cute you don't want them to be ugly little cute mouse okay? So while those air firming up I'm gonna let those firm up let's go ahead and get some of the black and when I say some I'm talking like you know just a pinch I'm doing a nose and two eyes it's not going to take much black is one of those colors it does not take much to get to where you're going so let's cut this off here and get another little section we'll make the's into the eyes make this man into the eyes I want to make a ball to eyes so we start with one we cut it in half you guys keep it up okay? Because speedy gonzalez here is going pretty fast. Okay too little two little beady eyes I think that's appropriate for a mouse and I'm gonna attach one over here and attach one over here try to line them up this is where it's important that you line them up and then we need a nose and I'm not going to use that half for the nose that is too big I want just a little section we want just the little cute knows my eyes aren't level I guess that's better than my head not being level make another little ball for the nose and then write it flips right at the end we'll just attach a little nose now then let's come back to those ears and get those attached and I want to use I'm going to use the end of my paint bush and I'm going to put a little indented here and a little indent need to do this with what my ears to be somewhat level and then I'm going to take that little firm set here and I'm going to tuck it right in and let's do the other one oh how cute is that oh okay that was tough I started here with the mouse because your simple really and I'm going to move him off of my little foil surface here and we're going to opie loss a tail and moving its okay that's a cool thing about chocolate is weaken just reattach it okay well he looks like he's sitting on cheese a mouse in his chief okay how you guys doing they're ready to rip right along to the next thing yeah let's do our panda actually before we do our panda I'd like to do something a little more simple I'd like to do a hippopotamus I'm going to do the hippo in blue you can also do him and gray you could doom and pink you could doom in all kinds of fun colors purples, purple's a good hippo color I don't know what color they are in real life does anybody know kind of a brownie great caray hey there mostly in water right? Artistic freedom we could do any color we want hippo in this is where we're getting that exciting paint drying seen needing of the chocolate I think people might be just at home using this is a sleep aid that's cute little bells okay again I've got well it's bigger than a golf ball it's a good size whatever size you want it's bigger than my mouse and I want to start with rolling it into a ball because that's the way we do everything okay, so I have my ball now what I want to do is I want to create a chubby sausage that's thin on the end so I'm going to start to do a little sausage that's a little thin on the end and the way that I'm doing this if you'll notice is that I'm putting this side of my hand together and putting this side of my hand together and I just keep working it until I get it to kind of where we want it because this is where my legs were going to be about a flat nose ends so that I have this kind of shape can you guys see that barrel it's a little barrel shape okay now then you want to use either your exacto knife or you're sharp knife or your spatula or something and on either end I'm going to cut straight down so I'm creating the legs for this little hippo okay and at some point you have to decide which one is the front end in which one is the back end and I've got it kind of like this okay and I'm going to say this is my back end and right here in the back end I'm going to take my scissors I know I'm going to cut a little tail kind of lifted up okay just cute defy the tail right there and let's kind of fold bend our little legs down this is like plato one oh one then the legs down flatten him ok so we've got her little tail doesn't need to poke up quite that high I did just that so let me take my brush and brush off the pattern sugar and that's our body so let's let her body just kind of sit there now will work on the head and the head we start round but it's also a little bit of a sausage shape okay I got to get my clay good enough you're my chocolate so the terms would like to know if you ever use toothpicks as sort of a skeleton for the animals like maybe we catch the head or I really tried to avoid toothpicks because whenever you have a toothpick that's something that somebody can injure themselves with their feet for these little characters you're better off using little sugar sticks or a lollipop stick that you know is cut long enough that you can't get it into your mouth without realizing it's their toothpicks or one of those things that, um people can choke and hurt themselves on fairly easily and when I say sugar sticks, I know they have him in england I don't know where we can get them here in the states, but they almost look like those old times you guys remember those old time sugar cigarettes that kids used to buy years ago that's what they look like that and there would be would be perfect and you can use them for things like draft necks and all kinds of stuff, but as far as where we can buy them in the states, I have no clue because if I find some or if you find some, you let me know because I will buy some, ok, but stay away from the toothpicks if you want something like that, you're better off using a piece of raw spaghetti or, um what something else think in terms of something that's edible so that if a small child or somebody ate it and it will be an adult, it won't be a child because kids no, not teeth, that steph and you'll be an adult that eats it and if there's any toothpicks in there, you're yeah you're setting yourself up okay, so I start with my bowl and then I'm going to sausage this just a little bit and then remember when we did our baby and we used our finger so we're going to do the same thing so once I had that kind of all belong sausage shape then let's go ahead and come in and create our little hippo head here and I want to put a couple things over here for that eyes and well, I have this in my hand I want to use um like the back of my brush or my sk your or your ball tools probably too big for it but I'm going to stick it in try to hold it without creating too much create and pull it up making a nostril try to make him the same size that's always the hard part I want to come in with my sharp knife and create a wide mouth smile hippos have wide mouse and this one smiling it's here having a good time this ipos here for the party heating for party pull off another little bit of blue I want to make some ears now for the eyes I can also do the black or I can just poke holes whichever it is that you want to do whichever europe for the ears the ears on hippos are not very big they're just little kind of na bueller things so that's probably a little too much I think if I cut that blew in half would be good so cut that in half make one into a dot said it on the head so do you see what I'm saying sausages, cones and dots that's what you're looking at and they sit a little off to the side as opposed to right on the top then let's take our my ball tools too big so I'm going to use the end of my brush and just tuck it end and then let's use the black four eyes not four eyes but for his eyes or her eyes this is a girl because she's going to wear a skirt now you can either create a ruffle skirt like we did for the blanket or in this case I'm going to make my skirt out of um little hearts and I'll show you how we're going to do that first we got to get those eyes straight we don't need a cock eyed hippo my one eye is bigger than the other even though I thought I cut it in half pretty good sometimes you mess up and you've gotta fix it because why it again what I question ok how about a pretzel stick pretzel sticks would work perfect yes right that was a great idea was from lolly thank you lolli that was a great idea sweet and savory than to yeah good idea lolly thank you okay, now I'm warming up the back of the head for r hippo so it'll stick and I'm gonna warm up the front so we get a sticky situation going on there and let's put and I always like to give things just a little turn or a little twist because that makes it more interesting it makes it more lifelike is opposed straight on, so we'll do it that way little turn little twist and I'm going to use this pink now thiss pink that I'm using I have to explain a little bit this is, um an electric pink but my white chocolate that I was using had quite a yellow hue to it just because of its cocoa powder content and so you can see it's not a very pretty hot pink whereas this one was a different batch with the same color and you can see the difference that what your chocolate has to do and there's not too much you can do to change that other than look for a wider chocolate just do the best you can um one of my batches of white because my chocolate was so yellow I actually added white food color to it and yes, there is white food color and it's one of those things we just don't use a whole lot but it's nice to have some around in case it makes things look opaque not opaque yeah we'll pick forgot which direction I was going there translucent opaque it so a little a little more interest if you're interested from the internet okay um chefs mama was searching for sugar sticks and found what looks like a great recipe with one cup of oil icing and one teaspoon of gum text just roll that into thin little's thin little shapes and let dry for a few days that's actually a very basic basic uh come paste recipe cool. Yeah, chefs mama I like that. Okay, so I rolled out my pink I've done it fairly thin I'm going to brush off that excess powdered sugar guess what else I'm going to do he e you guys are like she's losing its late she's losing I'm gonna pearl dust some of this I have to be very careful with the pearl discus if I tap it too hard way will have the prettiest shiniest complexions you've ever seen okay and a brush off the excess now then you know those cute little heart cutters I was showing you ease earlier that's too big I'll use a small one I'm just going to cut some hurts can you guys hear tapping going on there busy working so just like when you're making cookies if you're cutter starts to stick, go ahead, tap it over here okay? I probably have more than enough heart gonna leave my pink over here just in case I come up with some other brilliant idea see how that pearl just made that pink relief fade down a little bit half I have to warm my heart's let me warm your heart, putting it in the palm of my hand to get warm and sticky and now I'm just going to start wrapping it around on our little hippo like a skirt. Groups that little blue on their laverne would like to know what's your favorite animal to make I kind of like doing the monkey I also do a lot of cars and a lot of motorcycles, which is not an animal, but when you get into that group of people who are into cars and motorcycles, they like having them done and they like having have done well and you do a lot of those what's the craziest thing that you've ever had the mold out of the chocolate. The craziest thing I ever had to mold at a chocolate was a president of a fairly major company on a tricycle with little fringe coming off the handlebars uh in his bicycle shorts on one of those, um bicycle you know, the bicycle tracks that are tilted at such an angle they had had me put him on a track like that with a little tricycle with pink fringe coming off in his bicycle, writing shorts I think they had made do him green or blue I don't remember it was a long time ago that was crazy. That was fun and the whole time I was doing it I'm thinking this man is the president of and it was a fairly major corporation I thought employees can have a lot of fun sometimes. Okay? Let's call oh, she needs a bow don't you think? Ok, let's make a bow now normally if your hearts are small enough you can make a bow simply by taking uh can get it off the plastic now simply by taking two hearts and putting them together as a little bo let's try this one so you put the two hearts together at a little center and you've got a little bow but our hearts are too large for her head so let's do a little bow this way a little ball, another little ball. This is where I need to have start with one ball and divide it in half, breaking my own rules. No chin did you see that? And it didn't work, so we've got two balls the same size let's divide him in half, rule out a little teardrop or cone shape, turn around so we can put the bow on her head sometimes when you attach him your flatten them out and recommend gotta redo it this's, we're having tools to your advantage. Let's put a little in dent right here. Make a little center ball really? Time would. Okay, I'm not having a good time on anything. Sorry, peta. So if I walk over and take a look where you guys at almost ready for boeing is you're good. You're keeping a bossam. Let me walk over and take a look white my hands off first. Oh, look at that. She is looking good. You're doing if you make her eyes or his eyes of little tinier, they look a little more realistic. Yeah, looks good. Looks good. Awesome. Okay. Pedal pusher in the chat rooms is calling for a a little pearl necklace around the pearl necklace would be good. Yeah. I'm not going to take the time to put went on, but I like it. That would be good little pearl necklace. And you know when you're doing these little critters in these little things, it's the details that can make a huge difference on how cute or a ncube they are. Um, one of the things I want to do here is if we come back and add just a little touch of pink on either.
Class Materials
bonus material with purchase
bonus material with enrollment
Ratings and Reviews
fbuser 995017ee
Awesome work and easier then I thought. Thanks for all the great ideas.