Lessons
Lesson Info
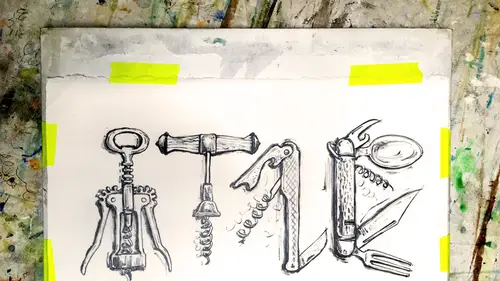
Drawing Supplies
I'm, as I said, we started out Just printer paper. You something free. Get yourself going nice and cheap. But there are all kinds of other papers that you can use. Okay, so for drawing with dry material, dry mediums like just sketching. I like to use Bristol board. It's very heavy weight, and it's very smooth. So you can really take some scrubbing. It can take a little bit of ink. I usually transfer any of my good drawings to something like that. Then you can also use all kinds of other papers. Um, this is watercolor paper. I like to use arches, hot press, and I draw on watercolor paper all the time because I don't necessarily know what I'm gonna end up doing to that drawing. So I'd like to leave the option of it being able to take some wet medium. So I buy this and big sheets and then I cut it down. I used to use I used to use a watercolor block. This is the water coil block, and this is the same paper on Lee. It has glue on all the edges, and so it stays down nice and flat. It's like...
I'm using my clipboard Onley. I've taped down all the edges and that's lovely to have if you're traveling or something, but it does get a little bit pricier. So I just go with the plane sheets of the same thing. Now, if you're going to be doing ah lot of sketching, which I hope you are, um, you need a sketchbook. So they come in any kind of shape size? No, you can get a nice one with really high quality paper, the symbol skin. And I really love these because it's kind of yellow. And so then if I do want any highlights to really pop, I can put white on this paper, um, papers a little heavier. So you're like, OK, well, maybe that might be a little bit scary to start out with. You might want to stay with your thinner, smoother stuff. You can also get a notebook in any shape. This one would kind of encourage you to do landscapes this way or figures that way. I personally use this kind of notebook. Um, just because since I I draw for a job, any of my drawings usually end up on really good paper. so anything that ends up in here is just going to be, like, a really basic sketch. So this has thinner paper, and I could just get a bunch of them one for every project I'm doing and just they carry around really easily. You do want to always carry your sketchbook with you. Um, same thing I use these to. Another thing I really like to go over is not using a sketchbook. So any of these ones, you know, the pages are bound in and you're stuck to one kind of paper. So this is called a wrecker Mount box. And this is used for, like, making a butterfly collection, I think is probably the most normal and has little pins in the side just to keep it in You open it up. And I would encourage you to think of this as your sketchbook and put all your paper in and carried around. So what you can dio here is Okay, Well, sometimes I like to draw on really nice watercolor paper. I've got that cut up. Other times, I like a little graph paper because I'm trying to draw something where I want to keep it really straight. This is great for working on value studies, but I also like to just drawn found paper Anything that you think is pretty like it kind of instantly makes your drawing better Quicker if you already started a really fun background. So I use any kind of little, you know, cards that I find inside of envelopes. Envelope linings are beautiful. So what I would do if I was gonna draw on something like this, I would start my sketch, and then I would probably use some white paint like some Jess Oh, or something just to cover up some of that busy spot and you'll see an example. I've done that later. Maps. So just put everything in there, You can get these online and just call that your sketchbook and carry that around. You know, it's glass, but so is your your tablet or your father. You think if you can't afford that or you don't want to bother ordering it? This works the same way. Just like that. We're also going Teoh, as I told you, tracing paper, we've got used that one. And, um, later on, when we draw our next, we're going to use some Cyril transfer paper. That's this. And it comes in all these lovely colors. This is how you get your drawing from one place to another and move it around. This is I think this is called Canary Trace. I used to use this exclusively all the time. I just love this color texture. So I would do drawings on that and just leave him on that, not bother transferring him to anything. Let's go through the pencil kit that we have just a little bit. Now, After the break, we're going to get a lot more in depth with your pencil kit. So artist pencils come in. Various hardness is that's the word, the one we're using. Usually that's called the H B. After the break, we're going toe experiment and try out all these pencils. So you really know what they do. Um, And then this'll is a pencil extender. What is this for? This is because I have tons and tons of these little pieces, and I can't draw with him because I grew up my pencil really hard. So you get a pencil extender and it just has this little flighty thing on there. You stick your pencil in their, um, sometimes you have to take it out of there to fit it in the pencil sharpener and then put it back in. Let's talk about pencil shirt. Oh, wait. Here. This is another favorite is a black wing pencil and these air, you know, fancy pencils, and you don't need a fancy pencil cause you've already done some drawings without fancy pencil. But sometimes they just feel so good in your hand, and you just love the tool, how it fits in the shape of it. So I encourage you to treat yourself a few times, get a nice pencil, but use it up. Don't Just like I wanted by all that, I see if you can get a nice pencil and see if you can get it down to a little stub. But then we saw the blenders. That's how you that's how you blend things you can. As I said, you know, you can blend with with nothing, just pushed the powder around. You could bend, blend, spit, or you can blend with, um, maybe a little bit of paint thinner or something like that. If you really want to get it washy, um, erasers. So way have this eraser. No, don't use that. Maybe on the first day when you're a racer, just comes out of the box and it's brand new. You can use that, but you're going to draw. See, this one's doing all right. See how my openess usually what you'll do is just sort of draw a pinkish gray line when you use this. And that's kind of what this tool does draws a pinkish gray line. Um, we're using this one. It's a plastic eraser, sometimes called a vinyl eraser. It's my favorite one of the best. You do need to dust it off all the time. This is a kneaded eraser, and they look like somebody on their fun to use. And so if you get a big, mushy mark, the reason people like thes is because they don't leave any dust. That's the main reason you can also shape him into a tiny little bit. I don't use them too much. They seem a little wobbly, but they're really good for charcoal. If you're doing a big charcoal drawing, that's what everybody uses. And then when they do get dirty like this, the reason they're called needed is because you just clean him up despite doing this needing thing. And then you have this nice, clean spot where you can start over a couple more erasers. Thes air. Not necessary. But I do use them all the time. These air retractable erasers. So you got you can get a thicker one. Now they do get a little dirty, Um, and then you can get a thin one. This one has a thin little eraser that comes out of it. And I'll use this one if I just have a tiny little highlight that I want to pull out of something or I've got a really nice drawing, and I just want to get a tiny little speckle coming with this one. But I kind of find these work a little bit better, So I just use these when I need to get into a spot. Um, pencil sharpeners. So this is my favorite. This one. I only have to use if I'm like traveling, and I really need it because that's a little fiddling for me. Um, they tend to clog up to, but this is a pretty good one. This you can you can really see what you're doing. Better with this and stop when you want to. That's that's the main thing I find with pencil sharpeners is get one that doesn't tell you when it's done. You tell the pencil sharpener when you're pencil is how you want it to be. So I was stickler for a sharp pencil. You have one of those automatic ones. It stops the pencils. Not totally sharp. They stop when it has a flat end on it. I like him really sharp. And then there's this hallway. This is the old artist way to sharpen a pencil. You got your pocket knife, and you have this stole broken pencil and you just start carving. And this is a beautiful, meditative thing. The reason you do this is because you have complete control over what shape you want your pencil to be. There are some people I've seen, pictures where they will carve the tip of the pencil toe look like there's a little train running through a tunnel in in the lead, for I have seen pencils with ah little family of elephants, from the mama to the baby just carved out of the pencil that we don't have to go that far. Um, but what this is doing is you're meditating on the end of your pencil and you're carving it to be the exact shape you want. You get this thing to be a little bit longer than normal, and you're resetting yourself. You're looking at your drawing. You're keeping your hands busy any time you keep your hands busy. That's when you get your best ideas or you step back for a minute and you look your drawing and you think, Oh, okay, I should stop now. I was just about to do that other thing because I was kind of really into my drawing. But actually, now is the time to put it down. So you just keep going on your pencil carefully until you get the end nice and sharp and how you like it. That's kind of if you want to be like the artist's wearing smoke. There's also some people use a piece of sandpaper and scrub the end of it just to get that really pointed. I tend to not do that because it gets really messy, and then I smear that all over my page. But you can do that if you want. That's pencil sharpeners and then a couple of other things to have around. I was have a ruler around, just in case I need it, although I try and avoid measuring in math any time I can. There's all kinds of tricks to avoid that, but it's nice to be able to have a straight line, especially for tearing paper. We talked about the dusting brush. Don't leave this on your paper to do that or to get on your hands. I just press it into my lab. So I always stand up at the end of the day and shake out because I could brush it that way. But then usually I'll get it. It'll come back on my paper, so I brush it into my last use this one to That's the free one or or 90 cent version, Um, and then I have Washington. I always use this because this won't rip your paper, and I always just take down the edges of my paper with that like that, so that if you do start really smudging, your paper won't move. Okay, I think that's it. That's awesome. Clear. Pretty affordable. Yeah, totally portable. I think these air fantastic and actually have a couple of questions from some online students. Karen Maples asking How about using mechanical pencils? She says that the advantage of that is they don't need to be sharpened. But do you recommend using those? Yeah, some people really like him. I don't use on because there are very uniform shape all the time, and I tend to really like that pencil reset. I like to say it sharp and get really dull. And then I know it's time to take a break and sharpen it, and I go back to a spot where I have a real highlight. So that's kind of my system was working sharp to dull, sharp, dull taking breaks. I get this rhythm going on, but the mechanical pencil It's great, you know, if you are traveling and you don't want to deal with this whole thing, right? One more question. Jackie Joyce Online is asking, she says, My daughter, whose age six wants to know how she can start off drawing first, which I love the fact that we've got all age ranges joining us today. She said that the draw the scissors air a little too complicated for her. Have any recommendations for a simpler form? Start with. Well, I know she if she's six, she's already done this one, right, your hand making turkey. So just have her move onto the next step, you know, draw around a doughnut or something like that and then decorate it. However you want anything really basic. I know. When my kids were learning to write, they got really frustrated trying to make the letters. So I'm just like, OK, let's just draw spirals. You just sit there drawing spirals. You don't have to worry about making anything perfect. Just start with with little doodles.
Class Materials
Bonus Materials with Purchase
Ratings and Reviews
Rhonda Bender
This class is about two hours long. Overall it is a friendly and accessible approach to introducing some basic drawing techniques and tools that is appropriate for those who are nervous about or just novice to drawing. It lets the student jump in by tracing a basic outline which is then detailed. Towards the end the instructor demonstrates a more advanced type of tracing using a tablet as a lightpad, and there is also helpful information on how to trace one's own work to transfer it to better paper or slightly alter the drawing to be larger/wider/etc. The middle portion has overview information on types of lines and methods of shading. These aren't super thorough examinations of those topics, but should be ample to complete the exercises and drawings included and recommended in the class. Likewise, the overview of drawing tools and papers is an overview, but strikes a good balance between overwhelming with too much information, and giving students enough info to know what tools they need for basic drawing and how to use them. There is a brief overview of how to use the sight size method to draw freehand more accurately. This is a subject that could easily be an entire class topic on its own. Some will find this enough info to get going, others might prefer expanded information and more details on this. The more complex subject of ellipses in perspective is touched on only briefly. (Perspective is also a complex subject that needs a whole class of its own, so this is understandable.) In contrast to some other reviewers, I did not have a lot of issues with the filming and camera angles. A lot of time was spent on the angle of looking at the drawing in action. However, it is clear that material was edited out from the live version. The edited version doesn't follow the drawing of every exercise through to its conclusion, and sometimes segments end or start abruptly.
Kelsy
I like it. it's not very in-depth but it gave me the courage to start drawing, and I had so much fun. Great for beginners.
a Creativelive Student
There was a lot of good information in this course: types of shading; analogue versions of digital tools like guidelines and centring. I had an ah-ha moment when Cleo talked about ellipses. That alone was worth the price of the course. I also loved the part about using a lightbox, as well as tracing and graphite papers as tools - but in a way that doesn't impinge on copyrights.