Lessons
Lesson Info
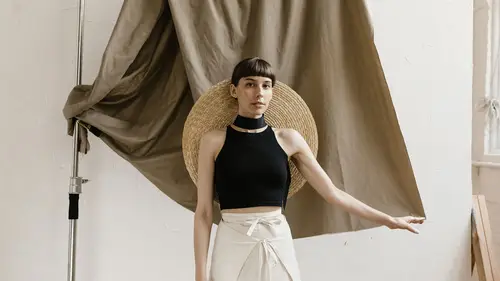
X-Drop Backdrop
So this X-Drop is a really neat product, and it's designed so you can set up your- designed so you can have a mobile studio, you can basically go anywhere and have a relatively stable backdrop stand. You see, X-Drop, their system has a big X, and when you pull that out, Lacey would you turn it around backwards, so we can get that on camera as well? Yeah, cool. And then when we start taking pictures we'll rotate it around. So the idea with this is that it folds down into this bag, so you can move this bag around. It's made by Westcot, it's called the X-Drop, it's a commercial product, they also have all different kinds of backdrops, so the backdrop's basically, gray, white, black, patterned, shapes, colors, you name it, the mottled look, the seamless look, everything. So they've got all different types of products you can buy as accessories. It all folds down well into this little portable bag, take it with you on location, great. It also works in the studio, I'm gonna walk over there a...
nd show you a little bit about it before I take a picture. Let's go ahead and- I'll just rotate it. It's not really, super sturdy, so what I mean by that is you're gonna need to weight this down if you take it outside. It's gonna blow over and I can pick it up with two fingers. That's good, and sometimes not good. It's good because it doesn't weigh a lot, it's not good because it's gonna blow around. Let's go ahead and rotate it. So the one that we chose to use today- Why don't we put it right in front of that floor? Yep, perfect. The one we use to shoot with today- Let's, actually, maybe let's move the whole thing back, including the white floor. Is this wood panel. So we got this wood panel look, you can see we're not gonna get any texture or visual relief on it, what I mean by that is you can't cross light it, and for this you're not gonna wanna use a gel or a different color for the background. You're gonna wanna light it pretty straight. For this first shot, I'm not gonna put background lights on it, the only only light will spill on it will just be the two foreground lights. Cool. Right, go ahead and stand about 3 feet from the backdrop. Right on. Pull this one in, go ahead and bring it in. And let's drop the power on both of those down by one stop. Alright, so wood paneling. Wood paneling. So what's the type of- what type of wardrobe would the model be wearing in front of this typically, I don't know, something like flannel, maybe she's got an ax, a little baseball cap, y'know. Women of the woods. So her clothing is not necessarily appropriate for the wood paneling, so even though backdrops- you can buy backdrops, I want you to think beyond the backdrop. Think about the design in terms of what's the subject gonna wear, what's the model wearing, what's your lighting gonna look like, everything should kinda fit together. Super. How should we stand on this one? What's a pose we haven't done? Let's put both hands up, so maybe one hand behind the neck. Yeah, let's do hair on the side. Yeah, that's great. Okay, let's try that right there. Actually, I like that. This hand across the tummy and behind the arm, there we go, this hand here, cool. Yup, just like that, like it. See how the light works, I've got her positioned fairly close to the background, just to see how that light spills. [Speaker chuckling] I like it. I get excited about my own photos too, y'know! Even though I've been structuring them, like "Oh, happy, I like it!" So that's great, I wanna see her hand cos I like how her hand is hanging there. So I'm gonna back up just a bit. [Camera Shutter Clicks] Nice. And then we'll do one more shot here. I'm gonna pull everything forward, by about four feet, so we have some good separation. I'll get this light, why don't you get that one over there. And you go ahead and come forward about a foot away from the front of that board. Yeah. Alright, cool. And let's change the position up a little bit, let's just have you rotate, yeah. And let's do something different with the hands. Yup. Like it. So now hopefully that background's getting a little bit darker. [Camera Shutter Clicks] Yeah, a little bit darker. So, back to your question earlier about how bright should that backdrop be. Y'know, there's no great answer. It's really, what's the vision that you have in your head? And then it's through deft adjustment and placement of your light, so you get to adjust the brightness of that background. You can adjust the brightness of the background by moving the model closer or farther away. You can also adjust the brightness of that background by bringing in those lights for the background, and increasing or decreasing the brightness of those lights in the background.
Class Materials
Bonus Materials with Purchase
Ratings and Reviews
Mr. Baggins
This class is pretty basic for the most part, but I definitely got some good ideas from it.
a Creativelive Student
The thumbnail on this video is very disbelieving. The video is very basic, where the thumbnail shows sort of an advanced type of backdrop. Dissapointed.