Lessons
Class Introduction
02:36 2Lens Choice for Macro Photography
06:14 3How to Use Extension Tubes
06:06 4Inexpensive Macro Tools
08:01 5Camera Settings
04:16 6Camera Support
07:05 7Shutter Releases
03:29 8Lighting
06:52Lesson Info
Lighting
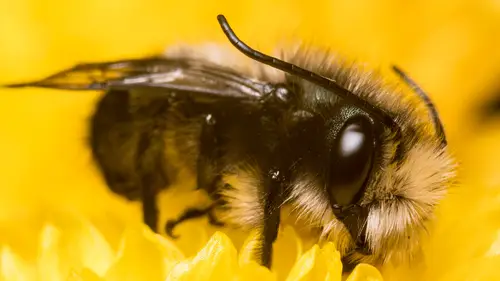
Lighting our photos. Alright, I've got a bunch of really cool lighting equipment. A lot of what I do is, I teach a lot of lighting classes and, I'm looking around the room and some of you have been to my lighting classes before, welcome back, it's good to see you again. I love lighting and I love wireless flash, and so I tend to use the little like the Nikon, and the Canon and the third party speed lights. Let me show you some of the equipment that I've brought today for macro work, and I would consider this type of stuff that I'm showing now to be more studio related. You're not gonna go hike up Mount Rainier and take a big ole stand like this, you know, up the mountain. That said, some of the ideas and the concepts that you'll see here, you can take into the outdoors when you're traveling. So, these diffusers that I have up here are made by a company called FlashBender, I love their products. Actually Rogue is the parent company, so Rogue FlashBenders, and they basically allow you to...
change the angle and the look of the light. You can see here I've got some diffusion, a diffusion panel with a grid in the front, and so this I could use to have a nice catch light in the bug, or if I'm shooting jewelry, or something like that, a nice long kind of vertical catch light or highlight, where as this one's more of a panel, more of a rectangular look. This stuff works great for macro photography. I also, sometimes will use soft boxes, and so here I've got a little soft box. This one's made by ProPhoto. It's a 1' x 1.3' soft box. You'll never find me shooting portraiture with small stuff like this, I mean, you could, maybe a headshot, but you won't do like torsos and bodies, but this stuff works great for macro, because what we want when you set up your lighting for macro photography, is you want to have nice, big relative size light to your subject. So, if your subject's one inch tall, having a one inch tall or two inch tall light can be okay, if that light's really close, and this type of scenario this would allow you to have this huge, huge, gigantic wrap around light for something like a flower. I love using speed lights. Today in the class, I'm using Nikon speed lights, but any brand speed light will work for your macro photography. Let me just shoot a quick photo here, just to give you an idea of what this is gonna look like. We're shooting tethered today, so that one's powered on, this one's powered on, and I'm just gonna shoot this flower. Do some side light, like that. Get my computer ready to go for tethering. There we go. Alright, and for this shot, I'm just gonna hand hold. All that stuff I've been talking about, tripod, can fly out the window if you're using strobes, because strobes have a really fast (snapping fingers) pulse duration, right, and if you are hand holding you can basically freeze the action from the strobe duration. Okay, so we've got the cameras tethered, that's great. I'm gonna do one quick test shot. I'm shooting my 85 millimeter lens and I'm gonna shoot this at, let's go to F 11, F 11, and then, my flashes are set up in manual as well, I've got one of them set, I'm gonna do that one quarter power, and that one one eighth power. Why? I don't know, sounds good. It's just a starting point. Alright so, quarter power, eighth power, I take a picture, and I've got this on manual focus. Here we go. Oh, that's nice. (camera clicks) Let's see if we've got a shot that works. And we'll go full screen. Okay, so that was the first starting point, and obviously it's a little bit bright, and maybe slightly out of focus. So, I'm gonna adjust the power down by one full stop, overall. So, I was at quarter and eighth, now I'm gonna go to eighth and sixteenth. Cool. Get that shot again. (camera clicks) Nice. More better, a lots more better. Still a little bright, little hot, and that's one of the things about shooting macro, is it, you know, typically you're working with still life. You can work slowly at it, It's kinda methodical. You can take your time, except if you're shooting bugs, in which case, that's very frustrating. By the way, I would just caution you, if you're getting into macro photography, don't start shooting bugs. Oh my gosh, it's so frustrating. Shoot flowers first, and then work your way into bugs. So, that was one eighth, one sixteenth, on F 11. I want a little more depth of field, so I'm gonna go to F 16, but keep the brightness of my lights the same. Here we go. Let's move it forward and backwards. Whoa, two shots. Oh, cool, that's great. So this, let's look at that and see what we have for focus. Focus control. It's kind of loading there. When I shoot macro I like getting in close in lightroom and photoshop, and just to see where my depth of field is. You can, now that we've looked at that I'm gonna actually walk over to the computer monitor. Lost my other tripod. (clears throat) Show this here. So, I focused right here at F 16, right there, which is, I'm gonna say two millimeters back from the surface, maybe three millimeters. It is out of focus and blurry. Look at that. And then, of course, down here which is maybe, I don't four or five millimeters back, it's really blurry, and then the focus plane hits the flowers over on this side, Or the petals over on that side, so that depth of field control is really critical when it comes to macro photography. So, you may be asking yourself, well how do we deal with that, you know, what do we do to get more depth of field?
Class Materials
Bonus Materials with Purchase
Bonus Materials with RSVP
Ratings and Reviews
Audrey Reed
This is probably the 30th class I purchased, and the first I watched in full. I like the instructor. He is funny, engaging and obviously knowledgeable. I don't shoot marco and was expecting and introduction, and that is what I got. Lots of good info on gear and techniques. I am excited to try some of his ideas!
Linda
I learned a great deal. Taking photos and attending classes prior to this class. He showed examples of both bugs and flowers. Yes, he did use a Nikon camera but it is unrealistic for him to show all the examples that he did with several different brands of cameras! I have a Canon 5DM4. It doesn't have focus stacking yet. But I did learn that they applied for a patent. So it is coming. If you are doing studio work, the focus stacking is built into the Canon software that comes with the camera. For lighting I have the Canon macro flash that fits around the lens. I have the 100mm and 180mm macro lens. Just received Canon's two extension tubes today. They did work with the autofocus and camera settings. I thought his style was approachable. My macro work is all about flowers. His flower examples were on point. All in all, it was a solid class presented by someone who enjoys his work! PS The iguana's eye photo was stunning!