Lessons
SPECIAL: Evening Light Painting Session
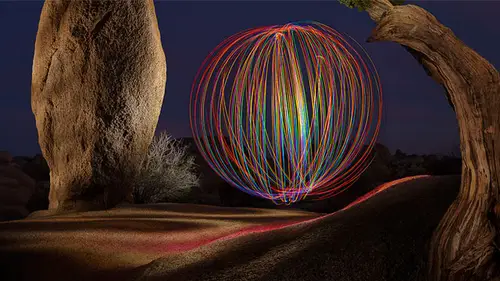
48:10 2Introduction to Light Painting
17:34 3Shoot: Objects on a Tabletop
22:43 4Shoot: Using Gels
14:55 5Editing: Objects on a Table
25:37 6Morning Q&A and Timing for Light Painting
23:22 7Students Shoot: Vase of Flowers
25:02 8Editing: Student Images and Composites
21:28Review of the Special Evening Shoot
08:25 10Shoot: Scooter Composite
27:07 11Compositing the Scooter
19:39 12Shoot: Light Painting a Person
18:19 13Student Shoot: Iris
05:46 14Light Graffiti
14:10 15Light Painting Example Review
20:09 16Fun and Unique Light Sources
27:42 17Sparkler Painting
10:20Lesson Info
Shoot: Using Gels
You could get colored gels from a bunch of different sources and just so you know, you don't have to buy, you know, fancy versions of them. I did one that you'll see on my website of a old roles for reiser jaguar I can't remember in was I kind of wish I had a colored jell o and the guy went looked in his desk drawer and he had just pieces of glass from, like, a an old train signal or something, and I was just shooting light through it, I have a blue cobalt blue bottle over there on the table somewhere that, you know, it was just, you know, it might have been a water bottle or something, you shoot light through it, you don't have to buy specialized stuff just get something that could do that so let's say I wanted to do something with color so let's do one in that way I'm gonna pull out two color gels here I have a bluish purple and on let's see if I can find something that would contrast with that. I got a green bush, purple, green or red area, okay, I got a bluish purple and a red, so ...
if I want to do that, all I'm gonna do is have those chills ready, and I'm going to put one of them over the flashlight just hold it with my hands for sometimes you put a rubber band around the flashlight said that rubber band can hold it just see what I'm getting okay and then let's do an exposure nine, eight, seven, six, five, four, three, two one and I usually move way off to the side where I can see part of the typewriter I'm only in like a typewriter write down if I have time on like the other things and I put the other color gel and walk over here gotta watch to make sure that camera doesn't see the front of my flashlight and then I'll try the light, maybe the radio in red I walked right behind it. I don't care that I'm in it as long as I was sliding myself, I don't know that I got enough blew on them, but let's see what it looks like. Can you see a little bit of blue on the left side? We'll read on the right ideally when I did my red, I would have liked to have been further behind the subject. If I was I was standing, I think about here when I did it, I would have liked to have been about here because the light can only fall on what you can see with your eyes from where the light is, you know I can't bend around corners and so usually what I would end up doing is on this side, I would walk until I cannot see this part of the of the subject and so that's where I would light it from, but right here, look at where the camera lenses this would be going into the camera lens most likely I could always retouch this out or use another one of my shots for this portion. We can try that, but I would like to light the typewriter from here because look where the light's falling and you notice that it's not falling on a good portion of it, then I would light it with the other color when I can't see the main stuff. I was lighting here so I would walk over here and I might be about here where the light is not going to get on those we could try one of those, but I think I'm going to get the front of my flashlight and part of it let's try it much easier when it's a big subject like a car and you could be outside of the frame. So I'm moving over here until I can only see half for the keys on the keyboard I'm using a red joe in this case and lighting from here knowing that light can only fall in what I can see from here. So when I'm done lighting with that, go to the other side and I go until I can't see most of the stuff I just lit and now I know that that cannot fall on that other stuff other than at the very top where I could see it on both shots see if you like the sound effects all right, but let's see what we got on this typewriter but you see a little bit more isolation between the two colors, it looks like I actually didn't get that much light on the very front, but if you look on the part of the typewriter that is in the very center top like words almost a v shape can you see the red on one side of the blue on the other? And so it's just a matter of experimenting a little bit mohr with that to see what I could end up with, I saw got some spill of light onto the radio in that kind of stuff, but that's part of my thought process when I end up using color gels is the light source can only light what your eyes can see from the that position and so I'm walking around until I can't see where I want the other color to show up, you know, painting with red, I'm going to move until it I can't see where I want the blue to go paint paint paint then I walked to the other side until I can't see the area where I put the red or all you can see a small portion to make sense does that sort of mute out where you had the red and blue on the front of the typewriter I don't know if I hit the front of the typewriter all that much it would move meted out a little bit but the main thing is I didn't want the rest of the scene to just be black so that's the only reason I did that and I don't know that I'd call that a finished piece there I'd say that typewriter certain look interesting but if I want like the radio or something I can do another one eight seven six moving until I can't see the entirety of the ah front of the radio I could see about half of it you get in a little closer here closer you get the brighter the light's gonna be because it doesn't fall off as much okay then I walked in the other side living so I can't see any of the grill and then if I want to try to light what's around it it's bill slight and he tried to put a little bit more of the other gel in there as well typewriter didn't get anything so let's see if we can get a little but let's see what we end up with there you see the colors and the two sides. You notice the middle. I didn't get much, though. Yeah, you do a mere lock up to help. Do I do the mayor? Lockup? I don't. Usually the main reason being is it's not critical when doing this. Because at the time, the mirror is flipping up there's, no light hitting the scene so you could shake the camera and it's not going to make the image look blurry or anything like it would traditionally there's. No problem with doing it, but with a ten second self timer or even with two second self timer, the mirror will have popped her. The mirror will pop up. You're not going near the camera. So it's not going to shaking much. And then you're going to start the light right after that. So it's not going to be a critical thing, okay? Yeah. So now if we took this particular image in, use that for the radio, but used the previous image for the, uh, the typewriter, then we could create a more interesting composite. It's. Just a matter of how long do you have to light things? If I had a completely dark room in here, I could do a two minute exposure or something else and then I'd have the time to really be precise with where I'm lighting both the radio and the typewriter whereas when you're limited to thirty seconds you know there's only so much you khun d'oh that makes sense right? Eso are we getting questions online as well we are been working out we're going to hold those in tomorrow for the break so I look out in the light that was good all right? Well with this what I would do is make sure that I have each area lipped eventually and if you're going to do it all in camera I would just keep working it each time and tell you for find it and you've got everything let right so let's try to refine a few doing a little self timer waiting to hear the shutter like a light from above funny too the other side and then get a little bit on the table trying to see if there's anything else but it's a matter of trying to repeat what you've done before in this case we're kind of starting fresh in then looking at what did you do too much of so I did too much on the little light meter that's sitting there the little east the leather case for it typewriter I think is looking ok in the lighting on the table is half ok like the area behind the radio on the right side in some other things that's looking interesting so this is when I might decide that the beam from my flashlight is a bit too big to do small objects like my light meter in that small camera so grab some sent a foil wrap it around just make that opening a little bit smaller so that I could more easily get mall let's see if I can now get it small you know my main worry is if I get in the frame too much the edge of the flashlight look might show up we'll see if I could get a little bit more find ten eight seven, six and I'm going to start on the small stuff so I'm not in a hurry when I do it and then anything I want the keys brightest so I spent the most time lighting it a little bit of a painterly look on the radio by not pain consistent and little streaky on the table you'll notice that the senate foil that it should be a more focused see that where you can really see where I put in the light and I think that's helping on the the light meter on the camera although I need to get a little more light on the camera and and typewriters not bad the radio's just looking a little too stylistic s o I might be a little bit more broad with that so I'm just looking at it and saying what away? What am I not lighting enough in what am I getting too much spill on but notice how I'm not getting all that much still beyond the subjects so I'm gonna do one more and you could film or of the radio the typewriters looking okay let's do it ten nine eight seven six five four should open any moment before I didn't get enough of the radio or not the radio camera so I spent a little time on it I want the keyboard to be the brightest so I spend more time there little extra light in there get aside and yes, you can walk right in front of the camera as long as you don't like yourself get some right on that okay? I didn't get the table though that's the problem with thirty second exposures like the radio more even typewriter doesn't look bad accessories don't look too bad it's million the table that I don't like, so I just need to be a little faster with what I'm doing and see what we can get I'm going by the vue on a on a monitor here I don't know how accurate that is compared to a computer because the view on the back of my camera's darker than that in the colors look richer so it's hard to say, you know I'm not used to this set up but I'm going to do one more and I'm just going to try to do that now that I'm familiar with what I want to light in holland takes eight, seven, six, five, four, three, two, one my son will get the form where it's going larger than I wanted to sew this one I think I'm gonna have a little extra spill you should get some desktop. Senator doyle was a little deformed in a way it wasn't expected so I think you got more still around things now you could see I could see where I walked through the scene a little bit. You see little bitty streaks of ghostly white nous that's where the edge of my senate foyle was this well when I walked right by the camera so ideally, I would have had the flashlight off when I did that, but it's something where he could easily retouch those to get it. But it does give me a sense for just in general the process and it all depends if you want to do it on one exposure or not. I have the tendency of doing multiple exposures because otherwise it could be here all day refining things in these time, you know, any up with a different looking resolve as long as I don't move the camera and I don't move my subject, then we can combine those together
Ratings and Reviews
Julie Coder
I've been interested in light painting for awhile, so I was thrilled to see this included in Ben's bundle package, since I'm learning Lightroom as well. Really enjoyed it! I appreciate the "trial & error" approach of the class so we can see the thought practice behind the photos, not just the final images. Really helpful tips for editing as well. I love the images on his website, which gave me ideas for things to try on my own. Fun, fun, fun!
Paul
Really cool class so far. Just wanted something to get some inspiration and this is fun class but it's gonna force you to exercise. I don't work for creative live but I don't have to say that the quality of the few classes I've just started in photography is very good. I once was a professional photographer and I've taken lots of live classes and I feel the value of these is good. I am looking forward to watching the Clay Blackmore class.
Student Work
Related Classes
Lighting