Lessons
Day 1
1Class Introduction
05:10 2Direction of Light: Setting The Mood
07:57 3Metering
34:21 4Understanding Dynamic Range
13:46 5Understanding Histograms
22:37 6Effective Size: Hard vs Soft Light
09:29 7Understanding the Inverse Square Law
19:41Light Modifiers and the Shape of Light
34:14 9Controlling Light with Grids
22:28 10Watt Seconds and Other Important things
14:15 11Color Theory Part 1
19:55 12Color Theory Part 2
35:23 13Calibrating your Monitor and Printer
27:38 14Mark's Lightroom Workflow
22:07 15Exercise: Purpose Worksheet
34:03 16Failing with Purpose
13:22 17Example: Prep Shoot for Testing
40:37 18Special Request: Pricing
58:05 19Creativity: from Idea to Product
41:26 20Sharing your Ideas: Making the Plan
05:58 21Working with a Team (Snapfactory)
28:40 22Working with Models
27:30 23Commercial Shoot Workflow
10:36 24Q&A
07:12 25Set Up Studio Environment
13:46 26Planning The Live Shoot
21:29 27Dialing In The Lighting
18:13 28Q&A
15:49 29QuickTestShot
08:52 30Photoshoot Foil Dress With Carly
34:17 31Lightroom Workflow
26:23 32Q&A
14:21 33Preparing for the Second Shoot
16:30 34Photoshoot: Deep V Dress With Michelle
40:12 35Photoshoot: Closeup With Michelle
14:24 36Photoshoot: Tether Tools Table
09:29 37BONUS VIDEO: Lunchtime Q&A
11:21 38BONUS VIDEO: Quick Ad Mockup
01:18Day 2
Day 3
Lesson Info
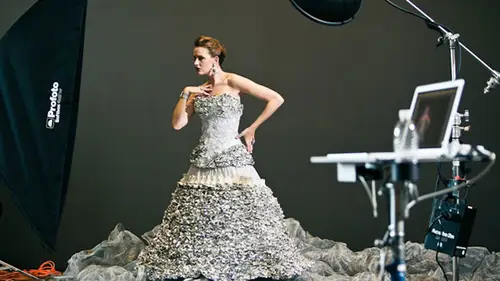
Direction of Light: Setting The Mood
So we're gonna do is we're going to start off uh by going through the direction of light and so to do that here's my little direction thing we're gonna do is we're gonna bring this light out here and I want to explain teo sort of what's happening on also can you grab my camera um or doing is I want to explain to you exactly how the direction of light impacts the mood of your images and how impacts contrast so to illustrate this so I'm going to do somebody grabbed my camera and if you can roll my laptop off there I'm going to put my camera right here just like this and we really need to understand what happens when lights move around so what we're gonna do is carly if you could take a stepover right there good were lining up carly and this camera and I'll move this over because we need to go there we go is to be lined up exactly with you guys yeah, there we go there we'll have carly right here and so we have this line the straight line there we go and I'm going to show you how light whe...
n we change the light it drastically affects the mood and the contrast in our images now contrast is essentially the difference between the brightest and the darkest areas in an image now I'm sure if you google that or if you're uh history are a photography major you'll know that there's a better explanation of contrast we're going to stick with that because it's very teachable so it's the difference being the brightest and darkest areas in our um in our image so if we have a light that is directly aligned with our camera now to make sure that you guys could see this I'm moving this camera out of the way here we go right so pretend like there's a camera right here and you're lined up exactly this is front light so I'm gonna make sure I make that very hard light sorry carly we're melting her at this point now this front light it is exactly aligned with our camera and our subject and it's called front light because it's falling on the front of our subject this could be a mountain or a model or a mushroom it doesn't matter if anything what we're getting is we're getting low contrast light because the light on one side are subjects face is exactly the same is on the other side and so it's just very flat we don't have any high contrast stuff going on they're so front line is going to give us really flat light so I'm gonna move you forward it's like this okay hang out right there know what I'm gonna do is we're going to talk about sidelight if I move this to the side of your face fried okay, good there's a very hot light. So sorry, this is coming directly from the side. We're going to need to kill that. Those lights over there. I'm pretty sure for this to work. Okay, so what we're getting here is we've got some, uh, ambient light's here filling in. We're getting there. We're getting light on this side of carly's face and no light on this site. Now, we have a bunch of video lights and stuff here. So, it's not exactly what you would see in the studio, but what's happening here is the contrast is increasing dramatically because we basically just have shadow on this side of the face instead. On this side, we have light. And so the darkest and brightest areas just changed dramatically just by changing the direction of her light. Now we can increase our contrast, even maur. This is called sidelight. By taking this light, check this out. You go right into the lens there. Okay, so I hope this is right. We should have a silhouette. We might have to move you, carly, that we're good. All right, now we have a silhouette and this is the highest contrast. Because if we had a totally controlled studio with no ambient light, this would be absolutely pitch black, and then we have this outline behind our subject and so the difference between the brightest and darkest areas are at their macs and so we have that going on now what we're going to do is we're gonna take this guy right back here so if you go back to your very first position just back little bit we're gonna put this back where it was just when we started blinding carly okay this flat light all right now what we're gonna do is we're gonna have this camera guy over here yes so we're gonna have you move this way now what's happening is you can see that we don't have to move the light we can move the camera in relationship to the light and you can see that the light is then changing and so it's always the difference between where are light is and where our camera is that's going to give us either side light or front like so you can move either one and this is really important to understand because if you are shooting over here so let's flip back to this camera here so if we're shooting over here with camera one and we have really flat light and it looks really good and pretend this is your actual camera in the studio and I walk over here to this camera so let's go over to this camera and I'm on the side what happens is our contrast in all of our shadows everything just radically changed because we moved our camera so if we wanted consistent flat light we have to make sure that we move our light in relationship with her camera so that we can have our light consistent. Okay, that is the direction of light thank you for being fried it's awesome. Okay and we can turn all these lights back on so just to review what we have our light at at zero degrees right onto the camera very, very flat light we move our light to the side of the ninety degrees high contrast light moved to one hundred eighty degrees extremely high contrast light and so just by moving around we get that now there's another thing that we can do that I didn't talk about and that is natural and unnatural life. So if I have a light that is low well that's not really natural because that's not how the sun works the sun is usually in the sky so we need to raise our light if we want unnatural light something that looks like campfire crazy were then we put the light down below and light and sore shadows so we also have contrast above and below by moving or light up and down so there's that whole sphere of where we can put our light and so that is how our direction of light changes okay, thank you very much now we're going to talk about something else called luminosity and again we're talking about light and four different ways we have direction luminosity that's that's amita ring in control and so for a refresher what I'm gonna do is I'm gonna refresh you with the exposure triangle now the exposure triangle works like this we have three things that control exposure we have our shudder in our camera we have our aperture and we have our s o so I'm gonna have ah meter right here really fast thank you okay so we have to be able to connect what's happening here with that exposure triangle that that I just showed you um so john can you also move this camera for the it's obscuring I think um so we have to connect these two things this exposure triangle and this meter and so the way that works is normally if you're shooting with your camera outside of a studio situation you're setting your s o and you're setting your shutter and then you're adjusting your aperture to get a proper exposure or you're setting your s o you're setting your aperture and then you're adjusting the third thing right to make sure you get a proper exposure well when you're using lights in a studio you will always set your shutter speed and your s o and the only thing that changes is the aperture that's it she always be solving just for the aperture value okay, the two things are gonna be set, and your aperture is gonna be the thing that you're changing. So, on a light meter, like this guy here, those two things are going to correspond.
Class Materials
bonus material with purchase
bonus material with enrollment
Ratings and Reviews
Brian Geoghegan
Mark Wallace, Brilliant at what he does, so clear to understand, he is amazing, well done Mark great workshop, I learned so much. Thank you, kind Regards, Brian from Ireland
Sean
Mark really knows his stuff. He was very well prepared and Mark did a great job teaching this course. Mark went through all the steps from beginning to end in great detail. He also answered questions from the audience an online viewers which helped fill in any blanks. Great course.
a Creativelive Student
I loved this workshop! Many things I struggled to understand about exposure and many other things became so clear! Just wow!
Student Work
Related Classes
Portrait Photography