Digital Darkroom: Lens Distortion and Timelapse
Lesson 11 from: Creative Wow: Night and Star PhotographyJack Davis
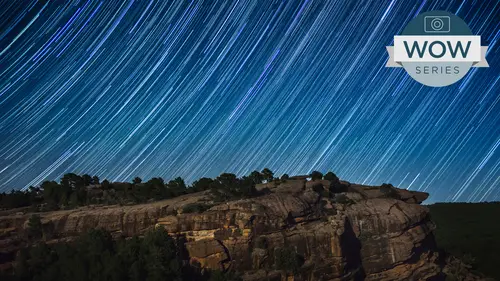
Digital Darkroom: Lens Distortion and Timelapse
Lesson 11 from: Creative Wow: Night and Star PhotographyJack Davis
Lesson Info
11. Digital Darkroom: Lens Distortion and Timelapse
Lessons
Pre-Show
09:45 2Night and Star Overview Part 1
35:26 3Night and Star Overview Part 2
24:26 4Night Photography Gear
42:33 5Settings Chart for Night Photography
44:45 6How They Took That Image Part 1
19:48 7How They Took That Image Part 2
27:59 8Night iPhone Photography
17:29Lesson Info
Digital Darkroom: Lens Distortion and Timelapse
first, a quick show. This lens profiles light room, and it's also available in Adobe Camera or a CR's. Jack calls it. This is a fisheye image, the horizon getting bent in the other image we looked at. That's that's the distortion you're getting for that fish I. So in your develop module, you scroll down toe lens corrections and under the profile tab enable profile corrections. Adobe has a database of all these different lenses, and they've analyzed. I'm trying to figure out exactly what sort of distortion they have, and in this case, my 15 millimetre of 2.8. Canon Fisher is one of the lenses they do have. They have most of the Canon and Nikon. They've just added a bunch of Stoney's Lakers and others. That's one advantage of having the more commonly used cameras is that these lenses already been profiled by Adobe You can make your own, but it's It's a lot of work, so advantage there so again, before and after you losing a lot of the sky. It stretches it out so that the disadvantage. But...
if you want to perfectly flat horizon at the bottom, there's one way you can get it, but you're losing. You know these corners, you'll see them go away as well as the upper dark sky and this part of the images. You can manually warp it a swell with the manual tools. Get vertical perspective correction aspect ratio. If you want to squish it, emphasize the sky and besides the foreground, a swell as then. If you want even more controls over stretching and so on, you can bring it into Photoshopped and transform your later for architecture, especially. I don't know how it will work. Upright works on this new feature. Upright works on night sky images. We can try it auto, see what it does. Nothing. Then it looks where straight lines in the images and tries to make them vertical or horizontal rectal. In years, when you're shooting up in a building, it's getting narrower from the perspective. Will try and straighten it out as if you were shooting straight onto it. OK, moving on the time lapse, show you a couple of time lapse videos and then should quickly show you how to make video bar in time lapse. Some auroras going my so these air probably like 45 2nd exposures that that I've turned into 30 frames per second video. So it's 12 seconds. So it would have been I can't believe I'm so tired. I can't. 12 30 0 busy Three days. All right. So we talked earlier about a circular fisheye showing 180 degrees the whole sky above you and how I set up my camera taking a time lapse while I'm wandering around doing other photos, Just more standard wide angle. And so this is the video that I got out of leaving my camera there. And at first it's like, Yeah, this is nice words. Remember I said how this night was a four out of 10 scale according to the solar weather folks. And then all of a sudden, this guy explodes and the whole sky is green and going crazy and shimmering and dancing and super bright. My exposures were down like half of a second F one point for it was just so I made that point. They're kind of fun to have that circular expected. Now I do a lot of printing on aluminum and using a CNC router, you can cut out the circular shapes from the aluminum, and so then you can sell a circular piece. If you're doing a lot of circular fisheye something you might want to look into it sort of a one trick pony lens. So definitely I recommend renting this one. But for covering the whole sky or a whole palm grove above you of palm trees, it could do cool images. That's an understatement. So this video is actually not time lapse. I throw it in here to give you an idea if you haven't ever been looking up to see the northern lights of how fast they move in real time and they saw them faster than this and slower than this. But this is shot with at 1. eso 51,000 and on my canon one DX at the time, when the best noise sensitive cameras trying to do 30 frames a second means you need a 1/30 of a second exposure. So, really, I have under exposed dramatically, but you can see the my brother and I really wanted wanted to know how fast they move, and I wanted to know that, too. It's all you ever see his time lapsed video because we need as long exposures in order to do it. But now we're starting to get to the technology point where you can really times record the Aurora movie player and just black out the screen That deserves the absolute How does a oh doesnt imminent layer? Yeah, what we have on here, show an explorer open. Sure. Full screen. OK, Yeah, this is I lowered the exposure there. You can see a midway because tryingto um, maintain that 30th of a second speed, but kind of mesmerizing, both. Neither. Absolutely. That is just And it may be that that spherical one again, I'm warrior. Sure. Listen, do you have it right there until the interval here would be again. The minimal amount One second if they can't a couple other photographers in this location coming into the frame there. Headlights going by. I can't be mad. I can't. I can imagine standing there, but, uh, in some ways, this pales in comparison. But this is for me a religious experience that it's so beautiful. Pretty amazing world we live in. Okay. Thank you. Sure. Okay. One final are two more time after a star Milky Way instead of Aurora e. I should just do all of these in full frame thing is 32nd images or maybe 22nd images trying still images optimizing for the stars of the Milky Way with a one second interval on Then so you end up with thousands of files with a shorter time and running all night. And then But you see this, the stars move smoothly. That way you actually can do a hybrid. You can combine images together like, um, 10 of those images together into a little mini star. Trails do one through 10 and then two through 11 and so on. And so then you get star trails moving along with it, or you can do it The you know, the star trails draw out there trails keeping you do one and then one and two stacked 12 and three stacked and so on. And make that into a movie. All right, finally we hear this one I had a little fun with with that bathtub, So I remember how I shot that bathtub with the light in it. Only for the first frame. Um, so I have masked over in photo shop. You can do video Now you can open up all your images as an image sequence and you do that as open as and then check the image sequence box has to be J pigs. Eso Then you can have a mascot the bottom to have the image with the tub glowing in there while the video is playing behind it with the stars going by. And then that's how I also I blurred the light up to make that glow at the end. So I think the quickest and easiest way to make a time lapse, especially if you're using light room. So you've got your whole sequence of images here. Ah, first you need to download some presets that you put in your light room program folder if you search light room time lapse presets. The name of the precept that I'm using our l R B B is and boy time lapse presets. I believe Sean McCormack that made them. And so it enables you to use your slideshow module to actually export your time lapse video for you. And one easy step were a couple of steps here, so I just gonna shift click the last one where I could do control a to select all. And I'm gonna go to my slideshow module and after you have installed the presets over here, in your templates, you have choices of different frame rates. So 24 frames a second is the standard film frame rate or 30 frame 29.97 Technically, TV 30 frames a second Internet standard. So any of those will give you move motion video. So you have 300 frames at 30 frames a second, you're gonna get a 12th video. So I often will think about how long my exposures are and how many of my exposures by thinking ahead to what the attention span of my audience. You know, Internet folks probably not going to step. Sit around for five minutes to watch a full long In this day and age Twitter attention span Shangqiu shiny, making it faster, you know, aim for the 12th or the 32nd independent, you know, I mean, you want to cover the full amount of the action you're looking for the clouds going all the way across, or the whole baseball game or whatever it is, but just keep in mind of that math of is controlled by the frame rate and how many images you have selected their in this case, I shot this vertically because I was looking for still frames rather than trying to make video unchecked, zoomed to fill frame. And if you have a different aspect ratio than HD TV, like most cameras, the SLR there 3 to 2. Where's your HD TV? It's 16 to 9 is not gonna match anyway, so you may or may not want that doomed to fill the frame whether you want black borders or lose. But if you get rid of blackboard is, you're losing ports of your image. So I'm gonna choose my frame rate. Uncheck this and then I'm going export video and preview. I don't sort of you can preview it in the library module by get up to a full frame and then holding down the right key and your computer will do alot Reds version of them as fast Conforto keep up and it will get jerk. He has to load previews, but then you know you've got the right sequence in the right order. Everything gives you an idea of what you're covering so then export video. And then down here at the bottom, there's the presets that you've downloaded. One stall, a couple of these different things, and you can choose what size you want. Output it to choose file, name and test. Save on. Then you'll get on export. Don't take a little while, but you can go get a cup of coffee or something. And as it does that, the real quickly how to do that on photo shop. You have, um, get out of out in the dialogue here closed. Cancel my blur dialogue. Okay, Now open as And this has to be. Um, no. Well, it says camera raw. It really doesn't. It doesn't work in here is this image sequence gets grayed out When it's not j pay. It may work with it if you select the first image in your sequence and they need to be named in order. So if you're a camera lap goes from 99990000 your time left is gonna meet out. You need to rename your files to be won through whatever it is and then open as image sequence. And it's gonna bring asking what frame weight you want, and then it's gonna give you a video document and photo shop, and from here you can trim. You can cross fade. You can add logo's on top, whatever you want to do than to file export, render video, and then that gives you a lot more compression options, depending on where you're sending it and what quality and what size and so on, so a little bit more powerful and still reasonably quick. But you just need to first export your raw files to J pigs in light room, and when you're doing that, you can rename them at that time. Under the export dialog, you can come down Mr Renamed to and then shoes Custom named sequence, and you can put in you know, the name or use file name sequence and it'll number. Remember it for you from wonder however many have. All right, quick before I throw it back over to you, Jack, I'll quick show what that um, spin blur looks like, um, excellent. Newer one with much better interface. Yeah, radio. But maybe there's some way that we could adapt your clever, precise entering to this new thing. But even if you zoom in, you can't perfectly get It is big dot tryingto lane that but you can pull it into an oval to get it is close to match. Often you'll see that I cokehead didn't get it exactly. And you have to keep trying over and over but on but also takes a long time to process. But just another option for you. Yeah, if you're anything other than a perfect circle, that's gonna be a challenge, because those are one picks a lot of those air one pixel streaks. And so your potential of getting the exact not only oval but distorted oval is Yeah, just shoot yourself and be done with it. I was again surprised at that. However you shot the bus wanna that It really waas about as perfect as you could in terms of a circle. Um uh, point about you just creating that video in light room that a lot of people don't realize we've mentioned it in other classes. We've talked about the prowess of light room and it's output modules. Remember, the library in light room is very similar to the bridge. The develop module in light room is very similar to Adobe camera Raw but Light Room also has thes Fantastic five export modules, and they're just fantastic O R. Five output modules and, um, slideshow now, with its ability to not only do what it's been doing for a while of take all these different sequences of still images and put them together. But now it can also take video clips as well as the still images and automatically export them as part of a slide show. And as a default, it automatically adds soft cross dissolve transitions between both still images and the video clips. So what you have is actually that the poor man, uh, video editor, you just arranged anything you want in that dime timeline, whether it's still or video, and it will automatically add your transitions to it, you can add an audio soundtrack to it. And as you saw, that couldn't be more simple of, you know, hitting export to video. It saves high quality, high definition video and you're set. If you wanted to add some or elaborate titles, either at the beginning ender throughout, just I would recommend using photo shop or something like that, said a little type and bring in that You know, said that that the 10. 80 p, you know, aspect ratio, that text and it's Smith wedding and dotted uttered on the wedding and the kiss and cake cutting whatever you want to do. And and it's an amazing So for a lot of people who have been hesitant to get into video, that's a wonderful way to do it. The other thing to remember is that light room can do basic color correction and tone correction to video clips as well a stills, not the entire develop module, but a good chunk of it. So that's really good to know. And even Mawr exciting is that now, as you saw, Adobe camera Raw is now built into photo shop is a filter in that same timeline that you just saw, the Bren pulled up allows you to take those video clips as long as that video clip itself is a smart object. If you go into your layers palette, right, click on that video clip and say, convert to smart object, you can then use the entire power of adobe camera raw to do whatever you want to any video clip. That means all of the power of clarity and sharpening and noise reduction in all the you know yet ing and all those capabilities. So for a lot of photographers, we've been doing stills forever because we love how we can polish our work. We've been a little hesitant the video, because we know we can never make it look as wonderful as we've been doing with are still images. But now, with the fact that adobe camera raw can be applied to video clips, I think a lot more photographers once they know that and realize that are gonna be using a lot more video in that work. Just because there's no reason we're not, too you can polish it just like your still images. So, really, before you move on brain, can you show us how to find that preset again once you've installed it? Yeah, it's in the slideshow module Jack was talking about. These are the output modules you got. Map, book, slideshow, print and web. So Sly Joe. And then in the left panel under template browser, you have light room templates and then you're the ones you've installed will show up under user templates. The question first Yes, certainly. Question came in in scene a glitch in star shoots or cynical I trails. Do you ever use graduated filters to compensate for over exposure in the foreground? Or vice versa, especially with the moon? I was just thinking about bathtub shot. Would you ever consider using that? I hadn't. It could work. You have. Usually, those are linear, like across the middle of the filter. So if you have one of the square Koken holder sort of things, you could slide it down to try and put that on the horizon. But unless you're shooting stars in Kansas, General, yeah, it would be hard to position that I tend usually try and do that digitally by shooting a second shot, exposing for the foreground, which, if it's not changing works and that you could then put that over or shoot a second shot for the moon, that sort of thing and trying digitally combine those exposures and you're losing light. Of course, in night, almost everything is dark, and so, yes, sometimes when you're exposing for the really dark, the sort of dark gets bright. But I'm always hesitant. Lose any light by putting any extra filters on. Yeah, I was speaking of which, we've actually got, um, Brandt. Let's see if I could figure out which one it IHS your seen with the fireworks. It's exactly what we were just talking about here, and I'll just open up. This document won't go through the process, But, um, here's what exactly what brand was talking about. We've got the basic shots he shot as a sequence you can see, he was on burst mode of the first shot. Then it continued on to the secondary shot, then the third shot that had mawr of the smoke and things like that. And of course, at that time, the final explosion and the smoke is also lightening up that foreground. So as you saw it before, So what I did on this composite Brendan the same thing you may notice over here these your looks like you were shooting this handheld and there's a against. So there is a movement throughout. None of this was sink. And so, um, the great thing about Photoshop and it's a future that's been in there for a 1,000,000 years is the auto align layers. So even these things that are not in alignment, um, were able to be brought into pin register by simply opening up those three layers of that exposure of those three different shots, selecting them and going at it. Auto align layers an auto line. Layers will do just that. It even with how dark thes files are it could find. And you can see that the tree is lined up exactly the same in all three shots. So this has already been done in this shot here and what we then did. Let's go ahead and take it as it came in under normal. So here's the one shot and then another shot brand mentioned about the blend modes and how you can use those. So this obviously is completely covering up the exposure before it. But if you wanted to build up the intensity or you've got multiple births and you want to cheat, you have no ethics, no morals, and you want to make it look like there was the finale of the fireworks. Right? You've got all these different shots. You can do that same trick they've been that friend was using. They'd lighten, and you can see now it's just adding that secondary exposure to it. You can go to the 3rd here and said that toe lighten and that's also going to add another set to it. And in this case, I only wanted to use the, um, bottom portion of this one. This is too bright and overwhelming. So what we did was just a little radiant mask in that Grady and mask is only leaving behind that portion of the foreground. So as a person was asking, What do you do? Can you can you paint that foreground? Can you do another exposure? Could you use something like a graduated filter? In this case, Brand had the overall lightened image here, and then what we would do is just take those two and then add that shot to it. So it adds our foreground. So you're getting the benefit of the Nice, which dark sky in the smoke out of it. So in this case, the features that were being used is one. The fact of the multiple exposures that brand took bring them all into Photoshopped is layers. Select all the layers use auto aligned to get them into a pin. Registration, as it's called, take advantage of that lightened blend mode in order to stack them up and combine the different exposures into one main one and then where necessary again, as Brian mentioned, Use your layer masks toe, isolate what you do or don't want in this series of images. Okay, and then the final one. What I actually did most Brand would never dio in his entire life, but that's what it will teach him to never ask me. Teoh tweak any of his images ever again is I took that one image, which is right here, and you can either take these images and create a smart object out of them or simply what I did. There's a little keyboard shortcut on me. Um, well, uh, we'll just leave that one there. There's a keyboard shortcut footer shop that's known as Elbow E or Claw E. Basically, hold the entire lower left hand corner of your keyboard. Down Command option shift or control. Walt Shift E. It makes emerge visible copy of all your current visible layers. And then I went in there and did my camera Raw filter. And so now I have this combined image that never existed before, and that's where we start getting psychotic and we add our shadows and our vibrance and do all the unnatural things that I would never ask you to take a look at the other 1.1999 million images that I have. I'm just gonna hold on. I think I like what you did with these images. Yeah, you know, and use the vignette something. And there's our before after we're taking veg the composite and yet we still have not. You know, we've isolated where we want those those clouds. So for those of us that don't memorize all the keyboard shortcuts, could you show us where the merger visible on down the little lines on the upper right corner of your layers palette is well, you can use that or the thing with layers is you've gotta layers palette. So if in doubt that duplicate, you know, new layer commander control J new layer, the merging of layers, or what? Brennan's saying that in all of adobes interfaces, if you go in the upper right hand corner of any of the dialogue boxes, any of the panels, anything you usually find this little teeny bits eeny, teeny, tiny booger oven interface. Yes, that was worse than Roseanna Danna, and that's going to give you all the options, like convert to Smart object or delete or new groups or your merge visible merge down. That's the command e the command option shift E option you won't find as a default there. That's why it's kind of nice to know that nebulous one great to pull out at those cocktail parties, the Photoshopped cocktail parties we've been trying to get you guys to go to Yes, baby, I'm making emerge visible copy. So anyway, those a few things about compositing and selectively choosing specifically specific images.
Class Materials
bonus material with purchase
bonus material with enrollment
Ratings and Reviews
a Creativelive Student
I found this course interesting and motivating. I enjoyed hearing about using a range of cameras from compacts to larger DSLRs to capture great images. I appreciate the great experience and passion from both Jack and Bryn and look forward to using the information to improve my night photography. The post processing is a very useful part of the course which makes it an integrated approach. The varied ideas expressed by Jack and Brynn and a depth to the topic of night photography.
Cecily
Interesting and informative class. Jack as always is brilliant, and Bryn shared a lot of his night shooting experience, his chart is a great starting point, and as he states is "just a starting point", make your own settings decisions on the night! Even though I have been a photographer for quite some years I'm always learning new things. Thank you both for sharing!!