Lessons
Pre-Show
09:45 2Night and Star Overview Part 1
35:26 3Night and Star Overview Part 2
24:26 4Night Photography Gear
42:33 5Settings Chart for Night Photography
44:45 6How They Took That Image Part 1
19:48 7How They Took That Image Part 2
27:59 8Night iPhone Photography
17:29Lesson Info
How They Took That Image Part 1
well, we have just went through a lot of left brain, heady things related to the settings in our camera. But I think seeing those in the context of the images, especially all the amazing images that bring should with us, would be the great way to cement those in. So I think we'll throw it to back to Brent and go through some of those specific things in the field. What you were doing to grab those specific shots, breaking news back to the earlier I turned on my phone during the break to check to see if my niece has been born. Not yet. Apparently, however, might have. It already texted me. The answer to the Why the red light and then doesn't affect your eyes. Apparently the purple Detector in which he thinks is the rod rather than one. The Cones does not since the red light at all, and so it doesn't That's the one that's the slowest to respond with that 45 minute recovery time. So ask and you get answer the beauty of the Internet here, so I want Teoh. Maybe you go through some of the exa...
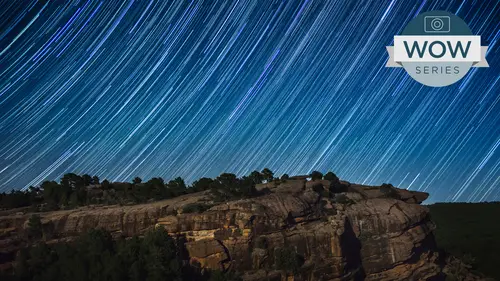
mple images to talk about some of the settings and some of the tips and tricks that go around just the pure speeds and feeds on how to shoot some of the images that I showed earlier. So I'm gonna start out with this baobab tree that from Botswana with the star trails around behind it. So I did mention that the earth rotation, in order to find that in the Southern Hemisphere you find the Southern Cross, which is four stars with one pair that are further apart than the other. So you take that long axis of the cross and fault, make a line through that and follow that line down to where it hits the horizon and that south. So then you need to point your camera south and put the foreground in front of it. So in this case, it's hard to do that angle and getting that line right. So I was using my IPhone compass and we were driving the Land Rover back and forth, trying to figure out even in every time we move the land workers, the compass would jump and throws it back in for, like, park. It s so that we were on the north side of the tree and pointing the camera towards the south. And in this case, we were trying to protect the camera. We talked about having the water protected from the op tech range leave. But you also need to protect it from people tripping over humor. Often hands out, hang the backpack from the tripod, or bolt it to something that is a Land Rover so that nobody is gonna accidentally knock it. You do need to worry about people. Unfortunately, sad reality taking your camera if you're gonna leave it out there and go sleep. So keep that in mind or hyenas chewing on it in this case, so just even zoomed out. You can see that there's a little bit of splotchy nous and color there in some of these sky that star trails or a little faint. And part of that is because when you apply heavy noise reduction, a star looks a lot like a noise. Appoint a bright white pixel to the noise reduction algorithm. So that's kind of a brutal aspect here and that you're having operated high I s O. But you're trying to photograph what looked like noise. You know, you could make some really nice story images by shooting, and I s a 100, pretending all the noises. Um, so just keep that in mind for, um, use my introduction sparingly because it's gonna erase your stars. A swell is, of course, the normal giving spot she color. Look to your foreground shadows. So that's another one of how I shot this night Time how to shoot this. So the this is ah camp in the middle of Botswana on Chiefs Island and have this little sitting area where you can watch the wildlife in this underneath the statue room. And so the light that you think glowing and there's one tiny little dim bulb. Had that been like a full on 100 watt ball, this whole foreground would have been washed out and gone to be doing something like this. If you condemn those life or bring your own light bulb and swap it out temporarily for a really dim one or have no light, you can tape your flashlight, your dim flashlight up in place up in there, or, you know you can throw a glow stick inside. You know there's a lot that differently. Dim light sources that you can tuck in under these things to give some glowing lights toe. Give some of that thing of that. That's a place that's inhabited rather than maybe just a empty seen. You know, it seems like those glow sticks would be perfect for that. Since there are many directional, just stick a glow stick in the tent or have it they're all pure red, appear green, appear blue, so effective. But maybe you could just change that after the fact for us. So just revisiting that topic of the number of stars you get you can simulate a longer star arc because with more stars in here with the trails right next to each other, it sort of looked like the trails continue on. But, like this trail here is clearly a different star there from that one. When you zoom out, it would have been blurred together. So if you don't have all night or multiple hours to shoot, if you increase your exposure so that the stars more stars air showing up. So, for example, how you might do that as student like you're shooting the Milky Way, So a 32nd 3200 I s O and then turned Those stack owes into star trails. You'll get ah, busier night sky, but you'll also get longer trails and then you could come back after the fact and darken it down on. Then the dimmer stars in the star trails. We're going to start to disappear in a I would only do this on just the portion of the sky. But another trick if you have limited time well and notice that you are getting different color temperatures from the different stars, depending on whether they're in the end phase of their lives or red giants or whatever getting filtered through our atmosphere and everything. But that's kind of neat thing. Um, I'm not sure if, with the video resolution coming out whether you can see the gaps, but we go to three toe or 4 to 1 view here. So these little divot in here Those are the time periods between the exposures and how you stack the images accentuates or worse than those lightened mode is stacking. All these images will show you and foot a shop. Changing the moda lighten is the easiest way to make a start. Trails image, but It also emphasises those gaps. And if you get into the star trails photography, Google star trails gaps, and you can do some more reading about how to fill. Blend them in different ways. Or I think Jack might be showing later on a blurring technique toe. Put them together all right. Getting away from stars a little bit if you want to dio one of these data night or night today. Images if you if you can, you can just lock your tripod down, composed the shot and then I like the tape it down. Tape the legs and Casey bump it is you're getting up and walking away Gaffer's tape or masking tape of you have it. Don't recommend duct tape is it's gonna leave sticky crap on your tripod and then the legs don't go together well anymore. Carpet of your hotel room. Yeah, whatever. You can dio put it up against the wall. And if it is in the hotel room, you know, please leave a note to housekeeping. Please do not move. People do get curious Wonder. So it's often times if you're doing it in a public place, public building and get permission will at least let people know. Hey, I'm going to be doing this image on leaving it here this long time period just so that there were Generally they're okay with it. It's not problem. But then you just better to do that and then have people come along and give you hassle about it afterwards so you can leave it in place or if you can't leave it in place, you can take advantage of Panorama stitching software. This image is actually seven Panorama is that I made. I I went from right the left and shot it I probably 10 images or something at 10 a.m. And then at noon and throughout the day, all the way until 10 o'clock at night was the last far this left. So then, in the Panorama software, you can whether use photoshopped you or auto pan a pro. You can leave those images together in there, and then you can blend them together yourself. Either way, there's when you're bringing in your images, blend them yourself with just you could do great at mass going across, and we have time on maybe demonstrate that, um, but the Panorama software will line it, even though the exposures air changing, it will try and adjust the exposures to blend them for you. But you say, Don't bother. I'm going to do that myself and decide where those transitions are going to be. But it's gonna put even if you've moved your tripod into a slightly different place, it's gonna help you out and try and put those back together to make up for that, needing to do it over a long time period. In a repeatable thing, you can also help yourself out by if you have to take your tripod away instead of taping the legs down. Just tape marks on the ground as to where you had your tripod legs and leave those, but maybe not your valuable camera equipment. All right, so night scenes I'm I'm on a pedestrian overpass here in Singapore, student so that you can shoot down the road without getting run over. And I think it was probably, let's see, look six seconds at F 16 so I was mentioning earlier the starbursts. You'll get those often with night lights, even at lower F stops. But if you want more in this case, I was wanting the whole seem to be in focus and get some starburst. There's a simple I s 0 400 within six seconds with enough to get some of the turning left traffic and so on. So this is a longer eight seconds. But of course, it depends on how fast the traffic is moving. If they've stopped for a red light, they're going to start to show up. So you trying time it with when there's green lights all the way down the street at the City Department to help you not gonna work. So then the final limit I believe I showed earlier was totally grunge ified one where I ran it through Nik hdr FX Pro on did a tone mapping algorithm that adds tons of detail. If you don't have that program, you can simulate it using crazy amounts of clarity and filling in fill. This is a process a long time ago. Tons of contrast. You know, you can go that crazy hdr Look, if you're I want that just within late room, you can get along quite a ways towards that. But that looks horrible. Get reset That so I don't have to look at that anymore by accident. So lightning. I mentioned the lightning trigger. When we talk about the gear, that's what I use here, shooting from a balcony. You really safety. It is important. You are protected a little bit if you're in a car from isolation, but really best to stay or 30 miles away from those thunderstorms and use your telephoto zoom. You don't want to be the tallest thing in a field, right? You know. So please, do you keep that in mind with lightning? And here I just exposed for the foreground. Set it all up before the lightning. The lightning was way over to the right far away, and I was hoping that it was coming towards me. I couldn't really tell what direction it was moving while I was far away. You can look at Doppler radar maps to see the directions. The storms were moving, so that one you weren't in the direct path of it. But you can get to the side and and know or hope that it's gonna move over whatever you've chosen for the foreground. Or maybe guide your twice in the foreground based on what Something that's ahead of the path of it. If you're really that into our staring differently just happening that it's gonna go so exposing for the city escape. And then I left it on the lightning trigger to run and grab the shot that will get it will trigger the shots from lightning that off camera it still will sense that the radio infrared light that's coming from that and that's how it triggers. So you get a whole bunch of shots of no lightning but films cheap on to test your lightning triggered to make sure you've got it all set up, you can use a camera flash. Sometimes a remote infrared remote will work on it, Um, to make sure that it's all triggered and plugged into your camera cables securely plugged in. It plugs into the same port that the Interval ometer cable released reports plug into on. That's how it triggers it. Just it's on top of your camera in the hot shoe mount. But if you don't have one of those, I can't rent one of those at night time. You have the advantage of just being able to put the camera for his longer than exposure as you can and not blow out the foreground. So maybe you can increase your aperture a little bit. You don't want to go too far in order to make a long exposure, because then you are gonna get enough light from the lightning register. So I hate to have a really dim lightning bolt shot so you can just leave it taking pictures. You compress it manually, or you can use your interval Lonmin er, to just take tell it to take a picture every second and just let it run all night. But your reaction time isn't fast enough to wait and watch it. Impress it, or at least my intern and you need to follow up the lightning bolt within like to 60 milliseconds, so different cameras are better, and then others are trying to trigger that. But of course, with the 32nd exposure, that's less than concerned. You're just hitting it. I'm waiting for it to go. So one way to If you don't have that, you maybe do have an interval ometer or you're getting enough lightning strikes because it's so hard to balance out that explosion with the foreground and the lightning. If you're gonna leave it on for 30 seconds. That's gonna be a pretty tough exposure to get both. What I've done at times is just, you know, get the base horizon line. Forget the foreground. Just get enough to have a sense of purpose. But leave it on for 30 seconds and just hope for it. So where you're going through it just keeps taking 32nd shots while the storm is around you. And don't even worry about the foreground. Sure. That another? Yeah. Even composite in the foreground. Proper photo shop gigs? Yes. Can I just have you do a review of the time intervals for different things. I know. We talked about that earlier this morning at two minute intervals for star trails. You're talking about doing 32nd ones for lightning? Just kind of do a review? Sure. So if you're doing the star trails your new two or three minute long exposures at maybe f 456 Something like that Little Oso through the Milky Way, such as the Palm Tree and Tonga image was 30 seconds long. Probably is where you want to start again. These are all starting points that you need to adjust based on your skies and the phase of the moon and everything. How much clouds and water vapor in the air. So, um yeah, that's Ah, just get you in the neighborhood number, right? And for the moon, that's could be really quite high speed. You know, you can dio 400 of us again 800 of a second at lower I s O. Because it's so bright it's reflecting the sun. So this thing I want 1 800 that f 56 with 600 millimeter lens where the one point for extender on it will give you this. See, what if I have my so that's even cropped in. So really, you know those point, in truth that do 1000 millimeters, You know, you get a nice image, 500 millimeter lens you can rent for a day and get a two x converter and you get 1000. And then you also helped out with If you have ah, crop sensor camera, you get an extra 1.6 factor of zoom in on that moves pretty far away. Yeah, you need a lot of telephoto to make it anything more than a small disk in your image. So so And just to clarify. So you're talking about you're talking about the time of the exposures. But what about the intervals between them? So, like the moon is just a single shot there. So with the star trails and time lapses, you want it to be a small oven interval is possible. And so with my set up that one second gap between So I set my interval ometer to a one second interval and keep it going. And then as soon as that clock, it just goes 0101 is counting down over and every time it hits zero that kilometers, triggering your camera. So, as you know, however, much of a fraction of a second after your last exposure is done that it hits 20 again, it's gonna fire it as soon as possible. So you want to be a small as you can get with whatever camera system set up, You have a minute, and it might might vary depending slightly. Some cameras take a little bit of processing times. They won't trigger right away after the shot and you actually on cannons. I've been told you don't want to have it on continuous drive mode for some reason because it has a slightly longer processing time, which doesn't make any sense to me since it's for fast shooting. But maybe something with the long exposure. I don't know. You can play with it and and see you know how you can minimize that gap.
Class Materials
bonus material with purchase
bonus material with enrollment
Ratings and Reviews
a Creativelive Student
I found this course interesting and motivating. I enjoyed hearing about using a range of cameras from compacts to larger DSLRs to capture great images. I appreciate the great experience and passion from both Jack and Bryn and look forward to using the information to improve my night photography. The post processing is a very useful part of the course which makes it an integrated approach. The varied ideas expressed by Jack and Brynn and a depth to the topic of night photography.
Cecily
Interesting and informative class. Jack as always is brilliant, and Bryn shared a lot of his night shooting experience, his chart is a great starting point, and as he states is "just a starting point", make your own settings decisions on the night! Even though I have been a photographer for quite some years I'm always learning new things. Thank you both for sharing!!