Lessons
DAY 1
1Intro and Who This Class is For
07:01 23 Groups for All Lighting Scenarios
09:00 3My Progress in Lighting
10:09 4Analyzing Circumstantial Lighting
51:46 5Circumstantial Lighting Q & A
04:16 6Using a Reflector the Right Way
15:45 75 Behaviors of Light: Overview and Angle
15:225 Behaviors of Light: Inverse Square Law of Light
13:05 95 Behaviors of Light: Relative Size
21:43 105 Behaviors of Light: Relative Size Continued
38:13 115 Behaviors of Light: Color
12:26 125 Behaviors of Light: Reflective Surfaces
05:39 135 Behaviors of Light: Q & A
04:53 14Location SWOT Analysis and 10 Things to Look For
23:47 15Location SWOT Analysis: Examples and Exercises
45:13 16Overview Q & A
11:30DAY 2
17Speedlites: The Basics and TTL
33:40 18Speedlites: Manual Flash
36:00 19Speedlites: Zoom Flash
08:35 20Speedlites: Zoom and Rotating Flash Head and Reflectors
12:50 21Speedlites: First Curtain vs. Second Curtain Sync
08:07 22Speedlites: High Speed Sync
12:01 23Speedlites: Optical vs. Radio Systems
06:38 24Speedlites: Groups and Channels
11:35 25Location Lighting Upgrade Examples
32:38 26Indoor Lighting: Building on Ambient Light
14:44 27Outdoor Lighting : Speedlights in Direct Sunlight
15:41 28Outdoor Lighting: Using Speedlites in Shade
22:29 29Outdoor Lighting: Romantic Look and Patterns with Speedlites
09:48 30Indoor Lighting: Creating a Window with Strobes and a Curtain
15:47 31Indoor Lighting: Moody Light with Speedlites and Gels
19:05 32Indoor Lighting: Reflective Surfaces
17:47 33Indoor Lighting: Shooting Against a Window
10:21 34Indoor Lighting: Adding a Reference Point and Ambience
07:15 35Indoor Lighting: Shooting into a Mirror and Creating Separation
04:59DAY 3
36Why You Need to Learn to Get it Right In Camera
07:32 37Location Photo Review and Analysis
35:07 38Intro to Reception Lighting SWOT Analysis
15:49 39Reception Lighting Setup
32:01 40Image Critique: Lighting Problems and Solutions
46:32 41Don't Limit Yourself As A Photographer
04:02Lesson Info
Overview Q & A
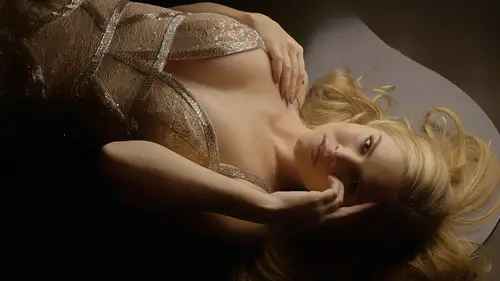
This question is from jail. Why photography and design can you address when and how to use a black friend reflector? We talked a lot about defusing a reflector of the silver side and putting the white thing over it. You talk a little bit about the black side, okay? Sometimes it's good to cut the light. I don't use a black reflector, but I do bring black flags, which has do between on the on one side, if you don't know what you're bettin is it's like a black, velvety material that sucks all the light out. If you are shooting a beauty portrait like, don't you shoot those now? I would use a black flag. It would be easier for me to subtract light on one side of the face then sometimes I'd light. So can you come in for a second? You're like finally. So if the light is just too even, I could in theory put, um could in theory, put something black next to her face and increase the shadow in her cheekbones a little bit. This is not activity in so it's not working very well, but it does give you...
that beautiful dodge and burning effect by using a riel lighting tool, so you're not always adding light sometimes is good to subtract. If I put her in front of that window she's going to be blasted with light but if I put this next to her face one side will be like five percent darker it would just give you that those high cheekbone looks for beauty portrait that would be gorgeous actually, uh let's see, we have a question about um using a great card as we're talking about color casts can you avoid a color cast by shooting a great card first that was when we had the red wall and talk about that in most cases yes, you can just you can improve the exposure using or like a like an export disk or something like that but when you have a reb jail like what we did that's far going to exceed the capabilities off often export disk so the answer to that is if this is the color caste is very strong absolutely not. But if the color cassis kind of just there, you could totally control it. All right? Great let's keep going with the rapid fire and again, anyone in studio audience let guys tio phone today kind of a lot. All right? So a question are all of these lighting scenarios good for light skinned people and dark doesn't work the same for dark skinned people, so when you're assessing all these lighting scenarios the shadows, the bouncing are you considering the skin tones as well? Yeah, I mean, skin tone to me is just like another color so when we talked about rachel's shirt versus mark shirt it's like a light color versus the dark color if you're shooting someone that's dark like a dark skinned person and you put him in front of a dark background probably not the greatest move, you know, just because there's no color contrast so I would say the answer is no, my lighting techniques wouldn't change at all uh, I just think where I choose to put them in front ofthe my change but the lighting things wouldn't change um and so just to further on that, um sort of people had voted on this one. What about a dark skinned person with the white wall? Yeah, I mean that's a very many black look and it's kind of cool it is a very it's a highly contrast situation I mean there's nothing wrong with it. I just think you better crop tight or you're doing like a silhouette kind of photo because if you have a white wall on a bunch of black figures like black tuxedos or black shirts or black skins or any of that stuff is kind of in front of the white war it's just going to be nothing wrong with it it's just going to be in effect but I would say if you're going to do that, I will shoot wider angle if you should close her up into their faces it's like you're trying to feature their face but their face are competing with a very bright background and you're not you're not it's not it's like you're trying to fight a battle you don't even know what you're fighting for some make sense if I if I have a really white wall with the sun here in the white wall and I have a bunch of people with dark skin wearing tuxedos, it would be a wide angle picture and I would play with the figures of the people, but I would never try to say look at the great face off this guy's when the white is so distracting you can't enjoy their face, he has a question, so I'm really excited to try this where you because I shoot overcast a lot obviously I live here but the flash hitting the ground and creating the light can you tell me a little bit more about how you be careful with that one? Because if you if you are with your flash on if the zoom feature of your flashes on automatic like if it's just into your lens, this is going to be a very big problem for you I didn't want to talk about intricacies because that's a different day, but in theory you have to switch your flash to manual zoom and put it as wide as possible because you need to make it look like the sun so you point that flash and in fact you probably want to point the flashes highest possible to resume it to take the wide angle panel out isms to fourteen millimetres the flash hit the ground and then if you do that wrong is gonna look like I see that I was imagining when you said that so I was curious if you do that you run into that risk but it could also be a lifesaver if you have let's say you have eighty per cent of the light you want and you need an electra kick this is a good feature for you melissa is dark you're not going to change that like if you if it's kind of dark just like seven thirty at night and you're losing the light it's on you try to make it look like daytime it's not gonna work because if you point that the contract will be too much and it will be like I see that people look okay uh do you guys do in the flash head back and forth a lot on your flashes and stuff do you think about that it's like changes everything it's like an amazing feature of the flash because by zooming the flash head you're actually changing the size of the light so cool cannot what else do we have turned the good folks in the world all right, s o of course some people are joining us throughout different parts of the day and v simone had asked does roberto think that all these effects can be achieved without an assistant? How hard would it be to do this by yourself? So I just wanted to get your thoughts are reiterating how much of this you can do yourself? Um okay calling the we have the flash bags that were the flash comes in on just a little pouches things uh yeah call it honey, I need you for a second. Like I said at the beginning of the class you're never going to create the same beautiful effect as if you have an assistant but if you have to work by yourself this's the little assistant it works great. The other options for you to bring a stand but that's carrying more pole poles and gear if you dont want to carry anything um this will do it. So basically I see here so basically you're photographing w here this is my my typical thing. I'll explain why later you stand right over here on dh I will put this always about ten feet from the subject about there with a white card at a forty five degree angle and then you are with your you're doing fashion shoot known your with your with your boyfriend or whatever he is here. Um when you shoot this that light stand holds the flash for you tossed a job. It's ten feet it's perfect. If you have ah light stand or a pool you can bring with you, then you can bring this closer and illuminate exactly where you want it. If you don't have someone go further away and let the light kind of spread and do the job for you. Okay, so there's that very cool. I think for our final question we have a ton of request. If you could summarize again what those or go back to and I think steel is going to be able to pull it up on the screen for us the ten things that you go and look for because people were really excited about that when you when you enter a location, okay, so just to make it quick and not kill them so that I look for simple things to simplify my life, you have a billion pieces of information in your head. So when you walk into a room, I simply looked for the brightest spot on the walls that is done direct. I look for clean backgrounds, I look for the shadows that are being casted by the objects on the environment I look for how reflective surfaces are on what color those surfaces are? Are they red? Orange, blue, green all that stuff I look for elements that are going to keep the background clean like the trees. I look for clean pockets of light on the wall. So if you have to work in harsh light that's a solution for you powers photographing her. Look at her beautiful skinny. If I was photographing her in direct sun, she would have our amazing for a shoot. Because I was just look for those spots I would have. I would need no assistance is just using the environment to assist for you on the last one that I would say it's really important. I would use a reference point. What is your reference points off light is the ambience. Orange is the ambience fight in my photo that I showed you I didn't have a reference point. So I created a reference point, but putting the light at the rolls royce and then making it look like the headlights where the reference point okay, you don't have toe see it in your face so that you can create the reference point. I think that's really hard to do it either way, that's part of kind of fast. Because I once did a photo where there was a lamp anywhere, the lamp was broken and I put a put a flash inside the lamp because it was broken and I put a orange jail in inside and I illuminated the lamp with my flash and it looked orange. And then I had another flash illuminating my subjects with an orange light on. They look like the lamp was illuminating them, but I created the reference points. By the way, they took about thirty seconds. You know, one flash here, one flesh here, manual flash. I'll touch the tomorrow shoot, okay. Their gold tomorrow is really to simplify, simplify, that's the whole craziness or flashes everybody all over the world. Some people know how to use it. Well, some people are kind of good, but medium. Some people are geniuses. I just went to the one thing tomorrow. I want to clean up all those questions that people have about the scariness off a speed light because the speed like is what created those beautiful photos that I showed you. It is a combination of all those tools on it.
Class Materials
Bonus Materials with Purchase
Ratings and Reviews
MizUniverse
Im sitting in my office listening to Roberto with my earplugs on and I know I have already left 2 reviews but he's so funny…. my family comes into the office asking me "whats so funny" Roberto makes me laugh out loud with his jokes but at the same time, he is SO great at teaching. Im watching for second time to make sure all his good info is ingrained. HIGHLY recommend you take his workshop on Picture Perfect Lighting if you truly want to take your photography to the next level! WOW thats 3 reviews now…can you tell I am impressed
Maureen T.
I'm taking a portrait photography course at NYIP online. one of the mentors there recommended the posing book by Roberto. I ended up ordering at the library the posing and the perfect practice book. I fell in love with both books...ended up buying them and signing up here for the year membership just so I can take all of his photos courses. I spent most of my weekend doing perfect lighting course here I am in love with the way that he teaches! He makes something so difficult and challenging for me make sense. I also like that he challenges us photographers to be true professionals. I am thrilled to have discovered Roberto and already noticed my photography is better in the short time that I've been studying him.
dLhickey
Roberto has the personaliyy and gift to relate to others.He is honest and shared some of rhe disaters that occurred, even with high paying and important clients when he failed to follow his proven and tested approaches. He has shared from his extensive knowledge developed by hard work and effort to master his craft. His dedication in attacking his weaknesses and making them a strength is inspiring. I have purchased many CL classes and all have worth the investment so I hesitated to purchase this course because I didn't think there was much new information. However the clear teaching and extensive knowledge shared by Roberto in his unique style caused me to purchase it gladly and believe it is an exceptional value. Roberto has shared his extensive tools, but you will never be the master of the craft without putting in the hard work and testing that roberto testified to. Thanks again CL for bringing the best to us and Thank you Roberto for taking the time and preparation to achive excellance in in this class.
Student Work
Related Classes
Lighting