Lessons
Class Introduction
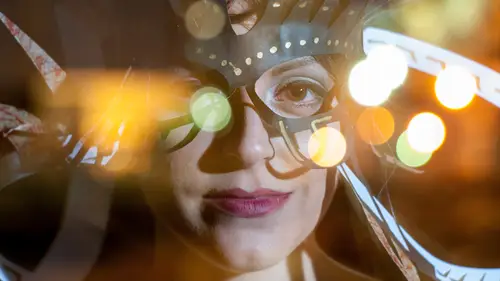
01:36 2Fundamentals of Night Portraiture
04:49 3Gear and Preparation
16:50 4Basic Settings
08:15 5Locations
06:15 6Subjects
04:22 7Safety
02:25 8Beating Adversity
01:28Lesson Info
Basic Settings
Night portraiture requires a couple of basic settings to get you started. The first thing, for ambient, we're gonna talk about how to use a six-stop rule. It might have been covered before, but I'm gonna show you my take on it. Second is for flash. I suggest using a flash meter, or you can "Chimp" your way forward if you don't own one or don't wanna rent one. Third, for light painting, the third element, it really depends on the flash lights. Some are bright, some are not. Some are wide, some are narrow. You just need to figure out which one's best for you. We're gonna cover some options on that, too. There's other options in Tim Cooper's course on light painting Let's start with the six-stop rule. Wow. The math in photography can be dazzling sometimes. When I first got into photography I was really kinda angry 'cause I didn't think I would really need that much math. It disappointed me. It disappointed me that I had to learn so much math. But the inverse square law, as daunting as the...
name sounds, is pretty simple. You double and half things. You go up a stop, you're gonna double. You go down a stop, you're gonna half it. To obtain the proper exposure, we start at ISO 6400. We set one aperture, let's say we usually start at a second, right? So, if it's a moon last night, such as when we were at Crater Lake a couple of days ago, we might start around F/2.8 or F/4. If it's a full moon night, we might start around F/8 or F/11. So we set it to ISO 6400. We set it up to one second. You take a picture. You look at the histogram. If it looks great, it you've nailed the shot, all you need to do is say, "One second at 6400 is one minute at ISO 100." It's pretty simple, right? Genius. Whatever the seconds are become minutes. One of the best gifts to night photography was this discovery and digital photography unlocked it. Prior to this, with film, you had to guess and take notes and learn about reciprocity. Thank goodness we don't have to do that anymore. So what if it's not one second. Well, if it's two seconds, it's two minutes. If it's three seconds, it's three minutes. You seeing a pattern here? Pretty cool, huh? We love using the 6400 rule because it guarantees you can nail your ambient exposure. What in life is guaranteed like this? You gotta love it. Do you wanna be an expert on doing all doing all of that great setting up for ambient exposure? Check out Gabe's course. Also, Lance's course on astrophotography will cover getting perfect exposures in addition to mine. Next let's talk about using a flash meter. I show a couple of examples here. A little one, a medium one and a big one. They have more features as you get bigger, right? The most important feature is that white dome on the meter. That means you're taking an instant light reading. That means the light falling on wherever the white dome is, is being measured instead of the light bouncing off and coming back to your camera. Why is it important? Well, the dome is also a dome. It's kinda shaped like a head. When the light falls on it, you're gonna be able to measure this, and if you have two sources, this and this and it averages it all together to give you a basic good exposure. When you only have so many batteries, and so much time at night, why not save a little bit of time by using a flash meter to say, "Oh, I need one more stop," and then dialing in one more stop on your flash instead of Chimping your way forward. Then again, sometimes we do Chimp it. How do we Chimp it? You can't just look at the LCD on the back of your camera because the LCDs are liars. Yeah. I said it. LCDs are liars. It's true. But not in the way you think. They're too contrasting. They don't give you enough information about what the real exposure is and your camera is making a JPEG over a RAW file. A RAW file has this much potential. A JPEG is a finished product and it's on a tiny screen. How could you possibly make a critical decision about exposure in one tiny place? Well, we look at the histogram. What's a histogram? It's the amount of light from black to white and how much there is. So left to right, black to white. The height is how many pixels at what percentage has that. So we look at a history and we say, "If it's all the way over to the left, it's bad exposure." Because everything's all in the grays. That example I have on the left shows kinda an underexposed picture, you'd think. The one on the right looks more favorable because it's not jammed up against the left. So when people say, "Shooting to the right," they mean moving that histogram off of the left edge so that there's detail in the shadows. What happens if it hits the right? You're gonna lose highlights. When you hit the left you lose shadows. So you wanna get your histogram somewhere in the middle. That's great mostly for ambient exposures. When it comes to flash, you're gonna see some spikes. What do they mean? Well, you're gonna have to learn by going through and looking at the exposures you made. I still say that using a flash meter is the fastest way to know exactly what's going on in the screen before you shoot it. Then you can move on to just being creative. Why work your way with Legos towards a good exposure? Now, let's talk about light painting exposures. This is where it starts to get fun. These are portraits. These are great. You can use just a flashlight to make a portrait. The example on the left is three friends facing away, with a really bright flash light in a slot canyon. We've got stars above them. I created silhouettes by asking them to stop, point the flashlight up and do that. That's considered a form of light painting, but it's also a portrait. The one on the right is two friends sitting and looking at Bannerman Armory up in the Hudson River in New York. They're just having a quiet moment after midnight, during one of our photo workshops, and they're sitting there. I painted them a little bit, and there's also more light painting down at the thing that looks like a castle. There's a whole bunch of students light painting it down there. That's also a portrait and they're both painted with light. No flash was used. So whenever I say there's a rule, there's always a way to break it. That's one of my specialties. Breaking rules. Let's talk about light painting and exposures. This is a basic primer. Start at ISO 100. Set it to 5.6. Turn your flashlight on and then sweep it across once. Go look at your picture. Look at the histogram. Does it look good? Look at the LCD. Does it look good? No? Guess What? Add some more. Go back and sweep twice. You can work your way towards knowing about this and please don't kill the shadows. Don't over-paint everything. Very important, walk away from your camera. Just don't paint from behind the camera. It is the most unflattering place that you could create light from. Would you like to level up on that? Check out Tim Cooper's light painting guide. He's going to do an amazing, amazing, amazing, amazing, demonstration of light painting. I aspire to be as good as he is with light painting. He's extraordinary. Thank you. I hope this gives you a basic primer on how to set up for a night portrait. These are the building blocks that we're gonna work with through the rest of the course.
Ratings and Reviews
Jan
I learned some techniques in Matt's class, which were helpful, but believe this was for the advanced photographer and i was a little confused at times. i would've liked to know the "how to" with the lights, showing how to program them with more detail. I am just learning how to set my camera for different lighting situations. But a very interesting course and glad i went through it.
Kirk Edwards
Great class! Liked it so much that I booked a trip to Colorado to work with Matt and Lance on one of their National Parks at Night classes. Highly recommend.
Margaret Lovell
While I believe this course is more beneficial for a photographer with better night photography and lighting skills, I learned quite a bit. This class made me think of some interesting ideas, especially using regular light sources such as flashlights or a pixelstick.