Lessons
Lesson Info
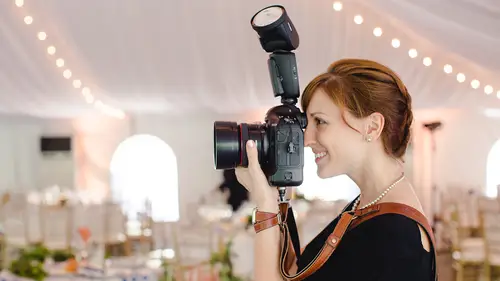
Edit In Lightroom Mobile
All right, so we have our goal. It took probably a lot more pictures than I even needed. But if I ever wanted to maybe put together a wall story of this little moment. Now I have a variety where I could just collage it onto the wall and have, you know, some verticals horizontal, some close ups and far away little little hands, which were the sweetest thing. So even though we're just photographing little moments, you won't be able to tell a story with it. So I keep that in my head. Even I'm to shoot my kids so he could hear screaming because he's so happy right now. But we're going to jump over to my desk and start working with these photos. We're not gonna let them die in the camera, so all right, so going into my canon connect app on for those of you trying to text me right now, don't worry. Do not disturb on your names. They're not gonna pop up and already connected this ahead of time. The first time that you connect your camera here, it is gonna take a second or so to dio. Don't get...
discouraged. Walk through the process, you'll have no problem. All right, let's go back to here, uh, images on camera so you won't have your camera on, and that's going to connect to the network. You have to prove it when that it's going to connect to the camera. Now, this is the same process I actually go and do when I'm shooting a new engagement session or I'm shooting a, um, wedding. And I want to do a same day edit or maternity session, and I want to be able to just send them a couple of photos right after I leave this session. It's a great way to connect with, um, and a great way to just give him a little bit of social media, A little bit of teaser just until you know, we can get what we need. What? I have said this to you because you do have a choice in how you set the images to come onto your phone. I have, um, pulling in the large J pegs at the large resolution. You can set it up where they're coming in just small J peg, and it's like super small, like a megabyte file. Um, but as I go through here, I'm just gonna pick some of my favorites. And you could do that by just pressing, Select, and then pick some of your absolute faves like I know this one of Lissy was really cute. I love this little hand one and then her hands. And then here I got both of their hands. I'm just gonna pick all of my favorites. Including Jude is kind of silly faces. Both of them love to make silly faces. I like this one of the two them together playing that one's hysterical with his face. And then I think I have some really cute ones. Also policy in the very beginning. Yeah, right there. I going to do too many, because again, they're large. So let's just go with those eight. I'm going to go to the bottom and hit import, and these were going to save all of the images. Now, if I had selected just doing the low rez, it would have been done downloading by now. But because I'm doing high rez, you as in see a little bit better, it's going to go to a slower process. Obviously, downloading these images, I probably should have said this to medium J Peg or small J. Peg. But what it will do is it will save it into my phone into my albums, and then I'm gonna pull it into, like, room now. Personally, I'm not a huge fan of editing photos on my phone. I much prefer bigger screen like this, but sometimes this is all you need. And even right away the images air okay, out of camera. But maybe one add your style. Maybe you want to throw them into black and white. So I'm going to go ahead and open the mid light room and just do a little bit of retouching. Not all. What? Not even retouching? I shouldn't say that should say editing, not a lot. I don't want to stylized them to the point where they don't look like kind of natural footage, because that defeats the purpose for May, at least of that candid kind of look if I go overboard in the retouching that kids is that much very touched, so I'll probably do things like bouncy exposure at a little bit of contrast, probably fix the white balance, at least to give a little bit of consistency. And the one thing I'd like to do is they like to up the vibrance of the photos, lower the saturation ever so slightly. I'd like to lower the clarity a little bit up the sharpness. These are all just my preferences, and it tends to be the way that I edit pretty much everything. So I'm gonna go ahead and pull up light room. Pretty sure it can do that while they are saving. And as you can see in light room, here's a bunch of pictures that I have from, you know, different clients. A maternity sessions literally sit in my car after these sessions and edit them, and they're not like the highest quality. So if I take this one a nice zoom it in a bunch, you can tell that that's really like a low rez file. It's not super super clean, but it's more than enough for them to grab that and then just throw it on to on to Instagram or Facebook or Twitter or wherever their favorite source is. So it's one of my favorite things to do on. And, you know, since we're on lock down, there's not a lot of weddings happening right here. So it's mostly maternity sessions and newborn sessions of and really an engagement session. So that's pretty much what we've got on my phone right now. All right, so let's go ahead and work with photos that we have. So what we want to do back in light room is you click on the bottom right, Add photos and you add from camera roll. I'm just gonna grab that first photo there of Felicity. That's the one that we got so far. And it is again Hi, rez. So it's just going to take a second to go in. So that successfully added, So I'm just going to pull it in now. Normally, I would do all of them and wait till they all did. But take a second to process. Now, this is a high res J. Paige, so we can go all the way into her little eyeball. And I was using at 4.0, I was using auto there. I detection autofocus, which is phenomenal on Canon, and that's what we got. So I said it to a I servo. And then there I detection had detection and face detection. So this looks pretty good off the bat, but what I'm gonna do is I'm going to go to my presets and I have a bunch of presets here for this for light room. These are the same presents that I use in light room, as well as captured one on my desktop. So it just depends on your style. And what is that you want? Bright and vibrant tends to be a favorite. Dark and moody not really won't go for here. Little, black and white is always fun. My personal favorites tend to be fresh and clean, which is a little bit like that light an area but not quite as warm. That would be a light and airy, a little bit too warm or joyfully simple. Joyfully simple tends to be my favorite and what I typically do. Um, but I think this photo looks better with the fresh and clean because we needed to bring up a little bit more of the, um, shadows in here that I've got a couple of other just fun ones. Toasted almond. I called stoop agree, and that changes a little bit of punch. You black and white, which is kind of Nice there. Let's just go ahead with, uh, fresh and clean. I like that one. If you haven't used presets before in light room, it's the fastest. What you could do with any precept that you have on your desktop, you have to just make a DMG file, bring the DMG file into light room and then just save the settings into your phone into like, room Mobile. I promise, is really actually very simple. Little tedious. But once you get it, you'll be very happy to. All right, So let's get back to editing this photo right here. Is that too much I want to do? Maybe they've in the detail. Just add a little bit to the sharpening and honestly, I mean, you tell me, guys, you can see I don't see a lot of noise. I was shooting this. This was at 12,800 I c. A little bit of noise here, but I don't think I'm gonna really see it in the print. So I guess I could add a little noise reduction. Yeah, a little bit. Just to smooth it out. That looks a little bit better. Maybe right around there. Yeah, but I'm not. I'm not bothered by it. I am going to go into the color and member had mentioned I like the vibrance up a bit and I take the saturation down and the reason I take the saturation down is because it tends to take out the oranges. Notice when I go saturation up. It's really just the oranges and yellows that you see. But when they go saturation down, it pulls that out. And for me, because I'm shooting in New Jersey a lot. A lot of people have what I call New Jersey skin, and I'd like to de jersey their skin, actually de jersey skin is a light room brush that I have and that usually do it with my local adjustments and then co through and, you know, go over the entire thing and just paid out the jersey out of their skin. All right, so let me go ahead, and that looks pretty good to me. So let's go ahead and export this one, and now I'm going to go into the top right corner. Where has the up and we're going to export to camera roll, so it's going to render that out again. Large. A pig file on 45 megabyte camera might take just a second
Ratings and Reviews
Steve61861
Vanessa Joy is terrific communicator, and this short video is fun and informative. I would love to see more detailed courses from her (and her husband on video).
Paula
Loved this class! Thank you so much. Excited to get a printer so I can take, edit, and print pics of my kiddos!!
Eli
Simple but practical. Good tips.
Student Work
Related Classes
Free Photography Classes