Lessons
Class Introduction
03:47 2Flash & Exposure Review
11:36 3Demo: Flashes Overview
11:54 4Demo: Manual Flash
12:16 5Triggering Methods Overview
15:39 6Demo: Mixing Brands of Triggers
17:45 7Demo: Defining Lights Overview
14:45 8What Modifier to Use with Multiple Flashes?
05:48Demo: Umbrellas
20:31 10Demo: Soft Boxes
12:57 11Demo: Octas
10:58 12Demo: Reflectors
05:47 13Demo: Beauty Dish
05:01 14Snoots & Grids Overview
04:15 15Demo: How to Setup Multiple Lights in the Studio
13:12 16Demo: Key & Hair/Rim Light Setup
04:59 17Demo: Key & Background Light Setup
07:53 18Demo: Clamshell Two Light Setup
14:39 19Demo: Key, Fill & Background Light Setup
17:42 20Demo: Side Lights & Background Light Setup
10:21 21Demo: Clamshell & Rim Light Setup
06:16 22Demo: Rembrandt, Fill & Hair Light Setup
07:13 23Demo: Rembrandt, Fill, Hair & Background Lights
20:40 24Demo: Clamshell, Rim, One Background Light
09:40 25Demo: How to Produce a Pure White Background
28:26 26Demo: Full-Length Portraits with Multiple Lights
07:28 27Demo: Still Life Example with Multiple Lights
10:22Lesson Info
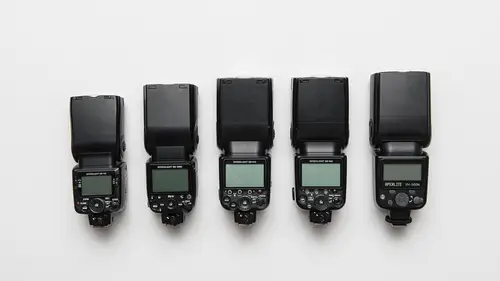
Demo: Flashes Overview
I've got a bunch of flashes here. A variety of flashes steaming from a very inexpensive flash. We'll talk about this, real quick here. This is an Amazon Basics flash. Amazon Basics. I bought this for about $ and it puts out the equivalent amount of light as my five, $600 Nikon flashes. The difference is that it's not fully integrated with the whole Nikon system. That said, this flash is an amazing deal. And Amazon sells this type of stuff but so does, so do most of your camera stores. They have an inexpensive flash kind of in this range. So, you can probably find a flash that will do most of what you need for, anywhere from $40 to $60. And then, I've got a kind of going up the range here, I've got another flash here. This is by a company called, Upper Light. I don't even know, really know the brand name but it's a Chinese flash. I think I paid $50 for this. It has, it has a TTL mode. It's got manual mode. And then it also has a mode called the Slave Mode. And we'll be talking about sla...
ve mode in just a minute. So you can see for 50 bucks you get a nice flash, it works just fine with the camera. And then, we get into whatever called the, you know, the Nikon branded flashes and the Canon branded flashes. This is an SB910. Another one I have over here is the Nikon SB5000. These flashes aren't $28. (chuckling) You know, these are pushing $600 a piece. So what do you get when you get a nice big 'ole flash, we get full wireless flash control, okay? So all the flashes speak to the camera and the camera speaks to the flashes. They all communicate back and forth. You can put them all around the room. You can control everything from the camera or from another flash unit. So, for 600 bucks, you get a lot of capability. Today's class isn't really about how to control the Nikon flash system. I've got a Creative Live class on that by the way, if you're interested in that. But really, I just brought all these flashes here today just to show you what you can do with it anything from very inexpensive to very expensive, okay? So let's, let's talk TTL control. So I'll turn, let's see what I'll do here is put this flash on the camera, so that the studio cameras can see what I'm doing here. So I'm just turning on my camera, turning on the flash and now, I'm pushing the mode button. And so, right here we've got, it says TTL, okay? TTL. And the Nikon one it says TTL BL and that BL stands for Balance Bill Flash. Don't worry about the BL, just think TTL. So, TTL stands for Through the Lens Metering and the way TTL works is that it sends out a pulse of light unto the subject and then that light reflects back into the camera. The camera goes, "Uh, I see how much light" "was reflected back to me and for the real photo," "I'm going to put out, let's say 50% power or 20% power." Okay? So, it's like this, Filler gauge, it sends out a filler, it reflects back to the camera. The camera then says, "Make a quick decision," "for the real photo, I'm gonna put out" "x percentage of power." TTL. So by the very nature, TTL is variable. If you move or if your subject moves closer to the camera, TTL's gonna pick that up and it's gonna change the amount of power going on the subject. If your subject goes further away from the camera, TTL adjusts, instantly. That's pretty cool. One the other hand, the downside of this can be, what if your subject is, let's say you're at a wedding. This happens a lot. One of your subjects is wearing a white dress. TTL's going to see that white dress and it's gonna go, "Oh, I need to dial back the power." Well, what's the other subject Morri? Black tuxedo. TTL sees that and goes, "Uh, I need to add more power." And so TTL, can be variable depending on what type of clothing your subject wears and I wanna show you that right now. I want to shoot a live photo showing you how TTL varies depending on the clothing. So why don't we start with black? Would you mind, being our black shirt photo? Would you like the orange chair or the posing stool? I'll do the posing stool. Alright, cool. That's great. Alright, so what I'm gonna do is, I'm going to just do something really simple here. I've got a rouge flash bender, okay? It's by a company called Rogue. Love their products, use them quite extensively. We're just gonna start real simple today and the way this works is it just, the flash goes inside of this and it makes a little soft box. So, we're not gonna do anything too complicated to begin with. And the purpose of using some type of flash modifier is to make the surface of light larger. When you're doing multiple flash photography, you don't want all of your flashes always to be just a hard flash. It's a very intense looking light when you shoot direct flash. So, this is just a diffuser and it's going to serve to make everything softer. And what I'm gonna do here next is I'm just gonna set-up everything so it talks to each other. I'm not gonna go through too many of the details because this is going to be using the Nikon wireless flash system and it's specific to the Nikon camera. So just trust me when I say, I'm gonna set-up to speak wirelessly. Later, I'm gonna show you all of the triggers and I'll go through it step by step. But for now, gonna keep it simple. So I'm putting this on this little stud here, this little brass stud. Cool, that goes in here into my umbrella bracket. Tighten that down. Great. And I'm going to turn on the flash, turn it to remote mode. Cool. You know what, I'm gonna use a different flash. Bear with me, I just realized it's in a different remote setting. Let's use the SP700. Good choice huh? Alright, I'll set this guy to remote. Okay, there we go. And now, I'm going to put the Rogue flash bender on there and one of the things you just need to be thinking about is that, this flash needs to see the instructions and there's a little receiver here on the side of the flash. So just make sure you don't cover that up. And when you're using triggers, like slaves, slave triggers. You also need to make sure that that sensor is never covered up, okay? So, I'm just gonna slide this down over the top and put the velcro around it so that it can still see the pulse of light. Great. I'll just do something like this. It should be fine. And we'll put it just about like that. Alright, so this is going to be a fairly basic portrait. Make sure all tethered up and ready to go. It says no camera detected. So turn this off and on again. There we go. Okay. So, no need to smile, if you like smiling, that's good. I like smiles, smiles are always good. I'm gonna go through my settings. I'm going to, remember I'm going to set my aperture for f56. And see, let me go to this one here. So, I'll go to aperture f56. I'm at a shutter speed of a 250th of a second and my ISO is at 400 ISO. Now, I'm gonna set this guy up to be a master flash and I need to make sure that it's speaking in the right communication. So, I'm gonna go to the master wireless mode and then I can roll this called advanced. Okay. And now, I'm in Channel and that's super important for the class but you can see my flash and my remote flash over there, it's gonna be in TTL mode, okay? So, I'm in TTL flash. Everything else should be ready to go. So, let's just take a picture. See how it turns out. 1,2,3 (camera clicking) Okay, I heard my remote flash beeped which makes me happy. Let's look at the photo. It should show up here on the screen. Ha ... not bad. For the first go of it, TTL did a great job. Okay, you see your photo? Hm-mmm. Alright, so I'm just gonna take one more and this one I'm gonna back up a little bit and get a little bit more of the black shirt. (camera clicking) Okay. And we'll look at that image. Super. Alright, so there is TTL. Now in TTL mode if I want him to be brighter. I have to tell that flash to go brighter and I just, on the back of my flash I say go up by plus one, meaning by plus one stop or minus one minus one stop. Okay, so we're done with the black shirt. Go and grab a seat. Whose got the next lightest shirt? You kind of do. Are you okay? Yup. Alright. I want you, kind of sit in the same spot. Now, she has a lighter shirt, more reflective. And let's see what TTL does for her shirt. Alright, I promise you this will not hurt. Here we go, 1,2,3 (camera clicking) Painless, right? Alright. So what I'm looking at is not necessarily the exposure on her shirt. More I'm looking at the exposure on her face because that's, that's the priority. So let's go back and forth between these two. We'll go here. Let me rotate my screen around. So his exposure, seems a little bit bright on his face. Her exposure seems a little bit, maybe a little bit better on her face. Let me go to comparing the two views. Another telltale sign of the exposures changing is look at the background. The flash distance to the background has not changed at all but you can see that the flash actually put out a different amount of light for the two photographs, okay? Because it's reacting to the, maybe different framing. It's reacting to the different brightness of clothes, reacting to, I don't know, maybe your glasses versus he didn't have glasses, maybe your glasses reflected back. So, that's TTL and TTL's variable. So what does that do for us as professional photographers? Well, imagine you're taking portraits of people and that, that person's coming through your studio and you're taking hundreds of images, every photo in TTL mode is gonna be slightly different in brightness. It can take a lot of work in post-processing. So, I'm not necessarily saying TTL is bad, I'm just saying TTL is variable.
Class Materials
Bonus Materials with RSVP
Bonus Materials with Purchase
Ratings and Reviews
Marty Walker
This is really a fantastic class and at an even fantastic-er price. Well worth the money, and is a great help. The instructor does a very good job explaining the methods, light shapers, and effects they create. One of my favorite videos!
Jeph DeLorme
Mike Hagen does a great job of presenting what could be a complicated process in a way that makes it easy to understand and implement. Not only does he make it easy to follow along, he presents alternative solutions that don't break the budget. I have viewed several instructors and various classes at Creative Live and this would definitely be one of my favorites. I have to say, this class would be a bargain at 10x the price!
Tim Stapenhurst
What can I say about this class? Mike is great- not only does he give a thorough break down of all the equipment one could need but he also includes wide variety of price options for those just getting started. Aside from his thorough knowledge of gear, Mike provides an excellent and easy to follow bread down of how to build up the light for your subject. His lesson plan is super easy to follow and very concise as he slowly builds up from using 2 lights to 5 lights. He also demonstrate what I think is a much needed trait in a photographer and that is being cool under pressure, dealing with issues and not getting rattled and simply going back to the basics. Creative Live Nailed it with this class
Student Work
Related Classes
Lighting