Lesson Info
3. Batch Retouching Photos in Photoshop
Lessons
Class Introduction
01:45 2Color Sharpen Techniques in Photoshop
10:12 3Batch Retouching Photos in Photoshop
07:20 4Resolution, Sharpen, and Magnification in Photoshop
10:42 5Retouching and Adjustments in Photoshop
17:26 6Color Correction and Adjustments in Photoshop
10:43 7Color Modes in Photoshop
16:03 8Spot Healing Brush in Photoshop
07:53Lesson Info
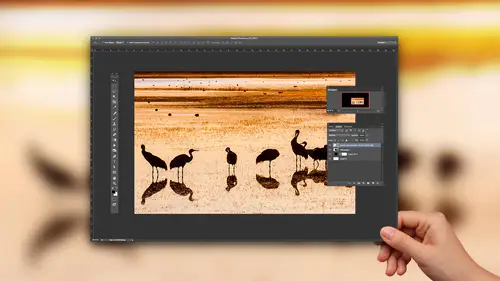
Batch Retouching Photos in Photoshop
Now, let's say that you want to save some time. So here I have a panorama. I'm going to stitch together, and I'm at the Albuquerque Balloon Fiesta and I go around here taking this panorama. Now, do you notice anything about the images in general? Do you see maybe some sensor dust specks? You see a little boy dark circles in there. You notice they're in the same position in each shot, which tells me they're actually on my camera sense or not in the scene. Well, there is a nice, convenient way of removing them very quickly. And what it is is you select these images, you click on the 1st 1 hold shift and click on the last one. And then you can type command are for raw. Remember how that would do it even if he had a J pig fall and you'll find that it opens multiple images over here on the left because I had more than one selected when I typed command are to say, going to camera raw. Then if you want to quickly correct those images on the left side where you see these little thumbnails, if ...
you only have one highlighted, and you make a change over here like I bring up the the whites here to brighten up the bright area of the picture, you'll find that it's not affecting all of those images on the left. It's only affecting the one. But if I go appear to the very top, there's a little menu over on the edge, and I could choose, select all. If I choose select all first, then any change that I make to the images, like frightening them up or darkening them up, you'll see, happens to all of the images together, which is great. That means I can come in here and optimize this picture, get it nice and bright the way I might want it in fine tune it. But then, when I really want to save time is when I come in and I want to retouch out those specs. So let's try it out. I'm gonna come up here to the tools of the top. One of the tools looks like a paint brush with some dots around it. I'll grab that. That's the spot removal tool, and that gives me a cursor that I can put on top of my image, and I want to get a circle just larger than one of those sensor dust spots. And so it. So the edge of that circle touches the good sky and doesn't actually touch the spot that's there. Ah, click and it'll find an area in the surroundings. Copy from and over on the right side is where I have some settings, and I usually have it set to heal. Heal means, blend into the surroundings perfectly match the brightness of the surroundings, and I have a feather turned down so it doesn't fade out on the edge, mainly so that it can perfectly match which just outside the edge. Now I'm gonna do that in a few areas here in what's nice is every time I do this to get rid of a little sensor dust back. It's applying not to just one image but all those images at once, because before I started applying them it, I clicked the select all button, and this makes it so. It's nice if I could see these sensor dust spots, and if you find it hard to see there is actually a choice near the lower right called visualize spots And if I turn that on, you have a little slider, you can move around, and it makes it easier to see where they are. My camera sensor was so dusty this day. I think I changed my center in right when I did, the wind come kicked up and through some dust into the air and it got onto my camera sensor. So I'm gonna come in here and just retouch these out. Now, I'm not gonna get rid of every single one that's in here because this is a terrible day when my center got terribly dirty. This was before they came out with a feature on the camera where it has auto cleaning, where it shakes your camera sensor to try to let the dust fall off. Uh, so I'll just get rid of a few more here, and then we'll see what the stupid move is because we haven't actually figured it out yet. One more. All right, so I do that and I'm like, This is amazing because I had all of those images selected. So what I just did is removed all of those sensor dust spots from all the images at once and So now let's stitcher panorama together and we'll get our full image. No, it's not. We want to do next. We want to do next is we fixed it. Based on the top most image, we now need to inspect every one of these images to make sure that we weren't retouching out a balloon from one or we weren't doing other harm to it. So if I zoom up on this, take a look at this image. This is the second image in the sequence. You see any problems? That's because, sure, there was a sensor dust specks somewhere. But when it figured out where to copy from to cover it up, it only did that on the first image and on the very first image. When there was a sensor dust back in this area, there was blue sky over here, and it was a fine area on that particular photograph to copy from. But in this image, it's not. So once you've done that, you need to inspect your end result. Go back to your little spot removal tool, and if you see me with a problem, click on it and you'll see that it's copying from an inappropriate area. So here's how you fix it. Do you click on that little circle that's inappropriate and then on your keyboard hit the forward slash key. It's right next to the shift key on the Macintosh. And when I do that, what it does is it forces it to pick a new spot from to copy from So that messed up here, too. I click there and I hit the Fords slash This one messed up to hit Ford Slash, and I just need to go through my image and double check that it didn't mess up in too many areas in each time it did. I click and I do. Ford slash. That's not always going to be able to do a great job in this case, since we need to get rid of a sensor dust back right from on top of, ah, hot air balloon. We might need to do it manually and decide exactly where to copy from going to see or it's such a light sensor dust back that was sitting there. I don't think I'm even gonna get rid of it. But does that make sense that after you've gone through and you had chosen select all. You have to hit it like three or four times. If it always seems to go to the wrong spot, you manually dragged somewhere or just get rid of it and see if the sensor dust back. Maybe you could move a little further away because it's touching the baskets there. Uh, but then you have to go to the next image and do the exact same thing again. Make sure you inspect all of those images anytime you do spot removal on more than one image at a time, because it's only calculating where to copy from from the first image. And it doesn't mean that that would be appropriate in all the other images. So we always need to go through and just confirm that it's not messing up. If it does click on the spot in its the Ford Slash key. Ah, that you want to hit or you can manually dragged the circles around Teoh. Choose where to copy from. I'm not going to save this, so this next time I teach, I want to be clean. So isn't that a stupid move, though? If you went in there and you just said This is amazing. I'm gonna get rid of all these sensor dust specks. You stitch your panorama together and then you just send it to the client because you never zoomed in on it to see the whole thing. But you wouldn't believe how common it is for me to look at panoramas and see that some of those little retouched areas we're just not appropriate.
Ratings and Reviews
a Creativelive Student
I loved this class - Ben is a really good teacher and the class is full of great easy to follow advice.
Bonnie
First off, the title cracked me up. The course was very good, easy to follow and Ben's a great instructor.
user 12004e
Excellent! Much better than I thought it would be. Invaluable.