Lesson Info
17. Shoot: Indoor Scene Part 2
Lessons
Day 1
1Class Introduction
09:49 2My Evolving Style
18:00 3Visual Examination
24:41 4Storytelling and Character
32:40 5Storytelling Q&A
07:59 6Critique Yourself Part 1
30:18 7Critique Yourself Part 2
13:06Identify the Problems
24:10 9Posing Overview and Q&A
15:17 10Ten Basic Poses
35:30 11Posing a Man
10:25 12Shoot: Posing Demo
11:53 13The Art of Self-Portraiture
17:49 14Posing Yourself
24:27 15Shoot: Self-Portraiture Demo
17:18Day 2
16Shoot: Indoor Scene Part 1
23:54 17Shoot: Indoor Scene Part 2
21:13 18Shoot: Butterfly Daydream
30:05 19Image Compositing
37:59 20Shoot: Using Props
18:26 21Editing Indoor Shoot Part 1
26:22 22Editing Indoor Shoot Part 2
20:47 23Editing Butterfly Shoot
18:33 24Editing Pool Shoot
24:48 25Shoot: Outside with Open Sky
23:49Day 3
26Shoot: Fairytale Scene Part 1
29:08 27Shoot: Fairytale Scene Part 2
22:20 28Shoot: Snow Scene
26:36 29Editing Outdoor Scene
31:28 30Editing Fairytale Scene
26:32 31Editing Snow Scene
15:59 32The Business of Fine Art
26:03 33Eight Business Practices for Fine Art
14:28 34Beginning Your Artist Statement
19:28 35Making Prints with Q&A
33:50 36Becoming You
32:35 37Taking Risks
29:40 38Bonus Video: Expand Your Space
01:17Lesson Info
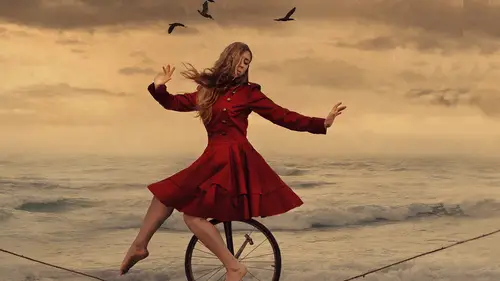
Shoot: Indoor Scene Part 2
so I decided to use the tripod for this shot because it is a little bit dark in this room but I'm not going to set it up on the tripod immediately just going to grab my camera thank you all right so I've got my camera who dear this is a difficult room to navigate I'm just saying if you're not here trust me it is a very difficult the navigates so I'm going to pick my angle now I think that camera angle is so incredibly important for something like this do I want to get a little bit more over here so that I can see the light on her evenly do I want to get right behind her which could be a really interesting shot just depending what I don't want to do is get too much of either side of the wall because we don't have it decorated so instead I want to get maybe an angle from right here so why am I not putting it on the tripod I'm not putting it on the tripod e x I don't know my angle and I don't want to have to keep adjusting my tribe odd to figure out the angle so I'm just going to quickly ...
take some shots of this scene you need to be a little bit closer because I am using a thirty five millimeter lens and this is just my test shot to see what the lighting is like how it looks all of that so I'm taking a look I really do like the lighting let me give you my settings I met f three point two I'm at one fortieth of a second and I'm at s o six forty so I had to have my eyes so bumped up a little bit my shutter speed us to be a little bit low and that is why I'm going to use a tripod because of I'm really not sure what I need to do here in terms of camera shake I don't think I will be able to hold it still enough because I tend to have a very unsteady hand so let me take another look now I took a shot just from standing and that tends not to be my style I tend not to shoot from up here and instead I get a little bit lower so I'm going to go ahead and crouch down I'm going to see what this scene looks like from a little bit of a lower angle and take that shot now I think that that's okay but I'm actually going to go against what I normally do shooting at a low angle because I want to see more of the floor without having to look up and see the ceiling because we didn't decorate that part of the set so instead I'm just going to get straight up here and then angle my camera down a little bit more because I liked this angle a lot so I'm going to go ahead and move back I'm going to go ahead and focus I'm changing my focal point just to be right on the head of my subject all right now that is my official test shot from there I'm going to move on and say what exactly needs toe happen to make this look exactly how I wanted teo couple of things that I want change and one change the pose of the model so not going to change it drastically but I'm goingto have eugene just lower your hands for me good and I will fix your mind there you go okay so that is back good now I think that her hands being lower will create a little bit more of a graceful line going down her arm so I think that looks really nice now a couple of things that I probably would have done differently had I just thought of it had I had more time right now I would have told her to take her nail polish off that's just one of those little tiny details that I didn't think of beforehand that I would probably have asked her to dio just because that's really modern to me and I'm going for a very timeless feel so I've got her in this dress that to me doesn't really have an era that it belongs in necessarily I've got nail polish though that goes against that because I can't imagine somebody from say eighteen fifty wearing glittery nail polish so that's something that'll probably dull down later in photo shop if it's a big deal I can see that the light is reflecting off of it a little bit so little things like that are so important now I'm actually going to set my camera down for just a second and I'm going to run over and mess her hair up a little bit because I think that her hair looks too perfect for this scene so let's see what I can do here just to get it tangled a little bit and this is that detail part again trying to get details that people can look at and understand the story so we've got some curls going up I do like to see a little bit of the back here so I'm just going to separate that maybe this one can go up here let's see the about the other side which I'm neglecting largely on we'll put that one over there so now she's got some hair moving around a little bit she looks like she's really really being integrated into that scene I'm going to run back to my camera and see what we've got going on here so when they grabbed this I'm going to shoot it a little bit further over here than I had been before I think yeah that looks really nice I can see her spine now and that is what I'm focusing on good and I really like that so I'm going to tell you a little bit why about why I'm choosing that exposure I am choosing this exposure because it's not over exposing so we've got a subject that is lit appropriately but I really want to see detail in her hair and in those shadow areas so I just tend to expose basically what auto would dio like if I would have to turn my camera on auto and then it exposed that's what I'm going for a cz long as it's not over exposing I am all for under exposing them so I could even take this seat I'll take my shutter speed up a little bit too one eightieth of a second and let's see what that does for this shot okay so it's a lot darker and the reason why I don't like it so dark is because we have this sort of strange shadow area where the log is in the corner and that's going slightly too dark for me because I do want to see some detail I might end up in photo shop making a dark anyway but I want to have that option of having the bright spot there just in case now I know I'm thinking about post I know that when I edit this I condole down those highlights quite a lot in curves I know that I could pull the shadows of if I needed to but instead I would rather shoot it just a little bit brighter in this case and then just take the whole curve down make everything a little bit darker how you doing over there jane okay good she's okay I forgot that she has been holding that position for a very good thumbs up e I love it okay so I don't really like this scene I'm just going to build it just slightly more and then take my final shot on the tripod to ensure that I'm not shaking my camera at all so let me just get a little bit more bramble here a little bit more for the corner because I think that there's a little bit of a bright spot back there that I don't like is much first we'll throw a stick let's see if we can get it no didn't get it but I tried but see some vines and vines because we're going to cover a big bright spot here so if I grab this set of lines that looks really good and this is the bright spot that I don't like so I want to go out and cover that because I could do it right now I don't have to wait for photo shop to be able to do that and I'm gonna fall but I'm not gonna fall it's okay this one has thorns so I just realized yeah okay there that's good okay we're gonna let that stay exactly like it is because I'm nervous that I'm about to pull the whole set down I'm like indiana jones okay I'm going to set this up on my tripod I am probably going to raise my tripod up just a bit so that we can see more of the scene from using a three legged thing tripod right now so this is a ball head tripod and I really really enjoy working with that kind of tripod which I didn't leave her like that before but this is something now that I feel like I have a lot of control over what I'm doing so I am going to shoot portrait and I'm shooting portrait because our model is standing straight so I really like that I like to shoot with whatever the orientation of the model is generally so if she's very squashed in the frame if she's sitting or laying they don't usually shoot landscape but otherwise I'll shoot portrait to try to get her in this shot all at once like we already said I am going to raise my tripod up a little bit so I'm going to make it match the height that I tested up so perhaps about there I think that's where I had it before I was crouching just a little bit when I was shooting and this is just going to ensure that I don't have any camera shake which I do tend to dio when I shoot so I think that is all even now no let me just take a look so I'm making sure that I am tilted in the right angle which I'm not someone a tilt down going to make sure that my focal point is where I want it on her exactly like this no I'm not actually looking to get her perfectly centered in the frame I'm looking to get her off to the right side a little bit and then I'm going to really dark and down the left side a lot more so I'm going to do something a little bit special in this shot what I'm going to do is shoot her a little bit close so I am right now at the same spot that I was before with the last shot that I took but then I'm also going teo pan my camera right and pan my camera left and I am doing this because I want to expand my frame so what does it mean to expand your frame and why would you want to do that it's pretty simple actually the reason why I want to do this is because I want to get us close to the subject as poss well where I get her whole body in the scene in and I'm doing that because I want her to be really in focus I want background to be a little bit out of focus if possible onda also if I expand my frame then I can print a lot larger so that's exactly what I want to dio so I'm shooting in a little bit closer I'm going to take two extra shots to the right and left of the frame and by doing that I can expand my canvas and photoshopped add those extra shots in and that's how we'll create my square so instead of pulling back and then cropping it into a square I'm going to expand into a square so I'm going to go ahead and take my official shot here got my subject and focus I'm taking my shutter speed back down maybe to one fiftieth of a second a little bit higher than what we started with um jane go ahead and relax your fingers there you go there we go okay so we've got the official shot there at least in my mind that's the official shot so I really like how that's looking it actually looks a little bit brighter than before and I think it's just because I'm tilted a little bit more towards the white and the shot just based on my angle so I am going to go ahead and up that shutter speed back to one eighty eights of a second take another shot okay that looks much better to me so that shot's a little bit more under exposed but I still see detail on all the shadows the highlights aren't blowing out so I really like how that's looking now if jane could just hold that pose for just a couple more minutes then I'm going to go ahead and expand my frame so I'm going to do that very very very simply I'm just going to lock my focus down to manual focus so why am I doing that that answer is pretty simple a cz well I'm doing that because I already have focus on my subject so if I know move my focus if I say keep it on auto focus and I pan my camera over the focal point's going to be on something different so it's going to shift to the back wall or whatever it is that it happens to be catching on so because of that I'm locking to manual focus and then I'm just going to go ahead and start to move my camera so I am just panning it over taking a shot not touching any settings panning it over taking a shot okay so I've taken those two extra shots now and that means that I am finished with this set up so jean you can go ahead and move your head if you would like hey good stay there though yep perfect I love it all right now because we have this all set up right here I'm going to do one more quick shot here I like to get another shot in the scene like this because it's already all set up so I would rather go ahead and just try my best to get everything going while we can so sometimes I'll come in and I'll do a close up just for the model so I'll go in and I'll say okay model you don't have a face in this shot so how about I give you a nice beauty shot or something like that in the scene whatever they might want to use and I send that to them and typically I'll say just don't put my name on that or something like that and then they can just have it for their portfolio but in this case I want to get one more shot I'll just move my tripod here a little bit I'm just going to repose her and do something just a little bit different hey I've got a line on me and so I wanna have you that was you take it just a little step over press your back against the wall good now I'm going tio move your hand up under on how are you doing there good okay keep this handle him good great and the same with the other ones were going to put it up and you can get it back behind this mine there yeah there you go keep going outward like towards the corner good great and you can actually rest your wrist on top of that log there you go perfect now I'm gonna move this let me know if I'm poking you in the eye oh that looks great look at that fun and love it good accidents now I don't mean to cover your hair and chest up though so let's go ahead and free that space a little bit we'll just go ahead and lock the hair in there again just for some interest oh I've got something in my finger who no it's okay it's okay polder okay well it in there so it's ok we'll just leave it for now and it's part of like I'm part of this yes now I want this one to go way up here way up there yeah that looks good sorry goodbye there we go okay so I really like that set up and I'm gonna shoot this a little bit more straight on I think at least so that I can see a little bit more of her face in this shot so now in this case I'm getting a face in this picture whereas I wasn't before so I need to consider that how am I going to shoot this to the point where I get an expression or no expression or something that I can manipulate later so I really like how she's standing here I'm gonna go ahead and straighten this up a little bit because I'm just a little bit crooked so I want my lines to all be the same okay now I'm going to tell it up ever so slightly just so I can get my focal point right on her face I can't manually focus to save my wife now I'm going to make sure that I flipped backto auto focus this is one of those big things that if you're flipping back and forth a lot it's so easy to forget that you're in manual focus then you have this really big issue of me or not moving that much so it's still kind of looks and focus but it's not so I'm back in auto focus and setting my frame could you part your lips just a bit good okay wonderful now is there any way I know your kind of tropic commute put your head back good all right now we have a defined jawline which I'm really looking for here instantly we create more interest in this shot I love where you're looking we can see some of your eye how about you direct your eyes more over here yep now I gotta catch light in the eye it's going to be really really subtle but it's there and taking a shot beautiful if I really love your hair in this stage just how you are if you can and I'm just going to move your dress a little bit because it's a little bit stick straight for me which I guess is appropriate with all the sticks around but I'm going to just pin it appear just like we did your hair see if I can get it to stick somewhere just like that okay now it's just creating more interest more detail more believability in this picture good now one thing that I'm noticing that it's not a big deal but it's just one of those little tiny details that you might need to think about is the hand so the hand is facing me directly which means that I'm not seeing all the details of the fingers so why don't we go ahead and tilt this hand just like that and have this finger pressed on the wall just like that now we've got light hitting all the fingers and it's just another little area of elegance and detail that we can focus on okay perfect great now in this picture we've got stuff going across her face in her mouth in fact which I think looks awesome yeah that's really good we've got her yeah no no stay there for just a sec we've got her hair going everywhere we've got elegant details but of course nothing that looks too forced I hope so now if she could just stay there for another second I'm going to lock to manual focus once again and just take some extra shots because it can never hurt to take a few extra shots around the frame got it okay you may relax and wipe your nose of it it's very cold in here in case you guys didn't know perfect so that would be it for this scene I have shot what I wanted to shoot and so I'm going to reset and I'm going to do another shoot in this space and that shoots going to be a little bit softer a little bit more fairytale storybook we have I think a hundred butterflies to bring in they're not real butterflies they're actually pictures of butterflies so I think that's pretty interesting I requested no feathers so we have pictures of butterflies on benedetti butterflies so let's go ahead and get you out of there and then we'll start to just haul this stuff we would love to ask a question or two if you don't love that fantastic let's start to get all of the vines out as that rate all right so we've got one from alley who says how do you gain access to all these abandoned locations I can ever track down who to contact to use such places for shoots how do you do it or do you just try to fly under the radar I do a little bit of both if we're being honest one thing that I do is I tend to try to get a lot of photographers together just for a fun day of shooting and that means that we can all share a speak s so I might go to a location scouting agency where if you type into google location library location scout location scouting agency things like that it's pretty easy to find somebody at least in this city who will have a whole entire library of locations that you can use so I find places like that I e mailed them ask how much it is to rent they'll usually say something like a thousand dollars a day which is completely overwhelming but if you have that say twenty photographers renting at the same time you all split the fee and then you have access to this huge building with lots and lots of models and photo assistant that's one really good way to do it otherwise I jump fences and I crawl under vince's and I do whatever I can to get access but I will always try asking first because I really am paranoid of getting arrested so rightfully so yeah way had a few questions about your how you doing he's the rule of thirds and also curious people were curious about why you decided to go with the square image method yeah well square images let me talk about that first because I think that that's a really important part of my process square images are to me looking past the photo so instead of seeing a standard photographic frame two to three ratio amusing a square where in my opinion you have this image where you don't see it as a photograph immediately you see it as something more than that and so I like to create stories I like to create images that or perhaps not photographic in nature and because of that the square really allows me to do that now as far as the rule of thirds go I actually do kind of adhere to that a lot a lot of friends I will place a subject right in the middle of the image in this case though I had her off to the right hand side so when I goto actually compose this image I'm going to make absolutely sure that she is in the right hand third of the frame or that I moved her to the center in some way
Class Materials
bonus material with purchase
Ratings and Reviews
Kirsteen
Brooke says she wants to be inspirational - she has achieved this and so much more during this course. I am so inspired to follow my dream of becoming a fine art photographer and step out of a life as an academic and stop finding excuses. Watching other photographers shoot and edit is always a great way to learn, everyone does things slightly differently and I enjoy Brooke's no fuss techniques. Seeing so many of Brooke's beautiful images through the course has been great and seeing shots from the shoot through to editing really makes them come alive. If you are looking for inspiration or you want to learn techniques or new skills then this course provides all of these things with a big dose of positive thinking thrown in.
user-a81eeb
Brooke is amazing! I love this course. Brooke is easy to listen to. She has a beautiful insight into creative fine art . Love it! I have learned so much. I especially love that she is so candid about everything.
renee Akana
I love Brooke and the wonderful way that she teaches. She is a gift to us all. Jane, her model, was lovely - a beautiful girl, a wonderful attitude and a real professional.. I could not do what Jane did to help Brooke convey her story.