Multiple Local Adjustments: Architecture Photography
Lesson 12 from: Advanced Photo Editing in Capture OneDavid Grover
Multiple Local Adjustments: Architecture Photography
Lesson 12 from: Advanced Photo Editing in Capture OneDavid Grover
Lesson Info
12. Multiple Local Adjustments: Architecture Photography
Lessons
Class Introduction
04:58 2Local Adjustments Overview
05:47 3Drawing Local Adjustment: Masks with Brushes
08:59 4Drawing Local Adjustment Masks with Gradients
08:05 5Vital Techniques for Dodging and Burning
09:54 6Dodging and Burning Demos
14:49 7Local Sharpening and Local Noise Reduction
07:40 8Advanced Editing for an Editorial Portrait
05:51Simple Element Removal
06:09 10Multiple Local Adjustments: Product Photography
09:43 11Correcting Perspective for Accuracy
04:27 12Multiple Local Adjustments: Architecture Photography
15:13 13Correcting Perspective for Creativity
12:37 14Creating Dramatic B/W images
09:17 15Processing Black and White
22:08Lesson Info
Multiple Local Adjustments: Architecture Photography
So we're gonna at this image here. And we're gonna point out a couple of other features that we can use when adjusting perspective tool. So here's the image straight out of camera. And this one's a little bit harder to correct because if we look at our kind of angle down here, it's not like we're facing this image exactly front on and we're looking down on it a little bit as well. So in situations like this, sometimes we need to play around a bit more to see where our best perspective correction can lie, and such. So what I did with this image when I was playing around with it, we're gonna come to sort of adjusting it in a second, but quite often with this kind of shot, I want to get the perspective adjustment nailed down first. And then I find it then easier to visualize the adjustments. So if we grab our keystone option again, and we've got some choices here. Now, I'm guessing if I go to this building on the left and perhaps architects these days don't build anything straight anymore...
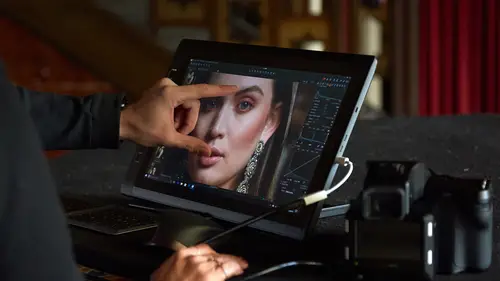
. So if we go perhaps to a building over there and hit apply, I think this is gonna overcorrect because we're kind of looking down on the subject. And it's actually not too bad. But I think it's just probably gone that bit too far. It's kind of lost that realism that we had. So if we go for a slightly less harsh correction, then I'll pick this building here, for example, and then maybe we'll go for this one over here, like so. If you want to be able to place these a bit more accurately, then there's no reason why you can't zoom in. Where are we? Over here, there's no reason why you can't zoom in just to be able to see better exactly where you're aligning. So, for example, this one doesn't matter where these control points are, it's all about fitting it alongside the side of your objects, for example. Whoops, I pressed the wrong cursor key. There we go, so I'll probably pick something like this for this side. And then if we go back over to this side, if I just zoom in a little bit, space bar to pan, of course, just Like Photoshop. And many other applications. Let's try that. So now if I hit apply, that's given me a bit of a correction, but it's not completely over the top. But in this case, the rotation I feel isn't as good as it could be. So what I will do is go to rotation and flip, and rather than drag the slider, I use my cursor keys. And if I do Shift + cursor, we can just jog the adjustment until it's something a little bit more realistic. Now, what you'll also see, if I press C on my keyboard for crop, you can just about see if I make the image brighter so you can see it, you can see how the image has been adjusted. But I'm just losing the top of this tower, which is a bit of a shame. But there's a handy little button in the crop tool, which is down here. Which you might wonder why would I ever want to do this? But this let's you crop outside of the actual image data area. So in cases like this where we just need a tiny bit more, we can open up the crop and we're gonna have a little blob of black space there, but that's easy to drop back in with content aware field. Or we could do it in Capture One, for example, with healing layers and so on. So being able to crop outside the image is actually a really handy little feature that sometimes we need to do if we're doing stronger corrections to an architecture shot like this. So let's fit back in this screen again. Let's cancel out my exposure. And then we what are we gonna do with this with regards to local adjustments? So first of all, of course, we want to dial in some kind of white balance, which is also tricky when we're working with architecture because we have loads of different mixed lighting sources. And really it's a case of how do you want to represent the image. So I think probably colder in this case is better. So just by dragging our white balance slider down, we can get to something pretty good. Levels wise, we don't really wanna move our highlight pointing, because we're probably gonna blow out some of the details there. But we could probably pull this in, just so we get some lightly stronger shadows and it looks a bit more contrasting overall. And I'd probably dial up our contrast slider a little bit too. And I'm conscious that I don't want this building to go a little bit too dark. So I might just raise that with the shadow. But that's affecting the rest of the shot. So that's something we might deal with with local adjustment. One thing which I find distracting is we've got a dust spot. Rather than using a repair layer, as we saw before, simple spots like that we can just use with the spot removal tool. So we have two kinds of spot removal. Dust, which is dust on the camera itself, which is probably what this is, and spot, which is an actual physical blemish. So it could be a spot on someone's face. It could be a mark on a building. Or it could be something that you physically is present in the image, not dust on the center. But as this is dust, we'll try this first. So we can grab the edge of the circle and just make it bigger and that does a pretty good job of getting rid of that dust spot. So now we're in a relatively good place for local adjustments. Probably just add a bit of clarity. And the problem areas that I see that we want to fix locally is that I think this building might be getting a bit too dark. And then we've got loads of sort of flare in this area from I guess this is a square or something or a more built up area where there's a lot more lighting going on. And we have got this sort of flare going on in the image itself. So we want to control that with a few different tools probably, but let's visualize. So we call this later city lights. And then we think about what's going to control that best. So I'm going to invert the mask. And we'll try a few different things. We could try exposure. To some extent that works. We could try high dynamic range. That actually gives us a little bit more detail. So if we drag the highlight slider down, that actually gives us a bit more detail in the buildings itself. So I think I'll dial in some highlight recovery, and maybe in conjunction with a luna curve, so probably down this kind of spot. So that gives us a bit more depth and guts in our city center lights. But obviously now we need to brush that in as a local adjustment. So let's insert our mask back again. Take our brush, nice big brush, probably. Low flow, because we don't want to brush it in all at once because it's probably gonna look way too obvious because you'll be able to see my brush marks, and so on. So let's not do that, and use the techniques that we know already. And use nice low flow. And then we're probably gonna need more of it in the center, compared to how we need it on the edge, and such. So if we just do a few passes like that, then we've got much better representation in the middle of our city lights, like so. If you've gone too far, don't forget you can just take the eraser. And then I can just take a little bit out the edge, like so. So I think that's looking much better. Again, if we need to adjust more, I could go back to my curve and just pull that down a little bit more as well. Now I felt that this building on the left was maybe getting a bit too much in the shadows. I'm guessing our point of interest is China World Hotel in the center here. So let's make a layer called lighten. And this is tricky 'cause it's kind of in quite deep shadows. So it depends how much data do we have to play with. And as I said before, it might surprise you exactly how much there is in the raw file. So again, what will work best with this one? So we could lift the shadows, oh, I need to invert first. Invert mask, we could lift the shadows a bit. And we could do that in combination with probably slide curve as well. So now looking at this building, if we turn our layer on and off, it's just a little bit lighter those windows, we can now see a bit more action in them as opposed to the deep black that they were before. So let's grab my draw mask. And then turn lighten on. Invert this back. And then now we can just brush it on as we see fit, and such. And of course there's no reason why I can't use it over here. If I want to just brighten this area up a bit. It was coming in a bit fast. So I can undo using Command + Z on the keyboard, and then just come back again and brush in a bit more. And then over here, if we feel this is getting a bit dark, we could just lift over so lightly the shadows there. Now, down in the front we've got quite a big highlight coming in this direction which could be distracting. So let's make a new layer and call that grad. Or it's just a little bit overexposed. Again, there's probably more detail in there which we could lift up. So if we do a little gradient mask, and I'll draw it around here, and stop about there. So that's just just a gradient mask up front. And I think probably an easy fix would be just to drag up the highlight slider. And if we zoom in down at the bottom here again and turn that layer off, see that was before the highlight correction. And then after the highlight correction. So we've just got a bit more detail in there. And we could probably bring the exposure down a tiny bit as well. So now that's less glary and less distracting down the front. Now, the last thing that we might want to do and this is maybe a sort of a personal choice. But I don't know if the roadway on the right-hand side is kind of somewhat distracting. So if we take another layer and just call this roadway, grab the gradient filter kind of like that. Maybe too much. Kind of like that, so it's just bleeding into the edge. And rather than do something to that whole layer, what we can actually do is go to our color editor. And if you want to know more about the color editor. Then that's a good reason to visit the advanced color correction class because we spend loads of time in working with the color editor, but very simply, all I'm gonna do is pick within that mask the warmer it tone of the road. And we can take the saturation out of it and perhaps darken it down a little bit as well. So if we turn that layer on and off, then we can see before and after like so. So just to take some of the distraction out of it. Now, looking at what we've done so far, I think rotation wise, I just wanna rotate it a little bit more as well. And then with the help of a grid line here, I could just see how my China Hotel is looking. So maybe just a little nudge like so, so it's that bit straighter. Do we want to do anything to the sky? Let's think, if I go to the background, then we use our color editor once more and then pick on the sky. Could I just darken that down a little bit and make it, no, I think more saturated doesn't look well. Actually taking the saturation out a tiny bit and darkening it down does pretty good. And don't forget you can always revisit our other layers again. So if I go back to city lights and take my brush, and I think I'll just darken off that little bit there in the middle like so. So we've done quite a lot with local adjustments. If we turn them all off, just to recap, we darken down our city lights in the center. We lightened up a couple of those buildings in the front. We did a gradation at the front just to take down the highlights. We could actually lift up the shadows. Oh, wrong one, grad, this one here. We could lift up the shadows a little bit as well. Just a touch. And then finally the roadway on the right-hand side, we just took some of the color out of that and darkened the density down a bit as well. Quite a lot of changes, but plenty of data in the raw file to do that. And of course working in the raw file in Capture One you can do this more extreme stuff without danger of kind of getting posterization or losing quality because we have all that raw data to play with. So if we do an Option + click here, you can see that that's before the local adjustments and after. So all the different density changes at once. And if we do an Option + click on the mask to reset button, or Alt+ click, as you might know it, that's as it came out of camera and then with our adjustments, like so. Any questions on that, Jim? One question, David. Yup. One of our students is not seeing the mask eraser tool in local adjustments. Okay. Is there a way to turn it on and off? Oh, they're not seeing it here, perhaps. Correct. There is no way to hide it. Okay. So you should be seeing it. I don't know of any cases where it's magically disappeared, but just click and hold down here and make sure you can see it. Perfect. Or press, remember, B on your keyboard for brush. If I zoom in, and then you have E on the keyboard for arrays, like so. So make sure you've actually got the right cursor tool up as well.
Class Materials
Bonus Materials with RSVP
Ratings and Reviews
Peter Hudson
This is fabulous - even though I use Capture One regularly I always learn something new from listening to David and this is one of his best - if David is the teacher then get the whole series is my advice - well worth the investment
user-940746
In this class David shows what editing can be done in CaptureOne and when it is time to use an external editor. There are lots of features in the program that David brings out to make the editing quicker and easier. The class also shows how much can be done in the program without going to an external editor, thus saving time and effort in editing. As usual, David presents the information in a manner that is easy to follow.