Difference Between Adobe® Photoshop® Elements and Adobe® Photoshop®Creative Cloud®
Lesson 1 from: Adobe® Photoshop® Elements for PhotographersLesa Snider
Difference Between Adobe® Photoshop® Elements and Adobe® Photoshop®Creative Cloud®
Lesson 1 from: Adobe® Photoshop® Elements for PhotographersLesa Snider
Lesson Info
1. Difference Between Adobe® Photoshop® Elements and Adobe® Photoshop®Creative Cloud®
Lessons
Day 1
1Difference Between Adobe® Photoshop® Elements and Adobe® Photoshop®Creative Cloud®
54:22 2Creating an Album and Connecting to Lightroom
25:48 3Guided, Quick, and Expert Edit Modes
32:36 4Layers Options Overview
40:52 5Guided Effects
24:13 6Puzzle Effect
18:26 7Resolution Dicussion
22:26Resolution Discussion Continued
20:20 9Canvas Resizing in Adobe® Photoshop® Elements
22:47 10Color Correction in Expert Mode
27:55 11Layer Masks in Expert Mode
16:33 12Correcting in Adobe® Camera Raw
12:24Day 2
13Creative Color
25:37 14Partial Color Images
25:13 15Converting Color to Black and White
29:10 16Custom Gradients and Vignettes
30:01 17Removing and Replacing Backgrounds
43:43 18Cookie Cutter Tool
17:17 19Retouching in Expert Mode
44:14 20Recompose Tool and Color Select
21:46 21Adding Digital Make-up and Text
23:10 22Creating Photo Collages
22:19 23Sharpening Your Images
20:16Lesson Info
Difference Between Adobe® Photoshop® Elements and Adobe® Photoshop®Creative Cloud®
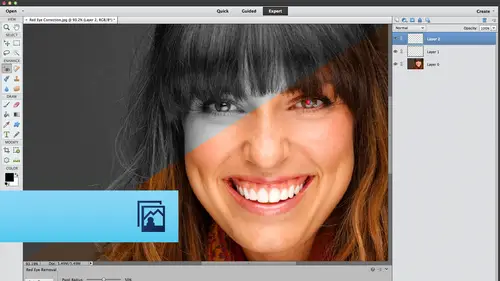
we're gonna have so much fun today. But before we get started, if you guys would like to connect with me online, I would love for you to do so. My website is photo lisa dot com In their doodles and gobs of free tutorials There for you. Take it, Manager. Be sure to sign it for the free newsletter by putting your email address in the field on the right hand side of the websites. You can stay up to date with everything that's going on in The photo is around. And if you want to follow me on Twitter, I would love for you to do that. My handle is that photo Lisa. And if you tried on over to facebook dot com slash photo Lisa and click the like button, you can download several cheat sheets, which are very handy. And, of course, if you want to connect with me on Google plus in Pinterest, that would be lovely to keep up with all my classes here at a creative live, you can go to lisa dot I n slash c l videos and you'll get a list of all the classes that I've done plus in the ones that are coming ...
up. I've got a nice discount offer everyone from my publisher, O'Reilly. And if you purchase the books from O'Reilly dot com and enter the code off D at check out, then you can get 40% off the print version and 50% off the E book, which is a great deal. Except Photoshopped Book is about 1000 pages around $40. So that's a really nice discount from the good folks at O Reilly, and we've got a fun contest going on. We're running it on photo lisa dot com, where you can win a copy of photo shop si see that missing manual or a copy of my News E book, which is the skinny on Photoshopped Tips, has over 150. Very useful, very practical Photoshopped tips, as well as $100 gift certificate from Linz Protego, my rental place of choice for any kind of camera gear, camera bodies and lenses as well in picks dot com, they're given away to $25 gift certificates per day, and with the holidays coming up, that gift certificate is going to be really useful. You can get all kinds of prints holiday photo gifts, etcetera from the good folks at in pics. So to learn more about the contest is trying on over to photo lisa dot com. And when you get to that home page, you're going to click on the Lisa's Live quote and before and after contest to find out all the wonderful details. Now we were announcing these things, announcing the winners after the last break on air. But to give the folks who are gonna watch the rerun the rebroadcast, a chance to win. We're gonna save picking the winners until late in the evening, so we will let you all know as soon as we've chosen those winners. And if you're not lucky enough to win a copy of the newly book Skinny on Photoshopped tips, and you can certainly purchase it for a whopping $2.99. Just get a photo lisa dot com and click on the books and video link, and it's the top entry right there. Now let us discuss photo shop elements. I have been elements biggest fan for many, many years. I've had the pleasure of reviewing it for Macworld magazine, for many, many years, and I'm always astounded at how much you can do with it and how few people use the darn thing. A lot of people have been pretty upset over the new software rental model that Adobe has come out with. I think it's fine. I think it's a great way to experiment with other pieces of software that you wouldn't normally. So you're gonna kind of seems like you have an opportunity to expand your skill set beyond what you might would otherwise. But Photoshopped elements and light room are a couple of the only programs now that Adobe ISS selling perpetual licences to, which means you you actually get the software and you own it. You don't have to pay a monthly fee to use it, so we're going to spend a little bit of time this morning really going over the differences between the program. So in this slide right here we have the Photo Shop CC Tools panel versus the Elements 12 Tools panel and that little Tools panel in the middle there. That is the actual size of the Photoshopped Tools panel. The Elements Tool panel is also shown in actual size this is one of the best ways that I can try to get the point across to you. That elements is user friendly. Photoshopped Not so much eso This just really kind of gives you an idea of how the, uh, about the design differences in the program itself. So let's just take a look closely here and see what might be missing from the Elements Tools panel. Well, things were in a little bit different order. You'll notice that the interface color is light grey. He cannot change that elements, so that may be a deal breaker for you right there. But it is a light gray interface. We've got the same zoom tool, the same old hand tool that lets us move around. And you'll notice that in the elements, tools panel, the tools, or even categorized with an actual word, letting you know what those tools might do, which is very nice. But a shot doesn't have any anything like that. Sometimes I think photo shop, You know, you kind of have to be worried that your it thinks you have to be worthy to use it, so if you don't know what you're doing, it really doesn't care, and it's just happy not to work for you at all. The elements is not that way really want to you to have a successful editing experience. So let's just trot down to the select section of the Elements Tools panel there. We've got all the same selection tools in elements that we do in photo shop, So we've got our rectangular in elliptical marquees. We've got our lasso tools, and we've got a quick selection tool, which allows us to paint on selections. So that would mean the elements is looking at the color of the pixels that you mouse over in trying to select similar colored pixels moving down to the enhanced section, which you can think of. Uh oh, that's where your healing brush is there going to be so on and so forth. So we do have a spot healing brush in elements, and it does have a content aware option. So we looked at a lot of uses for the spot healing brush set to use content, aware on Monday when we were the leading all kinds of things from our photos. So we've got that right here in elements. There is no regular healing brush, though. So fixing things that don't easily fit within a brush cursor probably gonna have to go use the clone stamp tool in elements. We also don't have a patch tool in elements. So we used the patch for quite a bit on Monday to select larger areas of our image and then move that selection to another area of the image in order to tell Photoshopped to use those pixels to delete the thing that we selected. So we don't have that in elements. We also don't have a pencil and elements, so you're not going to be able to draw vectors. So while we were talking a little bit at the top of the class, you know who should be using elements versus who should be using Photoshopped Graphic designers You're gonna have to stick with photo shop for the most part, use the pen toll. The elements is not gonna work for you. But if you don't use a pencil, that elements just might work for you. So we also do not have a quick mask mood in elements. The quick mass mode is that red overlay that you can pop onto your screen and it's helpful when you're fine tuning. A selection allows you to paint the red overlay on her off to either add or subtract to your selection. So we don't have that elements. Which also means we don't have Alfa channels an element, so you really can't save a selection to use later. But we've got full on layer masks and elements that came along and elements mine. And when that happened, that's when elements really started to be, ah, viable alternative. Teoh those who've been using photo shop for years. Then we'll look at the layers panel versus photo shops here in a second now, even though we don't have a pen tool here in elements, we can still create text on a path because we have a text on a path tool or a type on the path tool in elements that one came along. I believe in Version 10. We also have a content aware move tool in elements. Can you believe that so we can scoot things around school objects around within our photos right here and elements at straight from Photoshopped Every time elements is revved, which is each fall usually comes out in September of every year like clockwork. What's revved every 12 months you get more new features, and they always come from Photoshopped. Sometimes you'll find a future in elements that Photoshopped doesn't have. We also have content aware scale in elements so we can use that tool to either increase the size of our image or decrease the size of our image that uses technology. Were Photoshopped or elements, rather analyzes your image and prioritizes the patches of color that it finds. So it gives a lower priority to things that it considers to be a background like Bigger is blue, big areas of green etcetera, and it gives a higher priority to things that have skin tones or areas of fine detail. And you can resize your images and it works amazingly well in elements. The content where scale tool in elements has a threshold slider, which you don't have in photo shop. The only wayto help put a shop cc, do a better job of using the content where scale command is to create an Alfa Channel. Well, we don't have apple channels and elements, but we've got an extra controller on that content aware scale command, and it doesn't amazing job. So we're gonna look at that. And Elements is called the recomposed tool, which makes a little bit more sense because what the heck is content aware scale? I mean, does that mean anything to anybody in this room? It couldn't be more cryptic. So content, aware scale and put a shop recompose in elements makes more sense because you would be re composing the everything is in your image just by removing some of the background. Maybe scoot your subjects closer together or increasing some of the background in order to create the size of the image you need. If it's saying off the right aspect ratio or if you need space for text, we talked about the content aware spot healing brush elements has a pet I tool. This is new and elements 12 and you're not gonna believe how well it works. Photoshopped cannot do this at all. The only way to fix animal eyes. So with animal eyes, you don't get red eye. You get white, green or gold, I instead, and the only way to fix that and Photoshopped is to rebuild those people's. It's not that hard. You create a selection of the bad people, and then you create a new layer. Any feather the edges of the selection and you feel it with black. And then you create another new layer and you grab the brush tool set to paint with white, and you pop in a couple of glimpse in the people's cause. You know, if you don't have the reflection that it doesn't look, riel elements will be all that in about two seconds. It's really amazing. So that's new. In Version 12 the continent we removed, Tool is also new in Version 12. In this programme, we haven't talked about how much money it costs. Yet It's about 100 bucks straight from adobe versus photo shop, which is what photo shop Sisi is $10 a month forever. But then you do get you can get light room along with that, if you pay that $10 a month. For Photoshopped, the elements is about 100 bucks upgrades or around 80. To be honest, you confined new copies of elements on Amazon for around 80 so it's under $100 it is incredible, just incredible. So the pet Eitel is really just incredible technology And like I said, Photoshopped doesn't even have that. But continuing down in the tools panel, we've got vector shaped tools in elements and they actually create shape layers, just like they do in Photoshopped. You don't have as many options you gotta fill option for shape, layers and elements, but no stroke option for that. We've got layer styles and elements so we can add drop shadows and Bev ALS and in bosses and inter glows and outer clothes and all that kind of good stuff right here in elements. We've got the brush tools. We've got the eraser tool. We've even got the magic eraser in the background Eraser, Right from Photoshopped, we have the pencil tool which will never use the type tools exactly the same. The type tool creates vector based type, which means that the edges were always going to be crispy, so they won't look pixelated. We've got an eyedropper tool for snatching up color. We've got a Grady int tool, which is fantastic for creating new backgrounds or for using inside of layer mask. When we start doing some collages tomorrow, we're gonna be combining images and we're gonna use the gravy and tool inside of a layer mask to fade one image to another. We can also use that for a faded color effect. Neat stuff. So cruising on down in the tools panel, we're out of the draw section now. We also got the clone tool and the pattern stamp tool. We looked at those on Monday over Photoshopped. You've got sponge tool for de saturating. You don't use that very much. You've got a blur tool, and we've also got dodge and burn tools, even though you can't see them in this tool panel. But they're in elements as well. When we cruise on down to the modify section at the very bottom, we've got our crop tool down there. Interesting cause photo shops, crops will lives at the very top of the tools panel, but in Elements is at the very bottom. The content Aware scale, which in elements is called recomposed, lives right next to the crop tool that little looks like a free transform box with little green gear sprocket on it and then underneath that is the new continent were moved to a new version and next to that is a full on straightening tool Ah, full I'm straightening tool that uses content aware fill. So think about what happens when you straighten an image. You really just rotating it, and then you end up with transparent bits. You know where you rotated it, because it's no longer the exact size of the document. Well, in elements straighten Tool uses content aware fill technology to try to fill in those areas that are empty due to the rotation. And Photoshopped doesn't even do that. So that's a neat thing that's new in version 12 as well. And then at the very bottom of the elements told panel, Of course, we have our foreground a background color chips when you're using any of the painting tools in elements that foreground color chip is what color that tool use when you start to lay down paint. So pretty amazing, huh? I mean, we've got so many of the same tools in this $100 program versus photo shop and so much easier to use. I really couldn't get over the differences in size of the tool panel, so I thought I would just include that free all up. Next. Let's take a look at the adjustment layers that are available in Photoshopped Elements versus Elements CC. So we've got put a shop on the lift and elements on the right, so just starting from the top, we've got solid color Grady in and Pattern Phil layers. So those air fantastic ways to build new backgrounds once you've perhaps hidden in the background with a layer mask. I love using feel layers in that way because you can experiment with the color or the Grady int or the pattern depending upon which one you choose that you views simply by double clicking the layer fund nail of that field layer. And it'll pop the color picker or the Grady in picker or the pattern picker right open so that you can experiment with it. And if you change the size of your canvas, then Photoshopped automatically fills it with whatever that Phil Layer is using. So it's really versatile, If you would, if you made a regular old image layer filled it with color it. If you increase the size of your canvas, then you'd have an empty areas and you have to go get that color. She's edit Phil, so using the pill layers for that is a lot more efficient. So down in the next section, we've got fewer adjustment layers here in elements. We've got levels which is fantastic for correcting color and lighting. We're gonna be looking at that later on today. We do not have curves and elements elements used tohave, kind of a rudimentary version of curves. But I don't believe we have that anymore. So if you're a fan of curves, you're not gonna have that over here in elements. But we do have levels and elements. 12 has a new feature called Smart Toning, and it's a really interesting interface where you have your picture and elements, does four corrections on it, and you get to see those in the corners. And then you use this interesting on image interface. Teoh decide how much of any one of those corrections you want. It's a very visual way to correct your images. It's not scary. It's not complicated. It's just Oh, I like it better when I drag this way or I like it better when I dragged that way toward one of the little thumbnails that elements has corrected for you. So that's a really neat thing that we're gonna take a look at later on. Today we've got brightness and contrast here in elements which is really, really useful for all kinds of things. There's a lot of techniques that I like to deal in. Retouching portrait's and and just fixing lighting problems that I call selective lightning and selective darkening is really great for, like, lightning teeth, lightening eyes or just lightning any areas that are a little too shadowy. And the technique also works for darkening any areas, which is great for fixing. Shines is great for fixing over exposed areas, and I like to use empty adjustment layers for that. So I'll create an adjustment layer and then do this technique. But I won't really make an adjustment on that particular layer. So we're gonna take a look at that later on today. T hue saturation you've got in elements that's great for changing the color of objects can use that, Grady. It map is incredible. Toe have here in elements. Grady. A map adjustment layers are my favorite way to make beautiful high contrast black and whites from color images. So we're gonna take a look at doing that to you. Photo filter allows you to add a little bit of a color tent, just a very subtle color tint to your images and invert will flip flop? Uh, the color's in your image, so if you've got an image that's predominantly orange, if you choose invert, it becomes predominantly blue. So you have to know a little bit about color theory to be able to predict what invert is going to do. But it's handy to have around specially. For designers, threshold is a a great adjustment layer to create a pure black and white image from any full color image. So basically what it does is it takes the shadows and clips them to be solid black, and it takes the highlights and clips them to be solid white, great for special effects, and pasta rises another one for special effects. So that's where you can get that scanner darkly. That maybe that county Rees was in 1,000,000 years ago that nobody saw kidding. Sorry, Cheon, if you're watching, I love you, but that gives you kind of ah, heavy black outline around the subjects in your image. So many areas of high contrast. It just exaggerates the edges and makes it look a little bit like a comic book kind of effect. So what we don't have in elements is the black and white adjustment layer, which Israel handy for adding color tents in your images. Over in Photoshopped, however, Elements has an effect panel that has color tents as a preset in it, and applying them is a double click affair in elements does it non destructively. So that's not a big deal, that we don't have a black. And why adjustment layer available in elements We don't have vibrance. We don't have color balance. We don't have Channel Mixer because we don't have channels and elements. We cannot get to our channel information here in elements, which is why we don't have Alfa channels. So that just means that you can't go into that images particular Red, green or Blue Channel in order to tweak it or create selections and so on. But an amazing array of adjustment layers there seems like the most useful ones are there, least, in my humble opinion. So now let's take a look at the blend mode menus see any differences there All the same, all the same blend modes that we are used to seeing in photo shop or right here in elements, and you're going to encounter those in several different places. This menu is taken from the layers panel menu and elements, and that's exactly where that blend mode menu lives in Photoshopped CC. But as you can see, look at the size difference of the Did you see how everything is just a little bit bigger, a little bit more visible in elements little bit, spaced out, more friendly, less overwhelming. So we've got almost all the same, uh, blend modes and elements as we do in Photoshopped, the only ones that we're missing, our subtract and divide. And who uses those guys anyway, right? Here's our filter menu in Photo Shop CC versus Elements 12. We do have fewer filters and elements 12 and some of the same. Some filters that we do have an element that we have a photo shop, our names completely different things, such as you'll notice in the Elements 12 menu here. The 3rd 1 down is called correct camera distortion in photo shops filter money that lens correction filter, so we do have lens correction filter in elements. It's just called something completely different. Currents camera distortion arguably a little bit more descriptive than lens correction. So hopefully you're starting to get a sense of the friendliness of elements versus E opposite of that in Dear Photoshopped. So trying on down the Filters menu, we cannot access camera raws of filtered elements. That was a new feature in photo Shop CC, so we don't have that over here in elements. Other interesting things in the photo shop CC mini that we don't have an elements is the adaptive wide angle filter. We don't have that now. You will see the liquefy filter in the photo shop money, but not in the Elements menu, but it's still there. It's just nested in the distort category, so we do have liquefy in elements. However, it has, uh, fewer controls in elements than it does in photo shop. But it's fantastic that it's there. So liquefies a great one for performing plastic surgery on friends and family and clients so you can't let you push and pull pixels around. I'm sure you've all seen Google liquefy or search for liquefy videos on YouTube, and you won't believe the kinds of things that people can do with the liquefy filter. They could take really large people and make them look like supermodels and vice versa. I think vice versa parts more fun. So trying on down that menu there, we do not have oil painting elements. 12. Okay, so that's a little bit of a drag. Don't have vanishing point. So if you need Teoh, add an object to an image in perspective. It's more difficult to get done in elements. So that's the kind of thing that a production artist would be doing a lot if they work for a magazine, say, uh in advertising, So that may not be that big of a deal, but you've got most of the same artistic filters. Most of the same blur filters we've got Gaussian, Blur and elements just like with you and Photoshopped. We do not have the new blur filters that came along and see a six, so that would be the field blur, iris blur, tilt shift blur and elements. But there is a tilt shift effect in elements that you can create using guided edit mode, and we're going to take a look at that, so we do have tilt shift in elements. It's just not a filter that you can readily get Teoh on your own. We do have uncharted mask and a light version of smart sharpen in elements. So on sharp masses a great a great dialogue box to do. You're sharpening because it has a a little bit more control than other sharpening methods he can really control. Exactly, which edges are getting sharp ened. And how wide your willing Teoh left at sharpening Halo be in sharpening is just finding the edges in your image areas of high contrast and then making the light bits a little lighter in the dark bits. A little darker, that's all sharpening is. So we've got some great sharpening control here in elements, and most of the other filter categories have the exact same set. A couple of my favorite filters that will be your favorite filters when this workshop is finished live in the other category. I love using the high pass filter over in Photoshopped to do my sharpening. We've got that right here in elements I love using the minimum and maximum filters to tighten layer masks, and I believe I hope I'm not lying on this one will check. I believe those were tucked inside the other menu as well, so we've got those in elements now. What you're not seeing in the Elements menu is a video category. That's because elements Photoshopped elements does not have video editing capabilities, but you can purchase it in a bundled package along with premier elements. So Premier is adobes video editing applications. So Premiere Pro would be the gorilla in the room, The Big Boy like Photoshopped CC, whereas Premier Elements is a lighter, more consumer friendly version of that. So the two programs pair really nicely together premier elements in Photoshopped elements, and you've actually got, ah, buttons in the Elements organizer, which will look at that you can send once you've imported a video, you can send it straight over to premiere elements to edit it. So premier elements and shop elements work really closely together. So there is a video component. Add on, if you will, that you can purchase if you like to add a video. Pretty amazing, huh? Now let's look at the layers panel again. We've got the light innovate interface, and you cannot change that. But Adobe is getting some pushback on that. So that might come along in the next version or so I'm not sure. But maybe so. The Layers panel looks real similar. The big difference is that the controls that you find at the bottom of the layers panel and Photoshopped live at the top of the lawyers. Palin elements. Same thing with the options Bar Options Bar lose at the top of the interface and photo Schottel. Is it the bottom of the interface and elements which arguably that makes a little bit more since in its bigger T, the options bar is honking big, you will not believe how big the options of arias in the settings inside of it. I mean, everything is visible so wonderful. So just looking at the controls in the layers panel, what we don't have in elements that photo shop has is layer groups can't really create folders of layers. We don't have layer filtering layer filtering came along, and CS six so elements does not have that. Yet you do not have vector masks in elements, which again the only people they're gonna use that are graphic designers. We don't have a masks panel in elements, but we do have full on layer masks. So with no masks panel that means you don't have ah, feathering slider so you can't feather your mask on the fly or change the density of of the masks, which is really opacity. You'll notice that the effects button is missing from the Elements Layer panel, but that doesn't mean that we don't have all those layer effects. We've got almost all the same ones, but they're in. They live in another panel if expand, which arguably makes a little bit more sense. We do have a refined edge, dialogue box and elements, and that is super powerful voodoo for making complex, complex selections around hair and for things like that in order to mask a background in order to swap it for something else. So we've got that in elements, so that's huge. So for photographers, the fact that we have the Refiners dialog box means you're gonna be able to make complex elections like a cannon, photoshopped and layer masking in those adjustment layers and the sharpening filters that you need. What else do you need? I mean, really graphic designers. They need a whole other toolbox, whole other set of tools. But for photographers, you can do so much in elements. And when you pair elements with light room, that, to me is perfect combination. Absolutely. The perfect combination because light room and adobe camera raw, which is a plug in that gets installed along with Photoshopped and Elements, is all slider based. And there's nothing easier to use. And sliders visual nice interface, nondestructive editing, which means those programs really aren't changing your image. Those programs were keeping a list of your change requests, and if you were to export that image, then those changes would be applied to the export, meaning. You can always get back to the original image, which is really, really nice. So we're gonna look at how to set up light room to use elements as your external editor, because, ah, lot of people don't need to go into photo shop or elements if you are using light room or the adobe camera raw plug and you can do unless you want to create a collage or a partial color effect. And yes, I know you can kind of do that in light room, and you can kind of do that in camera raw but you cannot be nearly as precise as you can in elements or Photoshopped. So unless you're doing collages or you're removing something very complex because light room and camera don't have a clone stamp tool, so it's they have tools that will remove things by blending well. The Clone Stamp tool. It's a straight copy situation, so you can't create 1/3 eye in L. A light room. But you can do that every year in elements. So unless you're removing complice objects, making complex selections, swapping backgrounds, creating collages, you don't even need to go into photo shopper elements. So light room and camera rock and do so much. And I think light room plus elements is a great package, and you'll save money, too. I've got a deep dive on the adobe creative cloud that we did when it first came out, and we outlined everything that you get when you have a subscription to the creative plowed. And then we had a deal calculator, which, depending upon how many programs using the creative cloud, how you would get the best price on it. And if you're a photographer and your Onley using light room and let's say Photoshopped, Then it's gonna be cheaper for you if you purchase elements and again you can own it. You can, unlike room and elements, and that's just a magical combination. So you would use lightning for all of your importing and your organization in your slider based corrections, and then only go into elements when you need Teoh and you can have an image pop open an element straight from light room I photos the same way. If you're on a Mac, you could use I photo as you're importing organizational rating sorting database, and you can set up I photo to use elements as your external editor. It will take a look at how to do that later on T. So we mentioned Adobe Camera Raw. You do get camera wrong when you install elements, but it's a little bit of a light version. So let's take a look at those differences here. So we've got the Photoshopped version of a CR adobe camera, raw eight at the top left and Elements version at the bottom right, and you can see the tools on the top row. There are far fewer tools here in elements, so which ones are you missing? Your missing The spot Healing brush the spot removal brush rather in camera raw. You're missing the graduated filters. You're missing the radio filter. You're missing the adjustments brush. So in the elements version of camera raw, you can't paint on exposure changes like you can in the other version. Over there on the right hand side, you can see we've got the same hissed a gram and we've got the exact same set of sliders. They're in the basic panel. However, we've got far fewer panels in the elements version of camera raw. Then we do in Photoshopped. So the ones that are missing or let's talk about the ones that are there the basic panel which is where you're gonna be most of the time anyway. And you've got your sharpened panel right there. And you've also got your camera calibration pain. Will Seacon set up camera calibration in the elements version camera raw, just like you can in the Photoshopped version. What you don't have are the ability to create split tones right here in camera raw, which is really just map in the shadows of your image to a color and mapping the highlights to another color to create unique color effects. We don't have that. We also don't have the effects panel, and I don't believe we have edge been getting in the Elements version of camera raw like we do in the Photoshopped version. We also don't have the presets panel, so a little bit more difficult to say presets in the elements version of camera raw. But again, if you've got lighter in my room to do all that stuff, because the develop module and light room is where you make all your corrections and it uses the camera raw engine. So if you got light room and elements, then you don't care about the tools that might be missing from your version. Camera raw but still, you can do so many things. You can straighten and camera wrong here in elements you can't fix. Red eye here in elements, all kinds of things, miscellaneous things of note I mentioned already. We don't have a channels panel in elements you can't place a vector. Elements does not understand Adobe illustrator files or E. P. S files, which stands for encapsulated postscript, but you can copy and paste from Adobe Illustrator So if you happen to have illustrator and you open a file and you copy it, then you can come over elements and paste it right in and ill paste as a shape layer, which is vector in nature. You just can't use the file place command to get that done. But since there is a file place commanding element, that means you can bring in and images as smart objects in smart objects just put a protective wrapper around the item that you're bringing in. So elements will remember its original size. You can transform it, change the size of it multiple times without the pixels going to heck in a handbasket. So that's anything. The big thing in elements that is why graphic designers can't use it is because there's no I spelled that wrong. There's no seem like a mode. This is similar C, C and K y modus similar to seem like a Have you heard of it? It's me, so we don't have seen my case. So that means if what? What the heck is seem like a means for Siam magenta, yellow, black and in printing magazines. Anytime you have toe, have something printed on a pre press. So we're talking newspapers, magazines, things like that. Then they print them using inks instead of digitally, so the colors had to be made with actual paint. OK, so hence the different color mode. So Elements works an RGB only, but that's not that big of a deal. Because as we get more digital presses, it used to be that when you created a piece of art and you send it out to get printed, you had to send them a seem like a file that is changing these days because first ball doing the color conversion, uh, your colors can shift a bit. They always get a little bit darker when you go from RGB two seem like a but the printers themselves would rather do that conversion. So these days you're finding that they want RGB files, red Green Blue Files, and they're going to do the conversion into same like a that's specific for their particular press. So we're going to see more and more and more and more that so it will be less of an issue that elements cannot function and see him like a mode. Hey, we also don't have L. A B mode in elements, probably none of Valerie using that either. Other things. We don't have an elements. We don't have smart filters, but is that a big deal may duplicate your image layer or create a stamped copy of that layer, which, when you create a stamped copy all you really do as you say, Hey, elements. I want you to take all the content that's on my visible layers, and I want you to shove all of that onto a brand new layer and then run your filter on that. So no smart filters and elements no big deal. Duplicate your layers. Instead, it will add a little bit of fat to your file size. But who says that it will be any smaller than using smart objects? You're layers panel just a little bit longer. The image size, dialogue box and elements is exactly the same, except for it doesn't have the special math that Photoshopped pass for enlarging. And I mentioned earlier. We don't have stroke options on Shay players, but that doesn't mean you can't stroke them. You can stroke them with a layer style, so we do have that just in a different place. You can use custom shapes and elements, but you can't save them. But what you can do, an element that Photoshopped can't do is remember how in photo shop when we were sizing objects, we have to hold down the shift key. We have to drive the corner handles with the shift key, because if we don't the thing, it's all floppy, jod and squished and stretched and elements. You don't have to do that. It's sizes proportionately. It keeps preserves aspect ratio As a matter of course. That's nice. A little bit easier, a little bit more intuitive in elements. We've got multiple undoes with Commander Control Z in photo shop. You have to have add the option or Ault key to you get multiple induce, which is really the keyboard shortcut for stepping back through your history. Panel Elements also has a history panel. Elements can stitch together. Panorama is and use content aware fill technology to fill in all the edges so you don't have to crop the darn thing down. So small amazing elements has before and after previews always has full shot. Can't do that. Never has been able to do that. Amazing that is so handy because you can really see how far you know how much you've changed the image in the side by side comparison. To get that done in photo shop, you'd have Teoh name the image something else and have two different windows open side by side. The elements has always been able to do that. Elements has the image processor dialog box, same one that's info shop, and you can even use it for water, marking your images here in elements. So the image processor dialog box is a great way to resize or change the format of a slew of images. So if you've got a batch of images straight off her camera and you need to make them J pegs at 800 by 600 bam image processor can get it done just like that. So we do have that over in elements. And like I said, earlier elements does have layer masses, and I believe that came along inversion nine. That's a big deal. We had a work around before that that we could make it think that it had layer masks, but now it has the rial, and so you don't have toe kind of sneak in through the back door like that. Any questions on some of those differences that we went over We do out here. Anybody out here? They look, they look built. Go for it. Where the tools are the same between photo shop and elements Are the elements tools as powerful as? Yeah. Yeah. The tools that are the same in both programs work in the same way. And at least in my testing, they feel as powerful as the ones in those. Cool. Um, so G. Jr asked, um, how how well does the organizer in Photoshopped Elements work with light room five? And do you recommend using one and not the other, or can both be used to create a catalogue? Nice. Uh, so the Elements organizer is its database component, so you can import images with it rates or etcetera. It creates a catalogue of your images. Light room does the same thing. Light room does it far better. So if you've got light room, then stick with light room for importing sorting. Rating all of that, I would not use the organizer, but if you don't have light room than the organizer is nice, because what happens is you import images with organizer. It can't see images on your hard drive that you have not imported with it. So the only way to use it to browse images is to actually import and create a catalogue. My gym said so what it does is it tries to have it tries to pull off nondestructive editing by simply making a copy of the image file every time you make a change. So let's say I do, Ah, quick enhancement in the organizer. Then it's going to make a copy of my original and apply the changes to the copy. And then it automatically puts all those images in a stack so that when you're looking at your thumbnails in the organizer, you don't see, like 20 of this Hawaiian flower. It stacks them all up, so that's kind of nice. But it doesn't duplicate your images each time you make a change, and that's how it performs nondestructive editing. So light room does that far more efficiently because you're dealing with raw images over there, and it just really keeps a list of changes, and it doesn't really apply them, so it's not having a duplicate your image on your hard drive. So many times you're in your catalog. It's just keeping a list of what you want to change. So I would use a light room instead of the organizer. Okay, fantastic. Thank you. And then TK Ari efs about the brightness contrast saying the older one was sort of destructive. And is this new one destructive or non destructive? At the fantastic question? So the brightness contrast adjustment layer changed quite a bit. I want to say back and see us for and I would I'm tempted to say yes, elements uses that new algorithm. But that's an unconfirmed yes, but it's a more gut level. I really think that it does, but I'd have to check just to make sure that that's a fantastic question. Cool. And at least I'm sorry. You may have already covered this, but, um, camera guy wanted to know. Are there smart objects and elements there are in their arm. So there is a file place, command. And if you bring in a pixel based image using that command, you do get a smart object. So you get the features of the smart object that way, What you cannot do is bring in a vector in that way like you can in Photoshopped. You can also not activate multiple layers and convert them to a smart object in elements. So there there's a little bit of smart object in there, not the whole thing. OK? And you know, it was something that you know, um, that that I You and I've been talking about elements for the last couple of days, and I think there might be an idea out there in the world that elements is sort of photo shopped for beginners. But I think what we're gonna learn today and the next two days is that it's not. It can be a very, very powerful program for advanced users and photographers, which is who we're talking to today is, you know, element, you know, Photoshopped elements for photographers. Can you confirm that? Yeah, absolutely. And I would even expand on that and say that elements is great for beginners and intermediate users and advanced users because it has three editing modes. If you're just starting out with image editing, that tools panel on that layers panel and the options bar and all that stuff is really overwhelming. You know, there's a lot of functionality there that you're faced with. So that's why Elements has three editing moves. Guided edit mode is great for beginners because the program steps you through incredibly complex edits. You won't believe the stuff we're gonna create that puzzle effect on the wall behind me is a complex guided edit. The shop. If you try to do that in some shop, good luck. I will see you next month. But in elements is easy. So Elements makes it easy for you to grow your skill set with the same piece of software because you've got that guided edit moods great for when you're just getting started. You kind of get an idea of what the program can do you. And like I said, really complex stuff can be done in that mood. The next mode is quick edit mode where you get a few the tools, the tools panel. You're still not seeing the layers panel or anything like that. Then you've got what's called full on expert mode, and that is just like being in photo shop. You've got your tools panel on the left your Layers panel on the right, you know, you could just have a big old editing party. So with the editing modes divvied up in that way, elements suddenly becomes a lot more approachable For those who have not done digital image editing before and as they grow, their skill set that they can easily pop in and out of those different editing modes. And one of my favorite teaching methods when I get people first started on elements is to trot them through a guided at it. And it really is like having me sit right next to you, tell you everything to do because in guided edit mode and we'll look at that here in a minute, Elements goes and fetches all the commands and all the tools for that particular task from wherever they live in the interface. So you don't have to go rooting around through the interface to find them, and then what you can do is complete the guided edit. Let's say it's that puzzle effect back there. Then you can pop into expert mode and look at what elements did in your layers panel. So it's a fabulous, fabulous tool toe. Learn how those complex tasks are being accomplished non destructively. So elements. Always. When you do a guided, it duplicates your image layer, and it performs a nondestructive edit. So you're not screwing up your original image. So it's a fabulous learning tool. Yeah, so it some people do think it's who photoshopped for beginners. Your so lame. But it's awesome, and those people just need to stop saying that stuff. And they need Teoh realize that they're probably spending money that they could save because they could probably do everything they need to do in elements to save that money and have a more friendly, you know, pleasant editing experience. I was telling a story yesterday about how I can tell you how many photographers I have been teaching, and they have just been so overwhelmed with Photoshopped, you know, version eggs, that they're now paying other people to edit their images because they just can't there, so overwhelmed by that program. And that's valid. I mean, seriously, that's valid. But if I can get them on elements, then it feels more approachable. It feels more user friendly. It cost less money. They don't feel a stupid because the program is helping them put a shop is designed to make you feel stupid. How do you think I sell 1000 page book on it? It is not helpful in any way, shape or form Elements is the opposite was made for mortals. It's approachable, and I think most photographers were probably enjoy editing in it better than Photoshopped. But that being said, most people should be using light room really to do all their corrections instead of photo shop in the first place. So Photoshopped has a lot of cash. A with you, I used photo shop where you can still say that with elements cause photo shop is in the name Awesome. Thank you so much. That was absolutely perfect. So I know we're gonna roll. But Sean, to have a quick question, I do. I wonder if you could talk a little bit about the memory requirements for, like light room and elements and then also for, like, room and photo shop. See, see that one's easy memory requirements are as much memory as your computer can hold. It'll run on. I'm trying to remember the memory requirements honestly, can't remember to have to look it up in that great book right over there. But really, when you're doing any kind of image editing like that, you need to put as much memory in your computer as it is you can handle. Memory is a lot cheaper than it used to be. Have a great website for you. Hope for listening, paying attention and write this down. Ram seeker dot com Our A m is Mary S e k e r ram seeker dot com It doesn't matter what platform you're on. You choose your computer from pull down menus, and it's an aggregator. So this site goes out in search is for the best memory prices that exist on the Internet from trusted sources. And then you just click that link and you go to that store and buy that memory. That's where I've been buying my memory from for years and years and years years. But you need to put as much memory in your computer as it can hold, and you need to have, ah, fast, hard drive for any of these programs so hard drive if you're gonna go. The spinning platter were out regular old hard drive. It needs to be at least 7200 revolutions per minute, at least better yet, installing SSD Drive, which is a solid state drive that has no spinning. It's got different technology, so it runs a lot faster. I feel like I got a brand new computer when I swapped out my hard drive for an SSD drive. Their expensive. But it's worth it. If you are editing for professional purposes, if that's how you make your money, then your time is valuable. See all these people I can. I'm not going to spend $500 in the hard drive like you'll save. I mean, if you have the money. I mean, if you don't have the money, then that's a totally different thing. But you need to look at cost versus time savings because you'll make more money. You'll be happier. You'll be less frustrated when you have the right kind of set up, and you don't have to spend a 1,000,000 bucks to get it. So use an SSD drive if you can. There's ah kind of a new thing that's come out that my husband and I just bought, and it feels like we've got brand new computers yet again, and that's a hybrid drive so bits of it rsst and bits of it are spinning platter, so the price is cheaper. You got your jaws are gonna drop in about five seconds. Here we just put a terabyte hybrid drive in my Mac book pro, and it was less than $200. I want to say it was around 100 but I'm not sure, So we'll just go with less than 200 because that's pretty amazing. So look for those hybrid drives, and I can't tell you the performance difference that I've gotten. But my computers have always been maxed out in Ram just because these programs were happier that way. So lots of fast, hard drive space, lots of ram that's going to make the program really, really happy. But boy, that hybrid drive has really changed my life. My laptop, I should probably shouldn't reveal this if three years old so that ancient in computer years, right? But because I've got an SSD drive, a true SSD and that's where all my applications are installed. So it's smoke and fast. Photoshopped launches in under a second when it's not even running is just up, and recently I put that hybrid drive. So I've got two hard drives in my laptop, one for applications in 14 documents and boy smoke comes out of its going from there.
Class Materials
bonus material with purchase
Ratings and Reviews
a Creativelive Student
Creative Live has opened my eyes to education on-line and out of all the on-line resources I have come across, Creative Live is the best and there's never a catch. Creative Live is one company I trust 100%. They never would take adavantage of anyone. I love Creative Live.
a Creativelive Student
Every workshop I have watched LIVE is absolutely FREE! And... there is a rebroadcast that follows that is free. It is only if you want to go back again and again and again - that there is a purchase price. The knowledge of the instructors is phenominal..... well worth the cost if you choose to buy the workshop.
a Creativelive Student
Love the class and have been thoroughly enjoying it. One question- has anyone else had issues downloading the files? It seems to only go up to folder 13 and most of day 2 is missing?