Lessons
Day 1
1Pre-Show
13:51 21:00 pm - Bride and Groom Getting Ready
46:59 31:45 pm - Gift Exchange
25:16 42:15 pm - The First Look
15:32 52:30 pm - Bridal Party Portraits
19:03 63:15 pm - Family Portraits
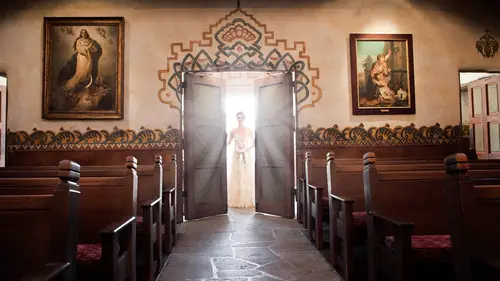
15:04 74:00 pm - The Ceremony
17:575:15 pm - Interviews: Craig Swanson, Father of the Groom
17:38 95:45 pm - Traditional Cambodian Dance
11:03 106:00 pm - Interviews: Wedding Planner, Bride and Groom
15:39 117:00 pm - First Dance, Toasts and Cake Cutting
31:29 128:15 pm - Bouquet/Garter Toss and Fireworks
15:22Day 2
13Day 2 Pre-Show
06:57 149:00 am - Getting Footage Ready
1:24:17 1510:45 am - Portraits Coverage
16:51 1611:15 am - Ceremony Coverage
36:48 1711:45 am - Reception Coverage
25:43 18Day 2 Wrap-Up
03:29Day 3
19Day 3 Pre-Show
00:51 209:00 am - Joe's Gear Bag
18:57 219:15 am - Rich's Gear Bag
10:05 229:30 am - The First Edit Part I
20:49 2310:00 am - The First Edit Part II
26:00 2410:45 pm - Proofing Part I
25:29 2511:15 am - Proofing Part II
21:23 2611:30 am - Proofing Part III
20:16 2712:45 pm - Editing The Album Photos Part I
15:51 281:00 pm - Editing The Album Photos Part II
19:46 291:30 pm - Editing The Album Photos Part III
11:33 301:45 pm - Editing Questions and Answers
32:42 31Thanks + Credits
06:38 322:45 pm - Interview with Shalia and Teurth Part I
30:30 333:15 pm - Interview with Shalia and Teurth Part II
15:25 34Day 3 Wrap-Up
04:04Lesson Info
10:45 pm - Proofing Part I
welcome back from break everyone we are going to be continuing on with day three of wedding photo journalism from start to finish with job, you sink and that you You guys already note This is not Joe. This is Rich. Prove who is Joe's assistant. You have been his assistant for six years, and you do all of his post processing. So I'm gonna let you take it away from here since. Show us what you do. Great. Okay, let's get to the computer. Okay, so this segment is, um, almost entirely going to be how I use light rooms, controls to color. Correct retouch Justin light room. We're not gonna go to photo shop yet. So, um, this selection of images I have 100 94 to get through, so I don't know, bringing it all the way through it in the segment or not, But the's have already been called down to our selection, so we don't have to go through and star them or anything like that. They're already set as far as the images I think we're probably gonna want to use even after, you know, color correcting and...
retouching. We'll still remove a few. So you put the time and effort in. But at the end, when it comes to really getting that flow just right, there's still a chance you won't be using some of the images. So I use again the combination of a keyboard and a mouse. I can't stand like the track pads or anything. So it definitely is the mouse some people love to use awake on tablet. I just like the mouse. I don't go for that. So you know how however you guys like is fine? Um, the wakame tablet does have a mouse that comes with it, and then you can do other things. Um, but I just find that keeping it all in one place is the way I like to do it. So you see already I'm using the brush tool. This is my favorite thing about light room is that I can essentially under expose an image like I could just bring the exposure down here, and then I can pull the brush in and just go ahead and paint the light in where I kind of want it. And so that gives me essentially kind of a custom vignette ing effect um, you'll see him kind of tapping the mouse as opposed to just dragging across, because I just find that doing well, tap here and there can kind of keep it exactly where I want. Um, I can use this mouse's scroll function toe, bring the size of the brush up and down super easy for me. And then if you ever hold option, you get the minus symbol. So if I, for example, his hands are a little bit too bright, so I could bring away the adjustment from that brush right here, you guys will see all my settings on the brush right now. I keep them, Um, the explosions, a 2.20 The contrast is, at 35 the densities only at 75%. So that's important to keep that in mind, um, you know, feel freedom kind of copy my feather and flow. I just put them here because it seems to work out really well. I've used it up quite a bit, so I find that that's where I wanted to be. Size is gonna change, of course, depending on adjustment to be so. There you go. And what's cool is you can always take a look just using this little flip switch to see the difference with this year. The other really cool thing that you can do is you can Whenever you move the mouse and this little thing gets highlighted, you can use the up and down arrows to bring that specific adjustment down. But something that a lot of people may not know is if you put the mouse up here away from it. If you push up and down, Well, let me see you push up and down. It actually does both the contrast and the exposure adjustment, whatever it is that you've done to the image, Um will like if I did sharpness as well. You can see that as I bring it down, everything comes down the whole adjustment from that particular brush. And you see these three different points here. I don't usually use this many brushes, but I'm just use one and then we'll go in here and you can adjust after and you can see it adjusting in here. Those kind of cool I don't need the sharpness so much. Yep. That's one of them. Um, yes. Go ahead, please. This on this the first edit you're doing to this photo? I mean, have you done a global adjustment before you go to the breast or you're just gonna go right to actually, you know, that's true. I'm here again. I'll show you. So here's the settings completely reset. I'll bring down the contract or the exposure a little bit. Sometimes I'll bring the shadows down. This is the newer set of the 2012 or 2010 process 2012. It took me a while to get used to it, but essentially, it is actually really fun to use this. I'll bring the exposure down a little bit to do more contrast. I don't typically like to just go straight to the contrast adjuster because they get more specific controls here. Um, I can use the shadows, which actually will bring down some of the contrast. Um, you could see how come way down here, but it gets a little funky, so you don't want to go too far with anything is usually how I go. And then I can use the blacks as well to do just the very darkest. But then so yeah, I'll do kind of like you say the global adjustments first and I'll bring it under. And then because I'm expecting to in this particular image, I know that I'm going to paint in the light with the brush afterwards so that I'm kind of exposing in a sense for this upper highlight area up here. So I want to bring that back down so the attention doesn't go there, and then I can bring in the brush tool and again, I'm gonna minus out his hands and minus at his head a little bit here. So that's still in the range and just kind of futz with it until it's pretty much what I wanted to be. I don't her hands to look like they're in some sort of darkness and then, you know, that's it. And then I can always adjust afterwards the global controls as well, just to kind of get it just in the right spot. So, yeah, that looks pretty good. I don't need to do too much with color, maybe warming up a tiny, tiny bit, but that's pretty much it for that image. Um, I chose the, you know, ceremony stuff cause it's kind of fun There's a lot of candid moments in here again. I would kind of bring this one down and then use this brush and you can see, um, this is another trick that people get caught up in. Whenever you click the brush tool, it'll leave the settings here that you had last time, except if you adjust them after you push the brush in. So when I start making a brush tool, I can then adjust these however I want, and it won't remember these changes, right, because the next time I close it out, I go to the next image. It will still be set at the ones that I wanted to remember, and the way you get it to remember those is actually a little complicated to may be super nerdy, but essentially, you want to go to an image all by itself. You'll open the brush tool. You'll set your settings where you want them. In this case, I want him to be Let's say I bring it down to 1.84 and I bring the contrast down and I don't want any sharpness. I don't know why that was there anyway, so I zero them out. And then instead of I don't make any brush strokes on the image itself, I close the brush tool. So all I've done is opened it, made those settings and then close the brush tool without making any brushes on there at all. And now it will remember those as the default settings. You'll see I don't have any sharpness here, and this is brought down from where it waas. I typically like this to be a 2.20 on then, Yeah, somewhere in here. No sharpness. We don't need that. So I'll close it again without making any adjustments. That way, it'll keep him remembered. The second I start making adjustments and then changing this stuff, you can change as much as you want. And it won't. It won't. It won't forget the original that you've saved. So I guess I'll just continue here with fixing up the images that I was on. And I just, you know, talk through pretty much everything I'm doing. I'm gonna go ahead and select the brush that I'm already using and you can see if you hold over it, just going to click anything. It will show you where that brushes affecting. If you ever need to see going to get her in here a little bit rich, feel free to be as nerdy as you like wheat that we eat that for breakfast. Very good. I will go all nerdy for you. That's very good. All right, so then that is. And so you'll see whenever I click this all the adjustments that this brush already had, like, the contrast was brought all the way up already. But that was there in this brush. I'm gonna check sharpness because I don't think this image is exactly well, I will go. We'll do this soon because they will give me a little bit less of it. So it's not super super sharp. Let's see what lens I'm using. Um, let's see what lens I'm using. There we go. So this is Ah, you know, my 82 203.2, all the settings, right, It's just not the super sharpest that's ever been. But we can go in here down a sharpening, and we can futz with this a little bit. So just adjusting this amount is going to be kind of the small little itsy bits here. We could go to one. The one we bring this in all the way. Okay, so here we go. So this sharpening is kind of a small, little tiny pixels. Unless you adjust the radius. I typically, if I want to, just the radius. I do the detail as well and I'll bring them up, and then you can kind of see it gets a little bit more gnarly as faras, the sharpening is concerned, Um, probably asleep. I don't want it to go too far. So it's OK, the images that just a little bit soft because they're not necessarily gonna be printing this humongous. If they do want a printed humongous, they should let us know, cause that's something we always tell people If you're gonna printed gargantuan, just tell the studio because we can We can always go in and make sure that it's really, really right for a large file will give him a tiff file, that kind of thing. Um, another thing that you can do is you can kind of balance out your sharpening with your noise reduction. So say the noise reductions all the way down. Um, and you bring your sharpening up. You'll start to get noise, which does represent the sharpness of the image of what you're doing to it. But if it goes too far, you can kind of balance it out a little bit with noise reduction. You still want to find the sharpness that you're looking for? Um, and it just depends on the image and depends on what you're going for. But let's see if I would I want to make this one where I really want it would probably down here somewhere and not too much nice reduction, because, really, it's not that bad, you know? All right, let's go ahead and get back out to the image itself. Um, I think pretty much everything is all right in this one. We don't need to do too much been yet. This one here, I'll show you how to do a little vignette We have. I have some presets that I've created. Actually. Think some of these may have been from an action set of some sort, but you can create your own presets. Really? Quite easy. And photos are in light room. I'm gonna use the standard vignette here. It brings in the edges but it doesn't really do too much on the top of the bottom. It usually just goes to the outsides and I'll show you the settings on it. It's just vignette. There's no kind of midpoint broad in. There really isn't very much going on in the post crop and getting. In fact, I'm not sure why there is, but, um, I can bring the midpoint in a little bit if I want, and you can see how it kind of brings in from the sides. Um, not so much again from the top and bottom on this particular preset. Um, if I do use the vignette and I know that the focus is kind of going to be on the text up here, I can always then take the brush and bring our light just back up here just a little bit just to help the I draw up to where the focus is gonna be. Images just a tiny bit purple. So I don't mind bringing the I guess it's magenta would be the correct term. So I'm gonna bring the tent just a little bit over again, using the arrows just to kind of adjust. You can see when used the arrows and you don't hide. And when this is just highlighted there that goes in steps of, I think five, Um, and you can do it more specifically just by clicking there and then doing the arrows, so that's just one spot each time. So if you really want to get specific with your color adjustments, you can click in the box and do the up and down arrows. Bring a little bit of this will bring down the shadows. Will do a little bit of blacks to. And, yeah, that's more or less done. Um, this image actually could be good. Contender for a black and white If you want to. Black and white, I have one again. It's a preset that I have created called Creative Black and White. Um, I click that, and it pretty much does everything as far as bringing the saturation all the way down. There are definitely plenty of ways to do black and white. I know there's somewhere in here. If I were to click a different, there's a black and white adjustments in here somewhere, but I don't typically don't use it. I just go in with these simple adjustments, making the saturation all the way down. I love to do a little bit more on the shadows up like the fill light. If you're using the old process version was called Fill Light. Um, and I just kind of balance it out in a way that seems appropriate again. These are the presets here, so you can feel free to copy. Um, the only thing I don't use when I'm doing that is exposure that I leave for later. So I guess we can really show you quickly how to create a preset. Um so OK, let's just just really quick were not. So let's say I want to do black and white extreme or something that we're never going to use that. But then here we go in, and, um, you're gonna these air the settings that are gonna be affected by this preset you're creating, so white balance is not applicable again. I don't want to use exposure because the exposure is gonna be different for image. Anyway, the rest of these I am going to use tone curve. I haven't made any adjustments to it. I rarely used tone curve. I used to use it a lot. Actually. Used tone curve in photo shop a lot, but not in late room anyway. I just dio That's how I go about it in photo shop. Eso tone curve not necessary. But we can leave it. Click. That's right. Clarity. You know, sometimes all adjust the clarity for black and whites. Maybe bring it up a little bit sharpening. Yes. Obviously, all this color stuff will leave than the rest of these things. Um, will leave noise reduction in there, too. None living yet ing um, And these air find what we can leave that that's fine as the process version. That's what version you're using. Um, I'm gonna create this now. It's already created based on the settings here. But if I want to make it extreme, obviously I have to do some stuff to make it a little bit more extreme. So we'll go a little down here. Maybe we'll go like this and it will pop up the clarity and the sharpening a little bit. So let me think. Is there anything else I want to dio noise reduction? No. Let's just take a look at how this looks up close. That's fine, but you can see, like for texts, you can do clarity. No problem on people's faces. I have weighed clarity for the most part of people's faces. But with text, it's actually kind of It works really well. So now I'm gonna update this preset with those things. I just changed again. I'm gonna change. I'm gonna keep the ones that I have selected already and not the ones that I don't want. I'm gonna update it. So now you can see a difference here. This one here, black and white standard this one's black and white extreme, which were never gonna use someone deleted. Uh, so that's that. So, anyway, let's continue on with our our light room adjustments. All right? We got an image here. Detail of the what? We call that the the tools of the officiant strayed for the wedding. Um, yes. We're gonna bring down our highlights just a little bit. Ah, you know, I'm not even really all that sure. What? I want to do this image. So let's try a few things. Do a little bit of the brush tool in here just to kind of highlight a little bit. Did I already do. Ah, yeah, I did. So I used my post crop, so I'm flying through things. So post crop vignette is my favorite one to use. This one does bring it in from all the sides and you'll see the settings down here in the post crop vignette ing instead of this other lens been getting. This is post crop. So that means no matter where I cropped the image, it's still going to bring that vignette evenly across the shot. Um, and then we get this, get out of here and then, you know, this is obvious. I can see the vignette, and I don't really want to see it too much, So I can always go in and go toe amount and bring it back a little bit so that it's not super obvious. So he just threw a vignette on there. I don't want it to be that obvious. I could bring the midpoint in and then feather it out a little bit more, and it's just a little bit there so you can see lip salon. You can see by clicking these little switches. That's the adjustment in made. Not a huge difference, but enough to draw your eyes in Pretty simple. I think I can see a little bit of grain in here. I know that's not That's just that's just what that looks like. So then, no, I don't need to do any kind of grain reduction. It's definitely magenta, but that is kind of the image, so I can go ahead and try to adjust it if I want to make it all like White Balanced. But I think in this particular version, I'm gonna probably leave it in this purple e goodness, because that's kind of where we want it to be. I don't want to do too much contrast. Yeah, I'm not too concerned about this image. It looks pretty good to begin with. All right here. We're gonna crop in a little bit because we got a lot of shoulder. I just find that. And then again, here's my rule of thirds. I'm going a little bit off of it from the subject, which is this text over here. It's still a lot of shoulder. Let's see. I'll probably use a vignette. Let's try this one. This is the, uh, it's called SK. I got this from somewhere. I'm not entirely sure where I got this preset, but this one, um it's actually kind of similar to the post crop. It is a post crop vignette, but it's a lot more like kind of squared, and it's much thinner along the edges. Here, let me see if I can show you. Um, it's definitely more noticeable, but it only runs along the very edge of the image as opposed to being nice and fluffed into the center. So I'm gonna go ahead and use that just because the edges here are, You know, I kind of want to darken out these edges. And then I'm gonna bring in the brush tool to get that subject again. Kind of eliminated a little bit. Yes, please. Um, when you're cropping, what size are you cross? Are you cropping it to any particular size or just what looks good for that image as faras the size It's a humanist. Parts like the aspect ratio, right? Yeah, that is staying as shot. I don't want to mess with them right now as far as making them anymore. Eight by 10 or anymore five by seven. I'm gonna keep them the same size as the sensor on this on the original image. So I'm not going to mess too much with that as faras, you know, the size of the crop. I'm just gonna leave it. I used to do all sorts of crazy crops, but that was way back. In the beginning, it was like a I can do all these cool crops. And then my body was like, Dude, we can't you know, we're not going to use this because those prints are gonna come out 5.5 by, you know, four or whatever. It's like just strange little crops. So for the most part, I would just suggest you keep them the same aspect. Ratio is the original file. So we've got the contrast here again. Purple. But it's supposed to because you can tell her skin tones. Right. So that's the image on that one. We got these guys. You know what? This one is gonna have a little bit of that post crop in yet. So you see, I brought down the green up here a little. Um, she's out a little bit. I can even bring this down. You know what? Never mind. I'm not going to. I'm not going to do that. We'll give him a little bit more and that's that. So you can see we don't do a whole ton. We don't do a whole lot of stuff to these images. We wanted to be natural. We don't want people to be like, Oh, I know exactly what he did to get that image where you want it. So you see how I'm bringing this in? I don't like so much of this. I don't like so much of this. I kind of want to tell a story with her across to her. So it's a little bit of flow through the image. We're going to use the vignette, the standard one that just brings in the top and bottom. Not besides, because she's kind of in the side here, and so is she. So we do that we're gonna bring this down a little teeny bit again. There's another example of one that I can really bring the exposure under. Bring in the brush, adjust the size of it. No one is gonna get her in there, something you'll see me use. Actually, let me go ahead and elite that adjustment. So one thing that I love to do is I start big with the brush, and then I go in smaller, so you'll see me adjusting the brush smaller as I go. And I just do a little cliques until I get way down in here. And of course, this is extreme. But I'm just kind of trying to show you as an example. So I started big. I kind of went and when and when and when I went in and kept making little adjustments the whole time I'm going to bring down the shadows of this brush and maybe a little bit of contrast on this brush. So that's that will do a little bit of the same thing with the normal with the actual global adjustments. Maybe bring the contrast a little bit up by bringing the blacks down. Let's check her out. I don't see what's going on here. Joe, are you mostly sorry? Rich, rich dude, the way you guys are you mostly a fly by the seat editor like, are you Are you looking at the numbers much like the history grams and know you're in the You know your numbers? Not at all. I don't care what's looking good to you. Yeah, exactly. It's about how it feels, how it looks. And like you say, Yeah, why buy your seat is probably the way to put it. I mean, I could go in and look at the history and let's see. What is it? What does it even mean? If I'm gonna teach a class on hissed a gram, we're gonna be off the air in a second. Actually, I'm not super familiar. I mean, I know that it's supposed to be all the way to the ends, but now I don't really care. Highlights. I don't really mind too much like this is probably out a little bit back here, but it's okay. I mean, if I want to bring it down, I can. The only thing is, and this is something that everyone should know, right? There's something it took me forever, or at least what I was trying to learn. These new controls highlights apparently just works with the stuff that's really, really, really, really bright. Whereas this whites adjustment is a global. So it does a little bit more of your mid tones as well. It kind of adjust the whole image, just like shadows really is specific just to the shadows. Whereas I believe I hope I'm getting this right. I might be wrong, actually, between the shadows and the blacks. Um, I think the black doesn't mess. Maybe it does mess with the whole image. Well, OK, do your research. But one of these does just the section of the hissed a gram, and then the others does kind of the global whole thing. Um, but yeah, that's those are the major differences. I usually go to shadows first, just cause blacks could make it look really muddy. So I try and see how much contrast I could get out of just using shadows first. So what, you're gonna do this so all 170 then pick a handful of them to do the wow two? That's correct. We're going to get an opportunity to see Oh, that's our next segment. Our next segment will be how the wilds have been picked. And, um, and essentially what we do to those next images wows. And just to answer a couple questions, everyone is wondering how you do the ah, what software you work within with for those wow images that will be Photoshopped. It will be four. That'll be Photoshopped. And so that will be like, Ah, skin complexion and everything. Yeah, I mean, we can do that for sure. We have a couple shots of the bride that, you know. I mean, she didn't need very much retouching to begin with. She is really pretty. And she had great skin. That being said, I have a couple examples where we can go in and I can clean up under her eyes. Maybe a little bit neckline kind of stuff. Um, And then I'll show you how we reduce that adjustment because you never want to just go all out. You want to make it look again like it's still there, but maybe reduce just a little bit so I can show you guys how we do that later. We're gonna go ahead and give her a little bit of warmth. We're gonna go ahead and do a little bit of the vignette ing, and we'll bring a contrast. This one doesn't need very much. Just a little moment. Okay, so here's an image of shot. Uh, that, you know, leads cropping for sure. Let's go and find the spot that makes the most sense. Maybe we'll leave some of these people up in the background here if I If I'm gonna follow the the 2/3 rule, he's got to be kind of way down in there. But let's see what this looks like. Yeah, that's not too bad. We'll go ahead and use that. I want to use this kind of thin vignette, but down in here bring down the whole exposure, and then we're going to just go ahead and give him a little extra around him. Here again, I keep the adjustment for the most part of keep this a brush nice and big so that it doesn't become super obvious that I've used it. All right, so let's see, uh, now we can probably do a little bit just of contrast. Simple contrast. Adjustment. Yeah. I don't think we need too much else to check for sharpness just to make sure, but I think this one's nice and good. Yep. Looking good. A little boost. Their exposure register. You'll use a program to calibrate your monitors Or do you just Yes, we do. We use the spider. Um, spider Pro spider something? Yes, Spider Pro. I think I have the It's probably Spider Three Pro right here. And it's probably telling me, Hey, you haven't done this in a month or whatever, but yeah, we use the spider on the laptop. You gotta use it. Laptops are always kind of bright because you're gonna be using them outside. I mean, a lot of these laptops air adjust auto to the the lightness, but there I don't ever recommend doing a retouching on the laptop. I mean, I'm doing it here because that's what we got. But, um, you wanted to be really controlled environment. You wanna have to bring in a laptop that's trying to adjust for the light conditions. You want it to be really, really stable the whole time. And, yeah, you calibrate with the spider three. At least that's what we dio. Um, are you processing sort of general processing for Web for print? Just all purpose processing right now? Yep. That's right. This stuff is gonna be I mean, we're gonna create standard J pegs out of these, so they'll be, you know, 567 megabytes. Appease that kind of thing for proofing and for you know, printing If they want a print from those that you confront, You know, with a J pick that size more than 11 by 14 you confront, you can probably get up. I mean, yeah, my my technical jargon on that is also, I get nervous because I know everyone's watching someone on the computers like you can't print bigger than this on a five megabyte file, but I'm pretty sure that you can print pretty decent size with those.
Class Materials
bonus material with purchase
Ratings and Reviews
Carlos Zaldivar
Joe Buissink, Thank you for share your out of this world wedding photography its be on great,I just love it. I look up to you every day I do a wedding. I have yet to meet you but some day I will. I took conclave in April 2013 and wished you would have been there. My favorite wedding photographer is Denis Reggie which has become a friend I just love his work also. Between you and him both of you I look up to and hope some day I can be as great of a photographer just like the both of you. I just love to be a wedding photographer. Thank you for share such great information and course. Carlos Zaldivar Carlos Zaldivar photographers www.carlos-zaldivar.com
Jessica Lindsay-Sonkin
This is one of the more slower-paced courses I have taken on Creative Live. I ended up watching the videos over a span of about 4 months, but enjoyed every moment of it. Watching Joe and Rich work is a beautiful dance. I love Joe's philosophy and he instills a calm spark in all that he does. The way he looks at angles, approaches situation and works with his clients is mesmerizing. I highly recommend this course if you are looking to be inspired by wonderful philosophy and to gain valuable insight through watching a master in action.
Student Work
Related Classes
Wedding Photography