Correcting Perspective for Creativity
Lesson 13 from: Advanced Photo Editing in Capture OneDavid Grover
Correcting Perspective for Creativity
Lesson 13 from: Advanced Photo Editing in Capture OneDavid Grover
Lessons
Class Introduction
04:58 2Local Adjustments Overview
05:47 3Drawing Local Adjustment: Masks with Brushes
08:59 4Drawing Local Adjustment Masks with Gradients
08:05 5Vital Techniques for Dodging and Burning
09:54 6Dodging and Burning Demos
14:49 7Local Sharpening and Local Noise Reduction
07:40 8Advanced Editing for an Editorial Portrait
05:51Simple Element Removal
06:09 10Multiple Local Adjustments: Product Photography
09:43 11Correcting Perspective for Accuracy
04:27 12Multiple Local Adjustments: Architecture Photography
15:13 13Correcting Perspective for Creativity
12:37 14Creating Dramatic B/W images
09:17 15Processing Black and White
22:08Lesson Info
Correcting Perspective for Creativity
You can also use keystone tools to kind of play with sort of the creativity inside of things as well. And I have a couple of examples here where I used the keystone tool which you might traditionally think that you wouldn't use a tool like that. So this is one of the few images in this class that I shot. And this is the image you see after working on it with local adjustments and so on and we can a re-create some of that. But what bothered me when I first looked at this? And you can laugh at me if you like. But the butt on the left-hand side side I thought didn't look quite right, because it's kind of leaning into the shot. So it had this uncomfortable balance to it, in my opinion. I mean, as far as I could tell, it was level. And if we use the straighten it tool, I can level across the top of this structure here, as such. But I didn't quite like the fact that this was leaning in. So this was one of the cases where I grabbed the tool and just did a little sort of slight correction like...
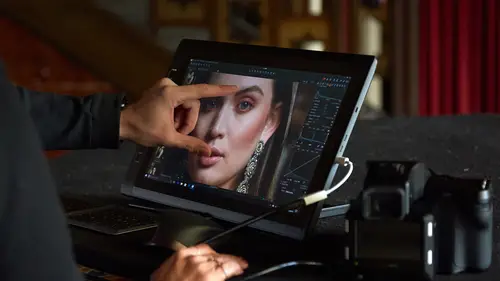
that, where it just kicked it out a bit. Now, rotation wise, it's kind of gone a bit too far the other way. So I can just grab the straighten tool again. And then drop it back, or visually, I find the easiest way moving rotation is to go into the box in rotation and flip tool and then just use your cursor keys like so to rotate. So I found that now that this is kind of straighter, it gives a better balance to the image overall. This one is certainly a pretty flat image as we see from the outset. And looking at the levels, we can see we've got no information here, no information in the shadows. So before we even get into sort of any local adjustment side of things, it makes sense to pull in our shadow point, pull in our highlight point, and then grab the center midtone one like so to see what we can do with the midtones. And also, a good little tip for thinking, well, how much data is there in this raw file? The sky looks pretty bright here. Am I losing the shadows down here? Just grab the exposure slide and see how far you can go in each direction. If I open that up by two stops, we've got loads of information to play with down in the shadows at the bottom. If I close this down a couple of stops, well, not even that much, 1 1/2 stops, you see we've got loads of information and nice structure in the clouds as well. So, it really is up to you then what you do with that data. Of course, this is how it looked in camera as it was shot. It was raining at the time. It was a bit misty. So of course the image looks a bit flat and a bit soft here. But how I remember it when I was standing at it looking at the view is something much closer to how it will be once we've finished with our adjustments. And we can only really do that with the local adjustments because of the environment or the situation at the it was captured. Capture One has to present to you some kind of standard contrast, exposure and so on. But it's only a guide point. With all this raw data available now, we can just push it and pull it around to what we need. So to start with this image, quite often before I do anything, I just fix the crop. So I want this to be more panoramic. So I don't want to waste time doing local adjustments on an area that's gonna be cropped out. So it makes sense to first do a crop before we get into our local adjustments. So, overall, I think I'm gonna want some clarity. So I'm just gonna put some clarity on the background layer. And remember, clarity affects contrast in the midtones. So it won't make my shadows go blocked up, because we're only affecting our midtones. It won't make our highlights get blown out. So just a little bit of clarity. Next, if you remember when I was playing around with the exposure, there's loads of stuff going on in the sky. So let's just grab a grad filter, gradiant mask. Pick a spot to draw on, I'm probably gonna start around here and finish there. And take that exposure down. And put some more clarity. Even though we've got clarity on the background layer, there's no reason why we can't put more clarity on the layer above. And see how that extra cloud shape has popped now as well. And if you want to go more than 100, you could do another layer and just do the same again. So, for example, we could, let's call this clarity sky, let's make another layer and call this more clarity. And then we can copy the mask from clarity sky. And then we can just do more clarity. And then we can add in even more if we wanted to. So even though 100 is the upper limit, if the image can take it, then there's no reason why you can't just keep keeping it on top. Same goes for highlight recovery and shadow recovery. If you need more than the 100 maximum limit that you're offered in the high dynamic range tool, then just add another layer and do even more shadow recovery or highlight recovery. So it's looking much more interesting. I just feel I might open the shadows a little bit at the front. Let's do some selective darkening, like so, and you know the drill easily by now. So we get a brush. We're going to drop our curve down. And I'm gonna have a nice low flow. And then I'm just gonna make these clouds a bit moodier at the bottom so we can see even more of that rain shape that's coming down and so on, so like so. And pretty much, with the exception of this rain spot on the lens, we can deal with that in a couple of ways. I could do a new clone layer, as you saw before because it's a little bit too big probably to use the spot tool. So I just call this rain spot. Grab my brush, sorry, not a clone layer. We want a heal layer. Grab my brush. Like so, choose the point I want to copy from, which is gonna be there and then copy that across. And if we're lucky, we might be able to get rid of those guys with the same layer. Yes, we can, so that's got rid of those rain spots and then I want to just give it a bit of a color temp. So let's just warm up the midtones so we have warmer clouds and balance that with some colder shadows. Now, we've done lots and lots to this image. We've pulled the pixels around to a huge amount. Because we've changed the perspective. If I Option + click the keystone tool, Option + click. So we had a perspective change, like so. We've done lots of local adjustments, as we can see. And how it came out of camera is really a long way off from where it's finished, for example. So the purpose of this lesson was really just to talk more about kind of the keystone tool. But again, there's so much data in the raw file that it doesn't matter if you're pulling it around. We're moving pixels, we're squashing them. We're doing all kinds of stuff to it. We've done triple clarity almost on the image at the top here. And it's still holding up pretty nicely. We can see a little bit of extra noise. But it's nothing that's gonna harm the image when it comes to print or display on a monitor or something like that. Any questions in that process, Jim? Yeah, one question that one of our students had, David, had to do with whether you have the ability when you're using a Wacom tablet to change the opacity of your brushes based on how hard you pressurize? Based on pressure, no, sadly not. Okay. So if we go to just to bring up the brush controls, so use pen pressure is only relates to size, not to opacity. Got it. So there's no way to change that, but I find that I think you'll be able to make much better masks by using the technique of having a low flow, because then it allows you to build up the mask in a nice slow, controlled, gradual way. If you're relying just on opacity and pressure, then I think it's really difficult to do that in a nice way, at least in my experience. For example, if we make a new layer here called lighten. And let's just grab a curve and kick that up a bit. And we go to our brush. So if I have a super low flow, let's go down to five, and I just wanna lighten over here, the pressure that I'm pushing on the pad makes no difference to this exercise. But going back and forth will gradually build that up. So you don't need to be a skillful, I find it difficult to moderate the pressure with the pen on the pad to get the benefit of the 4,000 levels or 1,000 levels of sensitivity that it has. And I think it's actually ergonomically harder as well. So another reason why I use a pen is that I find using a mouse uncomfortable. Using a pen, I find it much more ergonomic and having to vary my opacity I think would also get tiresome. But by just making the same shapes, the same passes, like so, then I'm gradually adding to my mask as the flow goes around. And I don't need any skill whatsoever in moderating my pressure. So on one sort of, you can see the little shape I made there. In one way, it's kind of, yes, it would be nice if it was an additional option. But I think anyway the flow control gives you a better way at the end of the day. Another one that I was gonna show for creativity. And this is an additional use of the keystone tool. So this actually allows us to correct in four planes. So this is great if you have anything architectural of course, like a window if you've shot a window. And it's gotta be dead square. Then you can just fix each corner point to the edge of that window and it'll snap right in. But this image, which we color graded in the advanced color correction class, it's got this board at the back. And I thought, wouldn't it be nice if that was kind of a bit more symmetrical. Maybe it's an OCD thing, who knows, but let's grab our points. And if we point them on each corner of the board, like so, and it's worth spending a bit of time being accurate 'cause the more accurate you are at describing the error, if you like, the better job Capture One will do. So try to be as good as possible in describing the error. So now if I say apply, like so, it gives me that nice sort of square border at the back. Doesn't really affect our subject at all. So if we Option + click here for keystoning, oops, Option + click, so you can see it's just pulled that corner in a little bit. But it hasn't really harmed our subject. The guy's facial features haven't been stretched at any way at all. But if you want a feature in an image to be perfectly square or straight or horizontal, then that's another way that you can use this particular tool.
Class Materials
Bonus Materials with RSVP
Ratings and Reviews
Peter Hudson
This is fabulous - even though I use Capture One regularly I always learn something new from listening to David and this is one of his best - if David is the teacher then get the whole series is my advice - well worth the investment
user-940746
In this class David shows what editing can be done in CaptureOne and when it is time to use an external editor. There are lots of features in the program that David brings out to make the editing quicker and easier. The class also shows how much can be done in the program without going to an external editor, thus saving time and effort in editing. As usual, David presents the information in a manner that is easy to follow.