Lesson Info
15. Retouching: Longhand vs Actions Part 1
Lessons
Day 1
1Empower Your Client, Empower Yourself
35:00 2Creating a Nuturing Experience for Your Clients
17:16 3Demo Shoot with a Client
45:14 4Shoot: Implied Nude
15:41 5Shoot: Maintaining a Connection with Your Client
29:03 6Retouching with Actions: Focus on Skin & Curves Part 1
38:19 7Retouching
19:24Retouching Using Photoshop Actions: Recap
25:03 9The Intimate Business of an Intimate Business
26:56 10Finding Your Client
34:14 11Why to Lose the Pre-Shoot Consultation
14:02 12Shoot: Shooting with a Vulnerable Client
44:04 13Shoot: Stripping Down Client Defenses
37:20 14Shoot: Posing and Mixed Lighting
47:57 15Retouching: Longhand vs Actions Part 1
28:19 16Retouching: Longhand vs Actions Part 2
19:57 17Retouching: Longhand vs Actions Part 3
23:49 18Retouching: Longhand vs Actions Part 4
20:25 19Tips for Male Boudoir Photographers
09:37 20Shoot: Creative Posing with Couples Part 1
24:00 21Shoot: Creative Posing with Couples Part 2
17:10 22Marketing: From Prospect to Client
39:42 23Business Practices: How We Do It
48:43 24Size Shaming & Pin Up Shoot
35:51 25Shoot: French Postcard
25:37 26Retouching: Pinup - Longhand vs Actions
34:16 27Retouching: French Postcard - Longhand vs Actions
41:01 28The Value of Failure
27:34Day 2
Day 3
Lesson Info
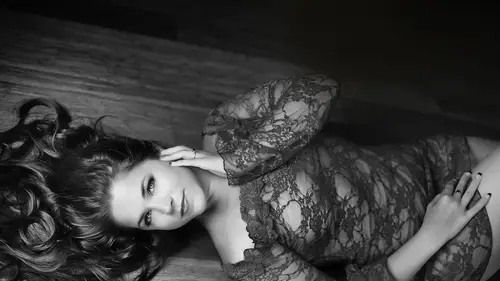
Retouching: Longhand vs Actions Part 1
I just wanted to talk a little bit about my Photoshopped process and about actions. I don't want anyone to feel short changed or anything. Um, with me using my actions. So today I'm going to be doing it longhand, Um, as far as, um can we get the next screen? As faras retouching goes? Like I said, its client driven based on what my clients expect, they want to be polished. So this testimonial here says my 50th birthday remains something truly special because of you. Rachel Stevens, You captured me on film. My inner self sparkling and sequin An icon of the fifties. Dare I say it out loud? Maryland, Thank you for making me feel so special and beautiful. So the, um, post process post processing in photo shop is such an important part of it. Even back then, in the days of George Farrell in the old forties, portraiture they retouched them to They just did it directly on the negative. Using things like chalk and graphite powder. They would scrub the negative and retouch wrinkles and smooth th...
e skin and take away stray hairs. So Photoshopped just makes it quicker and brings the opportunity into your home for anybody to be able to use it. Now, as far as using actions go, some people feel like it's a cheat. But I wrote these actions for myself with no intention to sell them. I wrote it. I wrote them to speed up my process. So what get in the car means I'm relating that Teoh. Why? Why walk When you can drive, get in the car, It's quicker. It gets you there faster, that's all. That's the only purpose of actions. It does the same exact thing and it gets you there faster. There are things that you know can be done in camera. But, you know, really, the only person the only people who care about getting everything in camera is the photographer. Clients don't care how you get there. They just care that you get there. So the way that my business runs because I'm traveling because I have a small kit, I don't have the opportunity to be able to have all this elaborate lighting I have. I don't have someone to hold the reflector exactly where I needed to be. I don't have someone to apply body makeup over like words. Asia these kind of things. We're keeping it very organic and very quick when, when During my events. So when I'm using my actions, it gets it does everything that I would do longhand quicker so that I have more time to be with my family, which is how we designed our life. Everything that we do. We want to do an amazing job. We want a life that is fulfilling for us, and we want to be able to be with our Children. And that's what actions. That's the purpose that they serve for me and as faras where I take the retouching like I've been mentioning all day today. You can love yourself but not love everything about your body. So what I like to deliver for my client is a polished image image that takes away the imperfections that they don't want to see. They want to see a picture of themselves without those imperfections. Of course, you may have clients where that is kind of like grandiose What? What they want you to dio Yes, the In those cases, you do want to be able to guide them, so it still looks natural. But when you're looking at From where we start to where we go, it does seem like a lot. But really, what I'm doing digitally is no different than what can be done with multiple lights, reflectors, body makeup. So it's just a different way to get you there. And that's all count the clients care about is getting there. So I'm gonna go. I'm gonna go ahead and drop everything. I'm gonna go ahead and get into the retouch like I mentioned before because I do use my actions. Um, I don't know them longhand, So I do have my little notes here, so I'm going to be referring to that. Can I have a quick question? Very start, Rachel. One from Tough Total. Is there specific workflow that you do use in photo shop like you Crop then work on skin than liquefy? Or do you just work as you see Need, um, the way that when if you guys remember yesterday when my actions were up, you saw, like, the F two F three of four. Those are the steps that I use, So I'll be doing it longhand. My notes are in the same format, so that what I'm gonna be showing you longhand or what you'll see in my actions that are actually hot keyed. So each step and I'll explain what they dio. If there's something really distracting in the image like a cord in the back or, you know, maybe like something's tucked funny underneath them or anything like that, I'll go ahead and I'll remove that stuff first. You're so when I actually get to the polishing, those kind of things aren't distracting me. But I do have a step by step process that I go to step by step process that I dio fantastic. Can't wait to see it. Okay, so I'm gonna go ahead and do a retouch. Let's see here, Angelita, Angelina Angelita. So I really want to dio, let's see something up close to her face here. But that one. You guys like that one when that's hard to see That one or that one. I wish that the thumbnail stayed. You know what they look like in your camera? I wish it didn't change when you pulled it into raw. I'm just gonna go ahead and pick one. Then let's do. Do you guys think about that one? Yeah. Okay. Okay. so everybody's getting me. So I'm not gonna really explain the process here in light room. I'm just gonna go to my base action here. I mean, my presets. And again, you can kind of use this and find See what it does, and then kind of go from there. Okay, here we go. So again, we're looking at the history. We're gonna open history options and make sure these two are checked. Every time I save, it's gonna take a snapshot for me. So I'm gonna go ahead. And the first thing I'm gonna dio I'm seeing a few things that are distracting to me. So I'm gonna go ahead and take these, take care of these. Make a duplicate layer, and I'm gonna go Teoh liquefy. And I'm just going to use this top forward warp tool, little finger. Icahn, I'm just going Teoh, get this little piece of fabric fled right up against her skin. And it's okay to have a little bit coming out so you can see just there. How that removing that distraction, that little thing. And just right here, I'm gonna use the other techniques to manipulate shape I'm instead of using liquefy this time I'm going to use the lasso tool to grab your lasso tool about 25 pixels. And here I'm just going Teoh, bring this in just a little bit in the copy it and paste it onto its own layer Dio transform and hit this little arch thing to make it the free transform. And I'm just going Teoh, check this in a little bit just to make it a cleaner line Not necessary necessarily to slim her, but just to make it a cleaner line. Okay, So when you're manipulating shape, it's really important to remember that if you're if you're working on a curvy girl, just keep in mind making her skinny isn't the, um where we want to take it. Where we want to take it is making her polished. So if she's whenever we do this, if you guys ever see like pictures of celebrities on the red carpet, they're always going like this. It doesn't matter if your £90 if you have your arm against your body, this little piece of that's going to stick out. So sometimes you just do a little tuck right there. And now I'm just gonna go in and I'm going to go ahead and I'm going to start working on the exposure. So when I'm looking at the overall image there, if I do crop, I will go ahead and I will do all of my polishing first. And then I cried because what I might think is a good crop Now, I might regret it later, and then I'd have to go back to the raw file and then try toe, you know, put it back on top and then try to make it match. It's it's a mess. So if if I do any cropping like I mentioned earlier, I always wait till I'm done with the image first. So I'll talk a little bit about where I see myself taking this image. So I'm gonna go ahead and I'm gonna want Teoh adjust the color. I'm gonna want to manipulate the color. I'm gonna want to manipulate the exposure, and I'm gonna look at shadows. I don't want to flatten out the shadows too much when I'm when I'm adjusting exposure. So uhm, I'm going to mask out a lot, so I'm gonna go ahead and duplicate the layer right now what? I'm gonna do is it's called quick. Um, fix exposure. I'll just do this the short way for you guys to pop up levels here. And if you hit auto, you can see sometimes it is beautiful. Sometimes it really doesn't do anything I'm kind of liking. I always always check. I'm kind of liking what does in some areas, but not so much on others. So I'm just gonna paint in the areas that I like, what it's doing, so kind of like a fill light really is what I'm doing here. And then I'm gonna go ahead and I'm going Teoh do a quick color fix. So when I when I'm telling you what I'm gonna do, it's what my actions actually named. And they're they're named very simplistically, kind of self explanatory. I'm showing you the long hand of my actual actions not to sell them, but because this is what I dio. This is my process. So we're going to do blur average. We're gonna go ahead and invert that, and then we're gonna put the blending mode onto color. And I'm gonna bring that down, Teoh way, way down. So you can see it's really kind of like, diffuses out the color and here because I shot it a little over exposed. You can see that there's hot spots here. As I'm going, I'm gonna address those as we go. But overall, I like what it's doing to the image, and it's just that was just literally 6%. So now I'm gonna go into my curves. I absolutely love curves. You can do a lot of when you go into the different channels in here. You can go. You can do a lot with, um, color correcting. So I'm just gonna bring some of the exposure down a bit. So we have highlights up here. We've got our shadows here. We've got our mid tones in here. I'm just going kind of play around with it a little bit. I'm gonna go into the different channels and just kind of play around and see where I'm liking. And I'm right now. I'm looking only at skin tone. So glad some color stuff going on here, let me take care of. So I'm gonna grab the hue saturation and they grab this little guy's hand and I'm gonna drag it to the left and de saturated out, and then I'm gonna find the tone that I like. I'm just gonna zoom out a little bit so I can match the skin. I get a little bit warm there. Okay. All right. Cool. Okay, So now we're gonna do is we're gonna do the eyes before we clean anything else. I'm gonna go ahead and do the eyes going to duplicate the layer. I'm gonna go right into adjustments here, and I'm going, Teoh go to Hue, saturation, and I'm gonna bring it back out here, and then I'm gonna go ahead and I'm going. Teoh, blur it. We're gonna use a surface blur on this. Go about on about 35 threshold. Um, maybe here we go. And I'm going to bring up curves hoops, and I'm gonna kind of pop the highlights just a little. Bring it up the mid tone a little bit. I'm gonna go into the Red Channel and I'm gonna pull back on it, and then I'm gonna go ahead. I'm going. Teoh, mask that out. Gonna grab my brush. And I'm only going to go over the whites of the eyes. And you want to be careful cleaning the whites of the eyes, too. Because people do have. It's not all white and people do have, you know, some veins in their eyes. You don't want to. You want to soften them. You don't want to totally get rid of all that Make it all white, because then they look possessed. I'm just gonna clean all this out here. You guys see that? And as faras here, I mean, some people might want to remove it, because that's her. I I'm not going to remove it. Um, I'm gonna I'm gonna leave this here. I might soften it down a little bit later. You can check before so I'm always going back and forth with my opacity to see before and after my I might think that looks great, but then realize that's too much. You always want to go back and forth on your layers. Like I said, if you remember from yesterday how I said using layers and blending modes and our pay city is like mixing paint for our campus. So I'm gonna just grab here the exposure adjustment layer, and I'm gonna pop up the exposure. Can I do a black mask on that? I'm just gonna hit the catch light. Really? Bring that out. So real subtle changes. And we don't have to worry about teeth on this one. Okay, so we're gonna go ahead and dio just some broad, uh um, manipulations on the skin using the patch tool. We're just the big things that I think are distracting. And if you remember, while we were shooting while I was shooting the girls and I was asking them questions I was mixing into my conversation when I was shooting them about, um, you know, do you want to see, like, this red on your chest? Do you want to see that? So when I say that my brand is my client, I am retouching for them. I'm noting, while we're shooting just kind of like with a casual conversation, I'm noting what they want to see what they don't want to see. So not only imposing and lighting a my facilitating that for them, But I'm marketing. I'm noting in my head like I can't remember my wedding anniversary, but I can remember every single thing a client wants me to retouch it away. John just said December 10 I'd be a terrible husband. I'm lucky I'm female. I do but recall specifically you're talking about the Rose Atia or what have you been asking about those? So thank you. Yes. And some people, You know, when you ask him the question, they'll say, Well, it's me and I and you know, I want to see me, so go ahead and leave it, but it's better. It's definitely better to ask so that you don't remove it. And a lot of times clients won't tell you. You want them to really love their images, so keeping that communication open is important. So I'm just going through and just doing the big stuff here that's distracting me in the skin. And as far as the shape goes, I'm liking the shape. I think this is nice and it's her. It's nice and symmetrical to me, part of her curves. We don't want to make the arm two straight. And I'm just looking around the image right now for what other little pieces I want to grab with the patch tool and get rid of real quick before I go into detail and start cleaning skin. Okay, I think I'm gonna go in here real quick and do a little right in here, too. Just the stretch marks right in here and again when I'm using my patch tool. I'm not completely removing it, because I know that I can come back when I'm cleaning the skin using frequency separation. I know that I can come back and fix that. Okay, so just blending back and forth, using up a city, we want to keep that keep doing that. Okay, so I'm going to go ahead and show you guys longhand the frequency separation technique that I like to use. Um, so I'm going to duplicate the layer twice, and I'm gonna go ahead and name this one texture, and I'm gonna name this one color. And if you remember yesterday, this is called skin clean. If you guys remember yesterday, I and I haven't tagged on F six for the hot key. You remember how many times I used it? So even though this is a longhand demo, I'm probably gonna just do it a few times, and I'm probably just gonna start hitting the action on it. And the reason for that is because I don't like to do a whole lot of manipulation on one layer. I like to do pieces of the face and then pieces of the body. I don't like to do like everything, all on one thing. So it's for me its steps and again Keep going back to visualizing mixing paint and painting on your canvas so you can look at it as if, like the direct The brush is drying out. You know, you don't want to keep, um, doing it on one layer. Okay, So I'm going Teoh on the color layer. I'm going to put this onto a Gaussian blur, and I'm gonna do 13 is my radius. And then I'm gonna go ahead and I'm going to go to my texture and I'm going to go up to image and I'm gonna dio apply image. And I'm gonna dio color here under the layer and then I'm gonna dio um hold on. I'm not saying Let me Let me try that one more time. Say that I'm sorry. I use my actions. This is and this is why apply image color. Let's do this. Here we go. Scale, Teoh Offset 1 And you know when you're when you're going through and photo shop and you're like, Why isn't something working? It's always user error. So that's another great thing about Photoshopped actions. You write your own actions, you only have to suffer through that once. Then you have it recorded because you could do it 100 times and then you get you know you do. It's like, you know the words to a song, and then all of a sudden you're like, Oh my God, I can't remember it like you're just sometimes you just don't retain it So you have an inaction boom. But I'm happy about doing it longhand. Okay, so then you grab both and you're gonna pull it into a group and we pull it into group because all the the filters we just applied to these layers, they work together. So the two layers stacked on each other, we have them on different blending modes, and they work in conjunction in relationship to each other. If I go in here and I bring down the a pasty on the texture layer now, I'm revealing the blur layered underneath. We don't want that if I go on my collar layer and I start Teoh, bring it down. Then I'm sharpening. But together now. So you see here. If I bring this down, see what's happening to the You guys can see it better. Close in. Okay, so now I can go in. And I can make my manipulations just on color and just on the texture, as opposed to doing both on one layer. So see that. See how the texture is still preserved And I would just do that and then do my oap a city and then flatten it and let's do it, OK? Do you believe the layer twice? Name this one texture, name this one color and then we're gonna go. Teoh are texture layer and bring to filter blur. Oops. Sorry. My bad color filter Blur Ghazi and Blur Do it. Ah, about 13. And go the color. I mean the texture and then image apply image color Subtract a perfect it remembered. And I'm gonna do in your light on there and drag these bad boys into a group. And then I'm going to go in to my color layer and I'm going Teoh, manipulate some of the color. So here, what I want to do is I want to even out the color here and down the nose. I want to bring some of this color over here because we've got some bit of a hot spot going on in here. I want to bring some of this color over here to kind of smooth this back into the face. I kind of like some of the highlights. I won't take all of it out. And you can see every time that Mike my tool makes that little target I'm sampling, so I sample like a madman. I'm sampling all over the place. That's how you preserve, uh, realism. You want to do it again? One more time. Okay. Okay. Texture, color, color, filter, blur, Gaussian blur, texture, layer image apply image. And we're going to do this to linear lights, and we're gonna grab them both and pull it into a group. Okay, so now, if you remember from yesterday, I grabbed my brush, and I'm gonna go about 20%. And if I hit my option or Ault key, I'm gonna be get this little dropper. So what I'm gonna do is I'm gonna drop. I'm gonna pull some color from about here, and I'm just gonna paint in over this hot spot to blend it down a little bit. So I'm just dealing with color right now. I'm not affecting any of the texture. And again, you want to sample a lot and bring it down the nose around in here a little bit on the chin. I might even grab some of this lighter color here and bring it up to the nose. So this is where we're coming in. And we're remembering the makeup artist and where she's contouring. So if you do that reverse thought process and Okay, well, we have got the contra down here, so that means this parts lighter. So she had some shadow coming in here. So what we want to do is we want to bring it up, But we don't want to totally brighten it, because then it flattens that curvature in her face. And so that's That's another reason why I do. A lot of I'll just do you use this little this little spot and then I blend it. Look at my own Pace city, and then I flatten because it helps you also keep yourself in check that you don't go too far
Class Materials
bonus material with purchase
Ratings and Reviews
a Creativelive Student
Let me first start off by saying that Rachel puts her subject first. She has a passion for empowering the everyday woman, showing them that Boudoir photography by no means only belongs to the "supermodels". She shows them that they're amazing and beautiful, and it was so comforting and heartwarming to see this in action in her Creative Live course! When Rachel's shooting with a client it's almost like no-one's in the room but the two of them. Rachel gives her undivided attention to the client's safety and well-being and general comfort. I was so glad I tuned in for the course as I learnt countless tips and techniques about lighting, angles, posing, different settings for the different types of shots you'd want to grab. Another reason that watching the class was such a pleasure for me is that Rachel comes across as that awesome, down to earth, lovely friend you might have in your life, who just happens to be one of the BEST Boudoir photogs on the planet! This was an excellent workshop, top to bottom, and I'd recommend purchasing it to anyone who wants to learn everything about this type of photography, including the business side of things which her husband, Sean, explained thoroughly. I have absolutely no idea what a couple reviewers were "disappointed with" but take it from me - this is a STELLAR course and if you're looking to get into the business, or just even honing your skills on photographing the ladies, this is most definitely the course for you! Tons of info - great guidelines on how to handle your models, great info on lighting, lenses and settings! Rachel will make you fall in love with Boudoir photography like your life depended on it! She's just THAT good! So go on, purchase the course and have her invaluable instruction at your fingertips whenever you need it!
SunSoBright
I mainly photograph landscapes but I'm interested in learning other types of photography. Being introverted it's a challenge for me to photograph people but I it's a barrier I want to get over. I purchased this course and some others on portraiture and boudoir photography. While Rachel and her husband aren't polished speakers I thought they were honest and straightforward. The "clients" being photographed seemed a bit nervous but I imagine that had a lot to do with the fact they were doing the boudoir session live in front of thousands if not millions of viewers. Rachel also had to keep in mind she was tethered and the recording of the session while photographing her client so I don't think this was optimal and Rachel's back began to bother her so I'm sure she was in some physical pain. Regardless, the resulting pictures were beautiful so Rachel was able to make her clients feel "safe" enough to get through the session. Also it seems part of the audience were women who had been photographed by Rachael so it says something that they came to learn from and support Rachel. I appreciated Rachel was photographing real women, not models. What I liked most about this course is it made me feel like little 'ol ordinary me could be a boudoir photographer too If I am ever inclined to do so. Her style of photography isn't quite mine, but the session was still useful and instructive especially with regard to her lighting set up. I wish Rachel had talked a bit more about setting up the support team that goes around with her like her make up and hair artists, how she finds and decides on houses to rent and what cities she goes to, etc. but I guess you can't go over every single thing in a single course or maybe that can be a future course. Rachel and her husband seemed like a nice down to earth couple who put their family first and they were quite honest about some of the difficulties and their concerns over safety for themselves and their clients. I was touched that Rachel photographs women who have gone through cancer treatment for free as I do volunteer work in a hospital. I thought the bonus and included materials which had Rachel's Lightroom presets and her client info packet was very generous. Some of the other photographers charge for getting a copy of their client documents and presets. I purchased Rachel's eBook off Amazon and wanted to purchase Rachel's Photoshop actions but in searching for the purchase links I read Rachel is going through some health issues, I think it was spinal fusion, and it seems has suspended her business until she recovers. It looks like she plans to still make her "return" sessions starting with Hawaii during April 2017. I wish her and her family the best and will say a prayer for her quick and complete recovery. Thank you Rachel and Sean for coming to Creative Live and I hope you will teach another class or at least participate in a critique of boudoir photographs.
WellsWells
Warning: You are about to encounter a large number of exclamation points. ;-) This was such a great course! It was great to learn boudoir with such a caring, generous, and knowledgeable pair! Rachel really brought it with her posing, shooting, and building rapport with her clients. She even kept going while in intense pain! Also, the sections on retouching were EXCELLENT! I had trouble following the first retouching segment where she used her actions, but then she came back to retouching later and showed us how to do each step "longhand". Knowing what each action is designed for makes such a difference! I feel like Rachel read the audience and saw that we were floundering, and tailored her presentation to just what we needed! Sean was also very thorough in his presentation of the "business" side. It is hard, as an artist, for me to run my business like a business. Sean showed how it can be done. He also showed the need for a strong "why" to focus on when telling others about policies. "It's a business. I need to feed my kids." I need to reach down and find my "why" that will keep me strong enough to stand behind my policies and pricing. I haven't gotten a chance to sit down and go through all of the bonus materials yet, but I am so excited to see what's in there! I saw that Rachel had posted a longhand version of the "little hug," and I watched it, and I have been trying it out on some of my older images. Just that one little tweak makes such a difference! Thank you, Rachel and Sean, for giving us SO MUCH usable content! I'm so glad I decided to watch and then purchase this course! And I can't wait to see the two of you again for your next creativeLIVE!
Student Work
Related Classes
Glamour & Beauty